Split
Attack
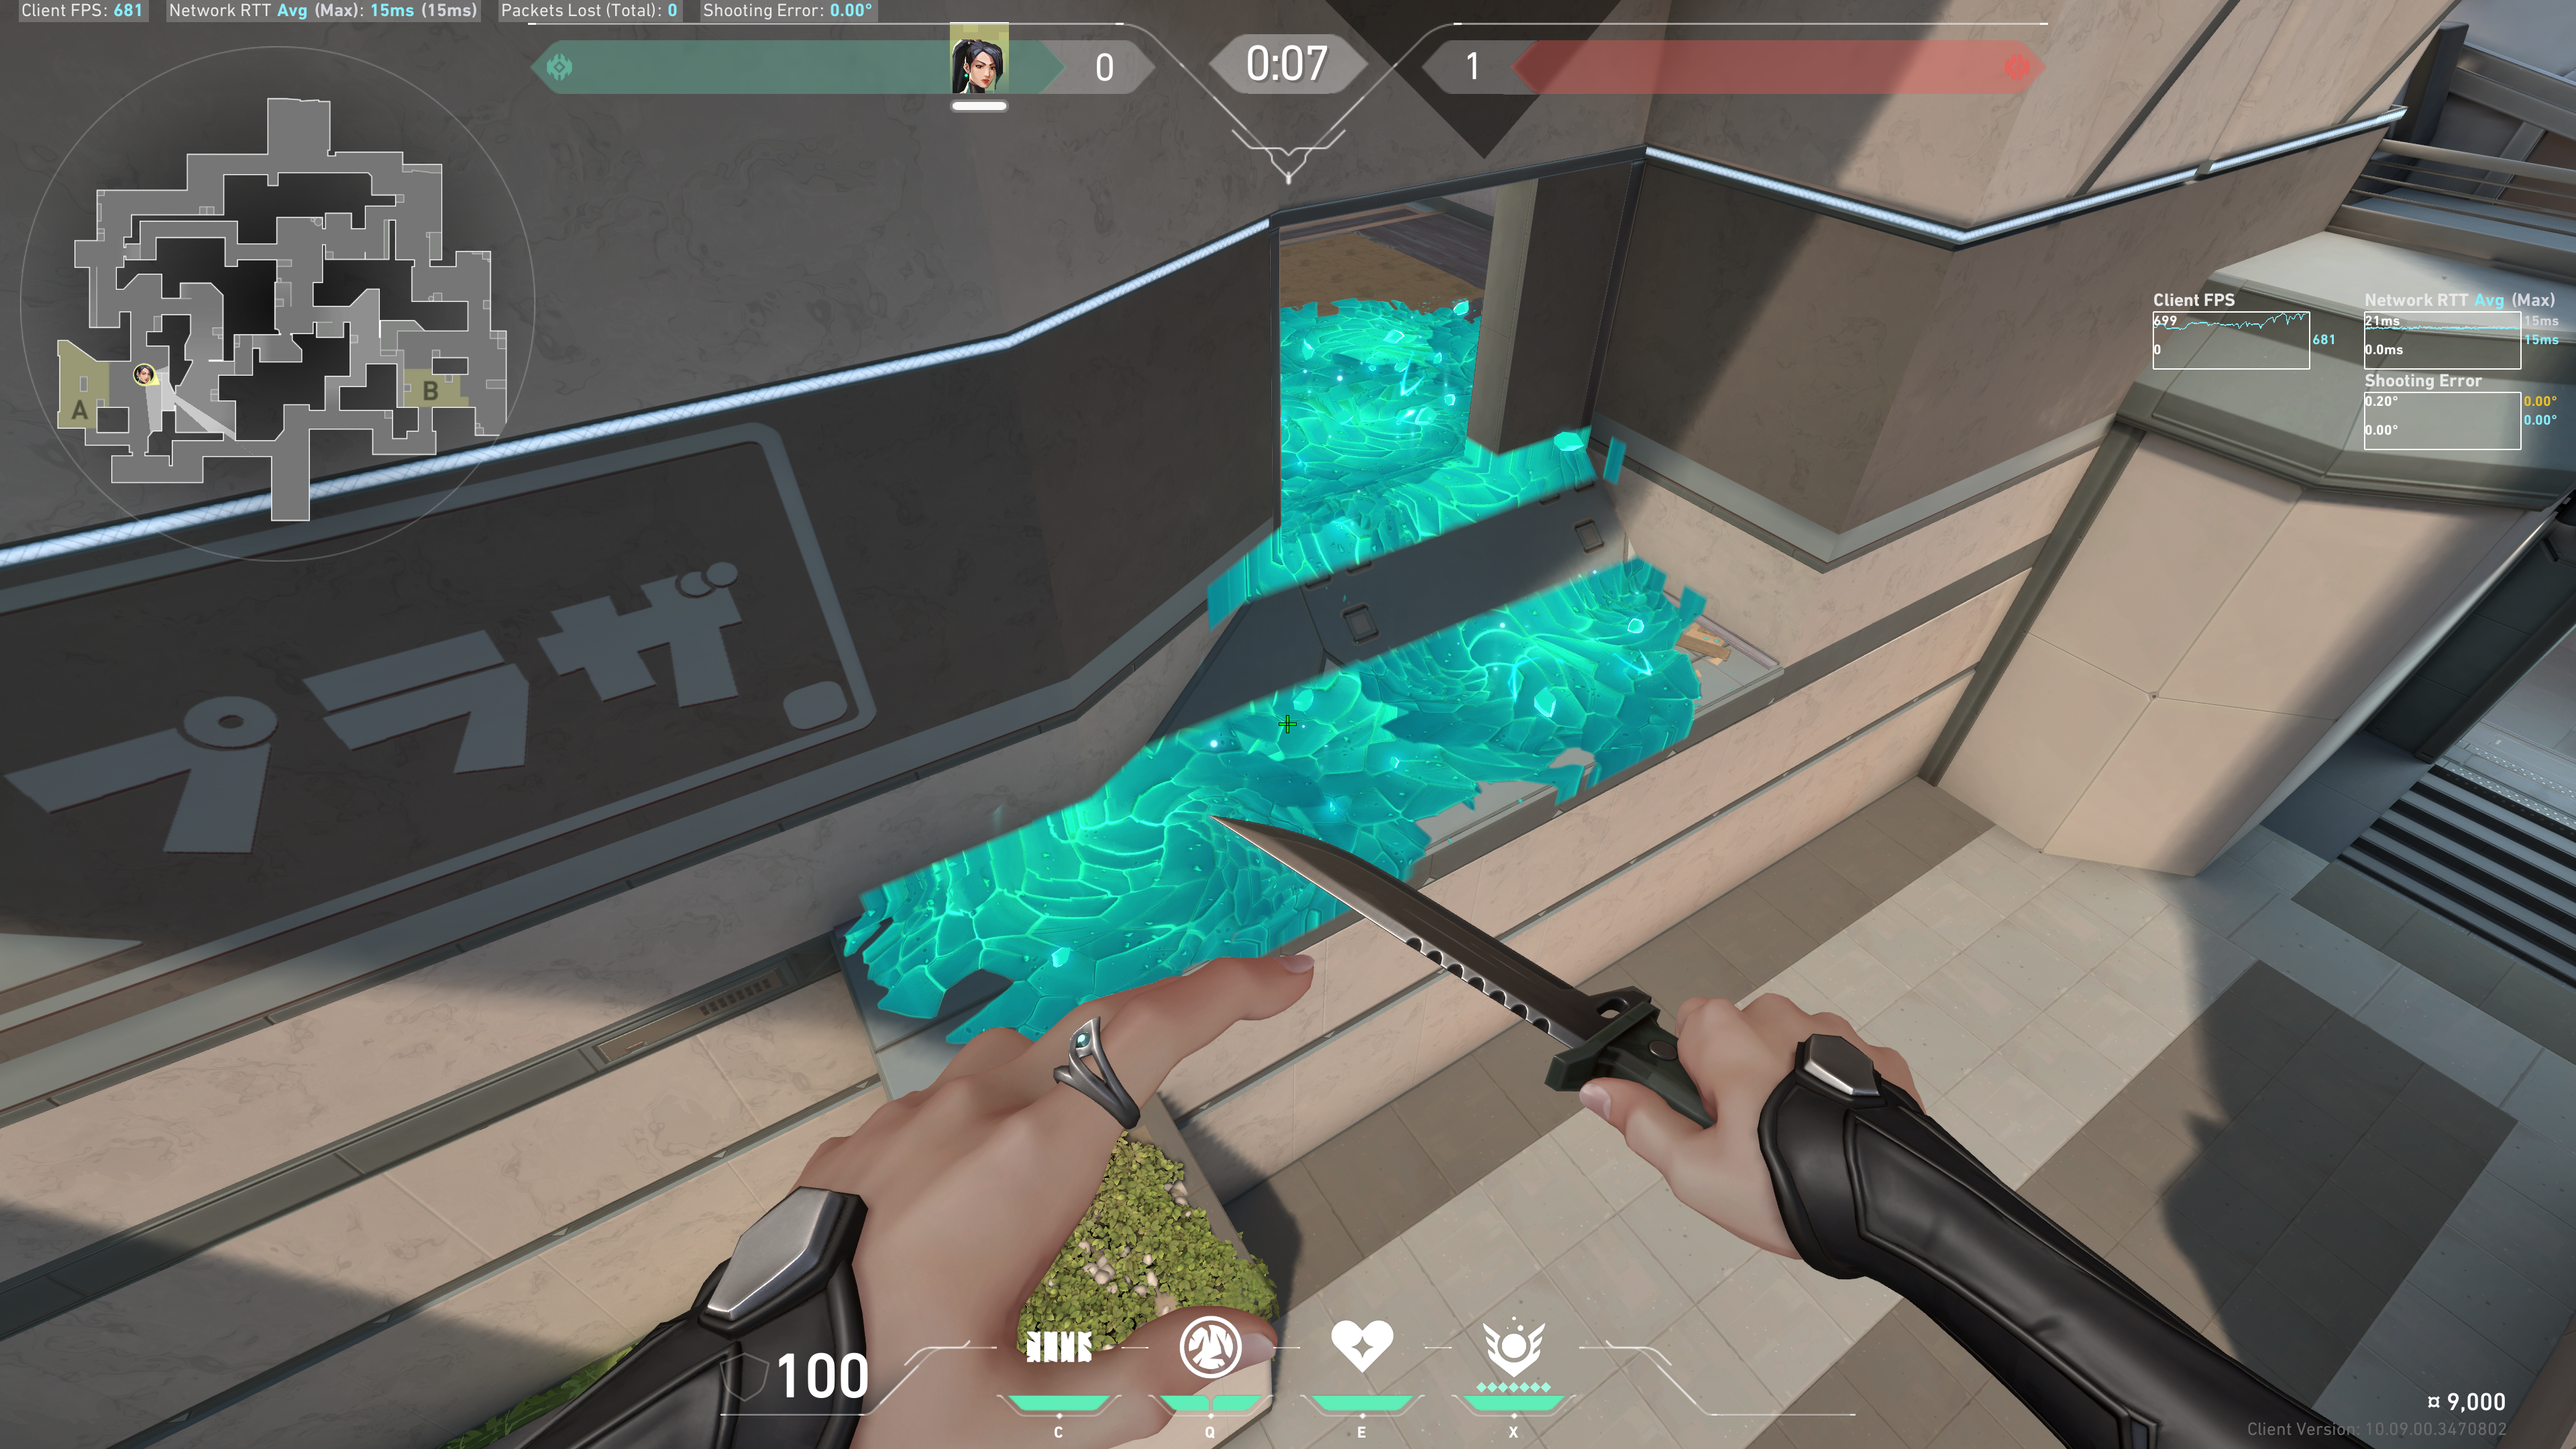
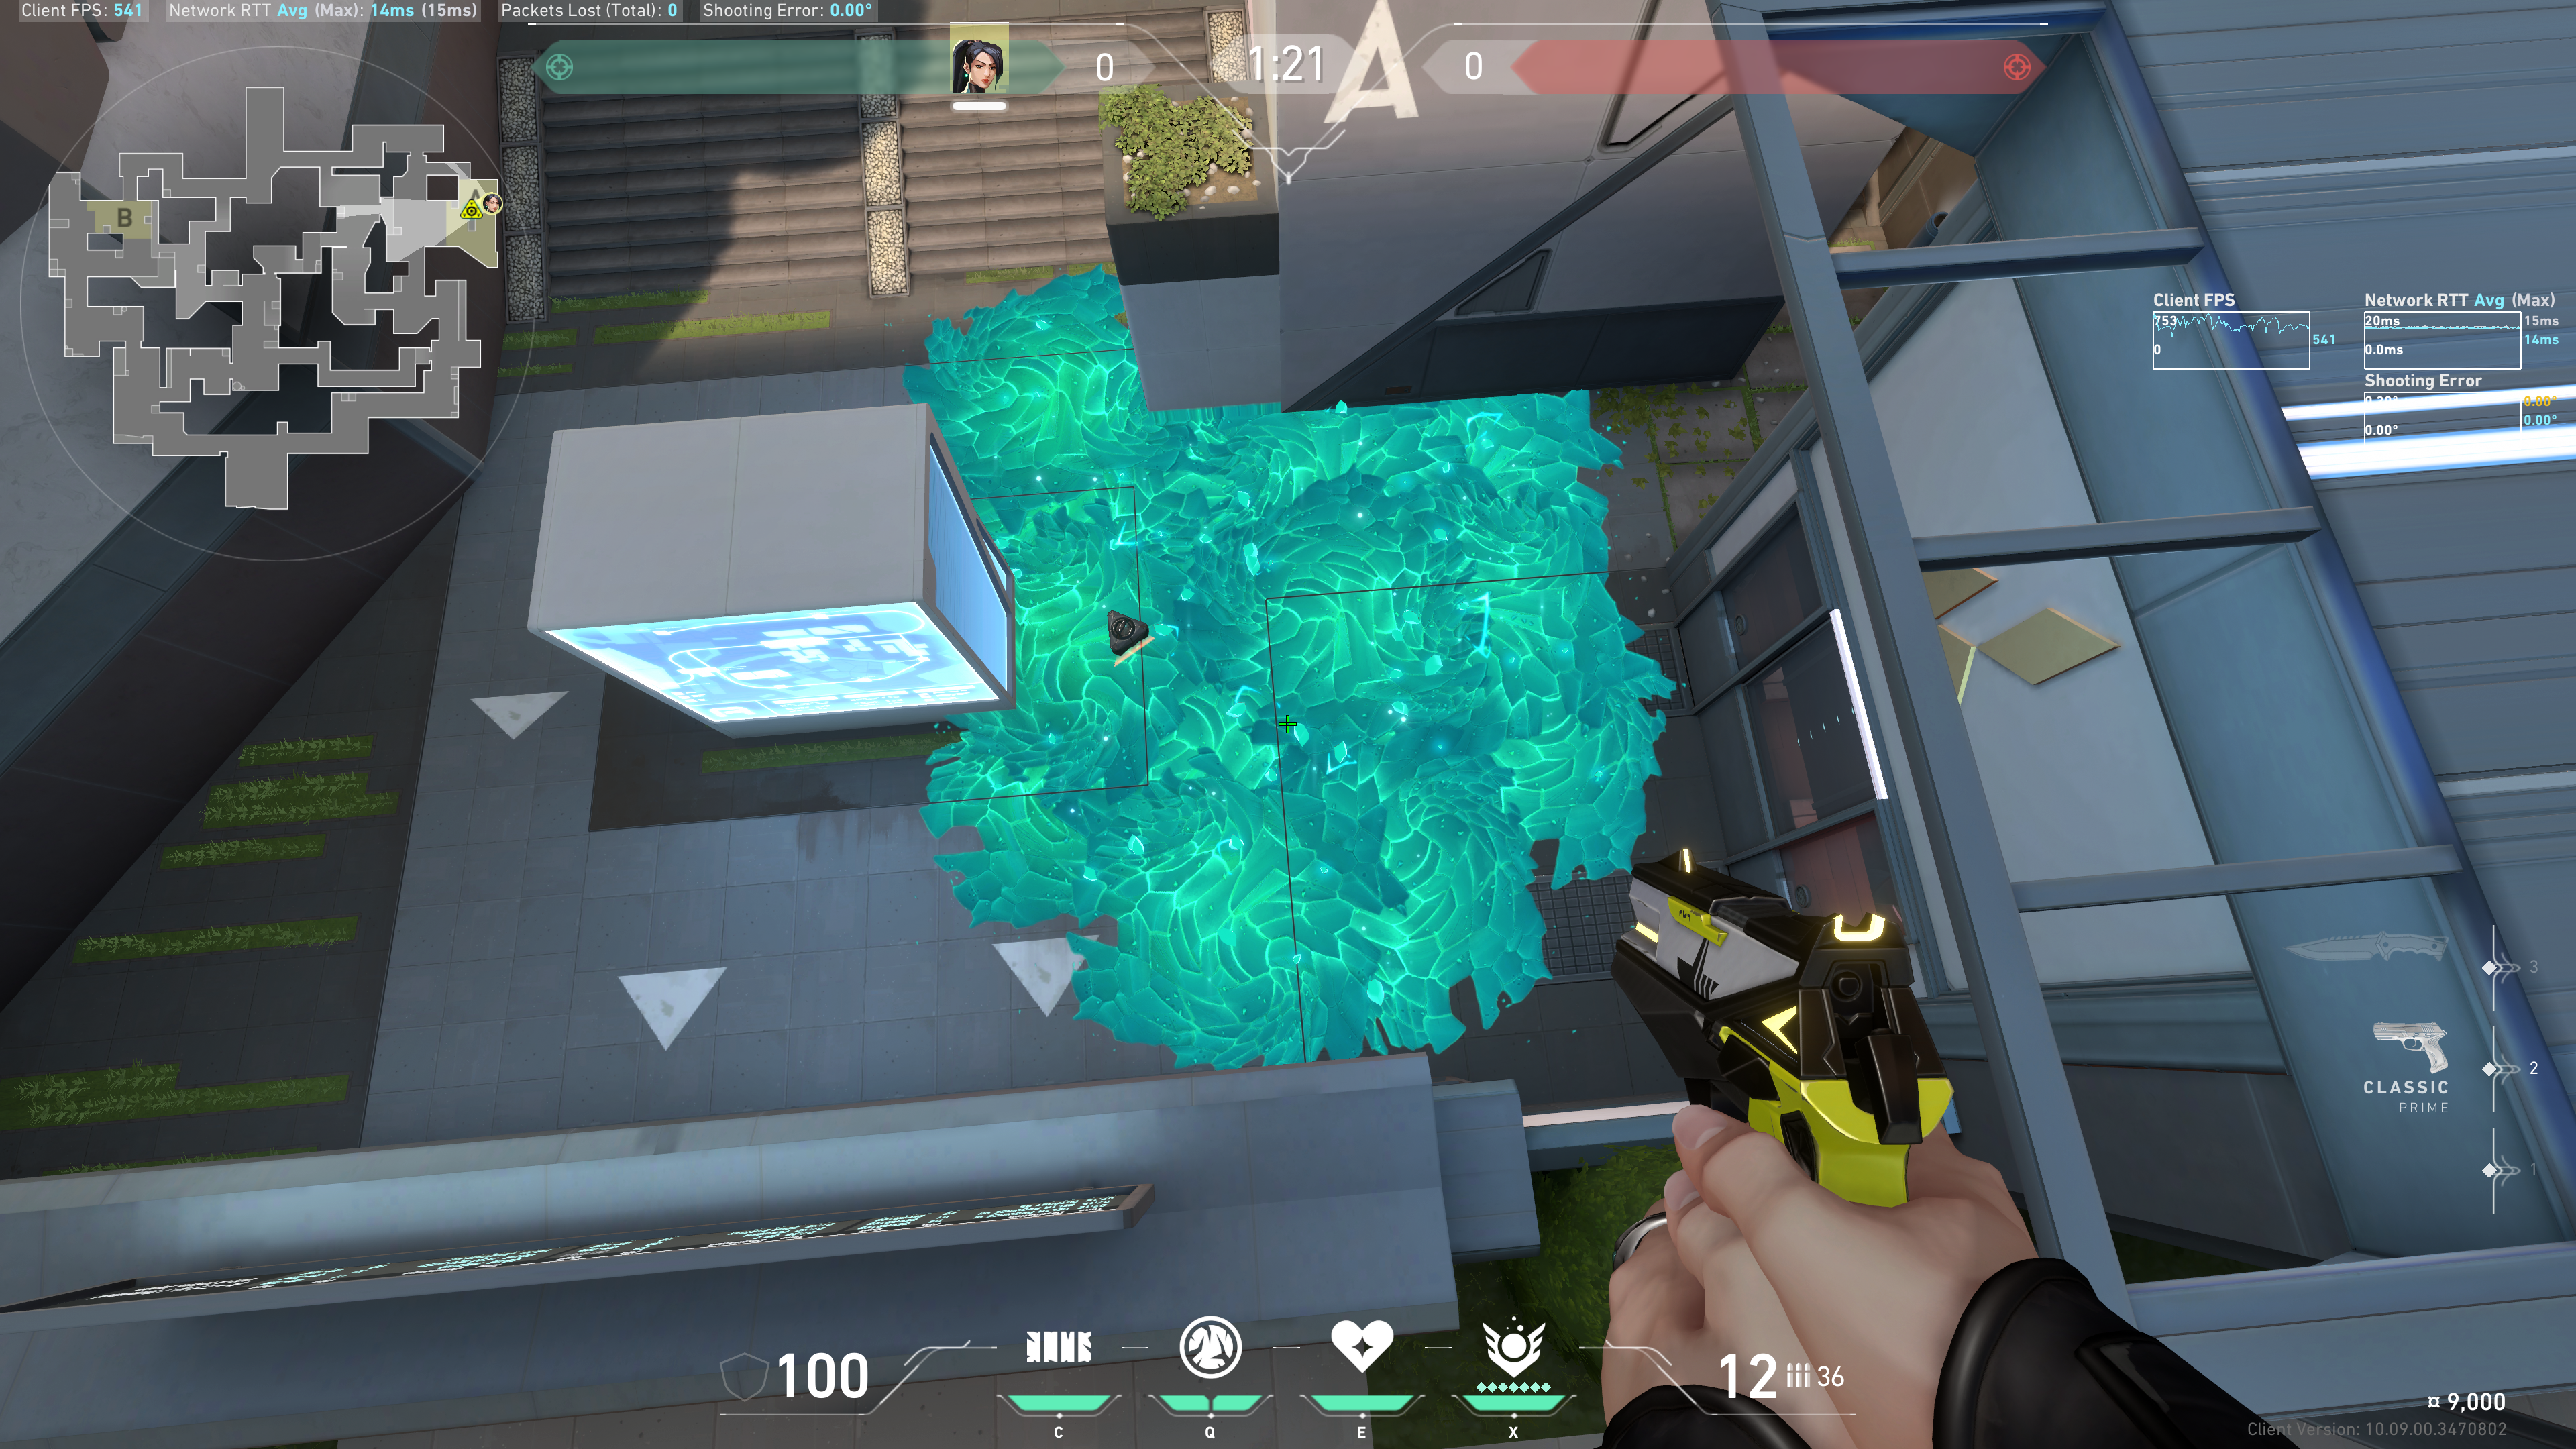
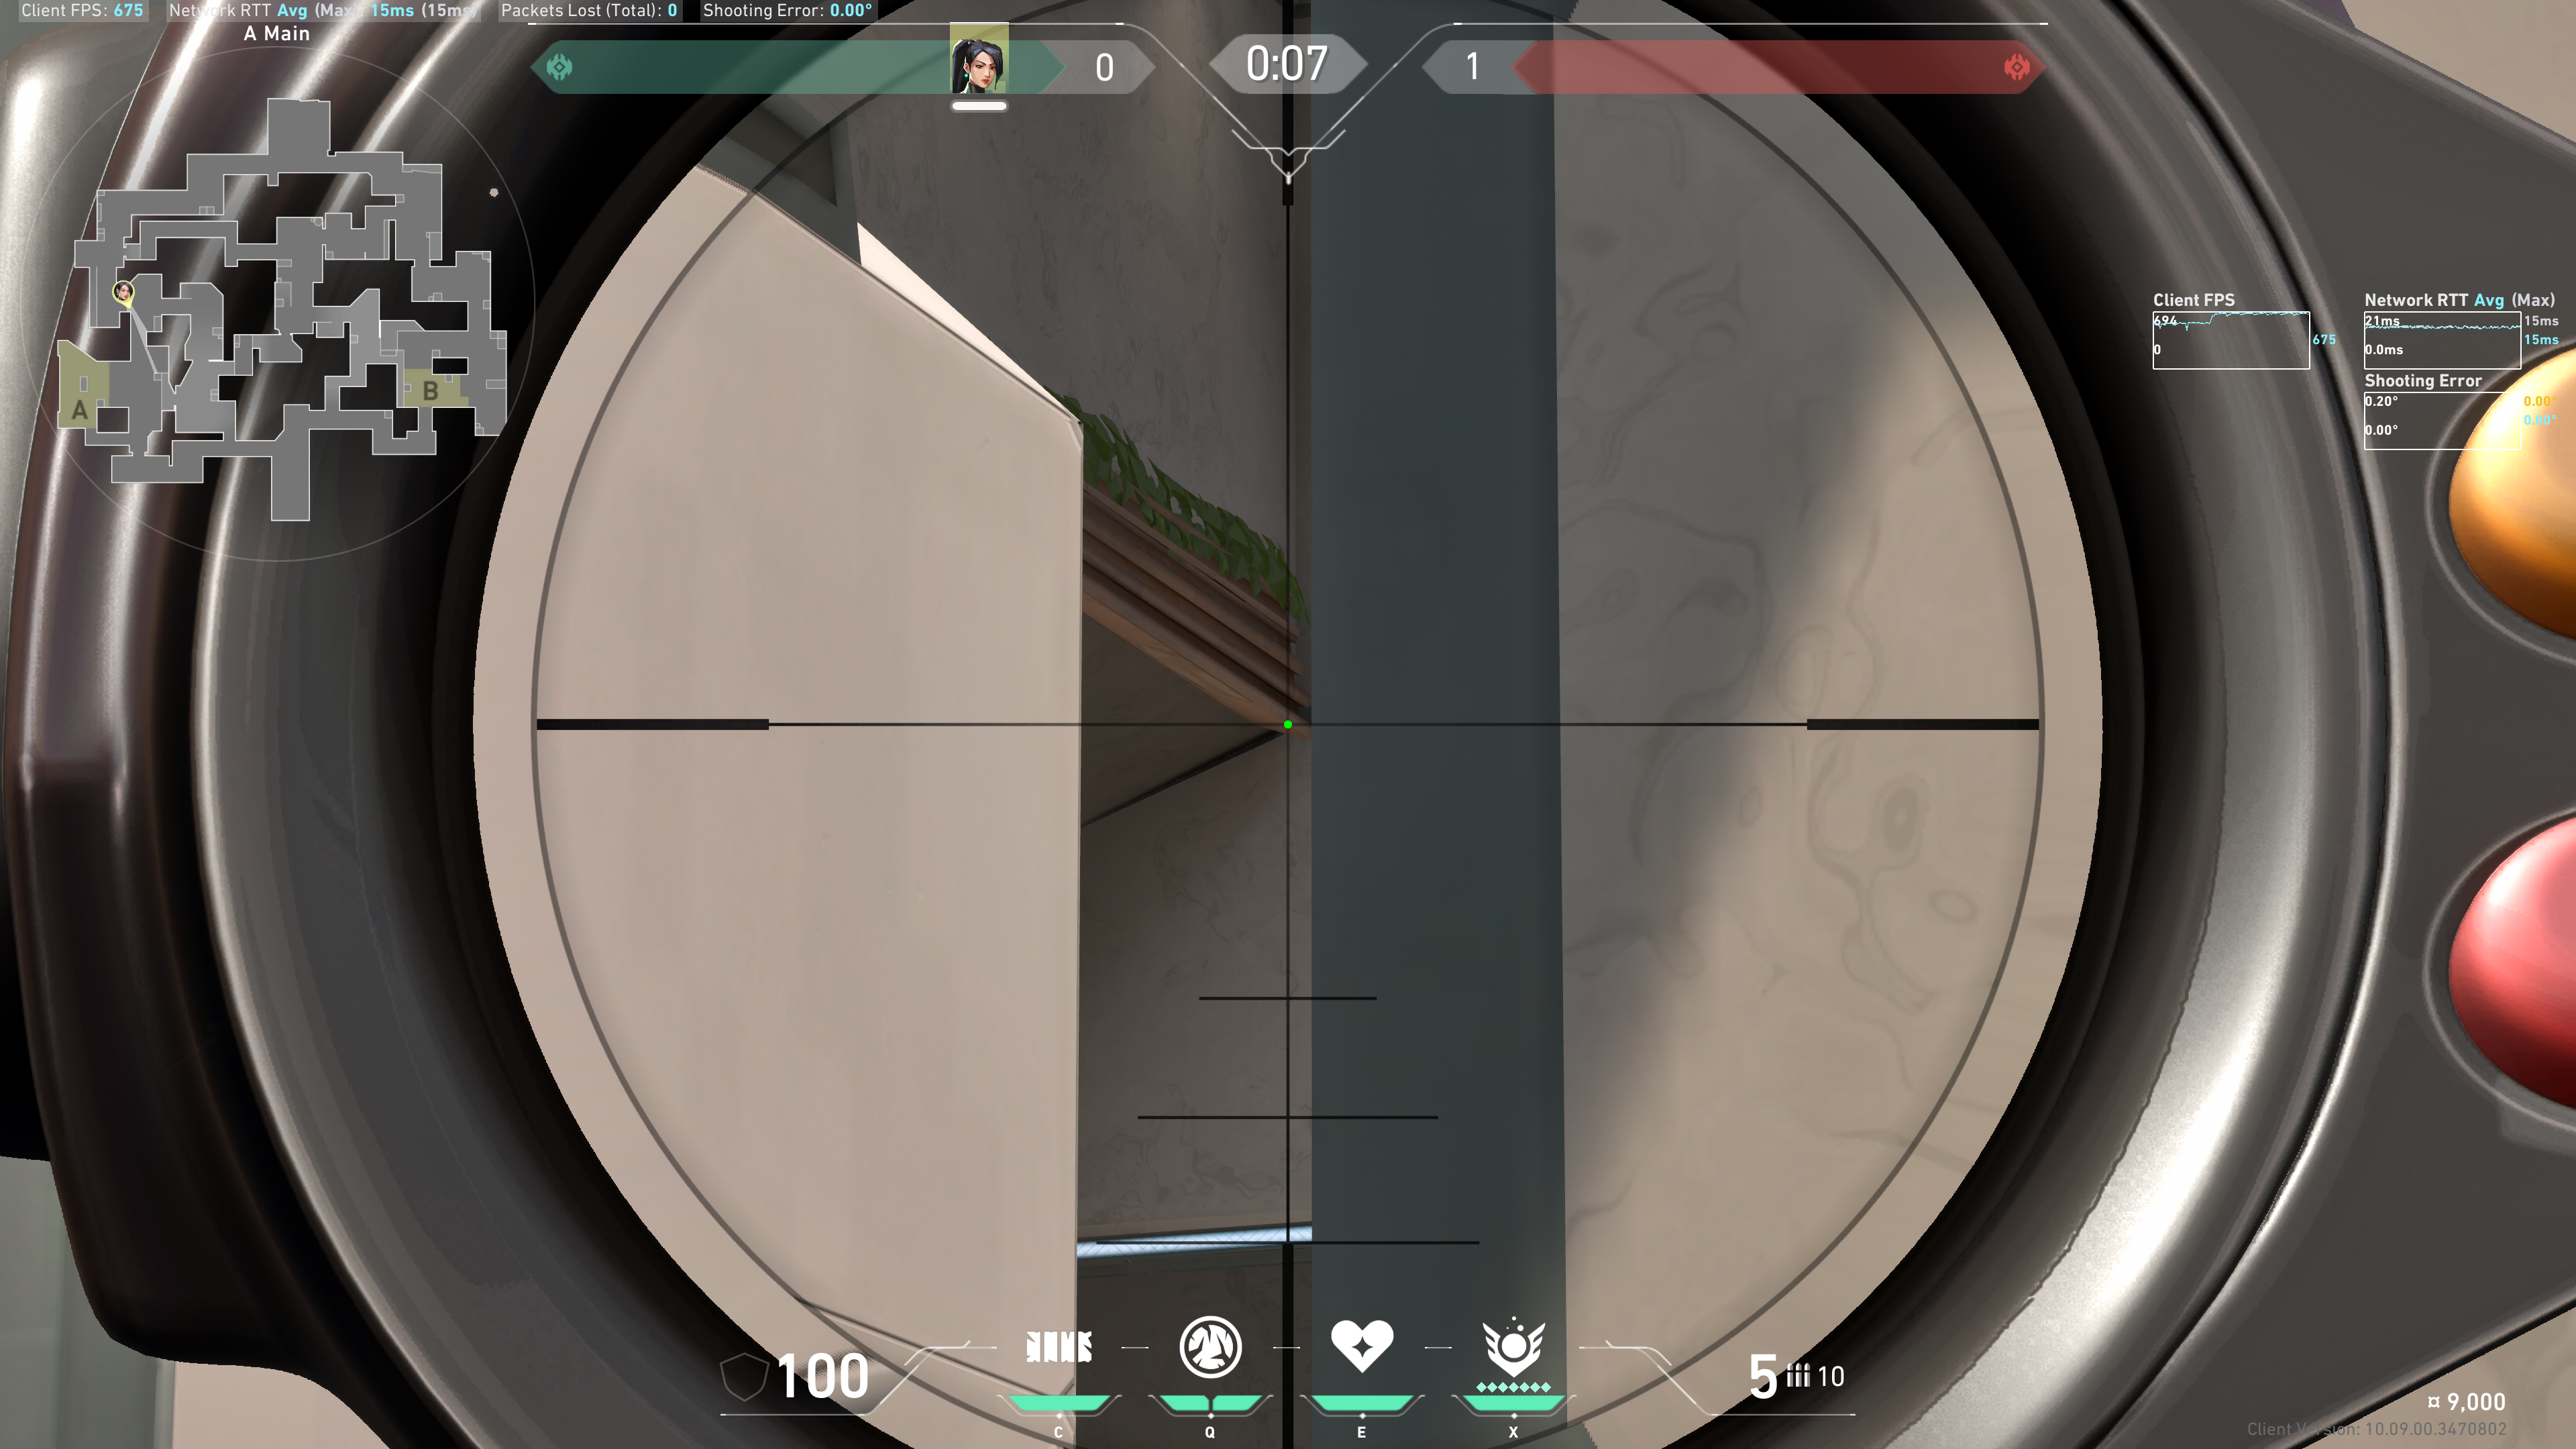
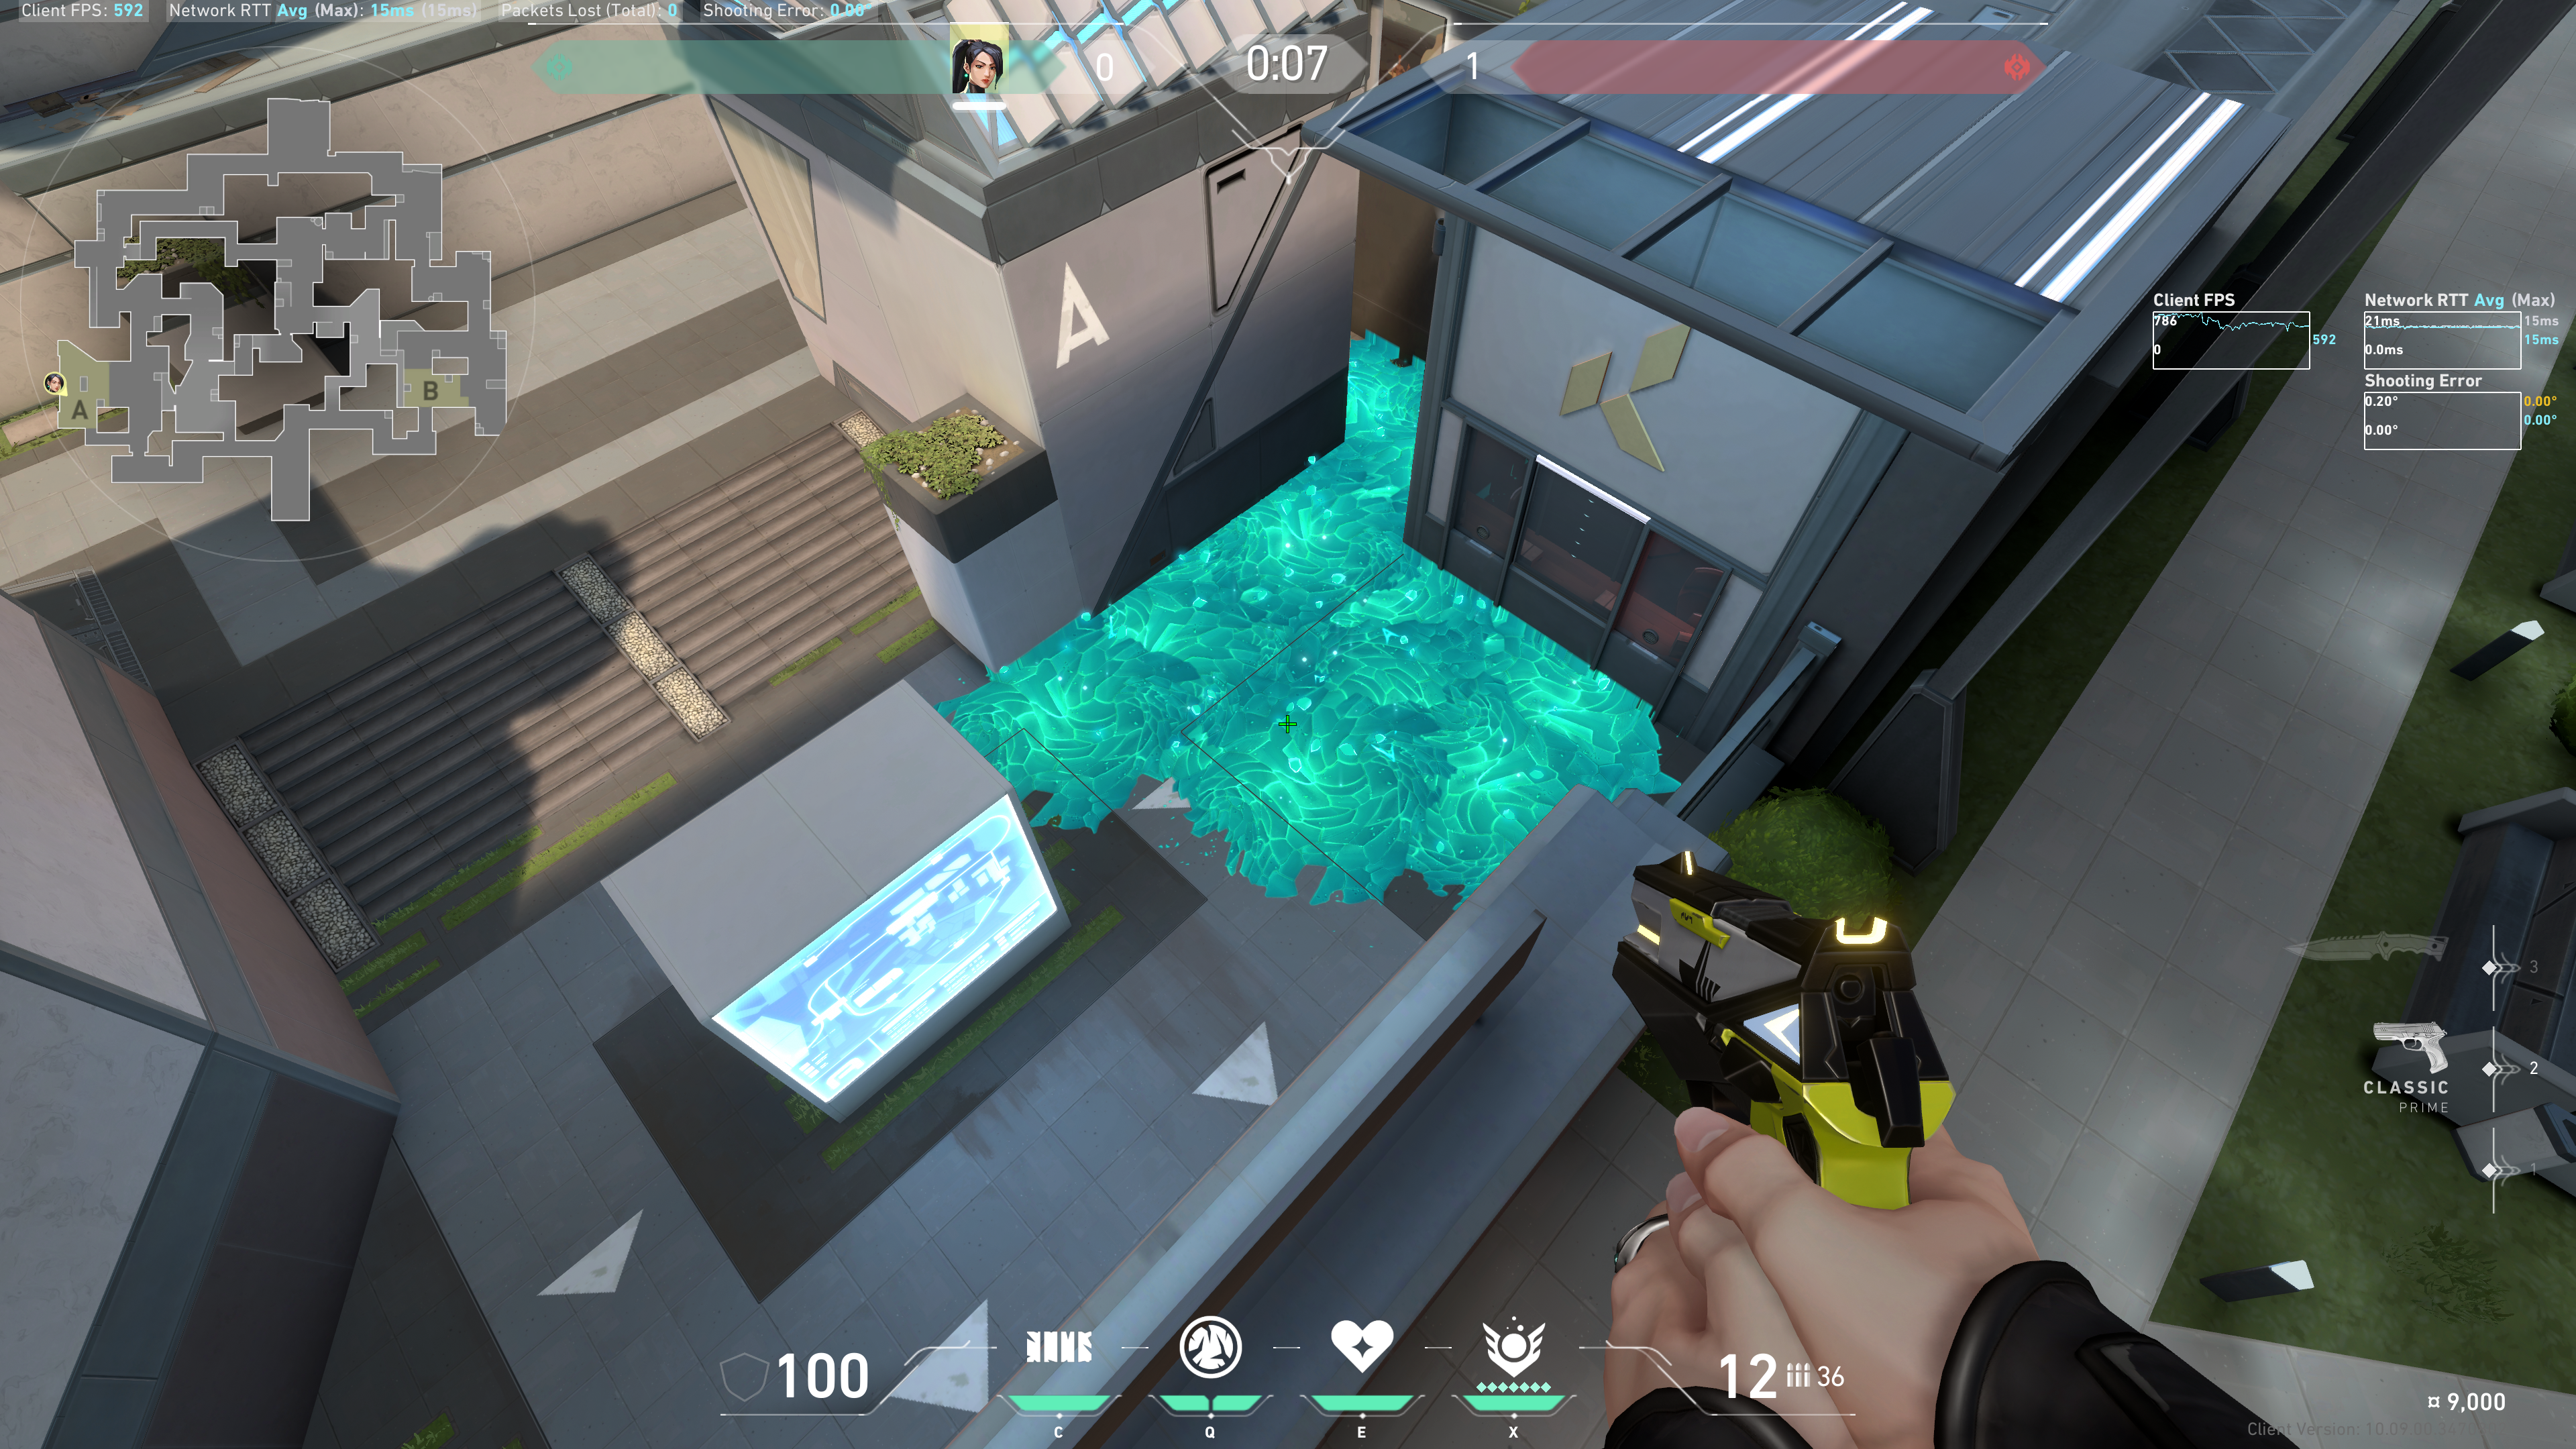
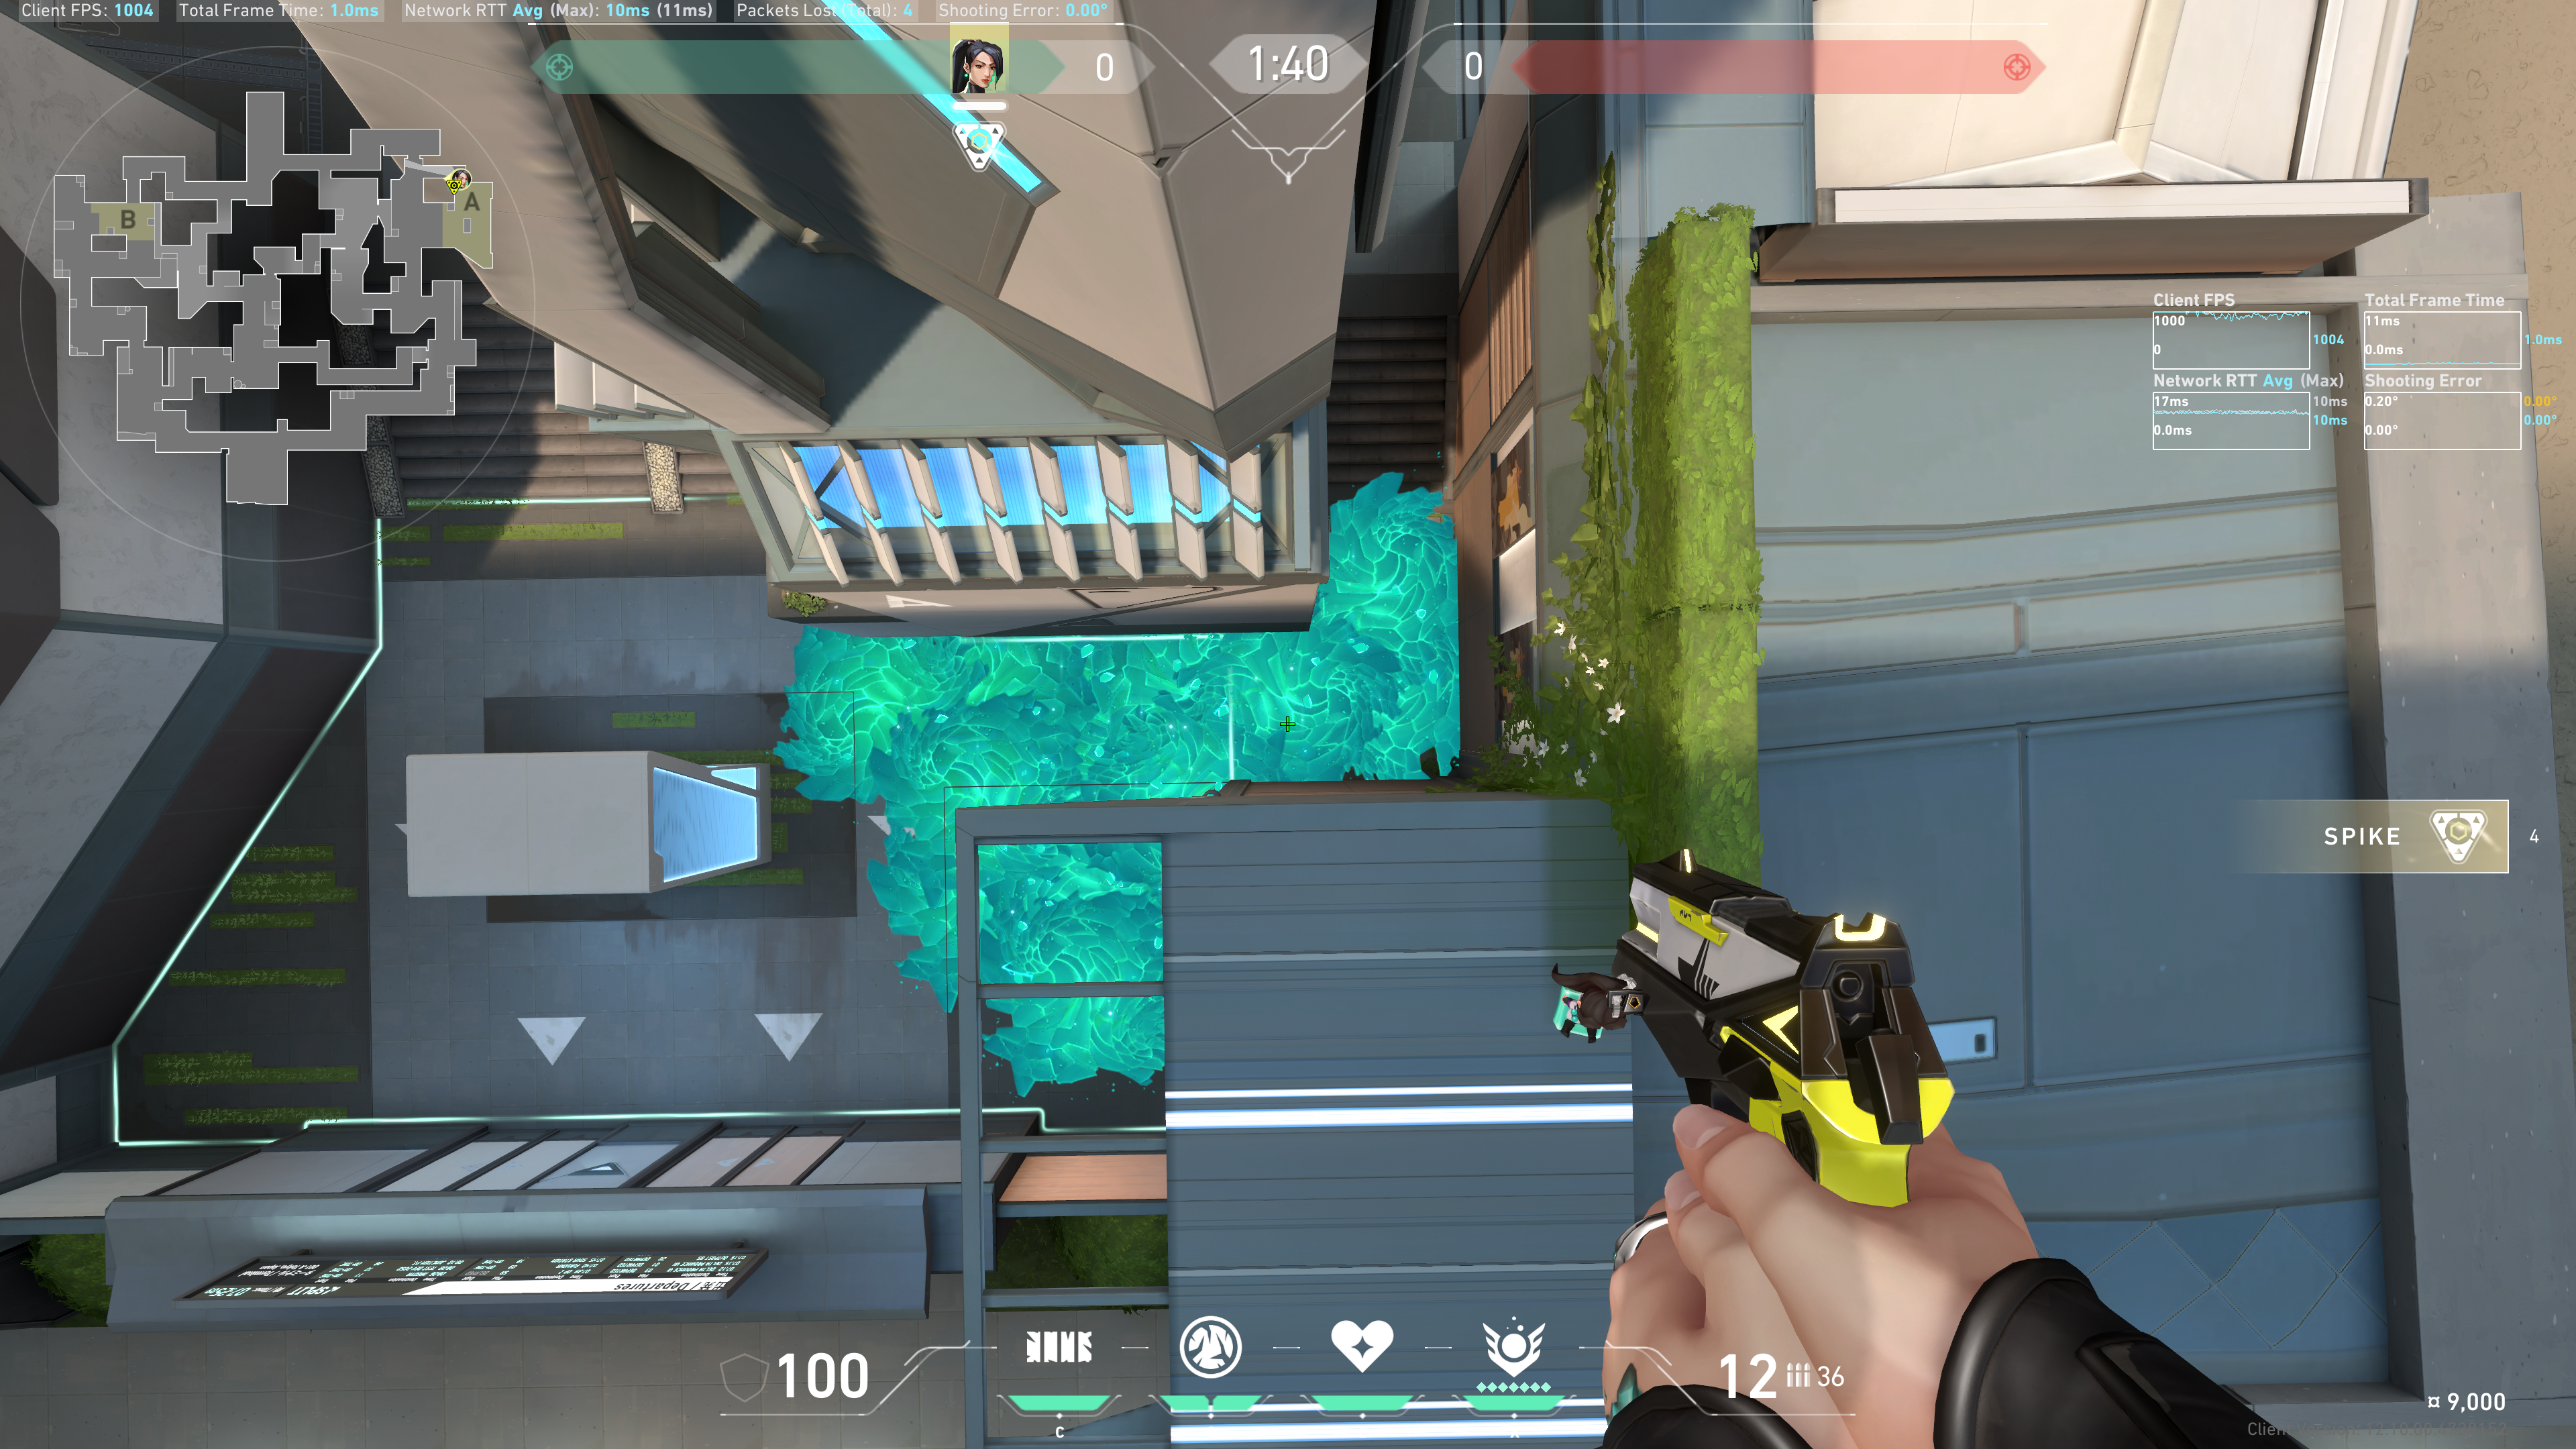
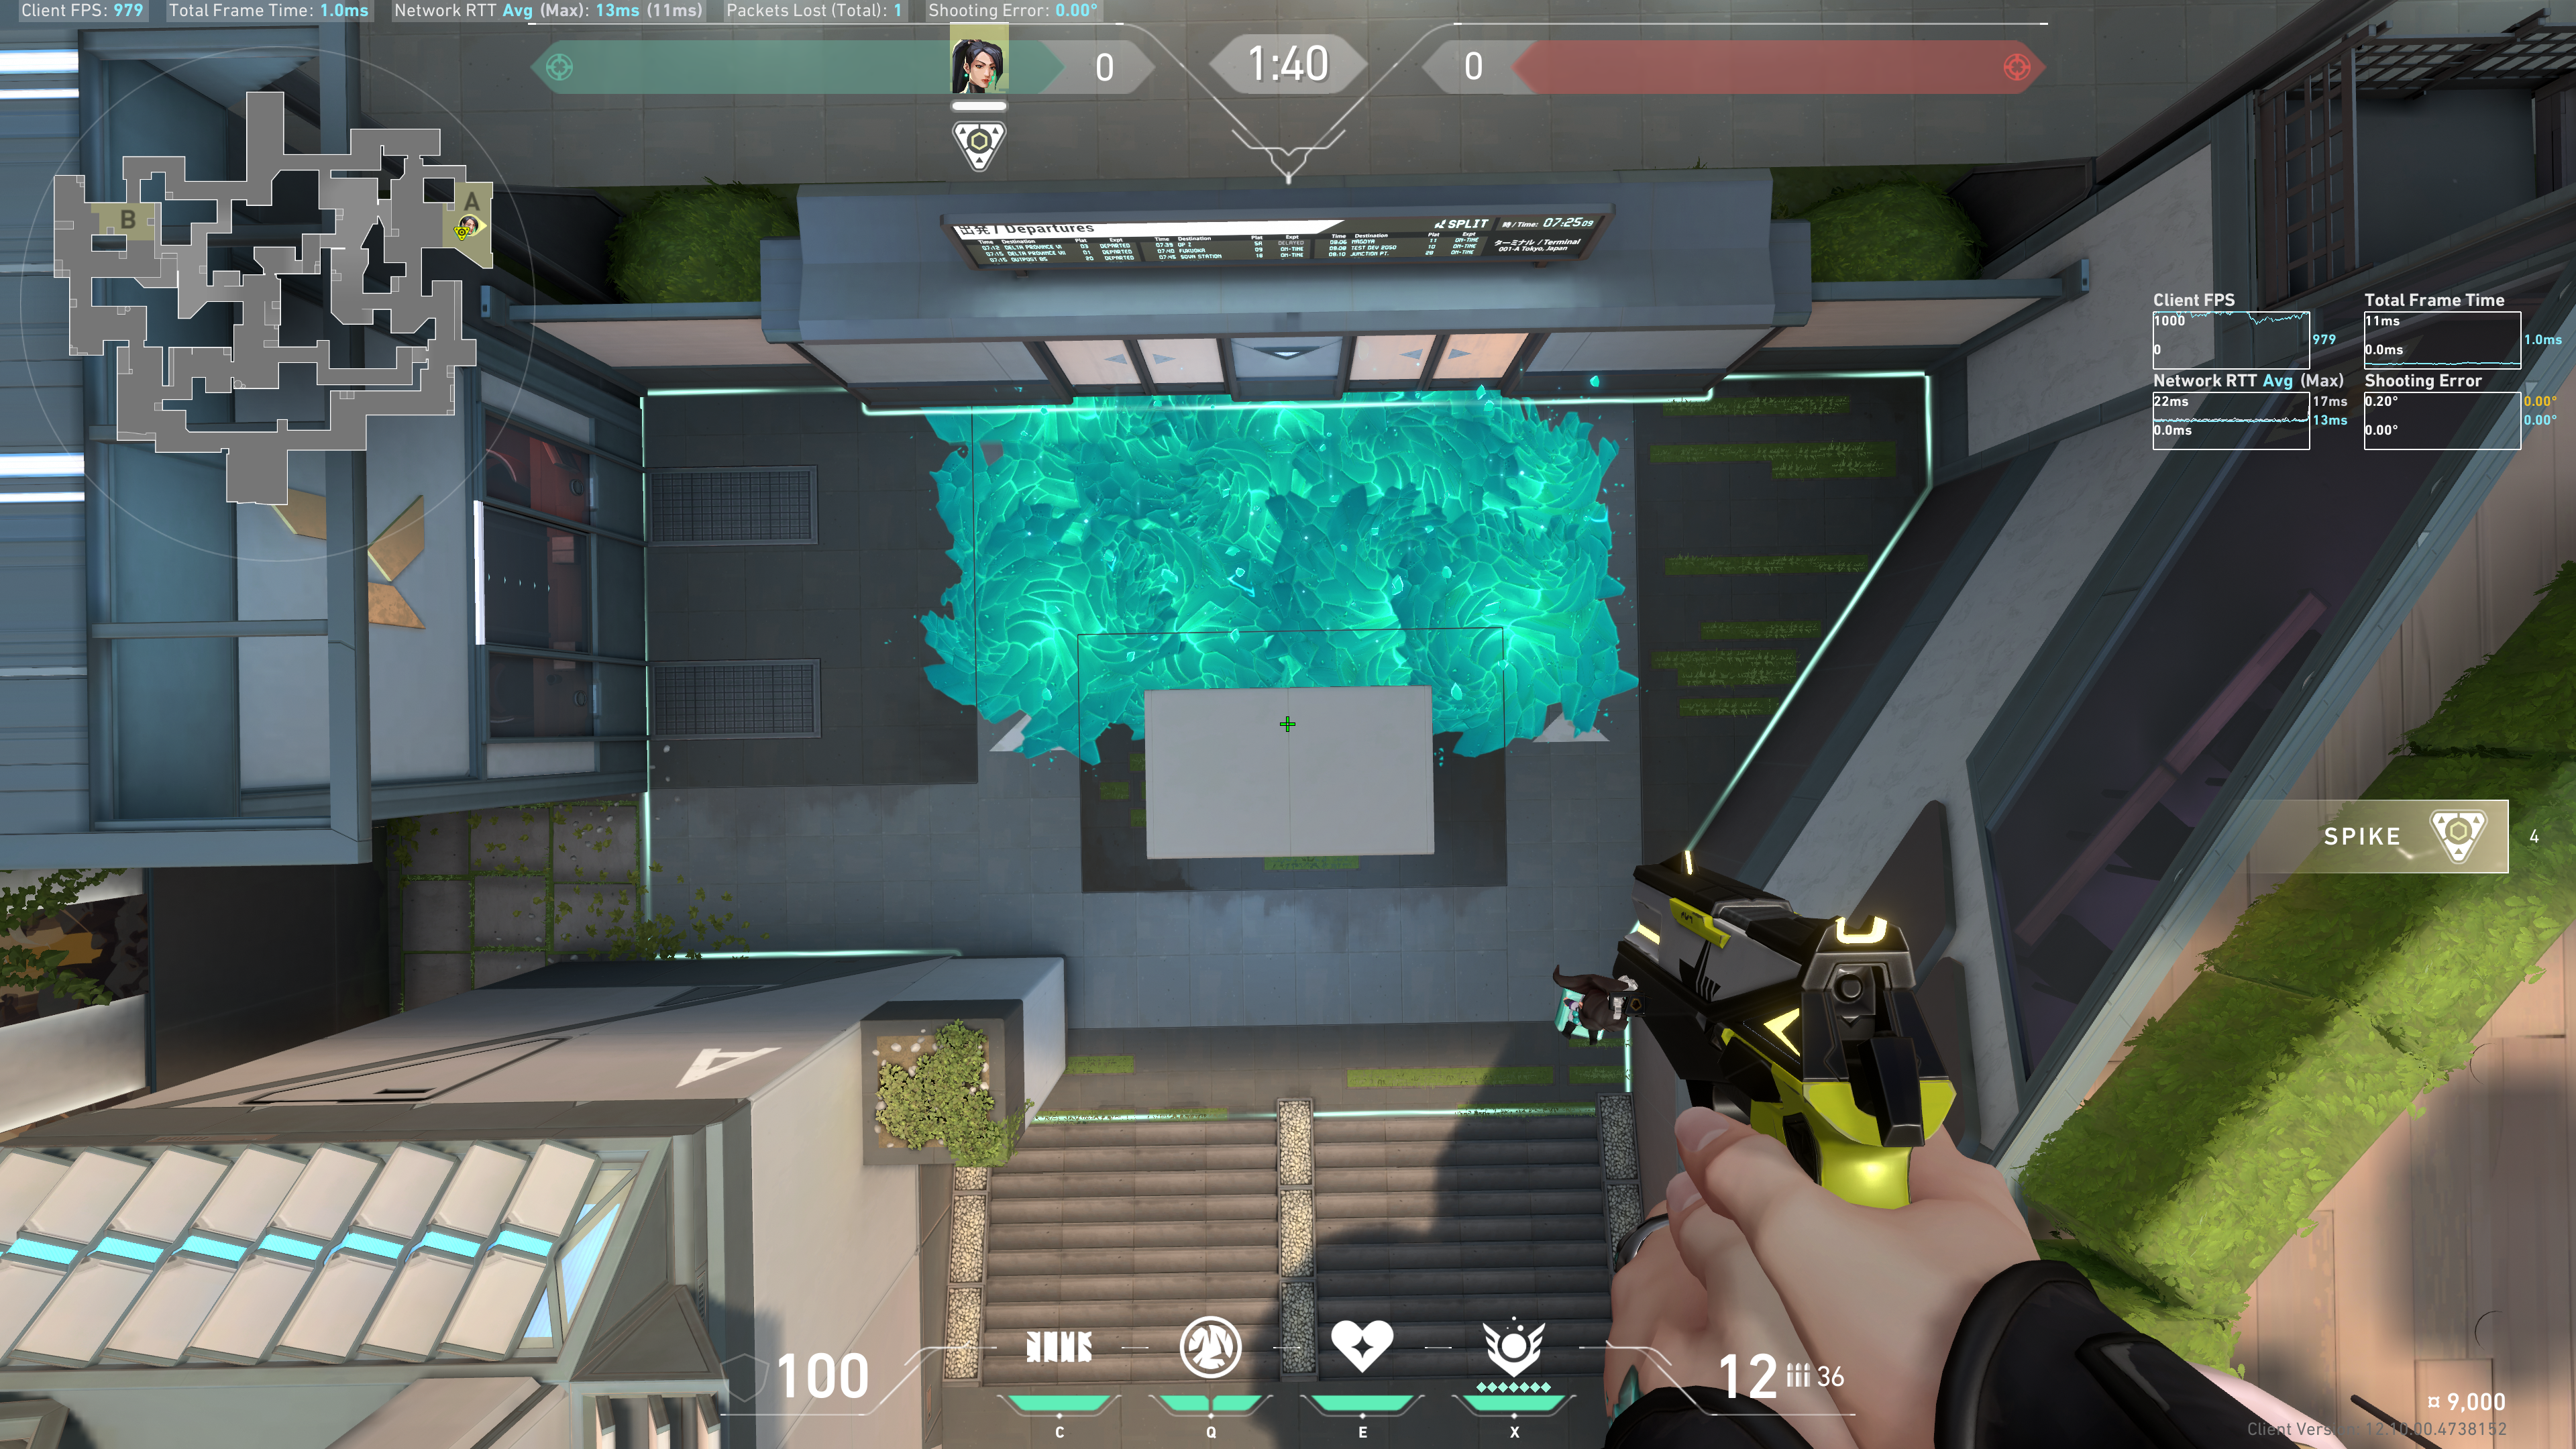
A Site
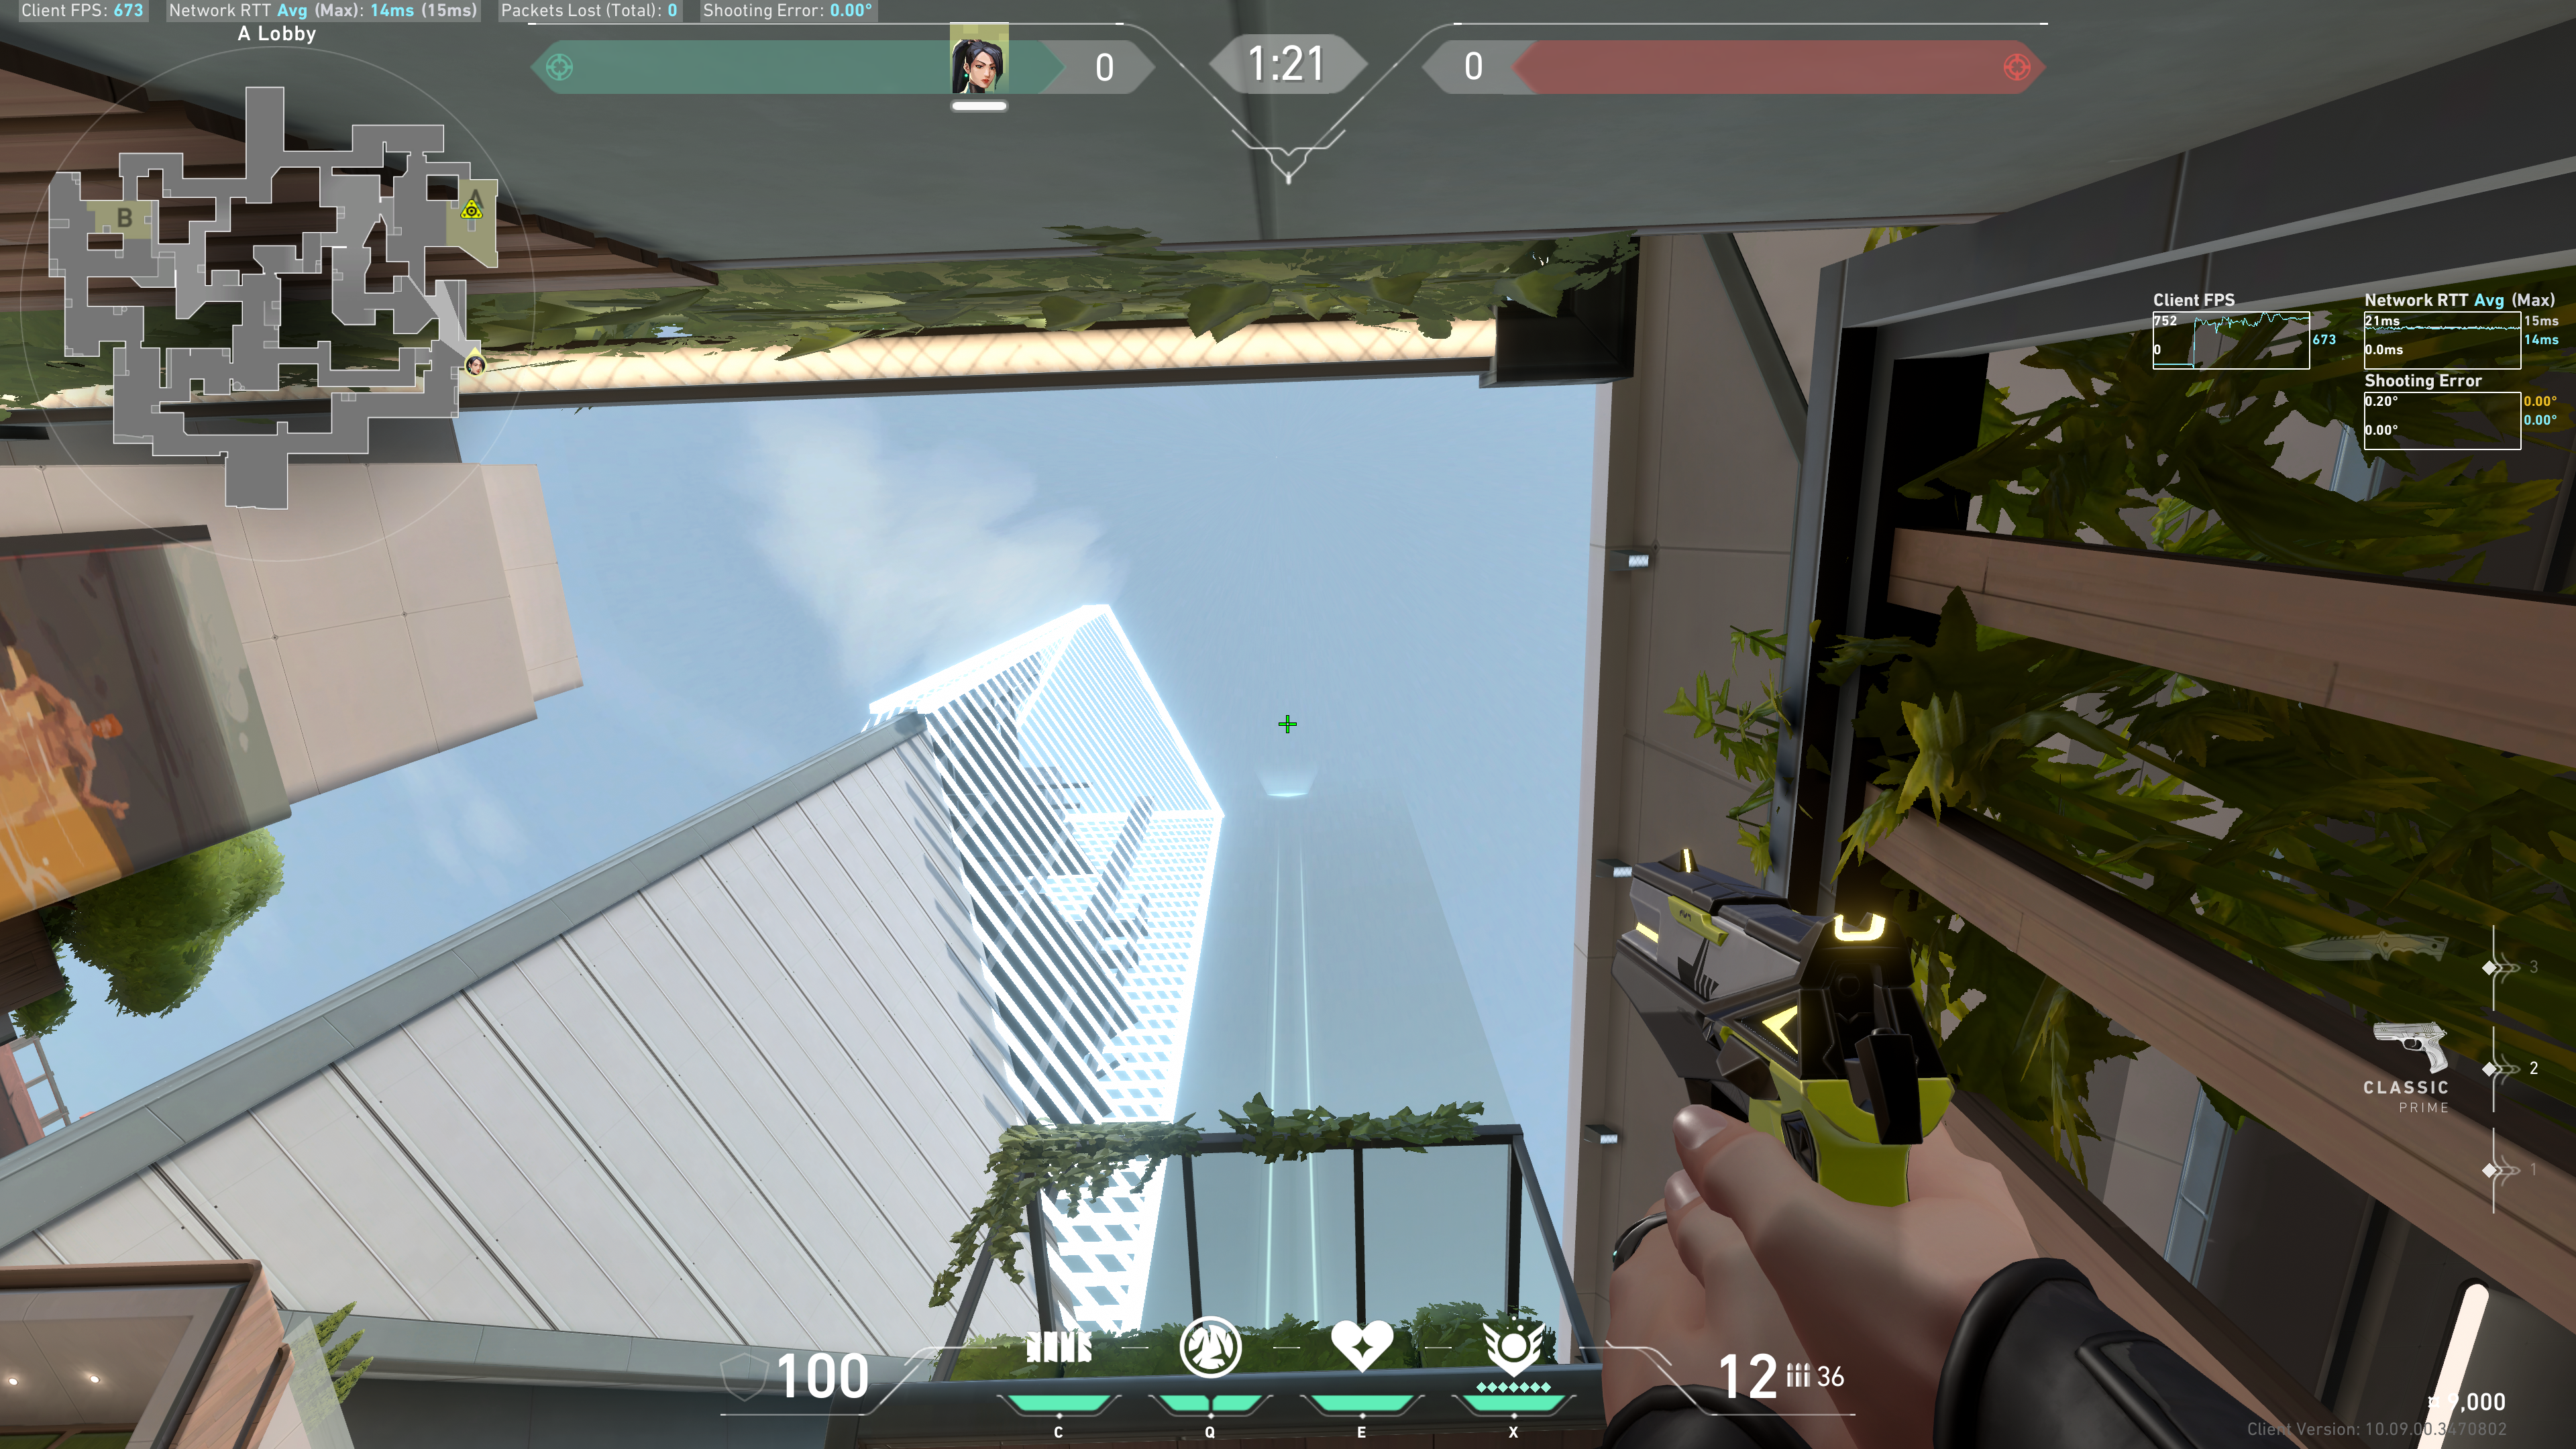
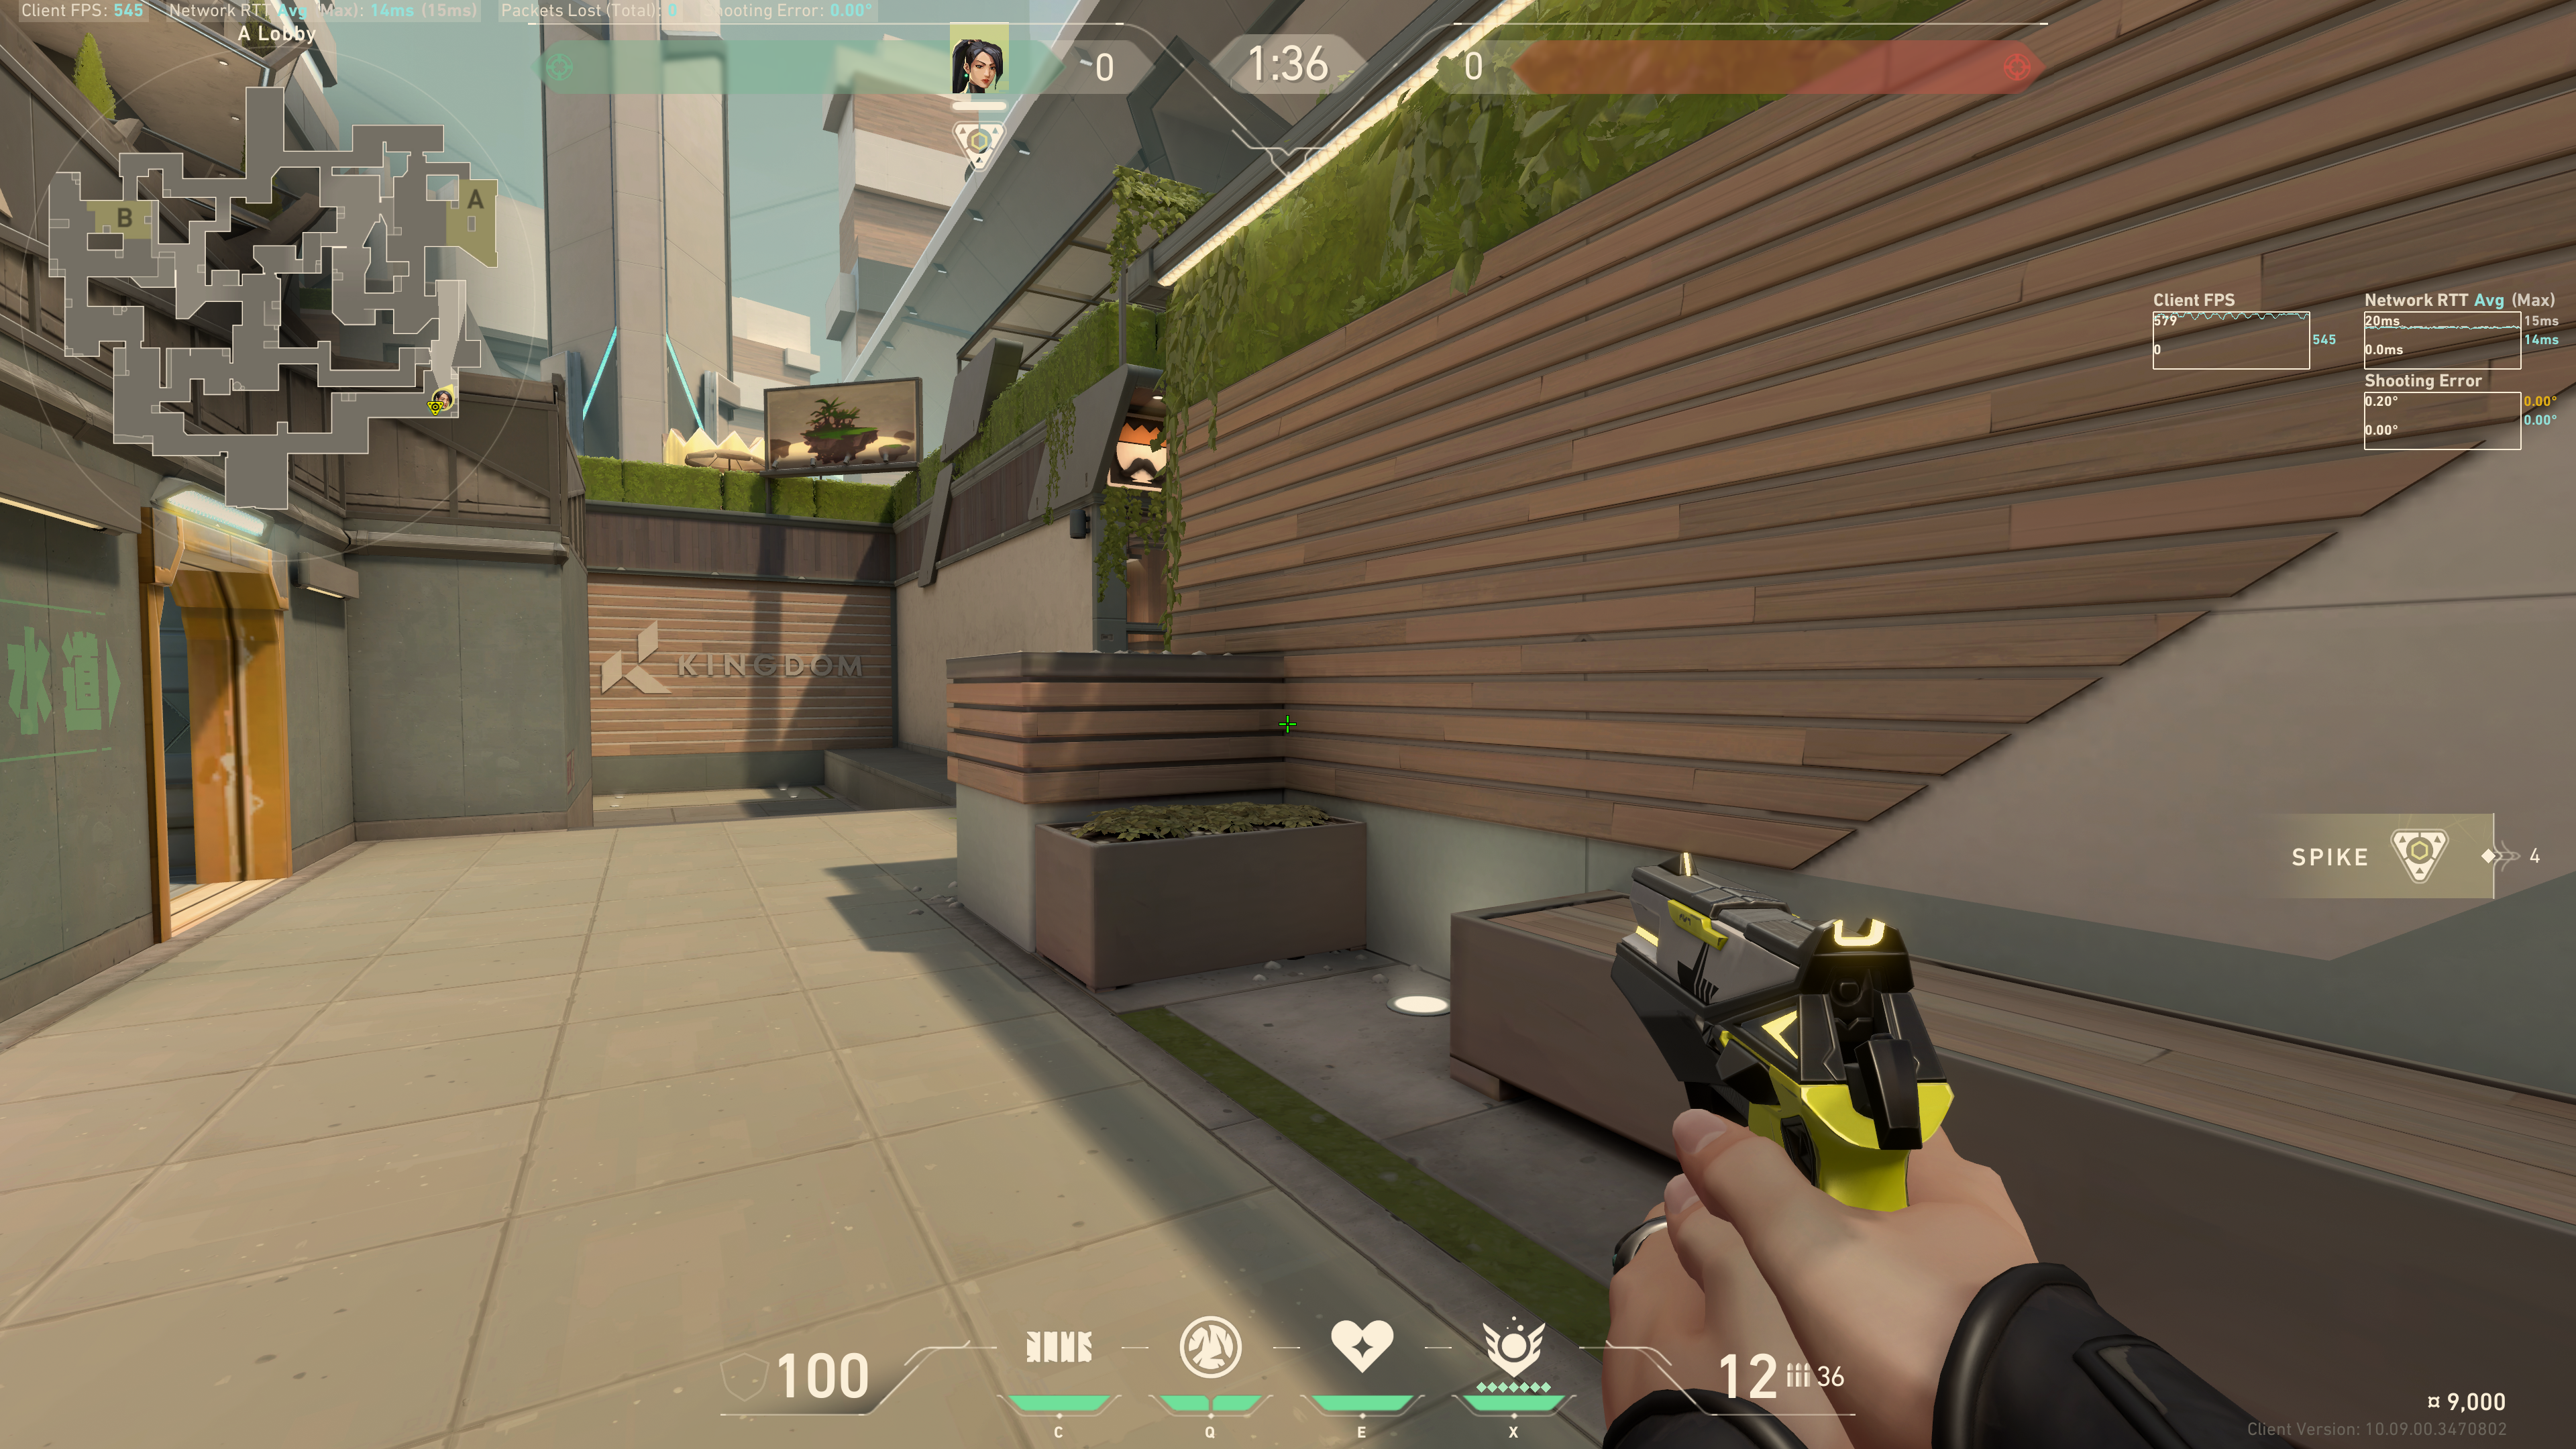
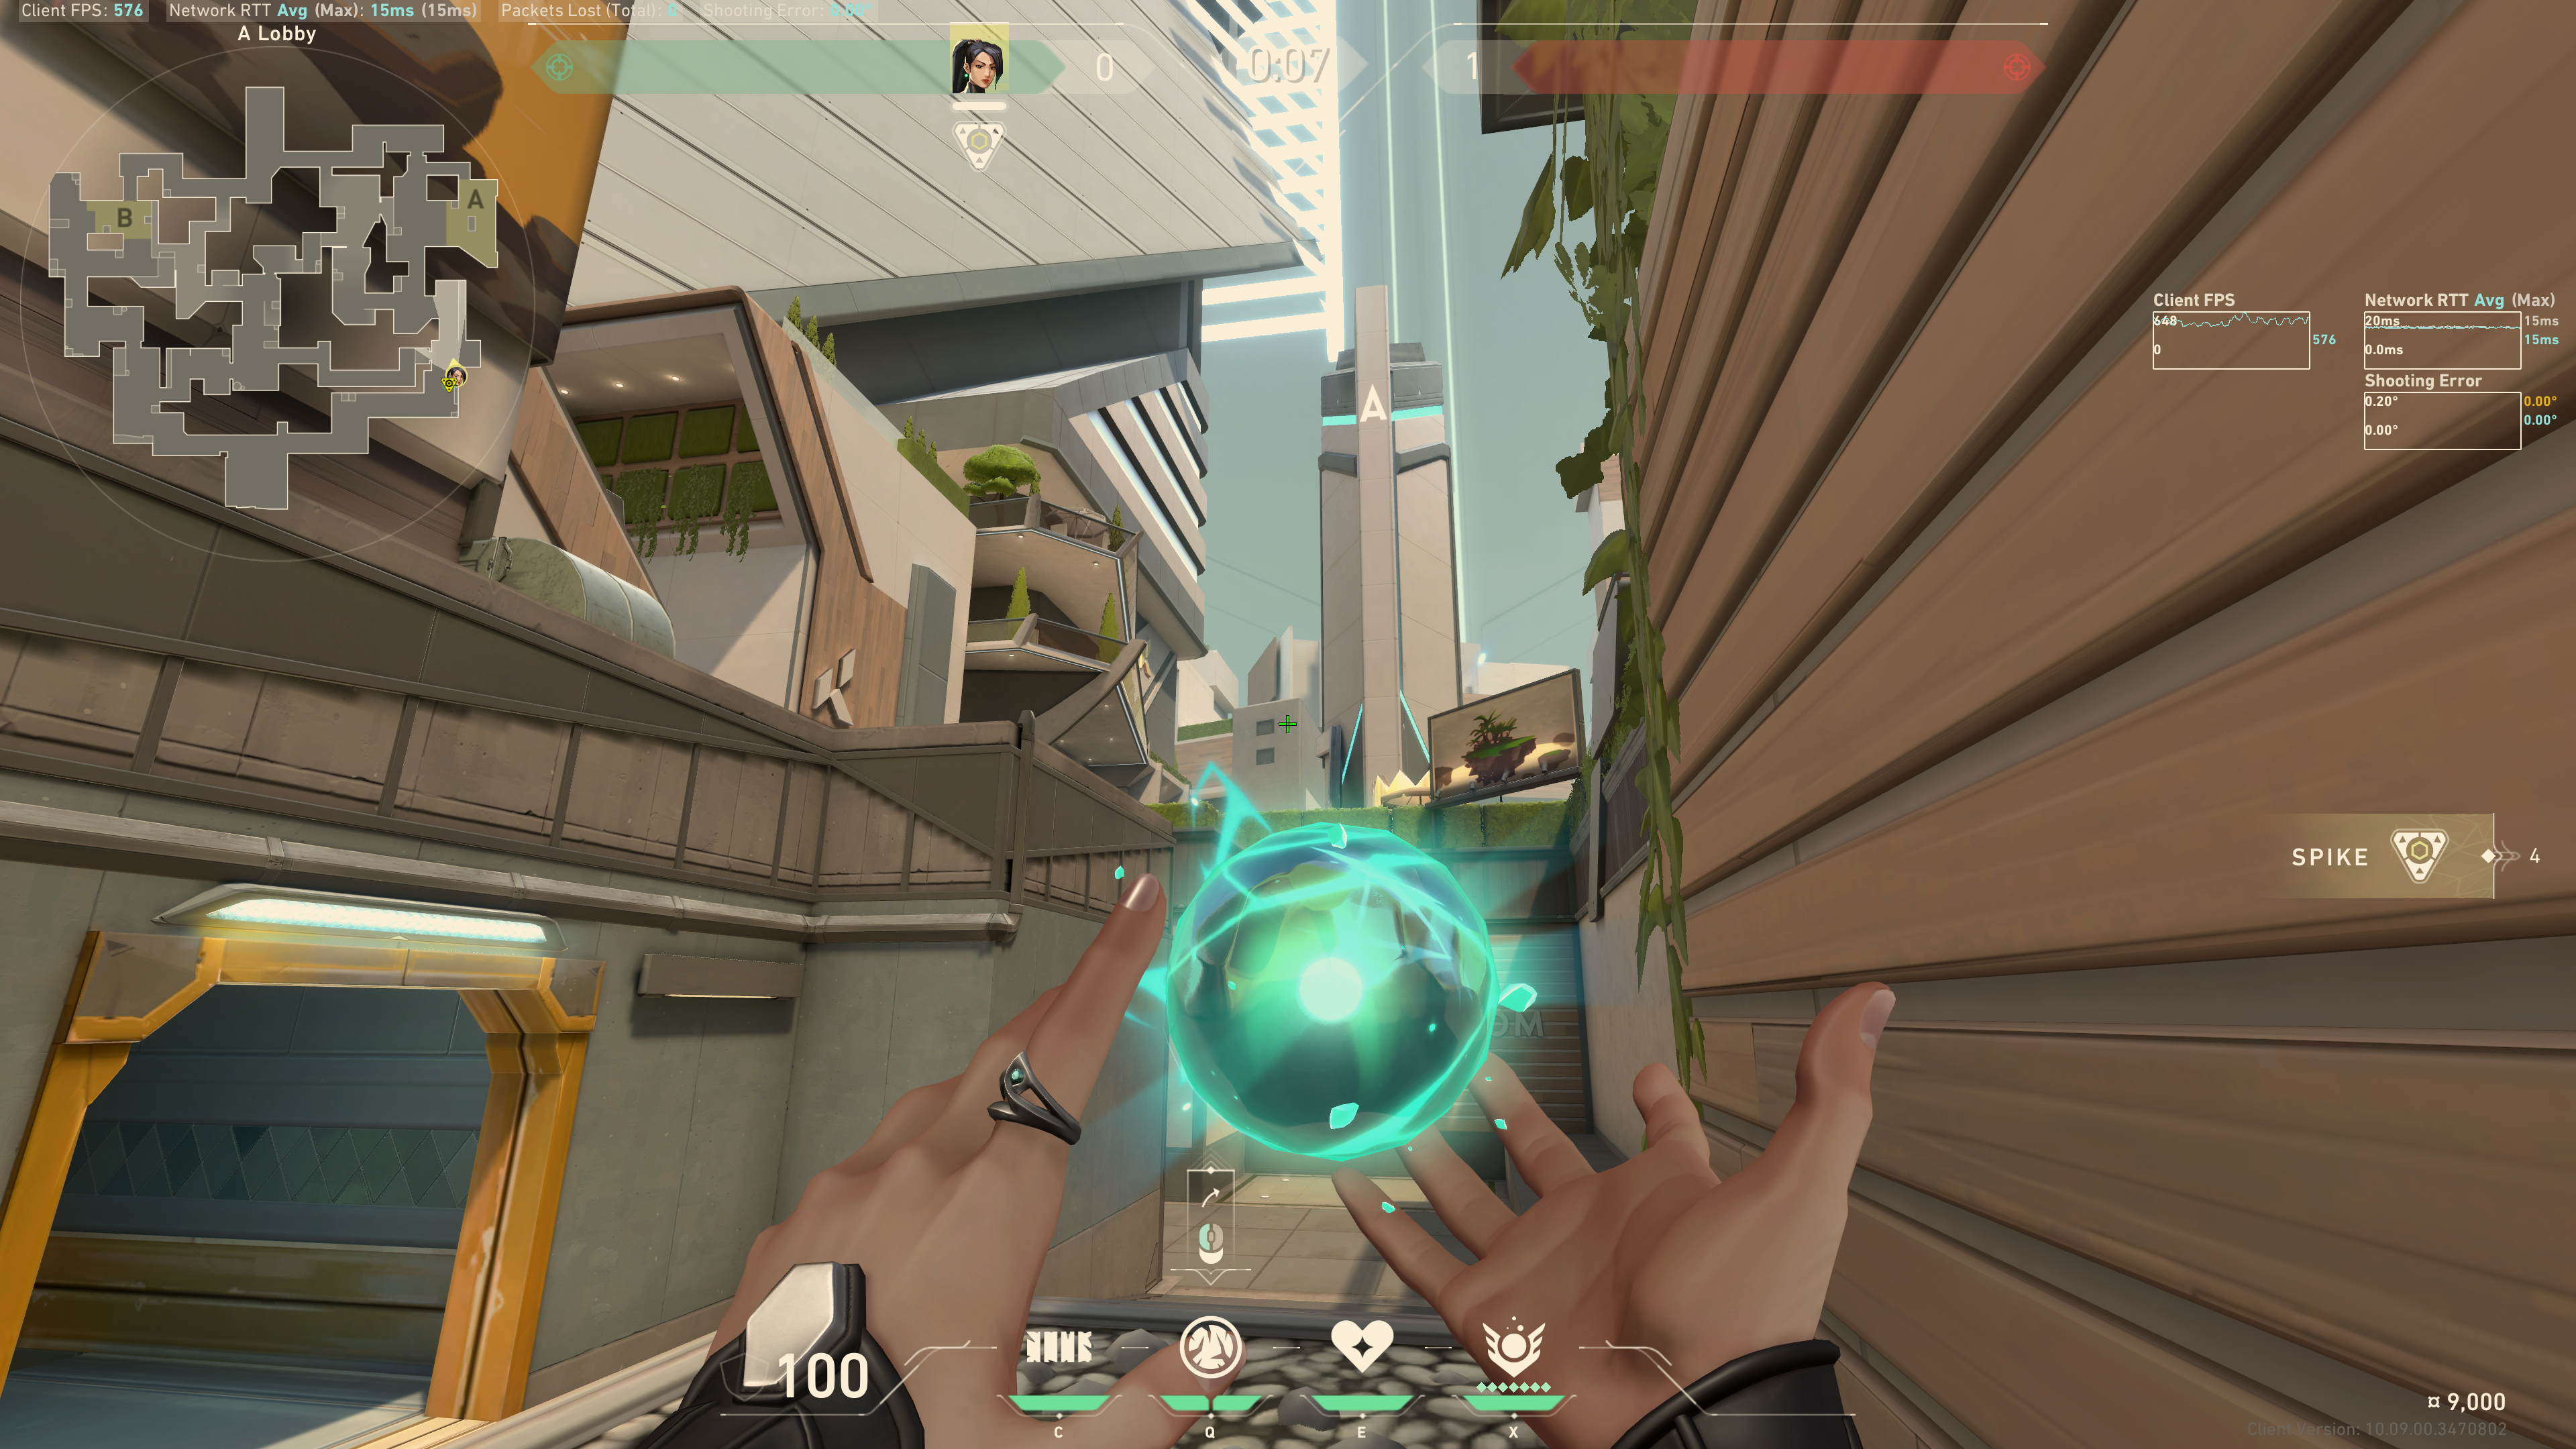
Position 1 - Flower Pot
Tuck into this corner:
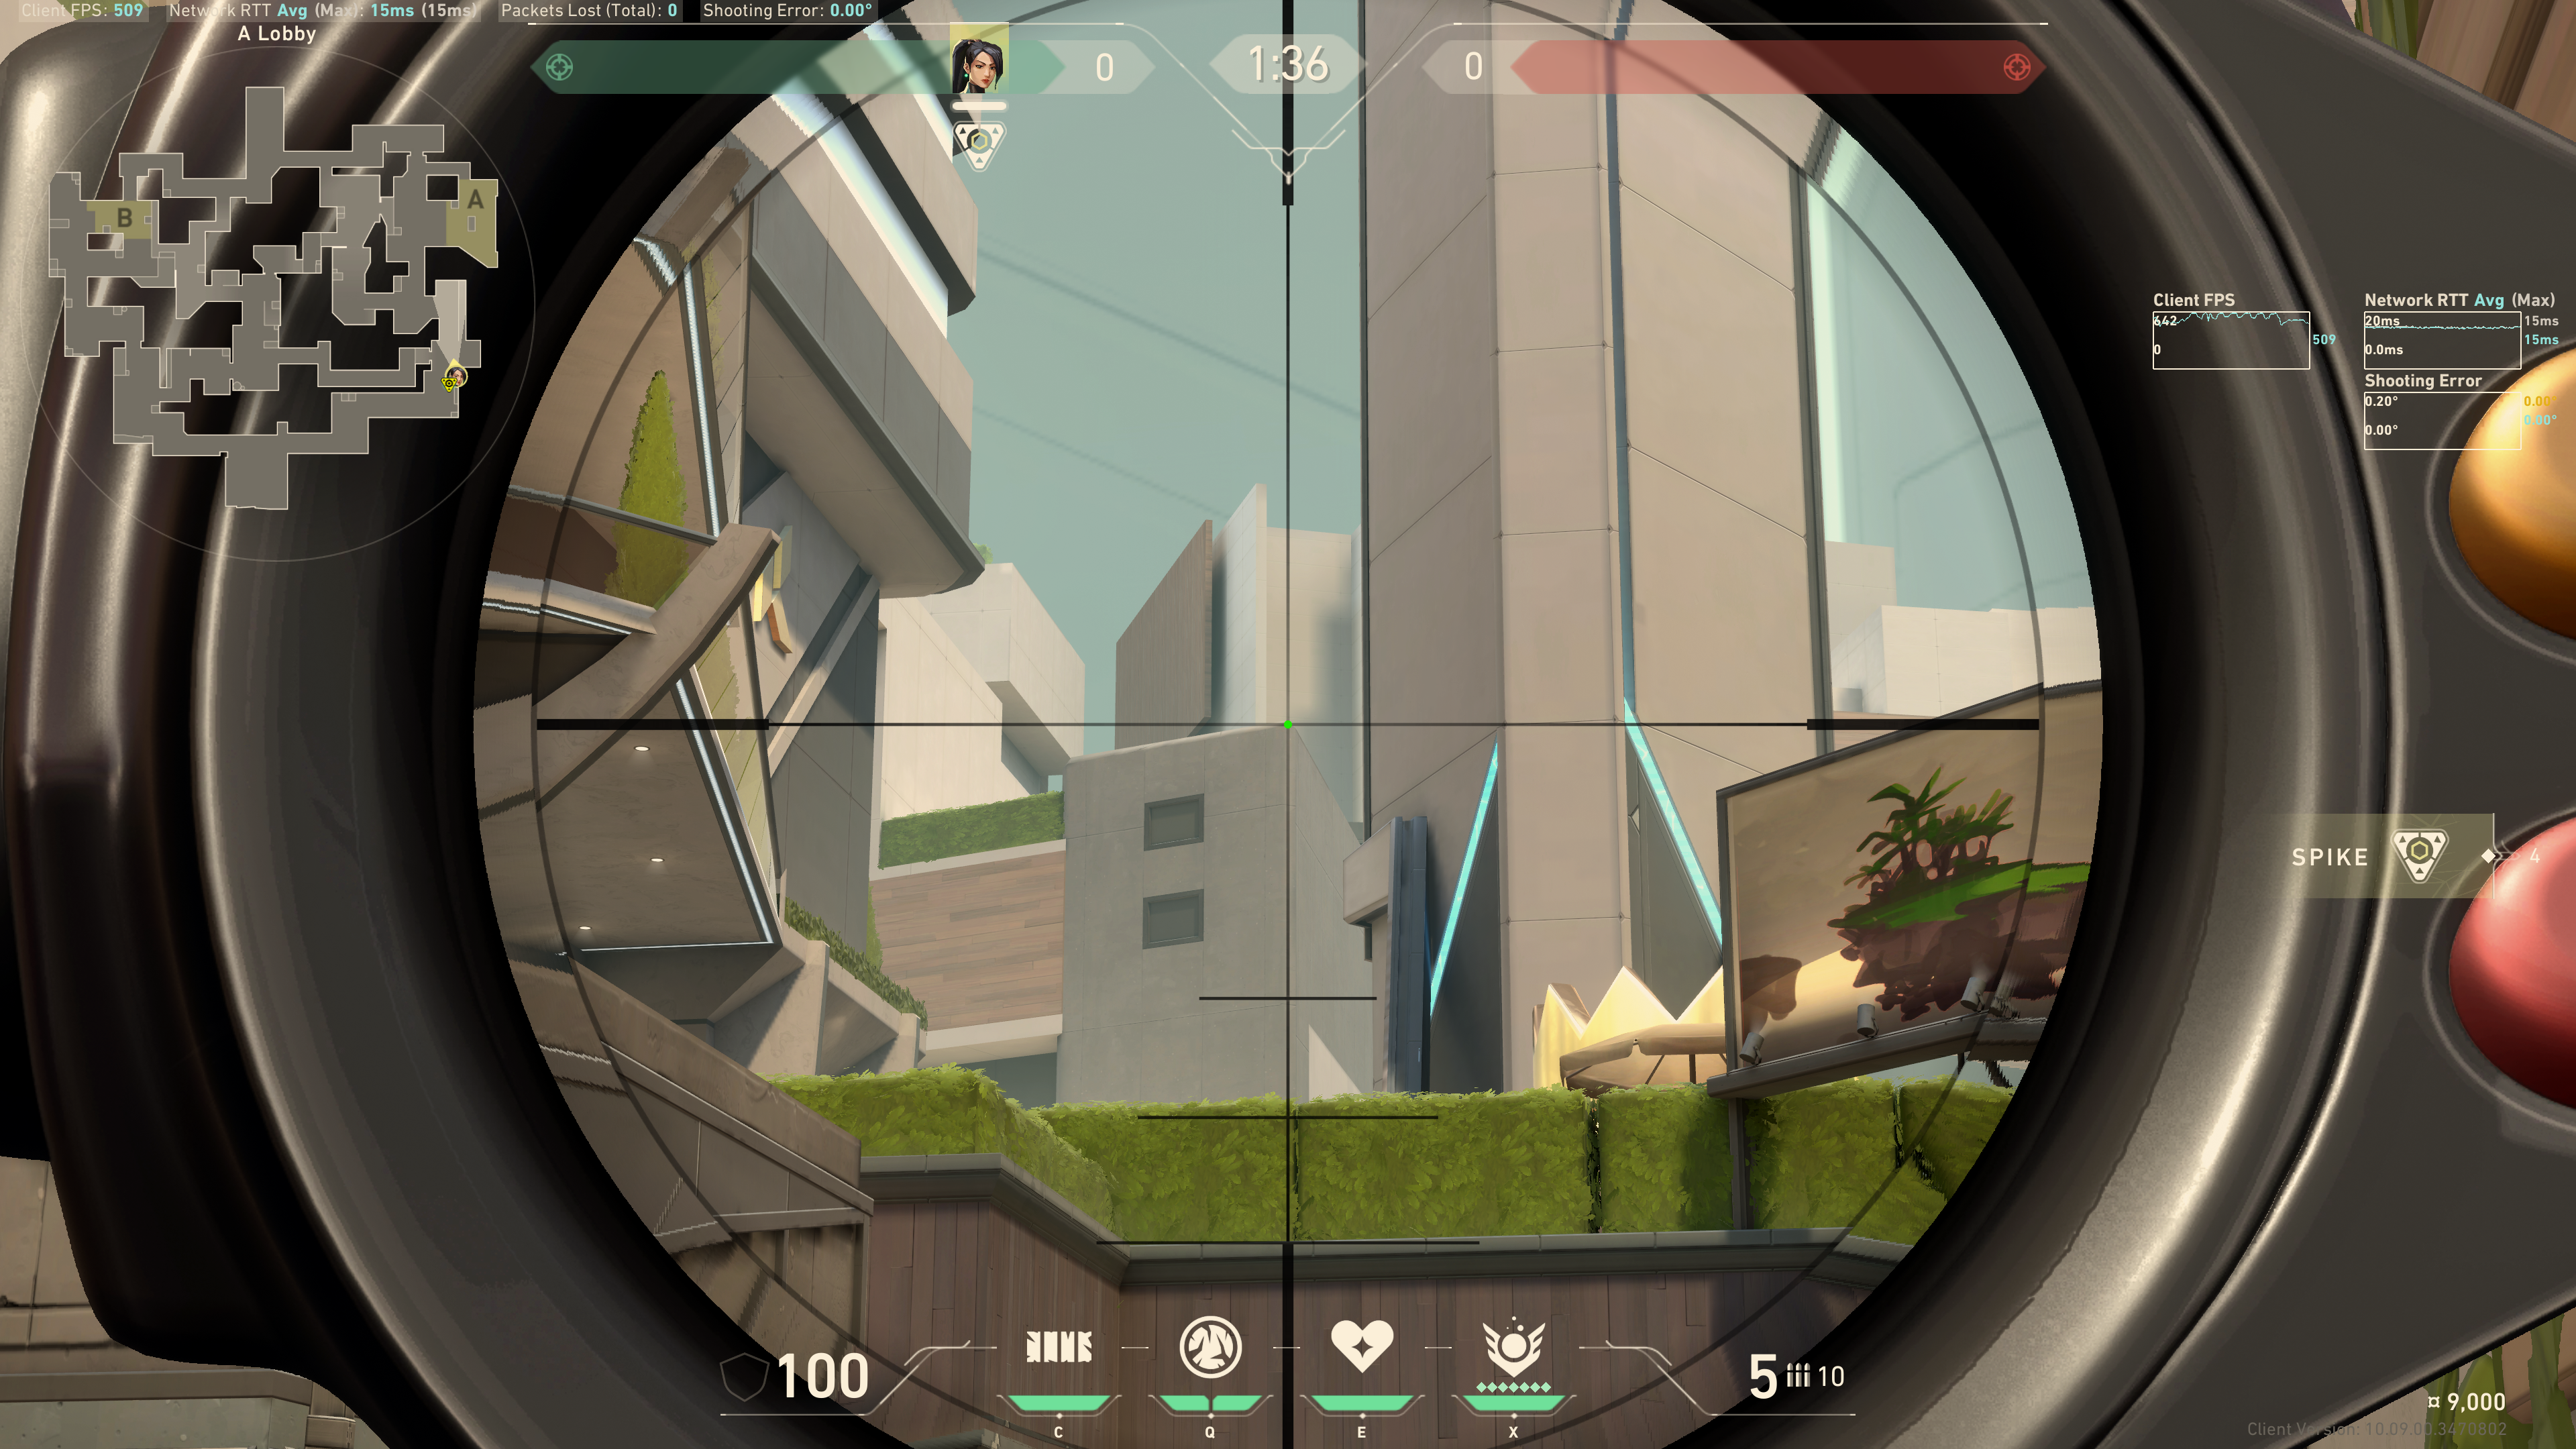
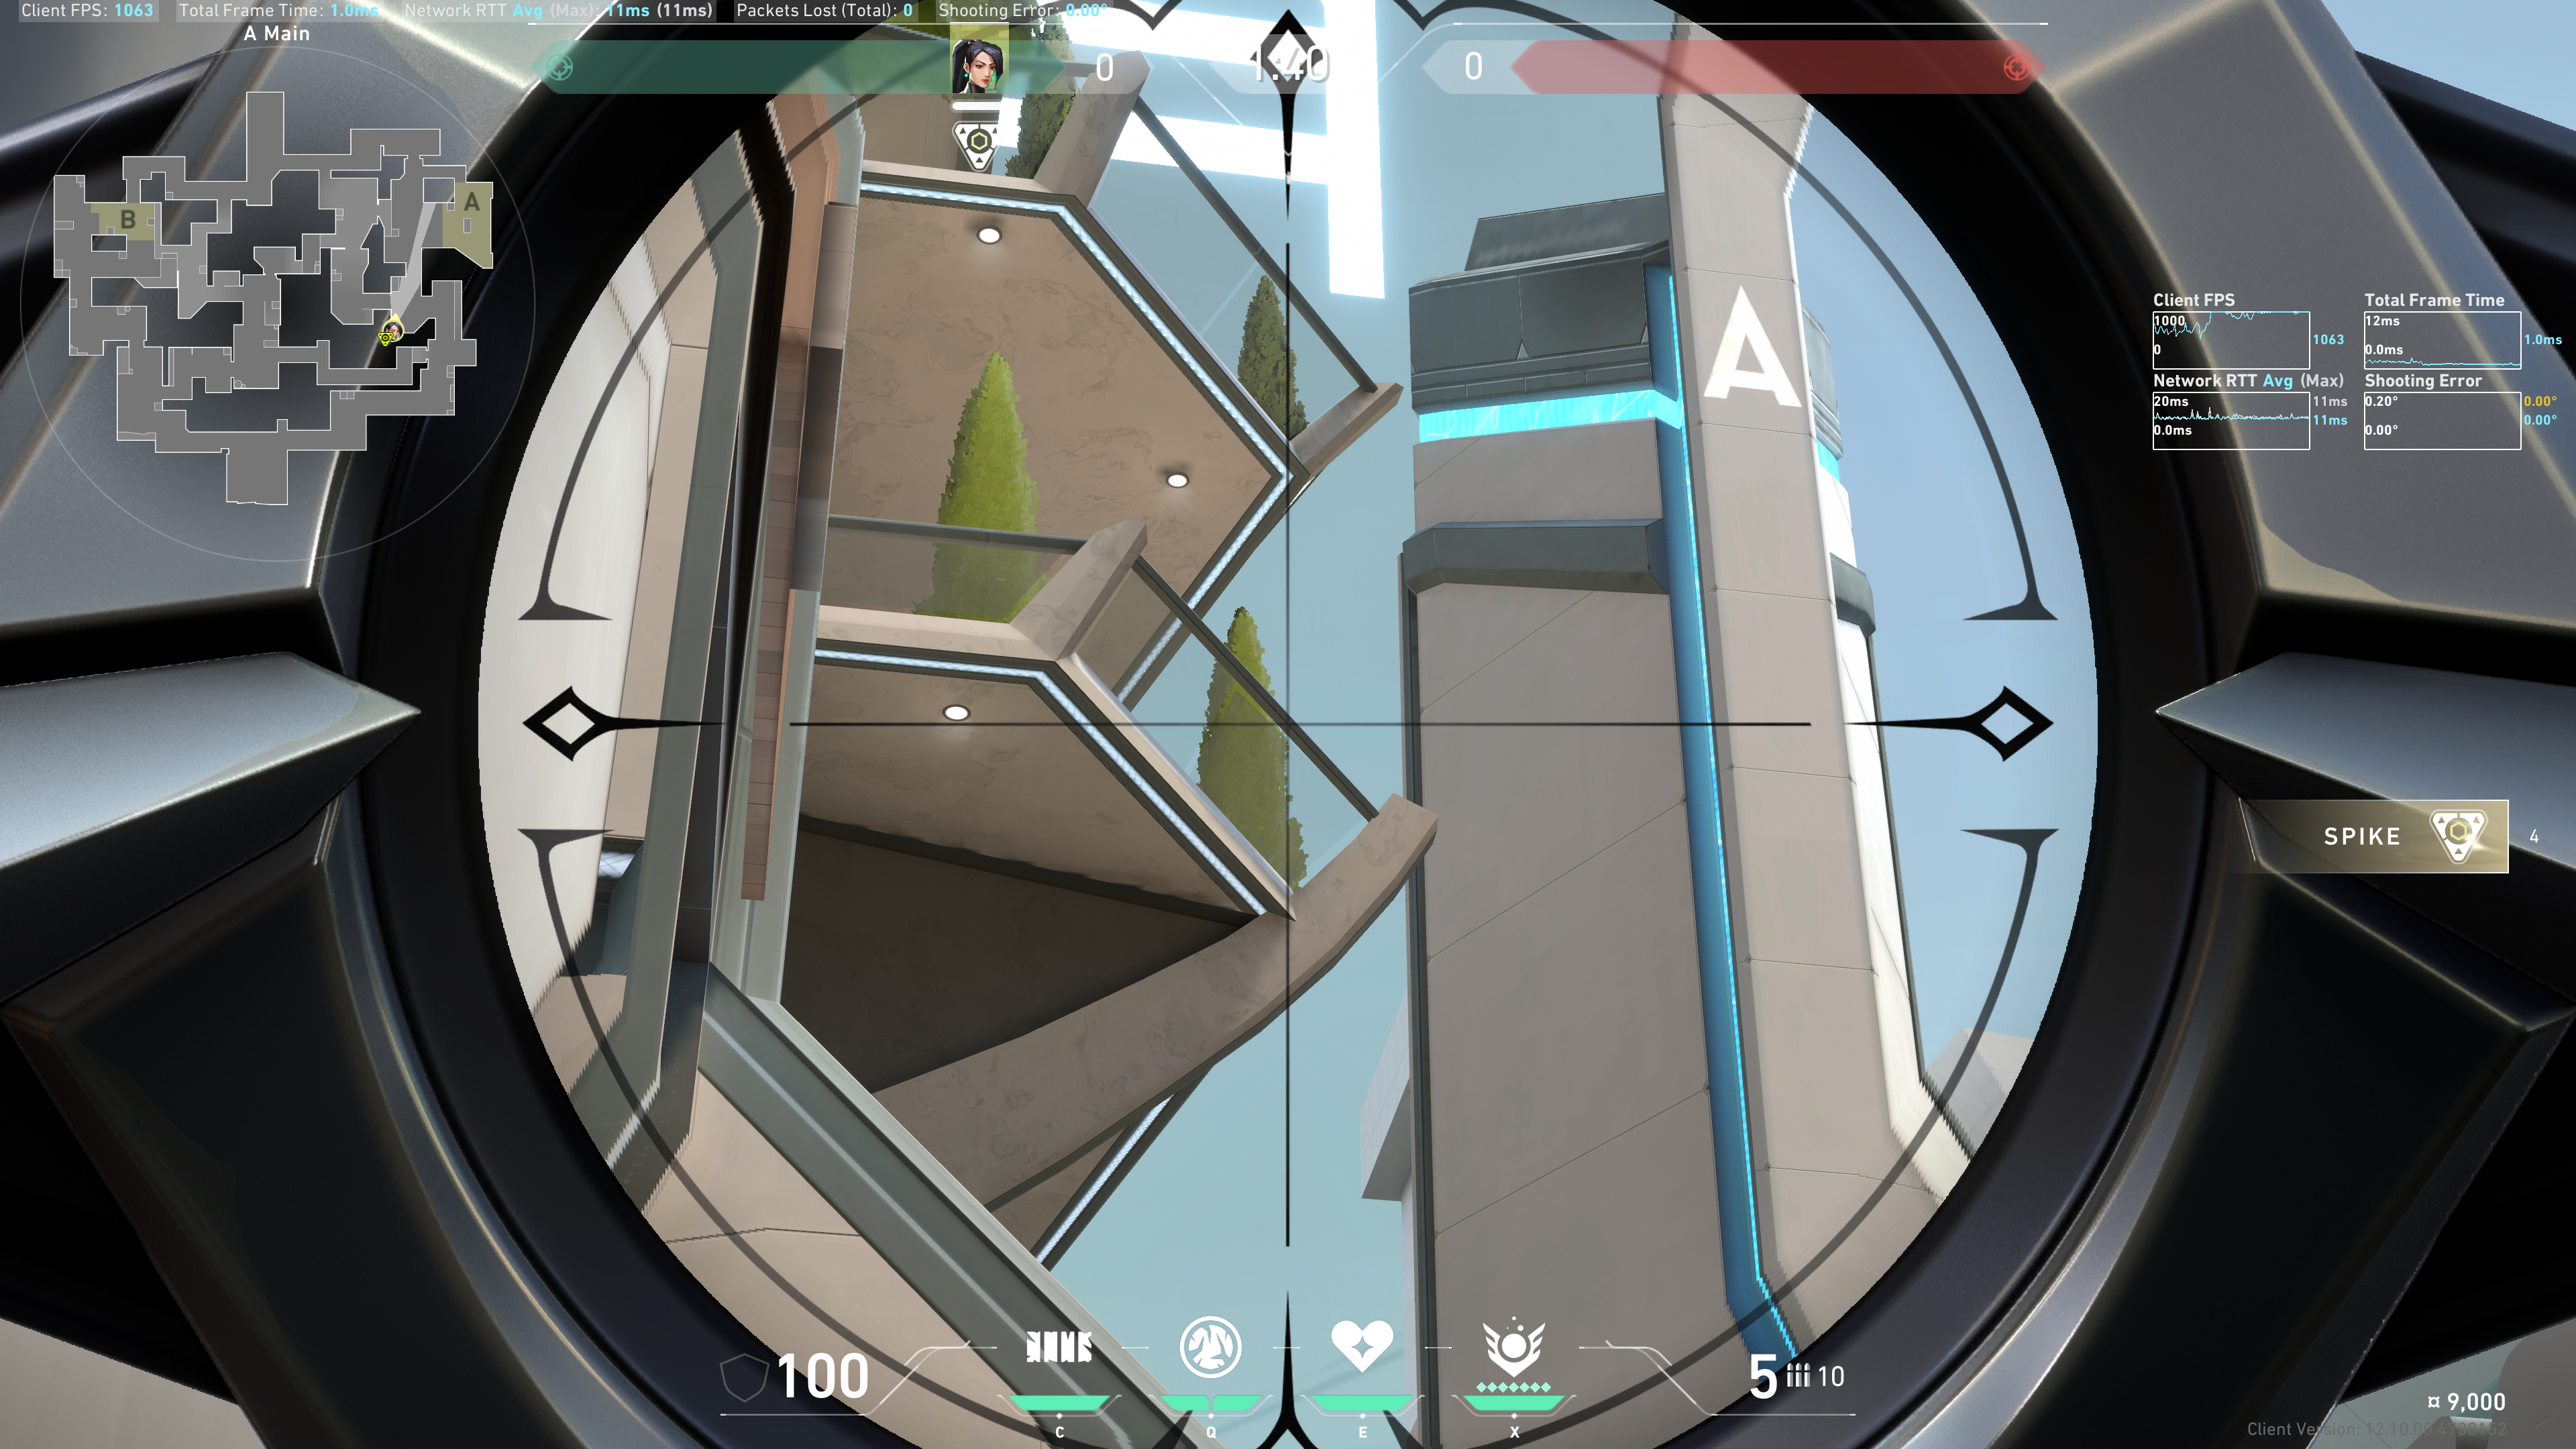
A Heaven / Window
Aim slightly above this lightbulb:
Results:
Sign / Back site (left side)
Aim in between these two beams in the sky:
Result:
Sign / Back site (right side)
Aim about 3-4 crosshair lengths above this beam in the sky. Going to 4 crosshair lengths will prioritize the right corner of back site instead of sign, though sign is still pretty covered:
Result:
Example combined results: 3 crosshair lengths:
4 crosshair lengths:
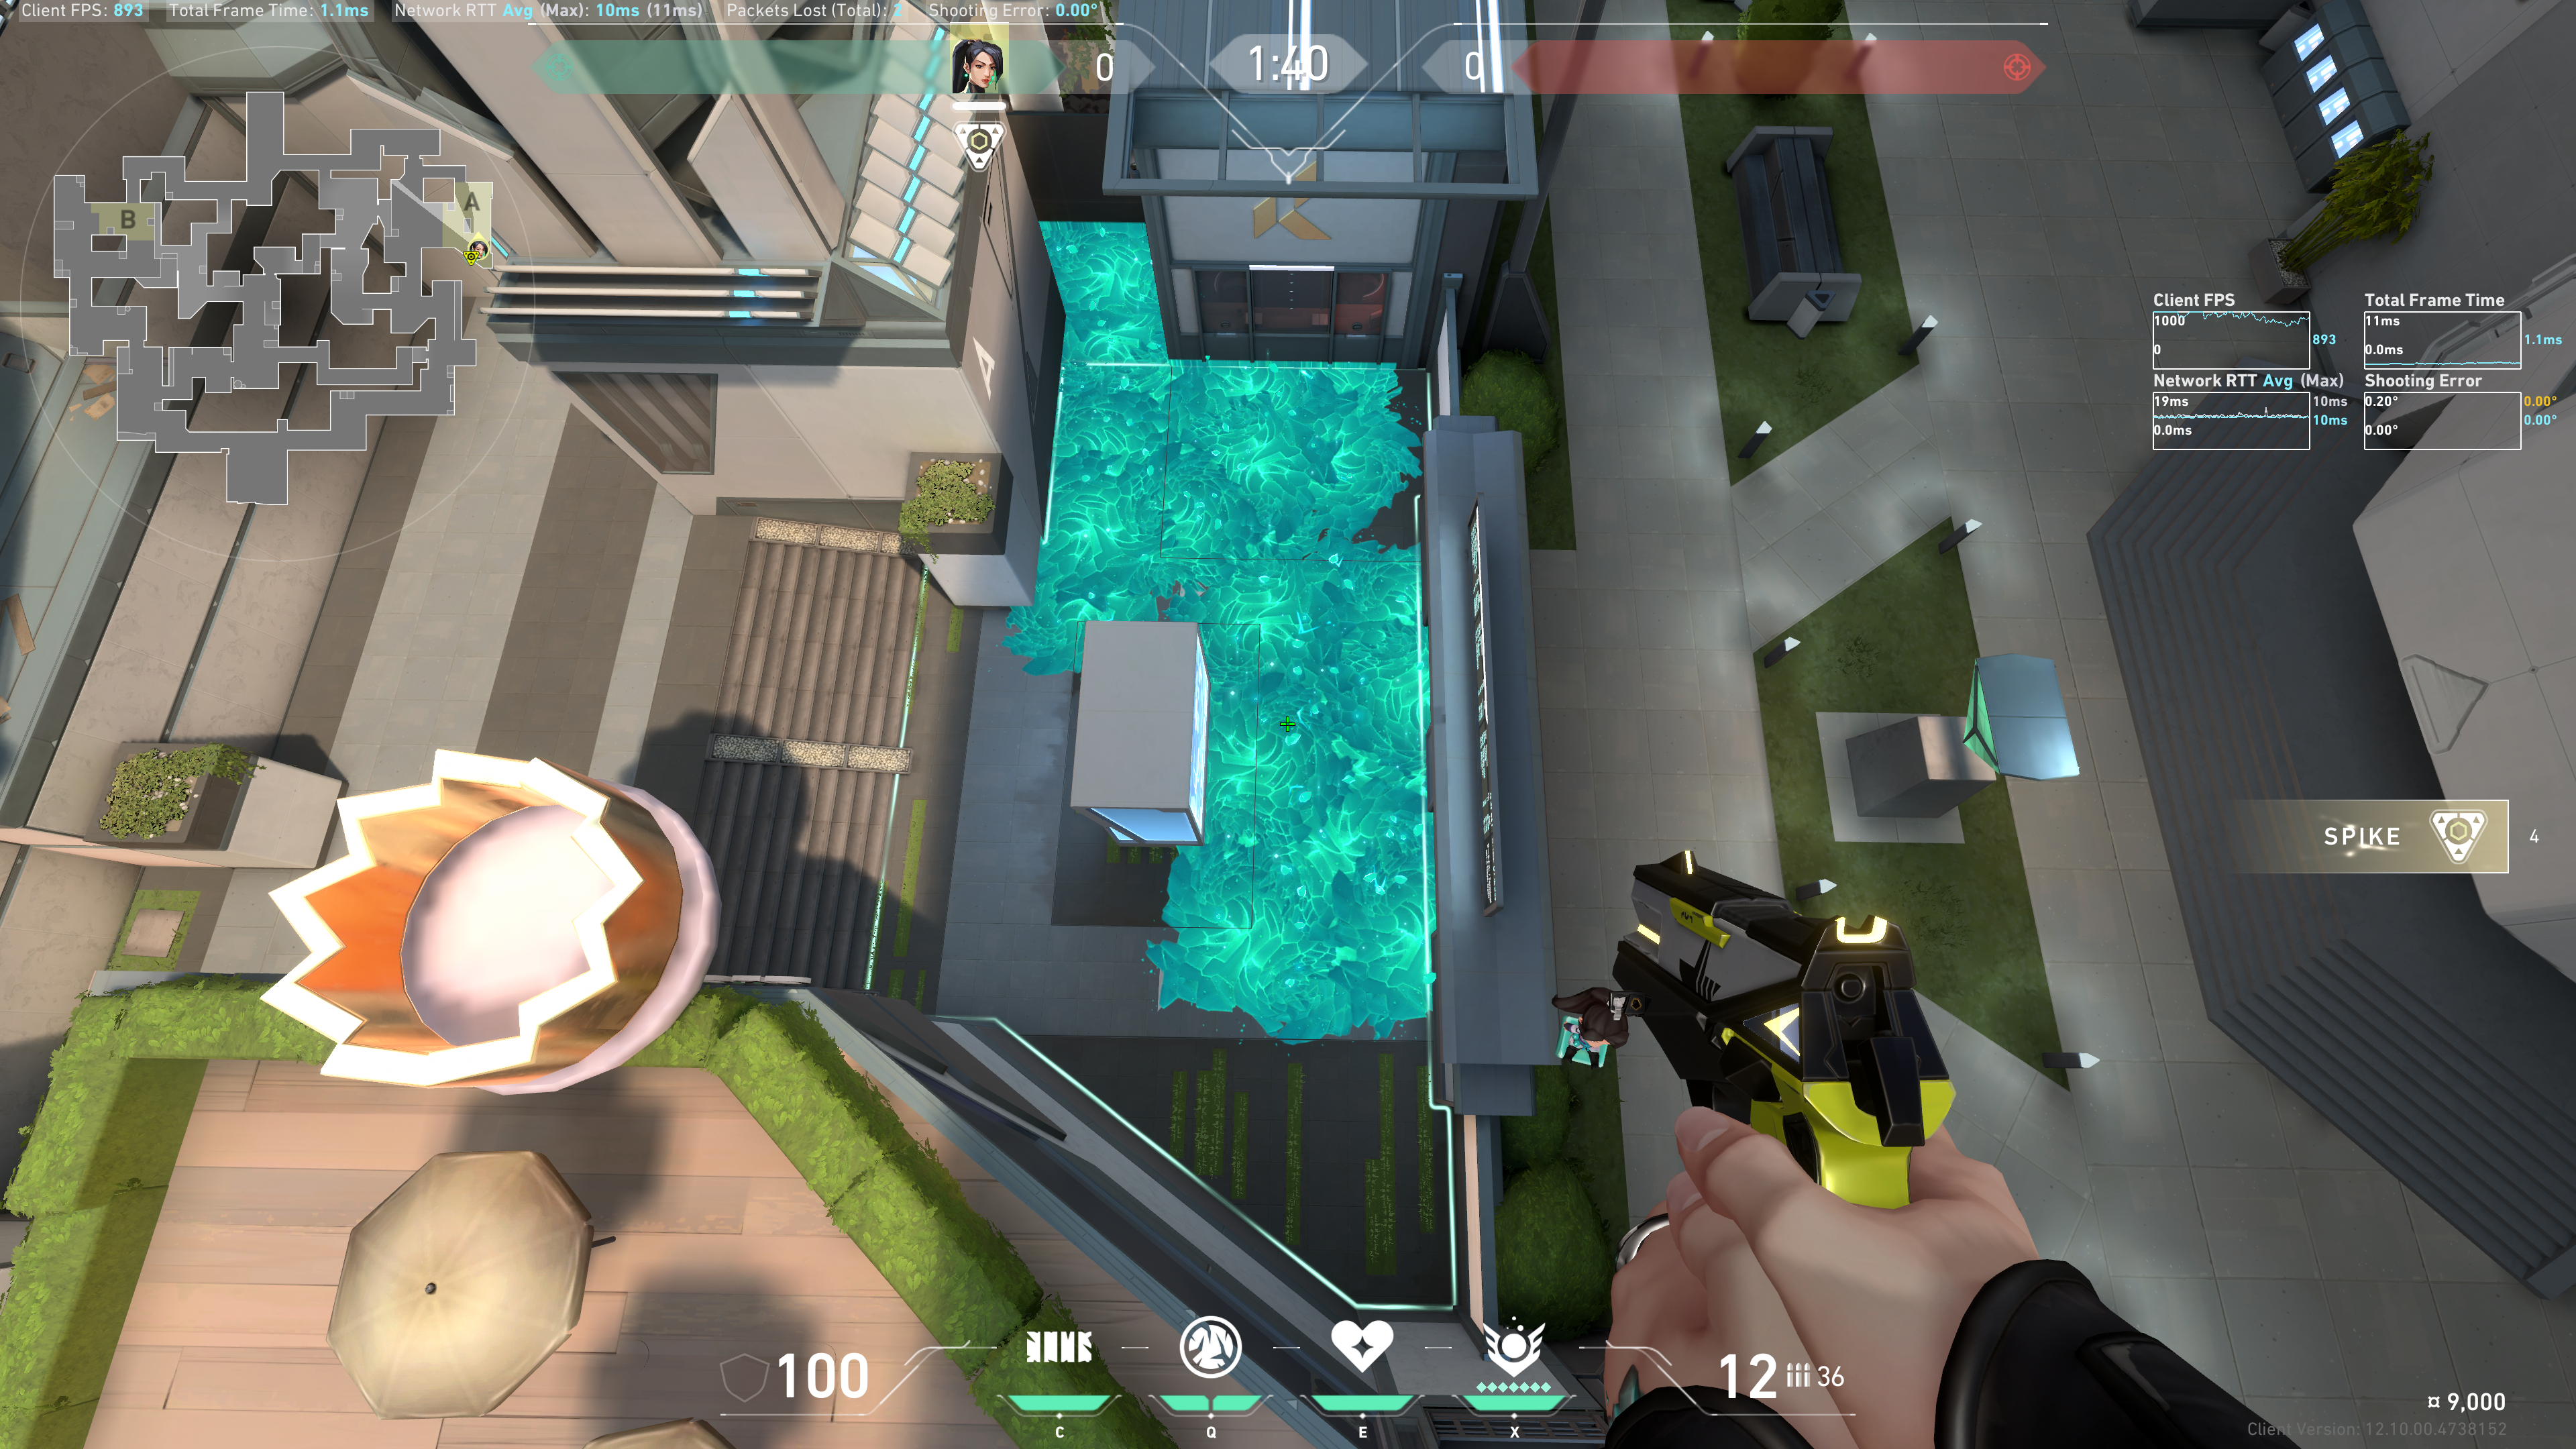
Position 2 - Grassy
Stand on these flowers, and tuck into the corner:
A Heaven / Window
Aim at this corner:
Results:
Screens (excludes Elbow)
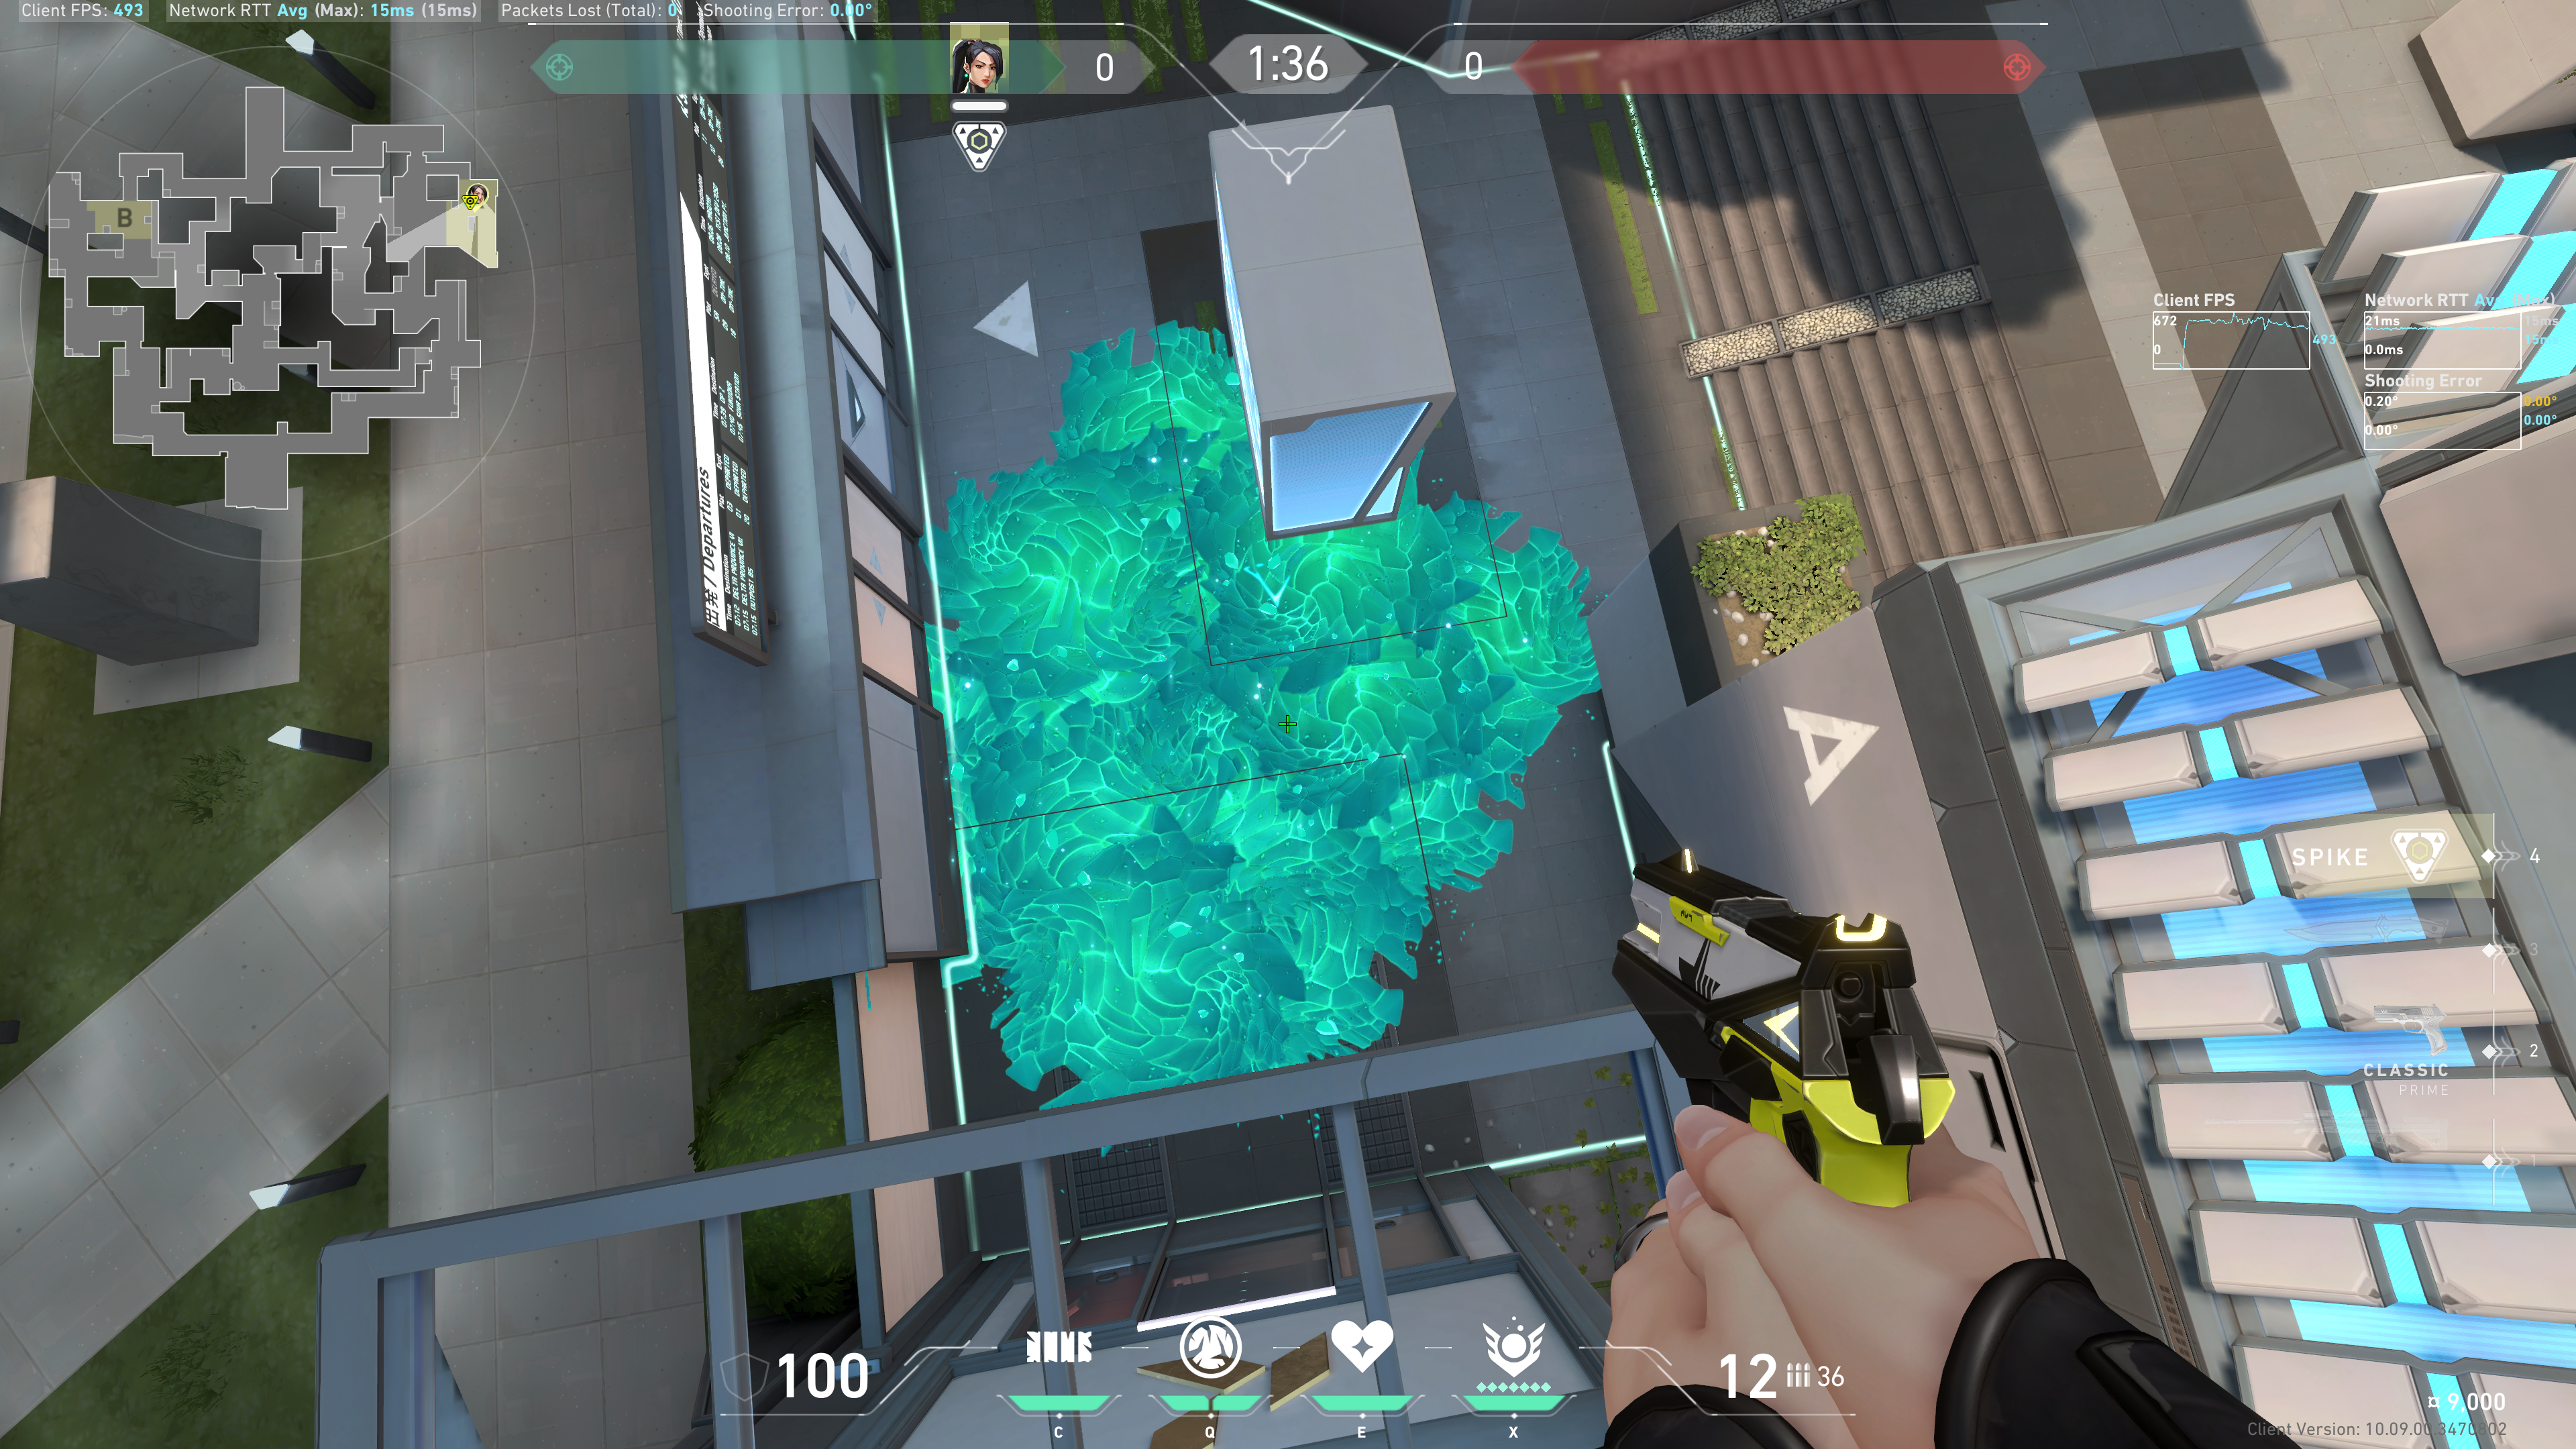
Aim to the right of the top window:
Results:
Note: Err slightly toward the right side, so there is a possibility of covering the Elbow peek.
Impromptu Positions
A Heaven / Window (slow push)
Note: easier but you do have to peek Heaven Rafters first. Hug this wall:
Expose yourself to Window, but not far enough to peek Flowers. Aim at where these two intersections meet:
Results:
Screens / Elbow (easy)
Stand A main, and look aim at the right frame of Screens doorway. Try to use it as a backboard:
Result:
Fighting for Heaven Control
Line yourself up with this wall:
Aim at the top right corner of the doorway frame, using it as a backboard:
Result:
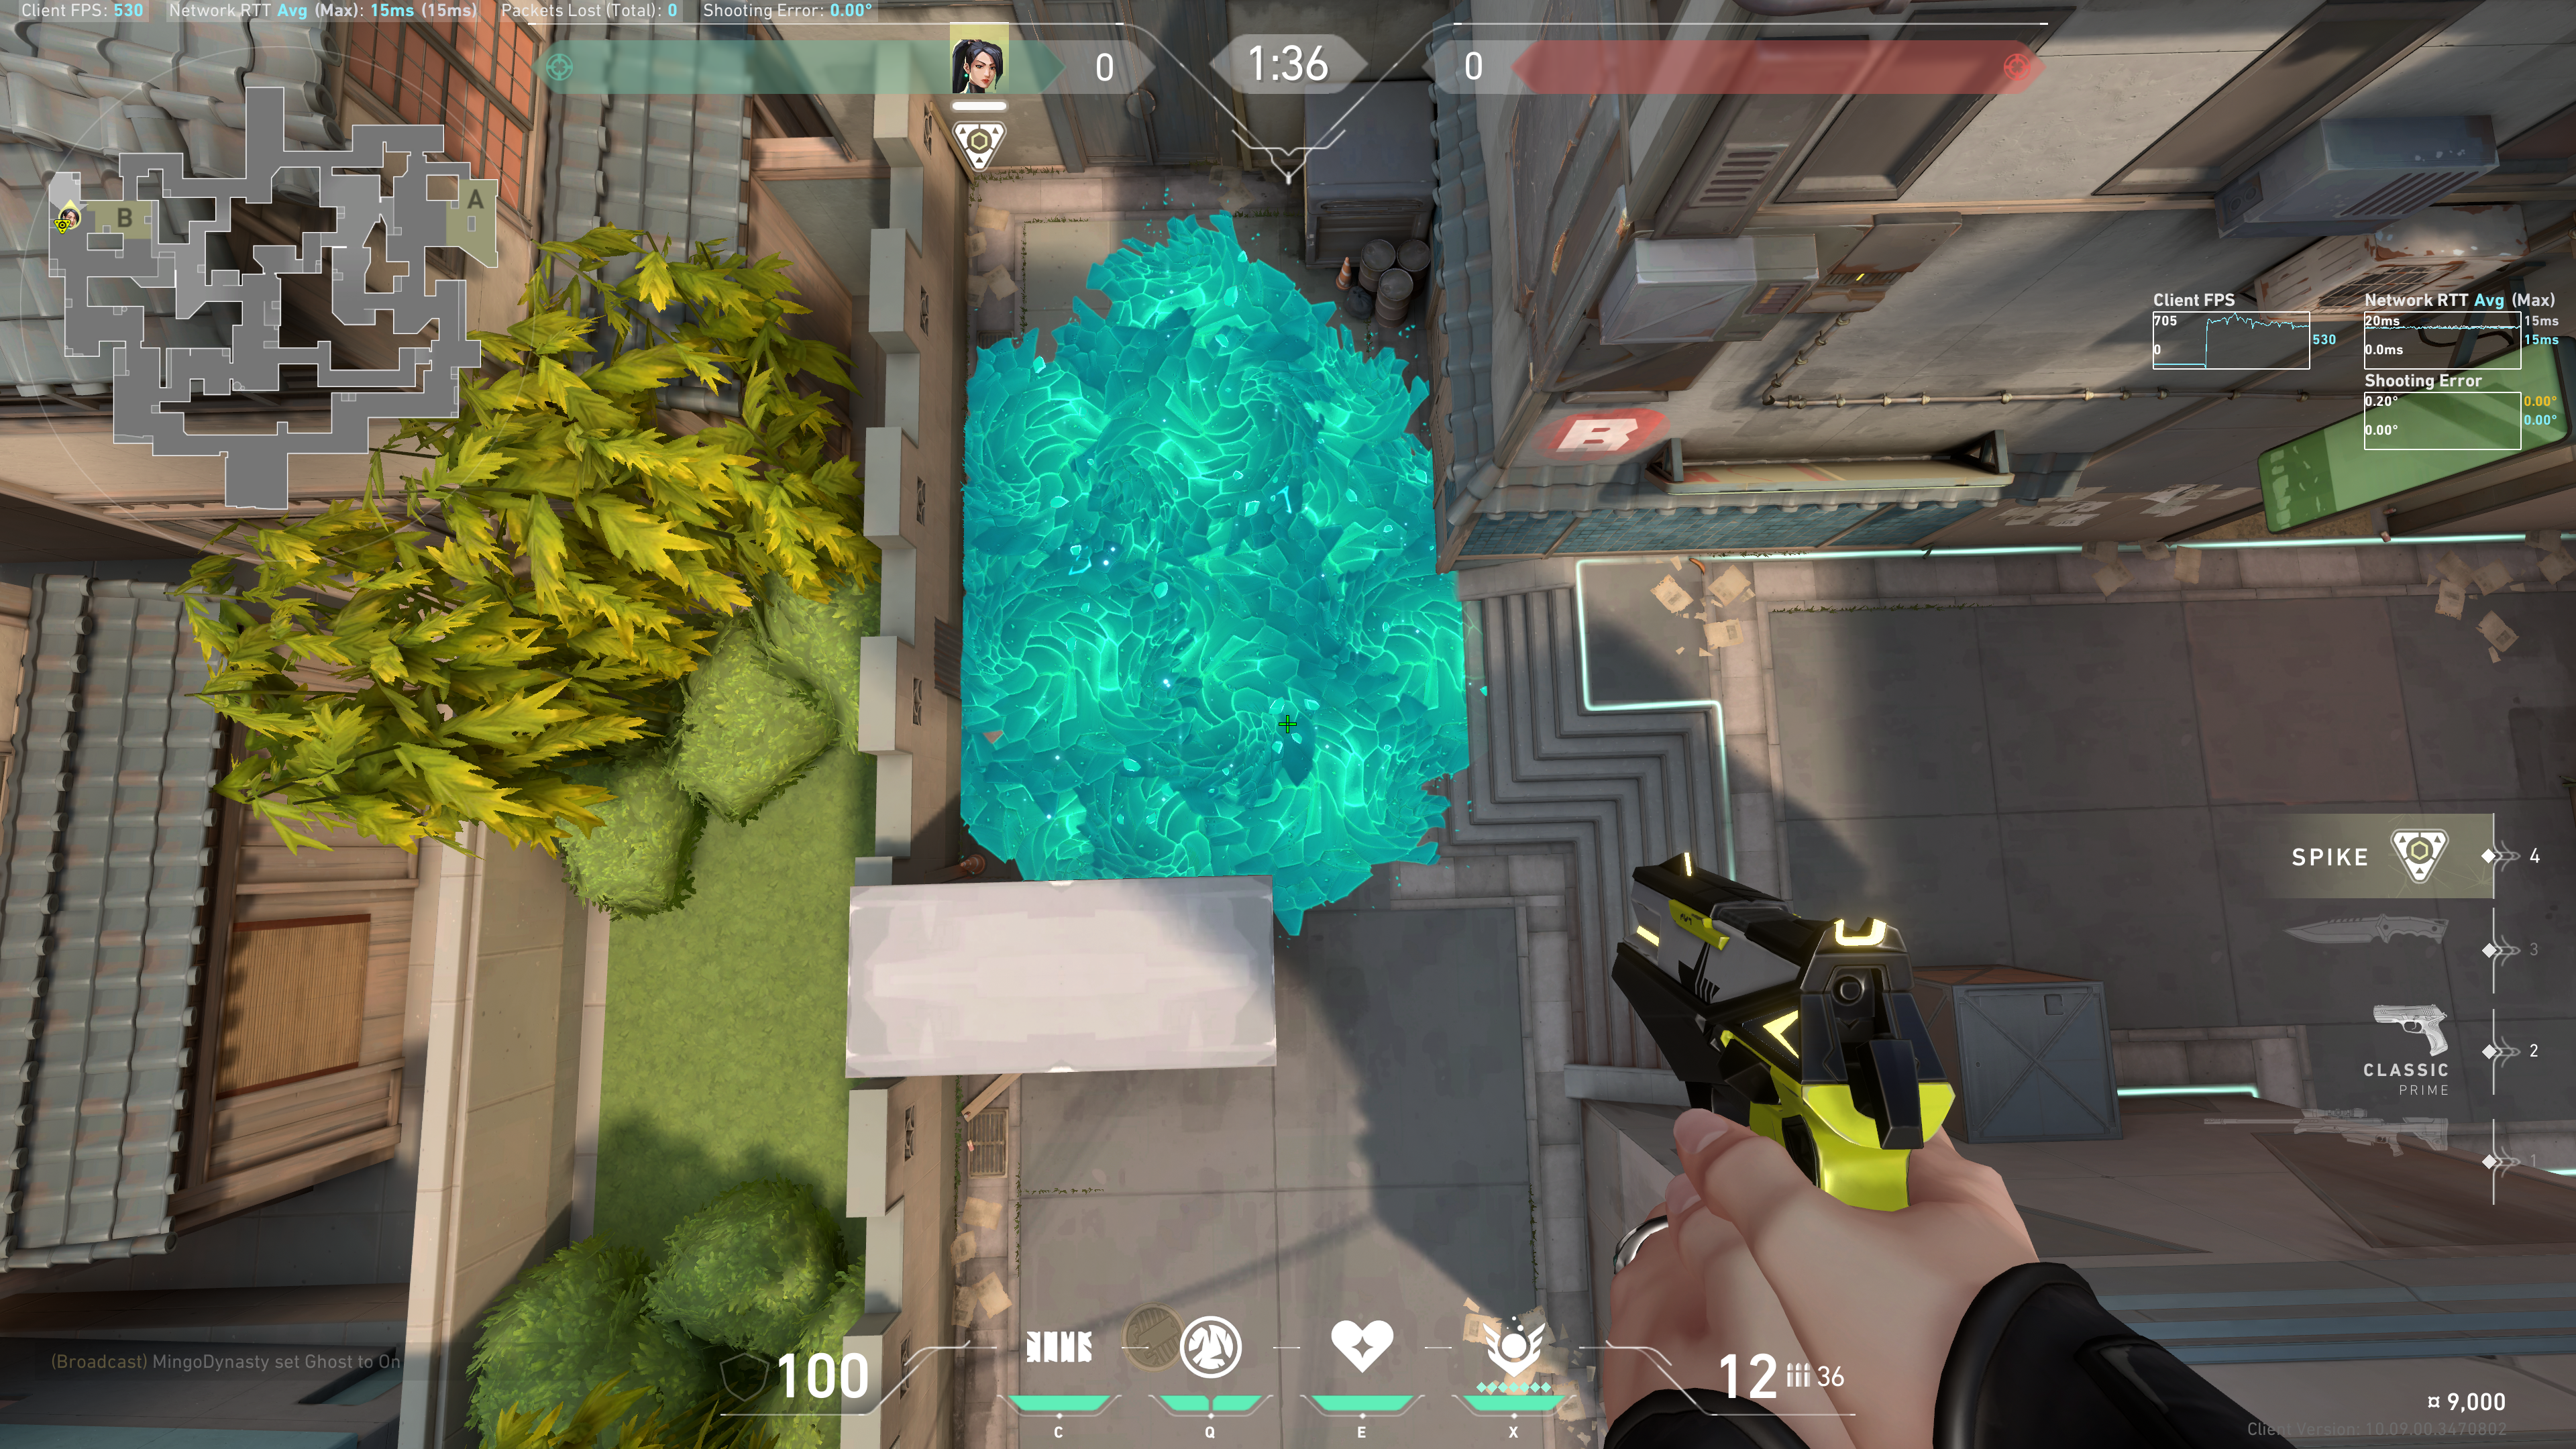
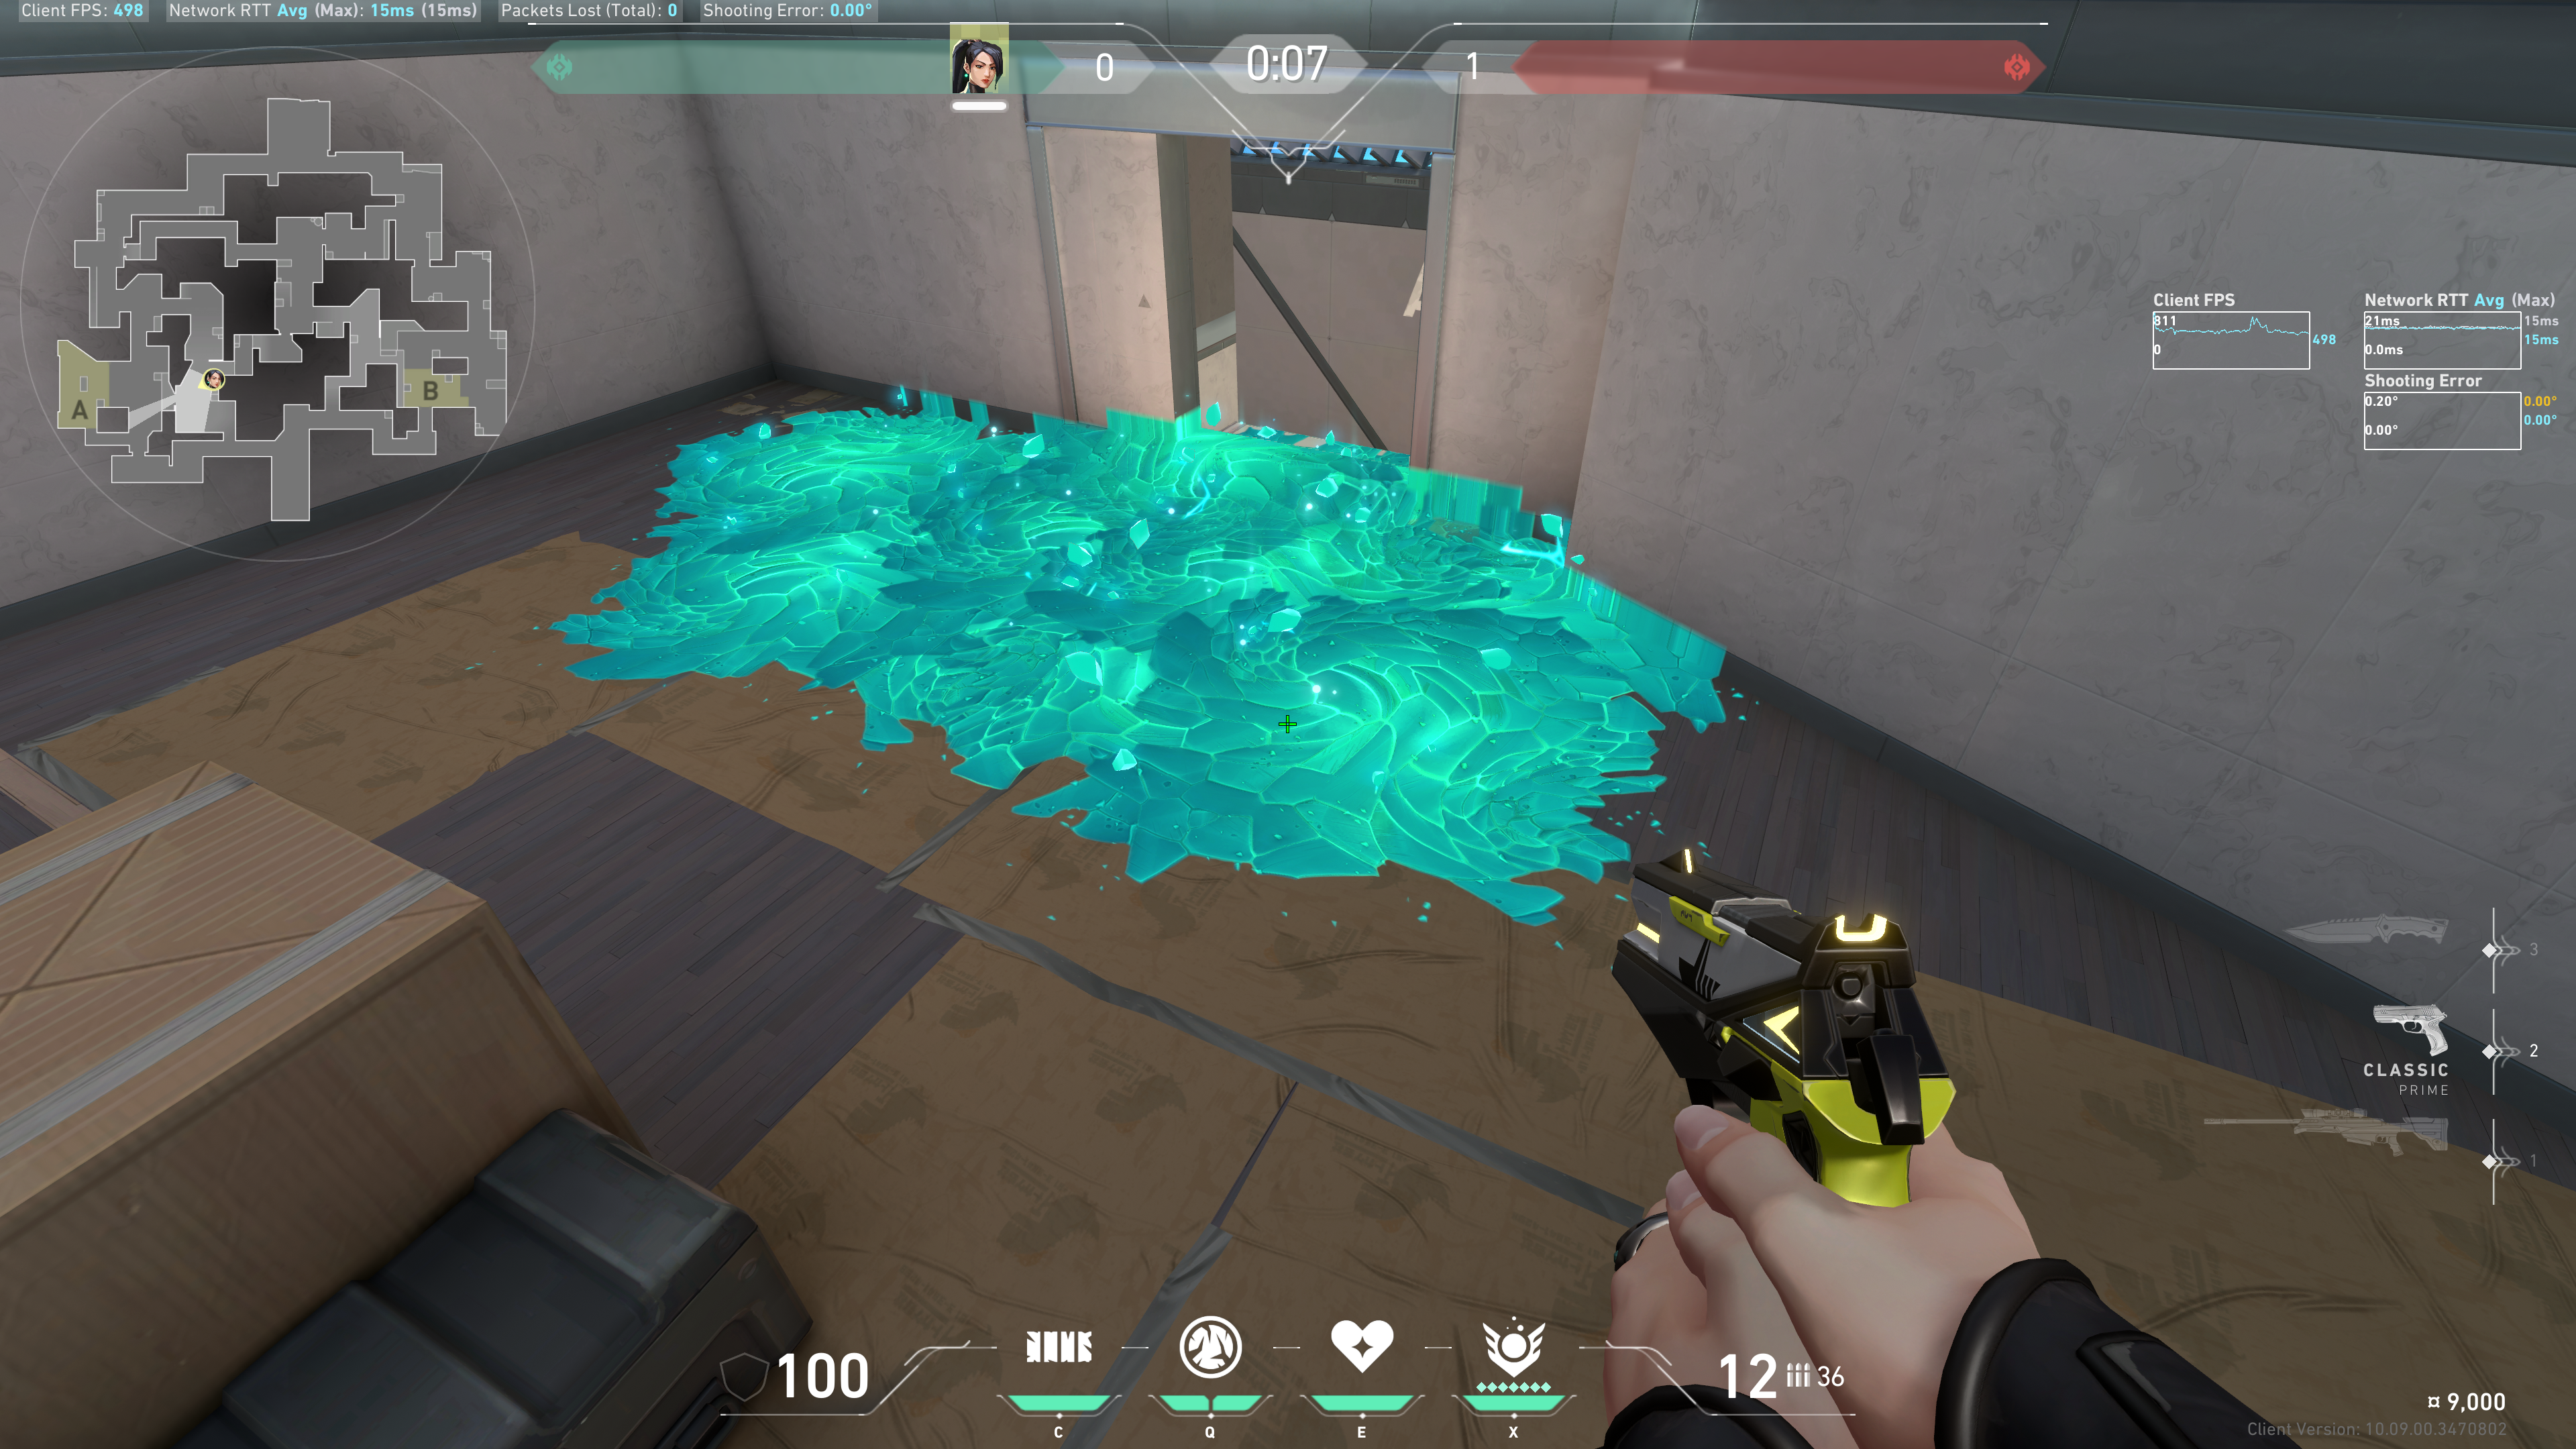
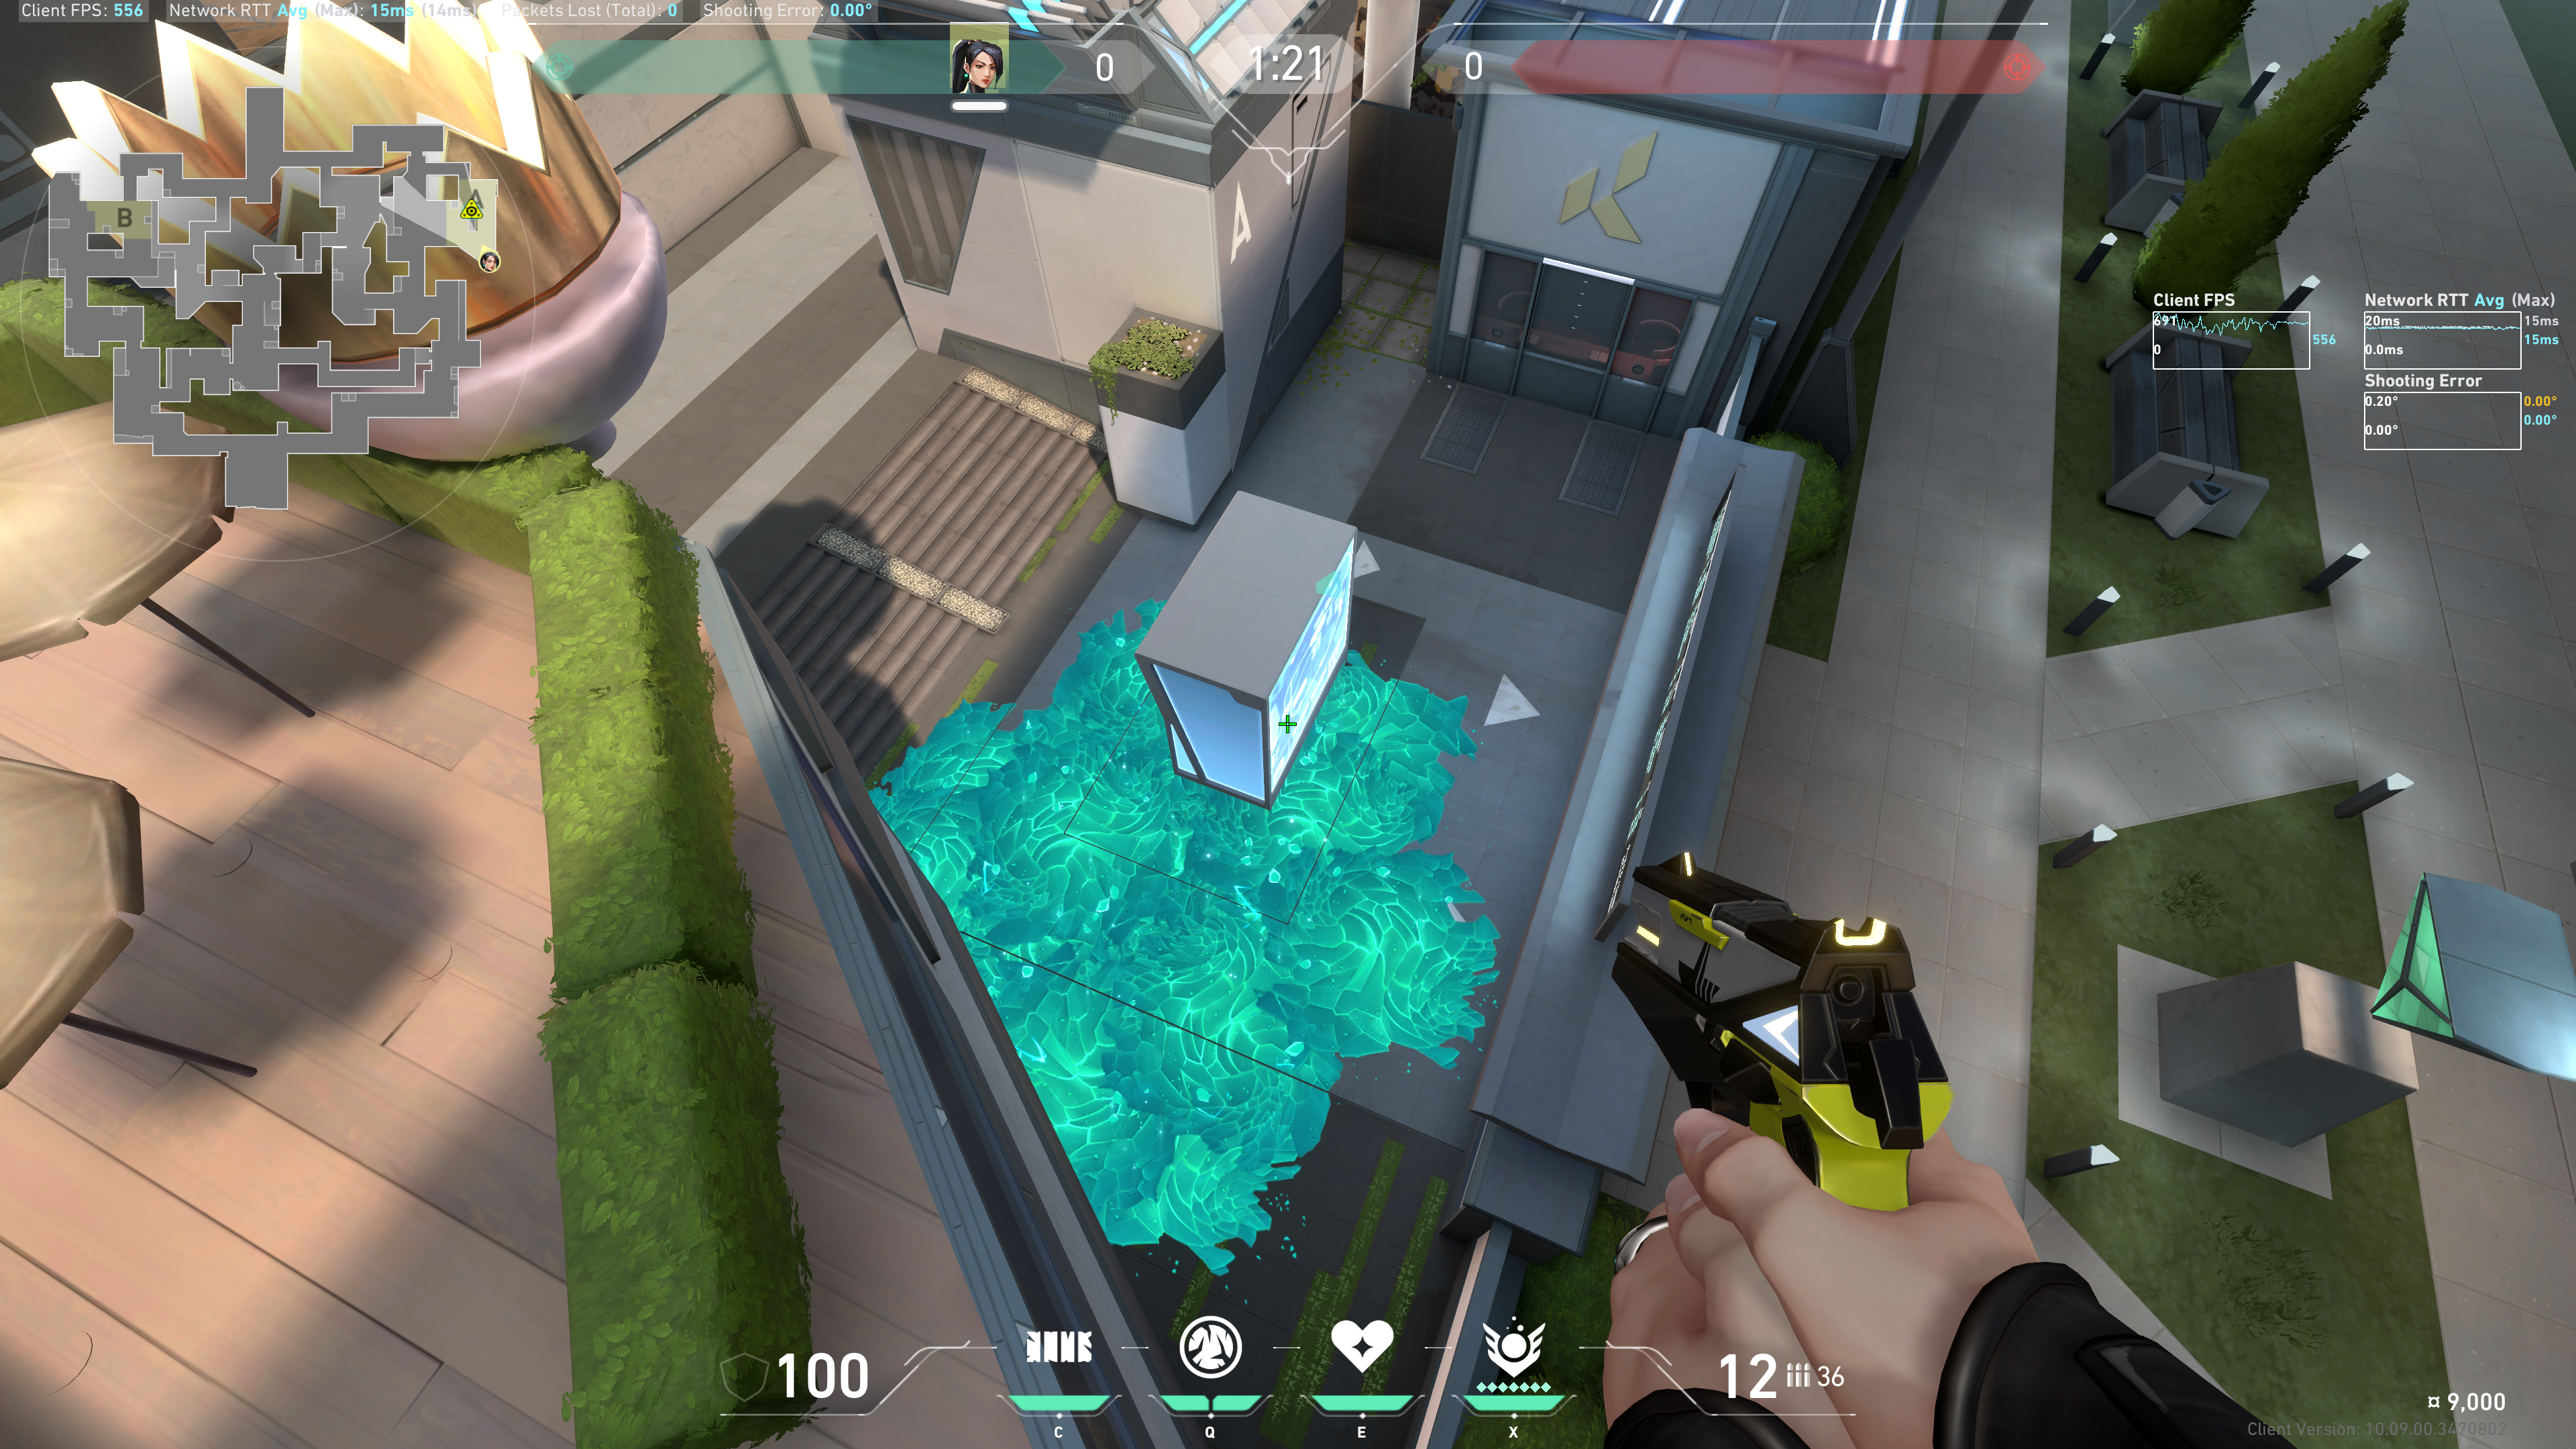
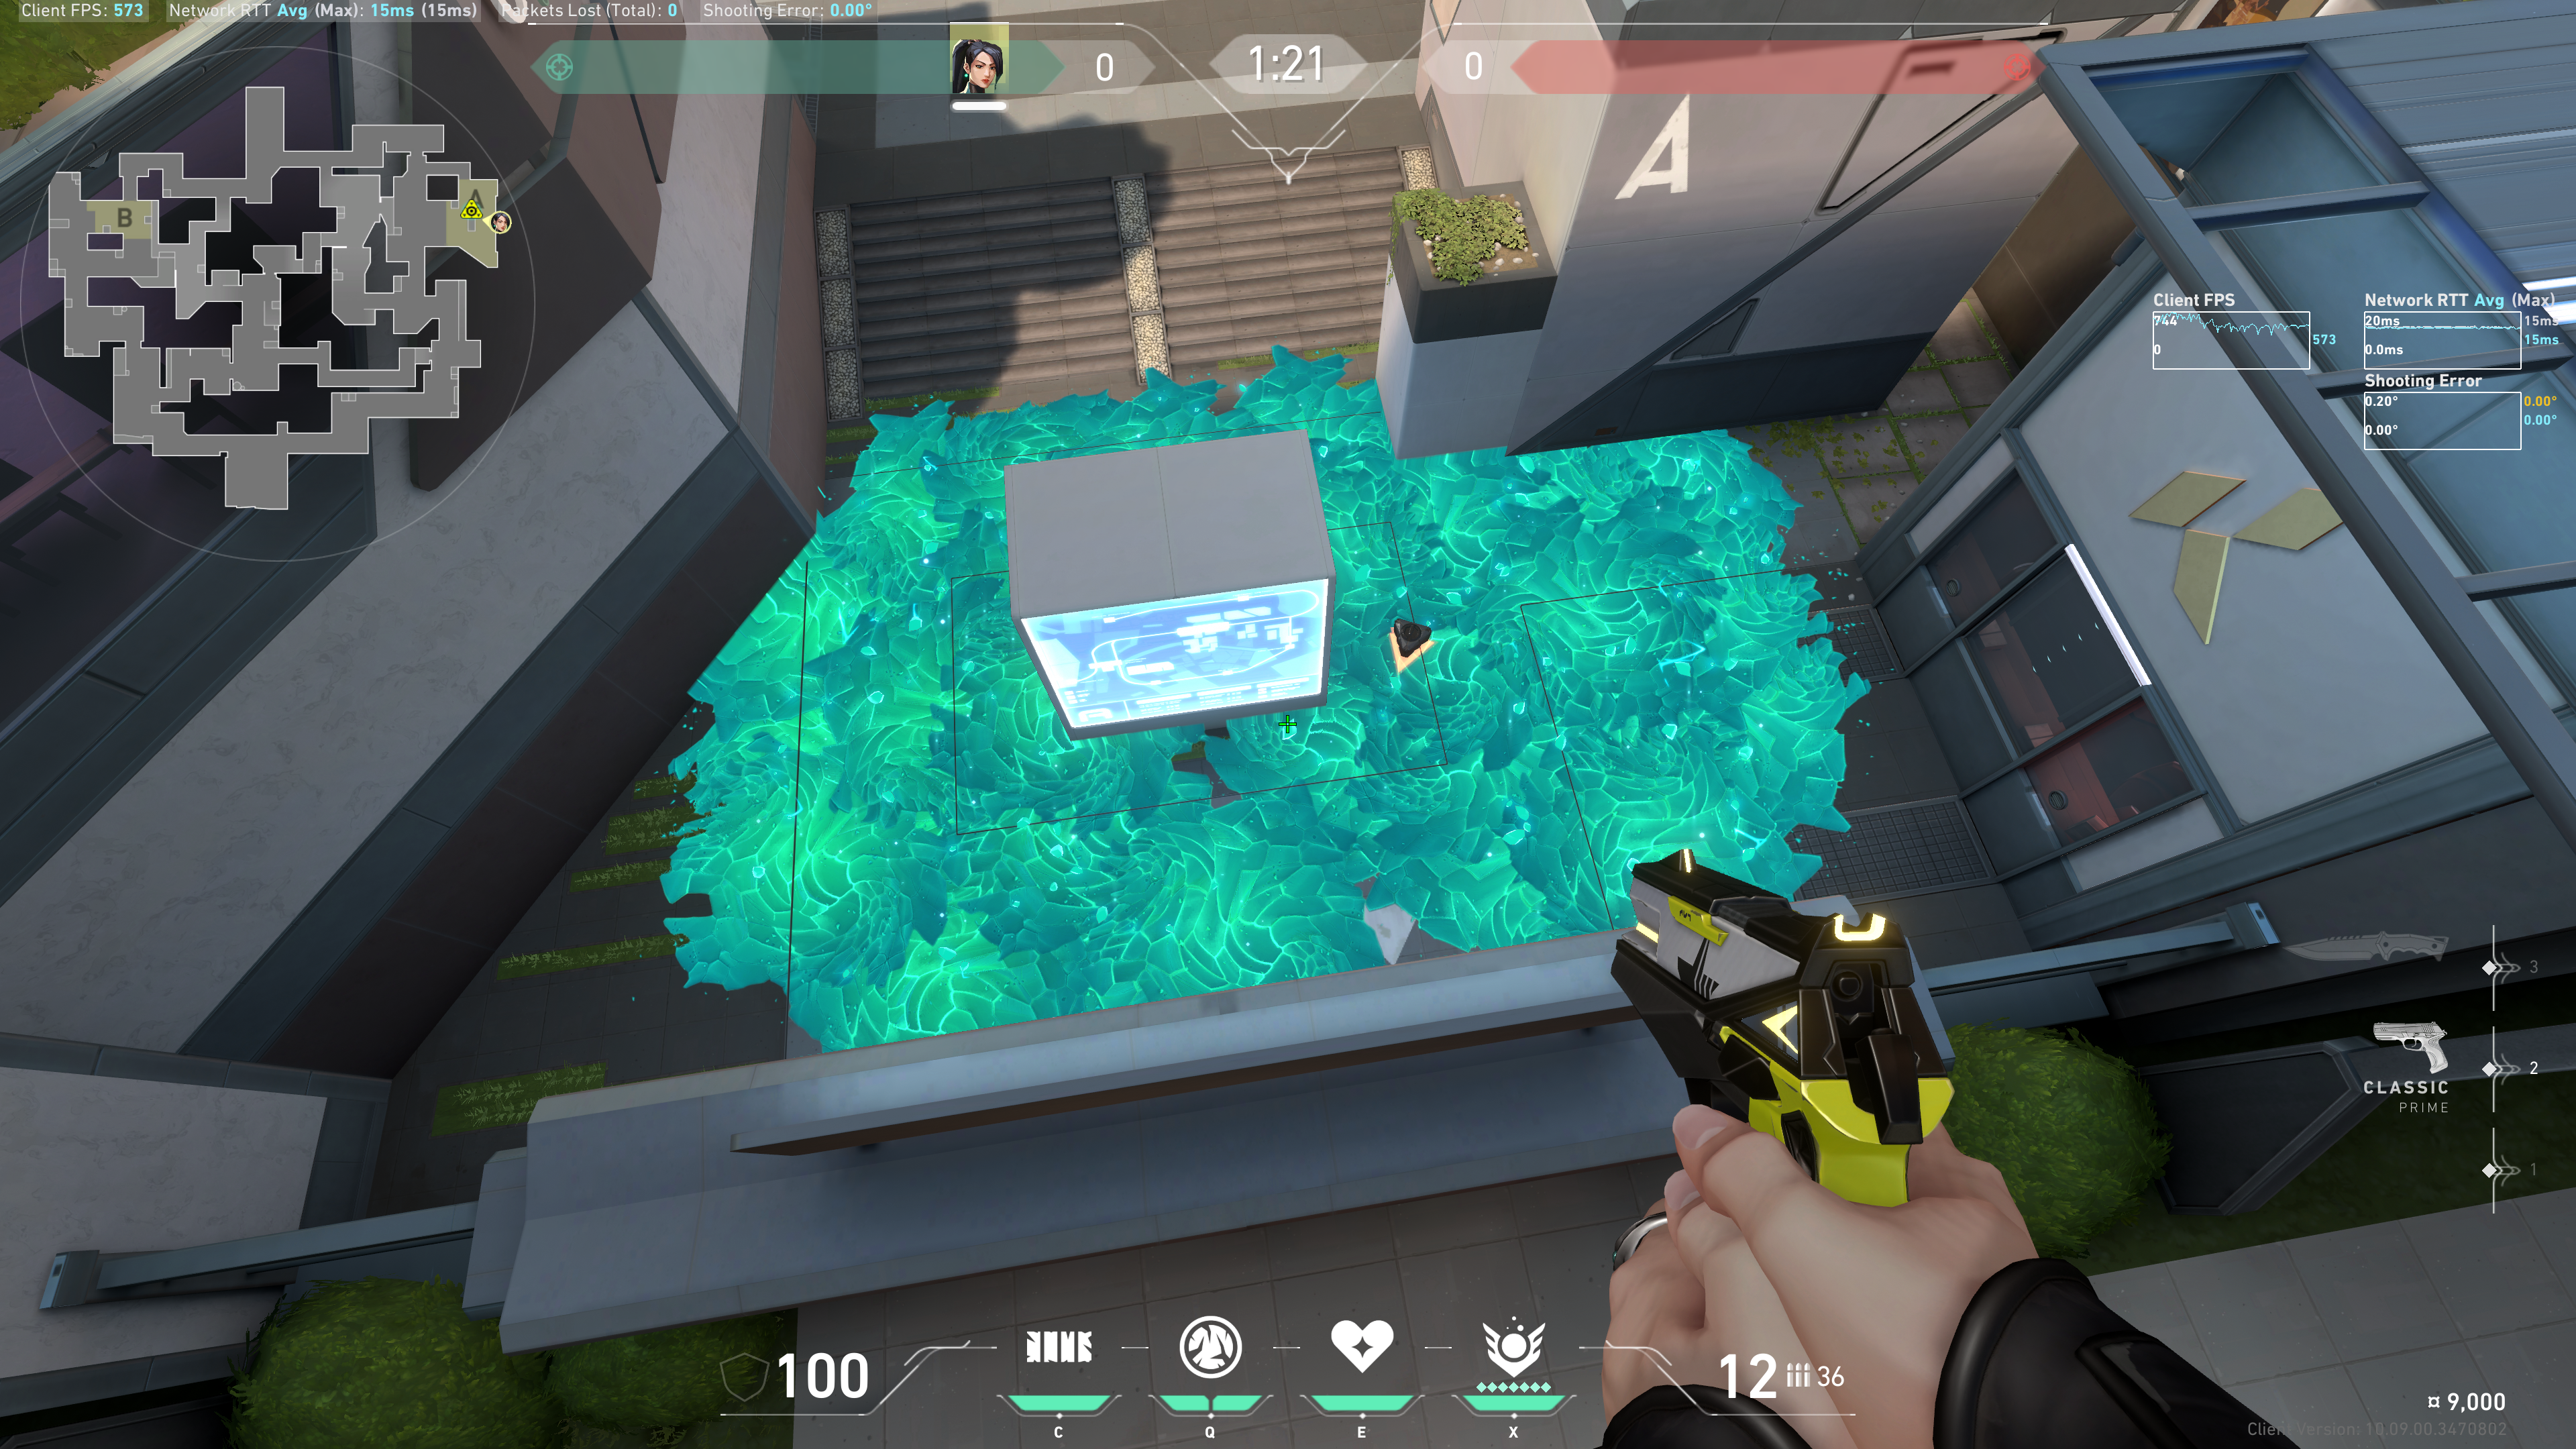
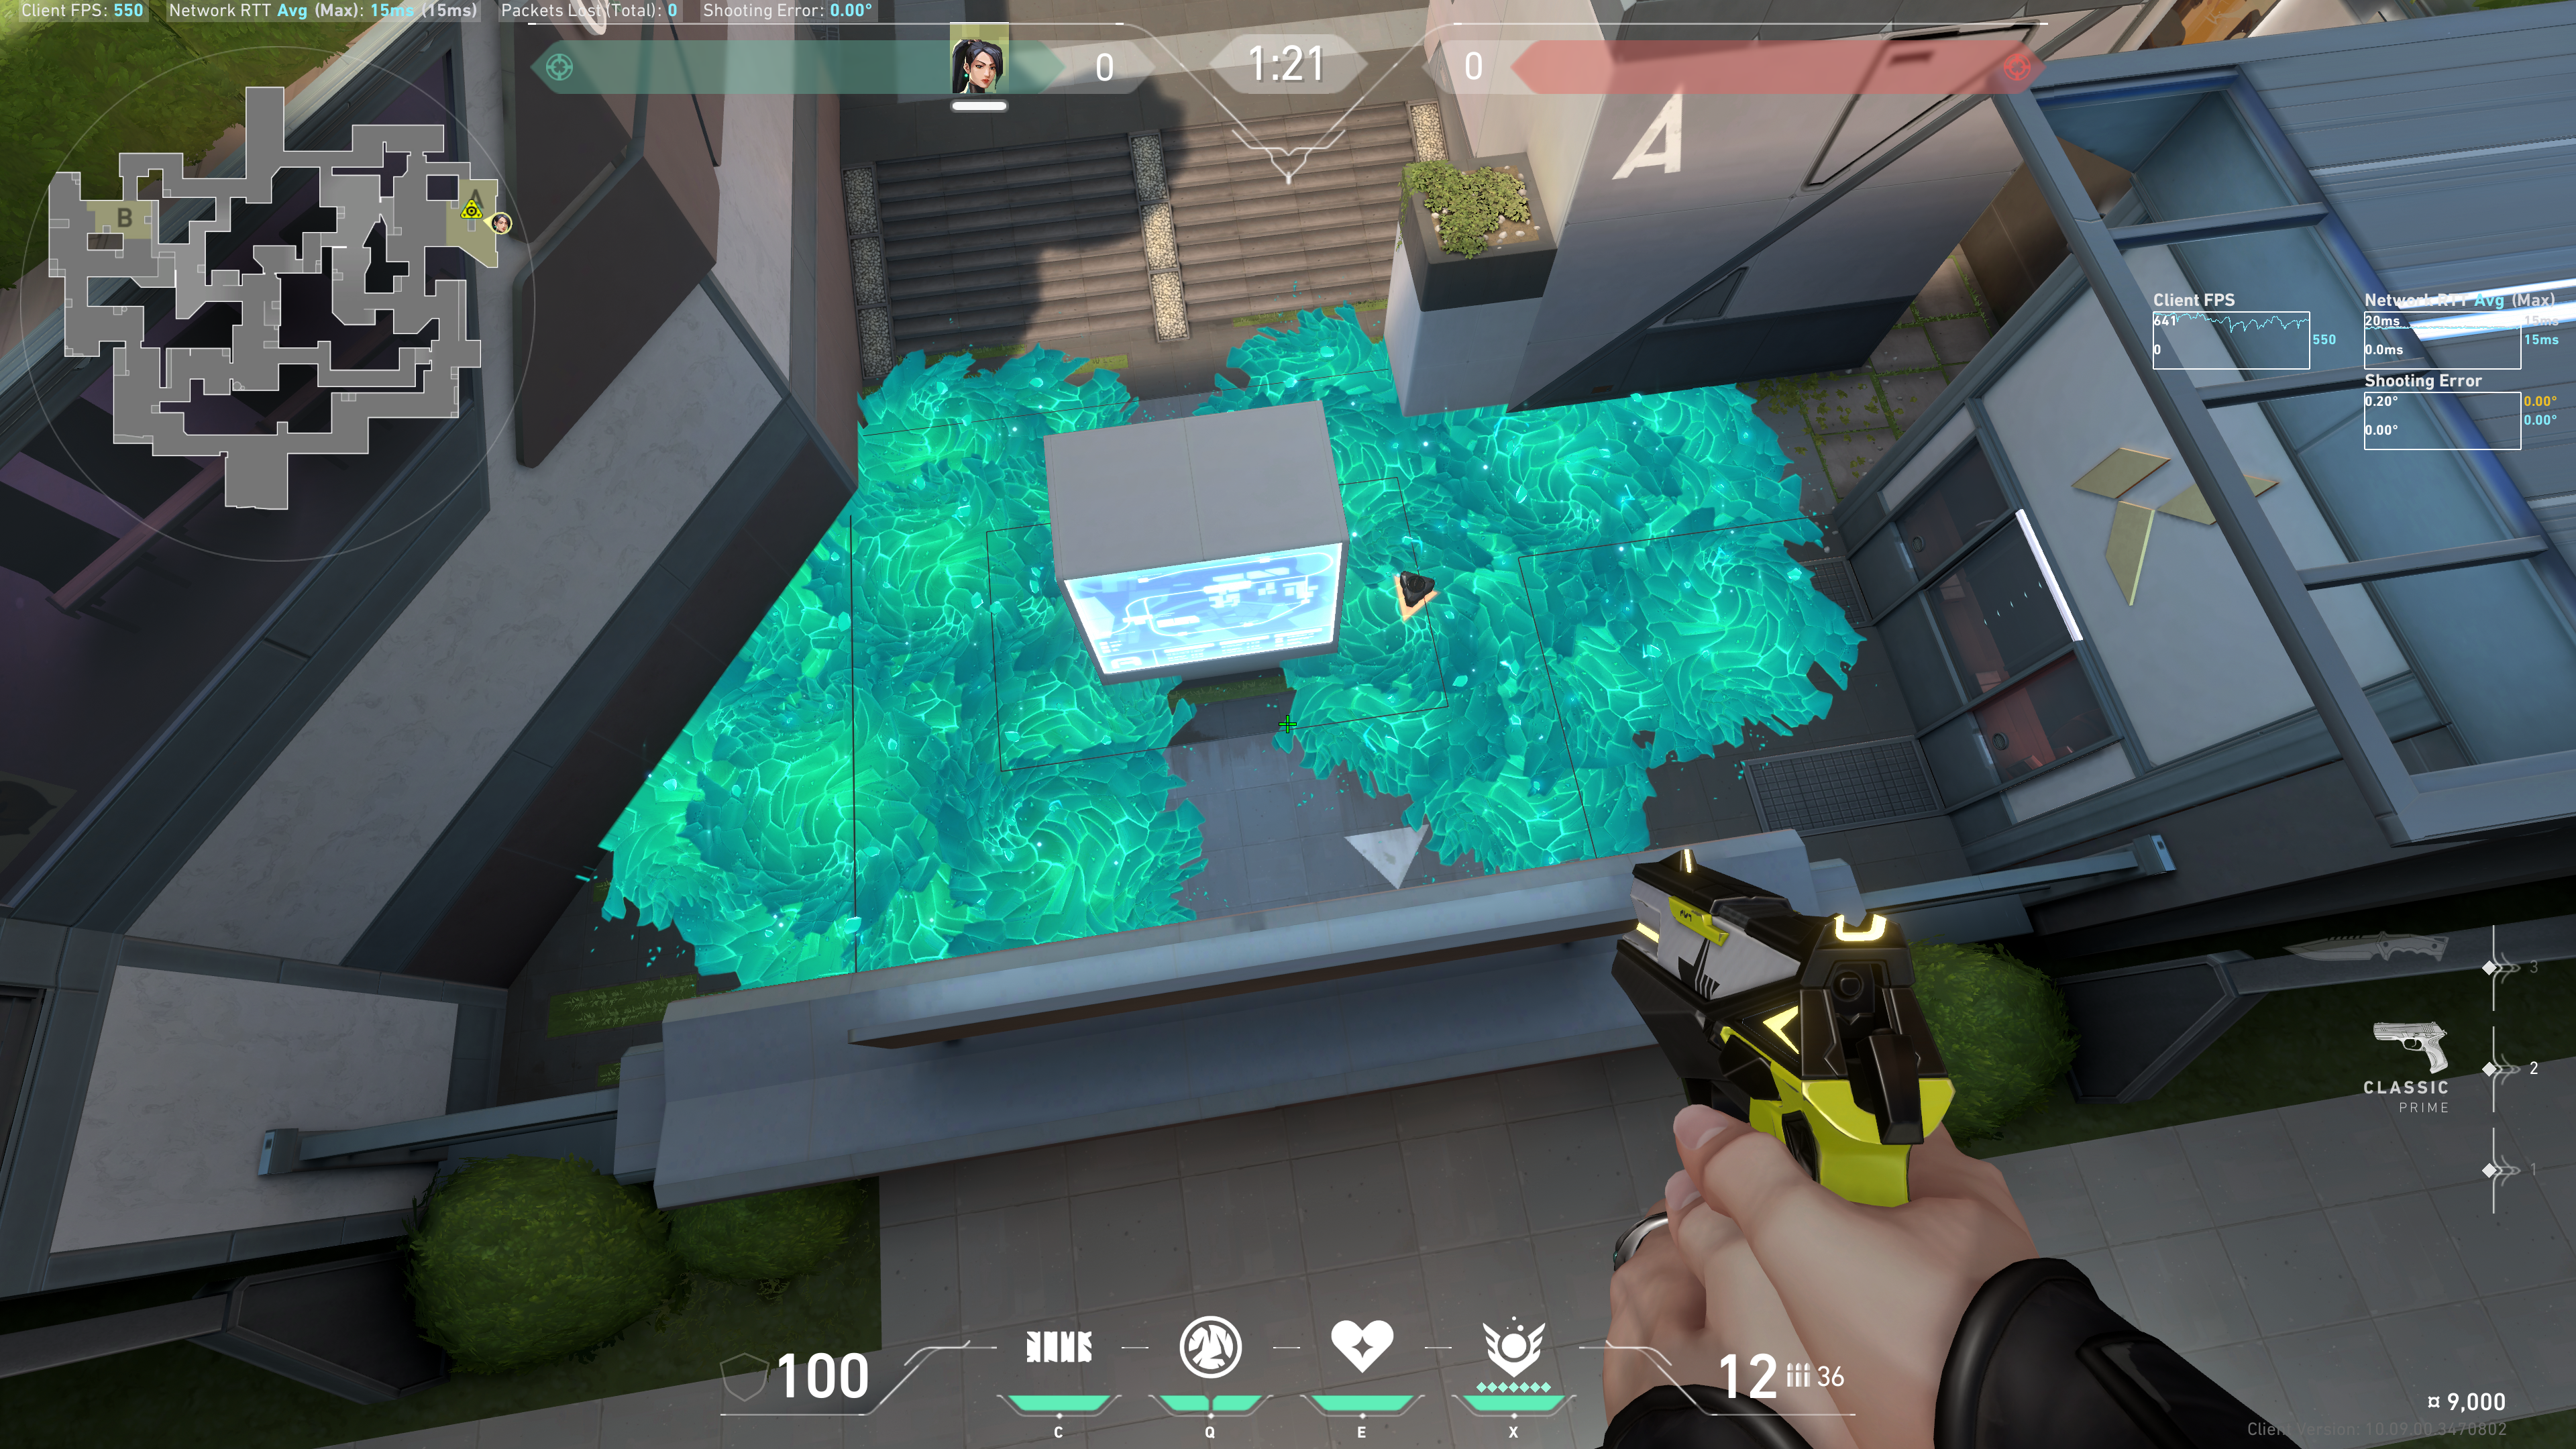
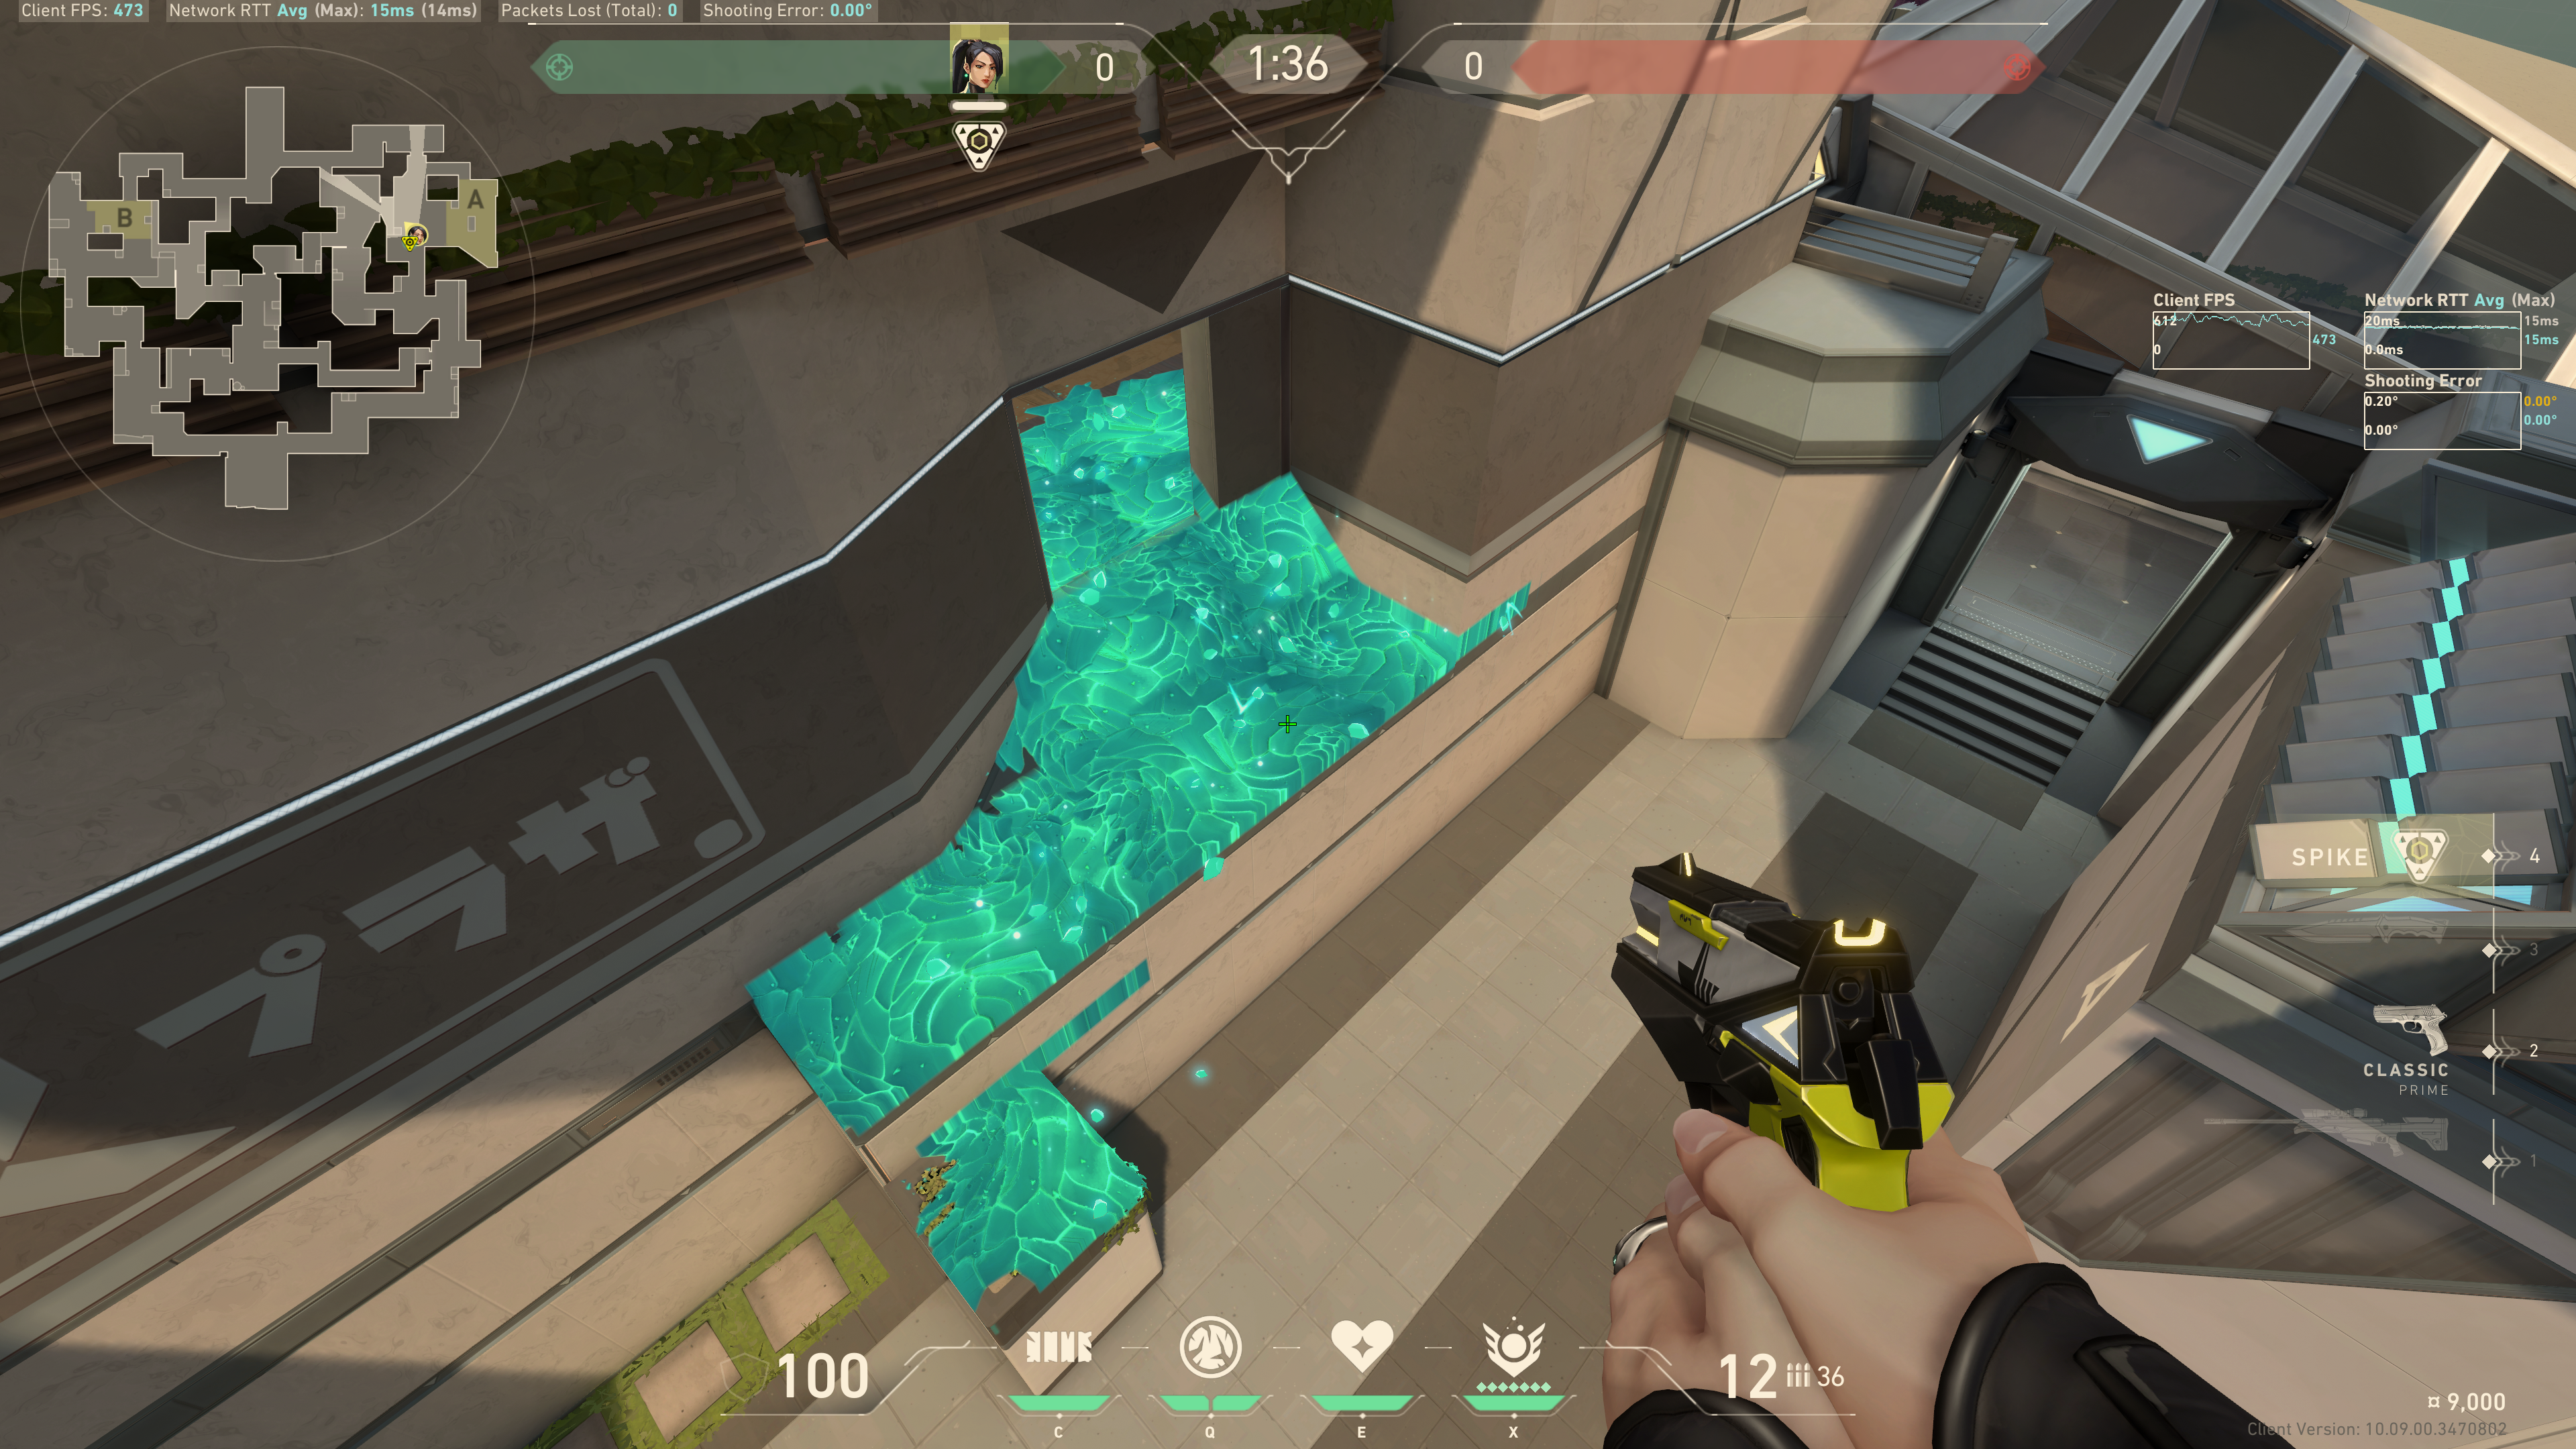
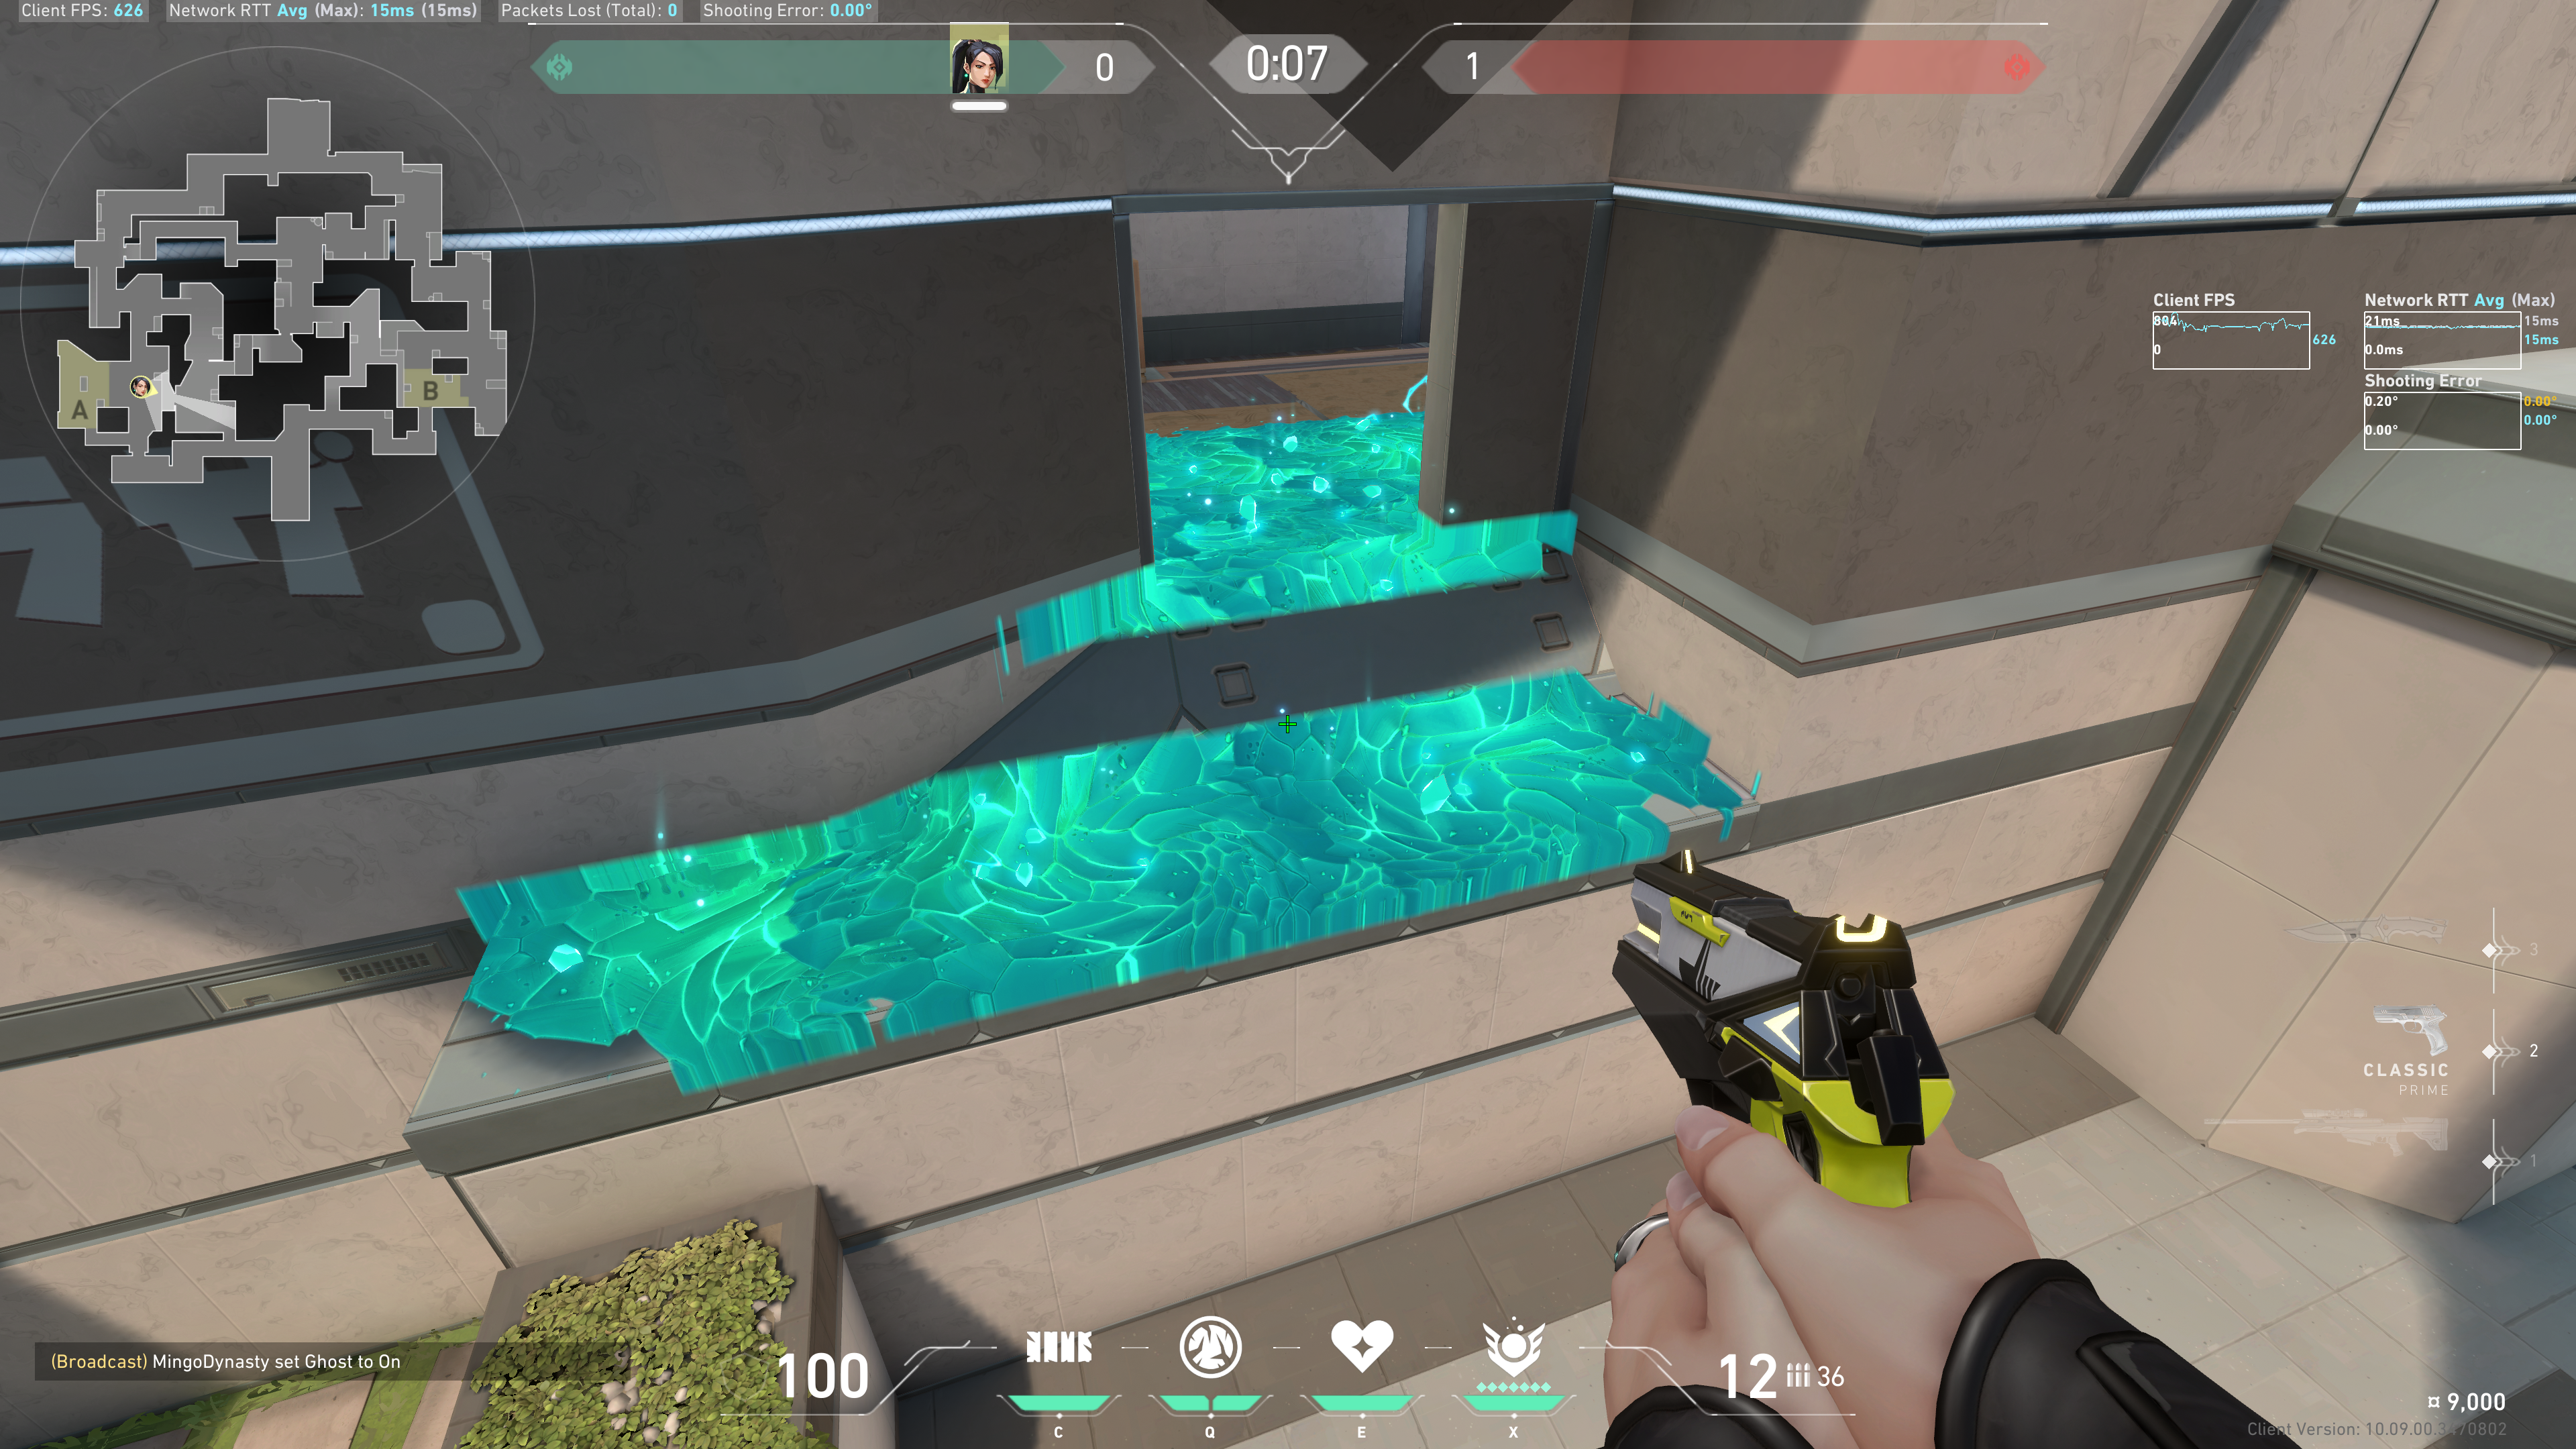
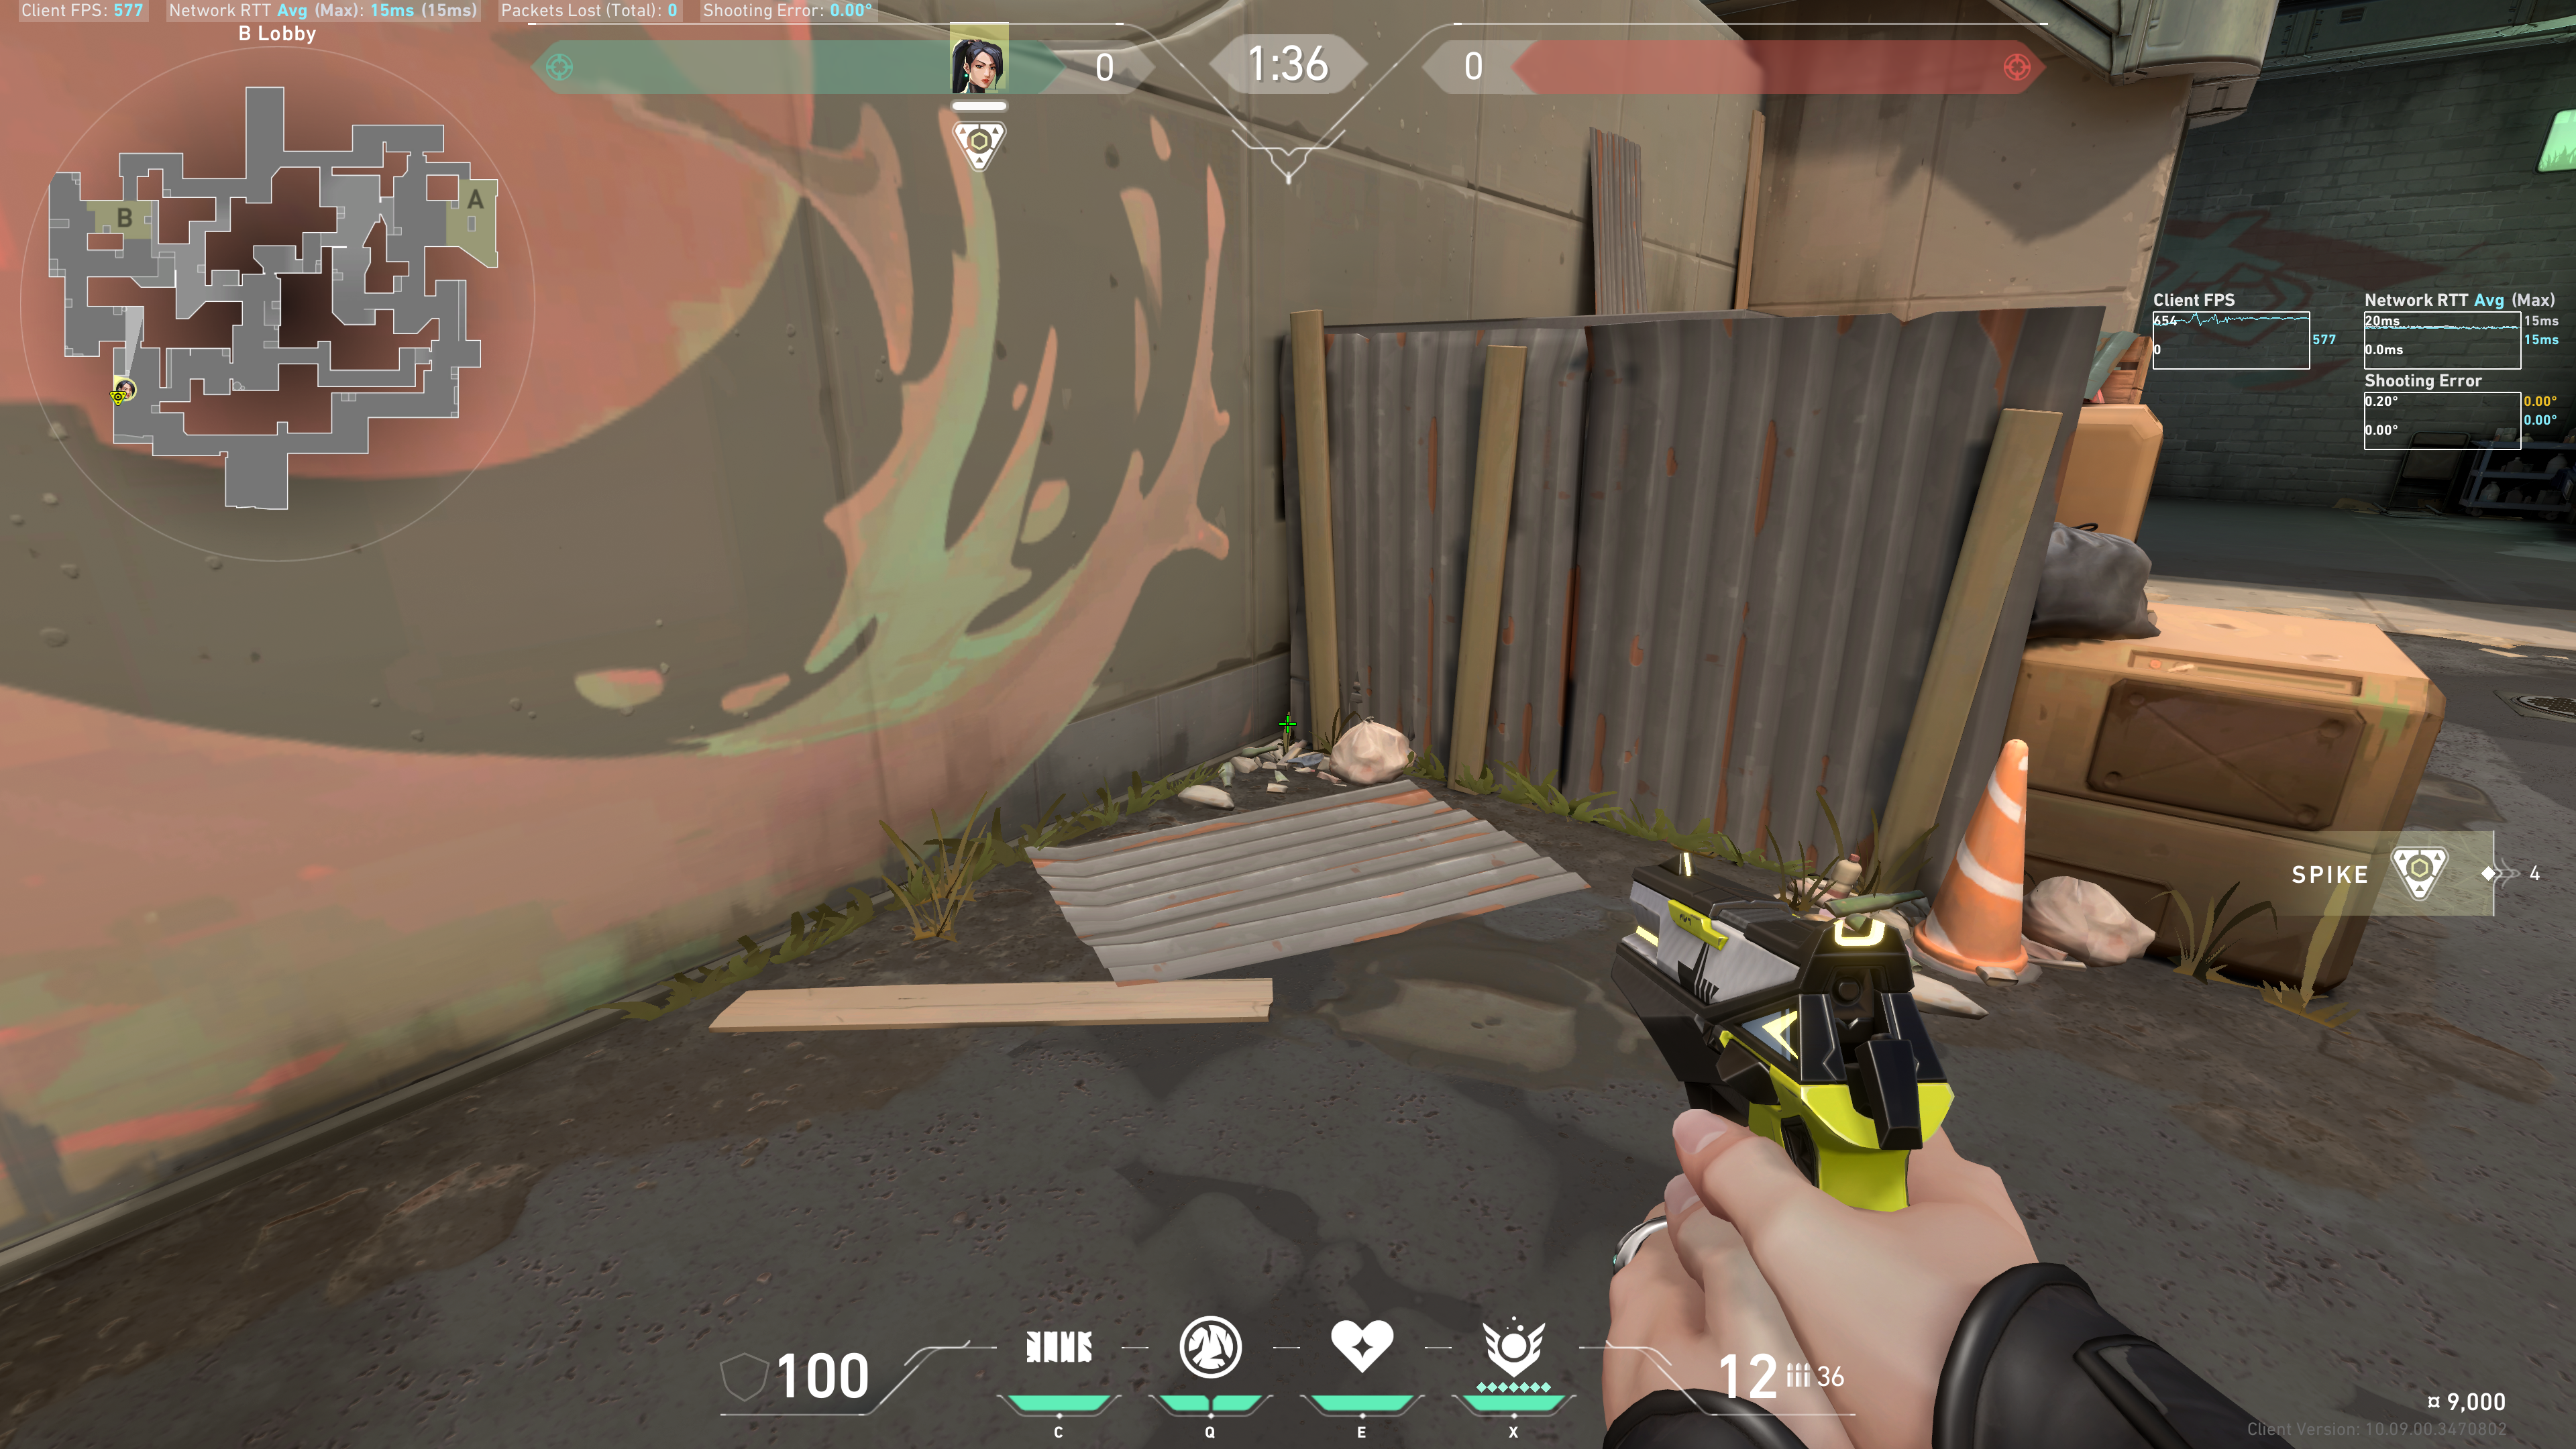
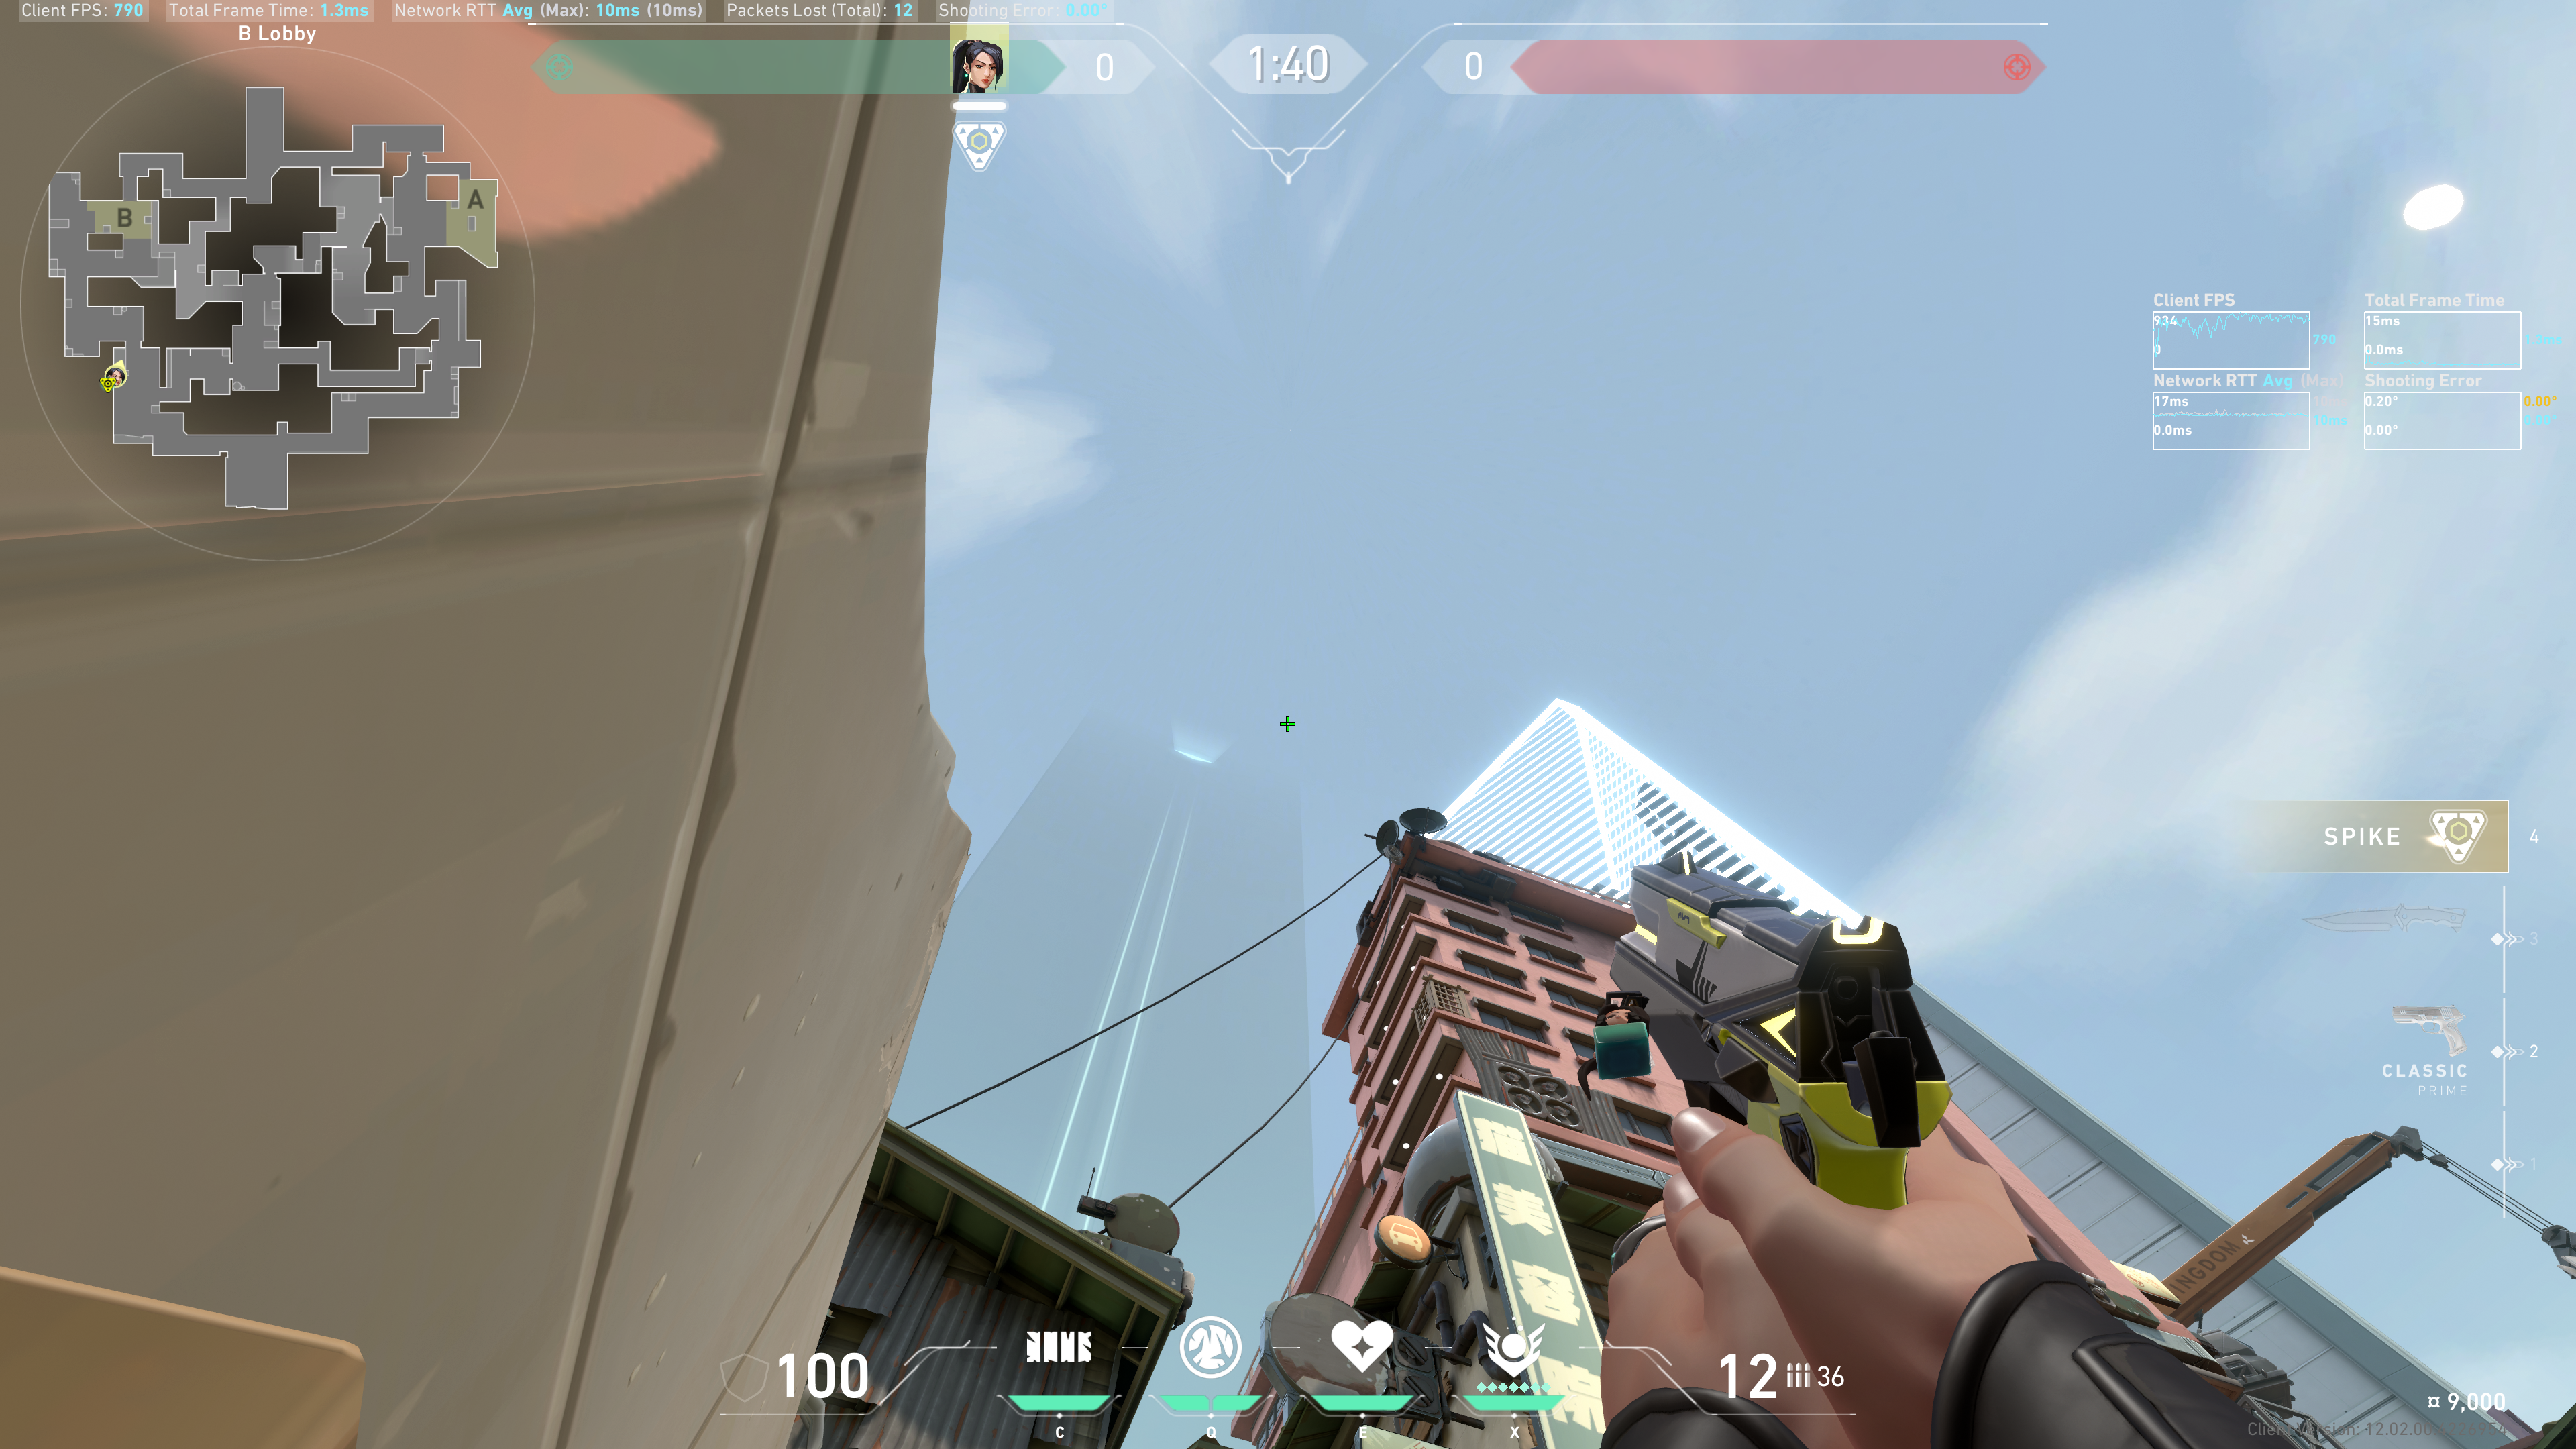
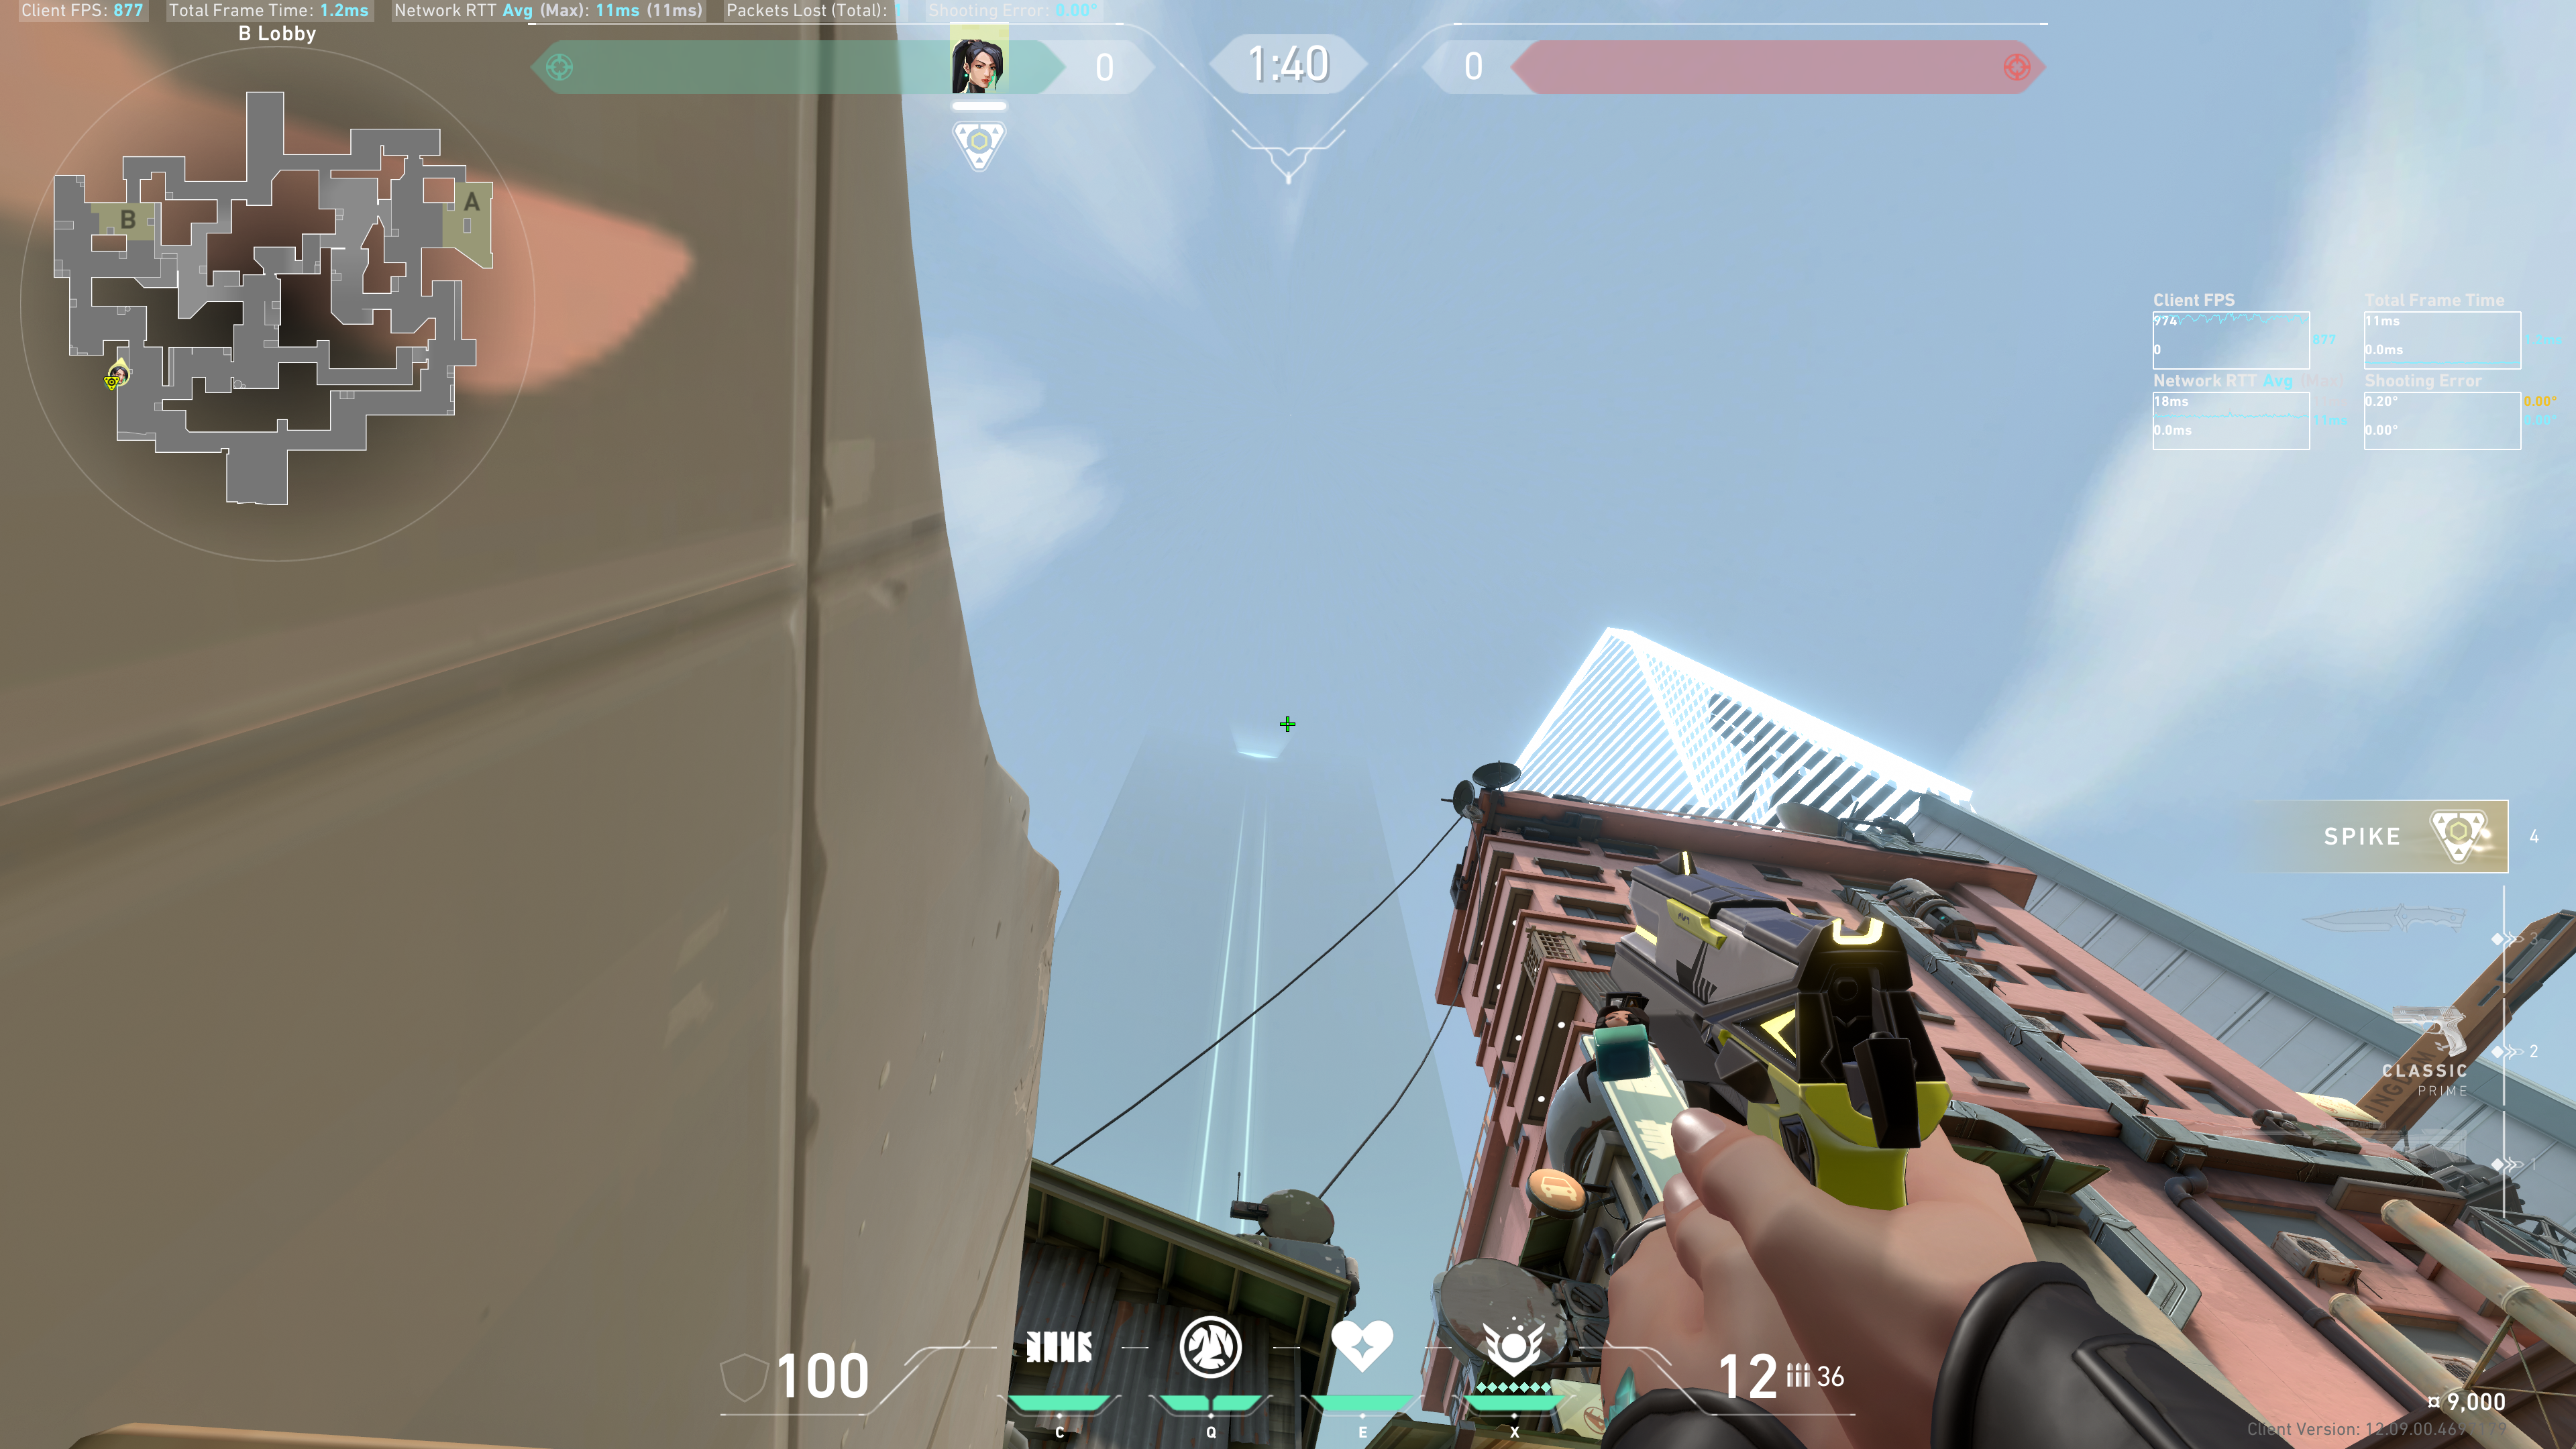
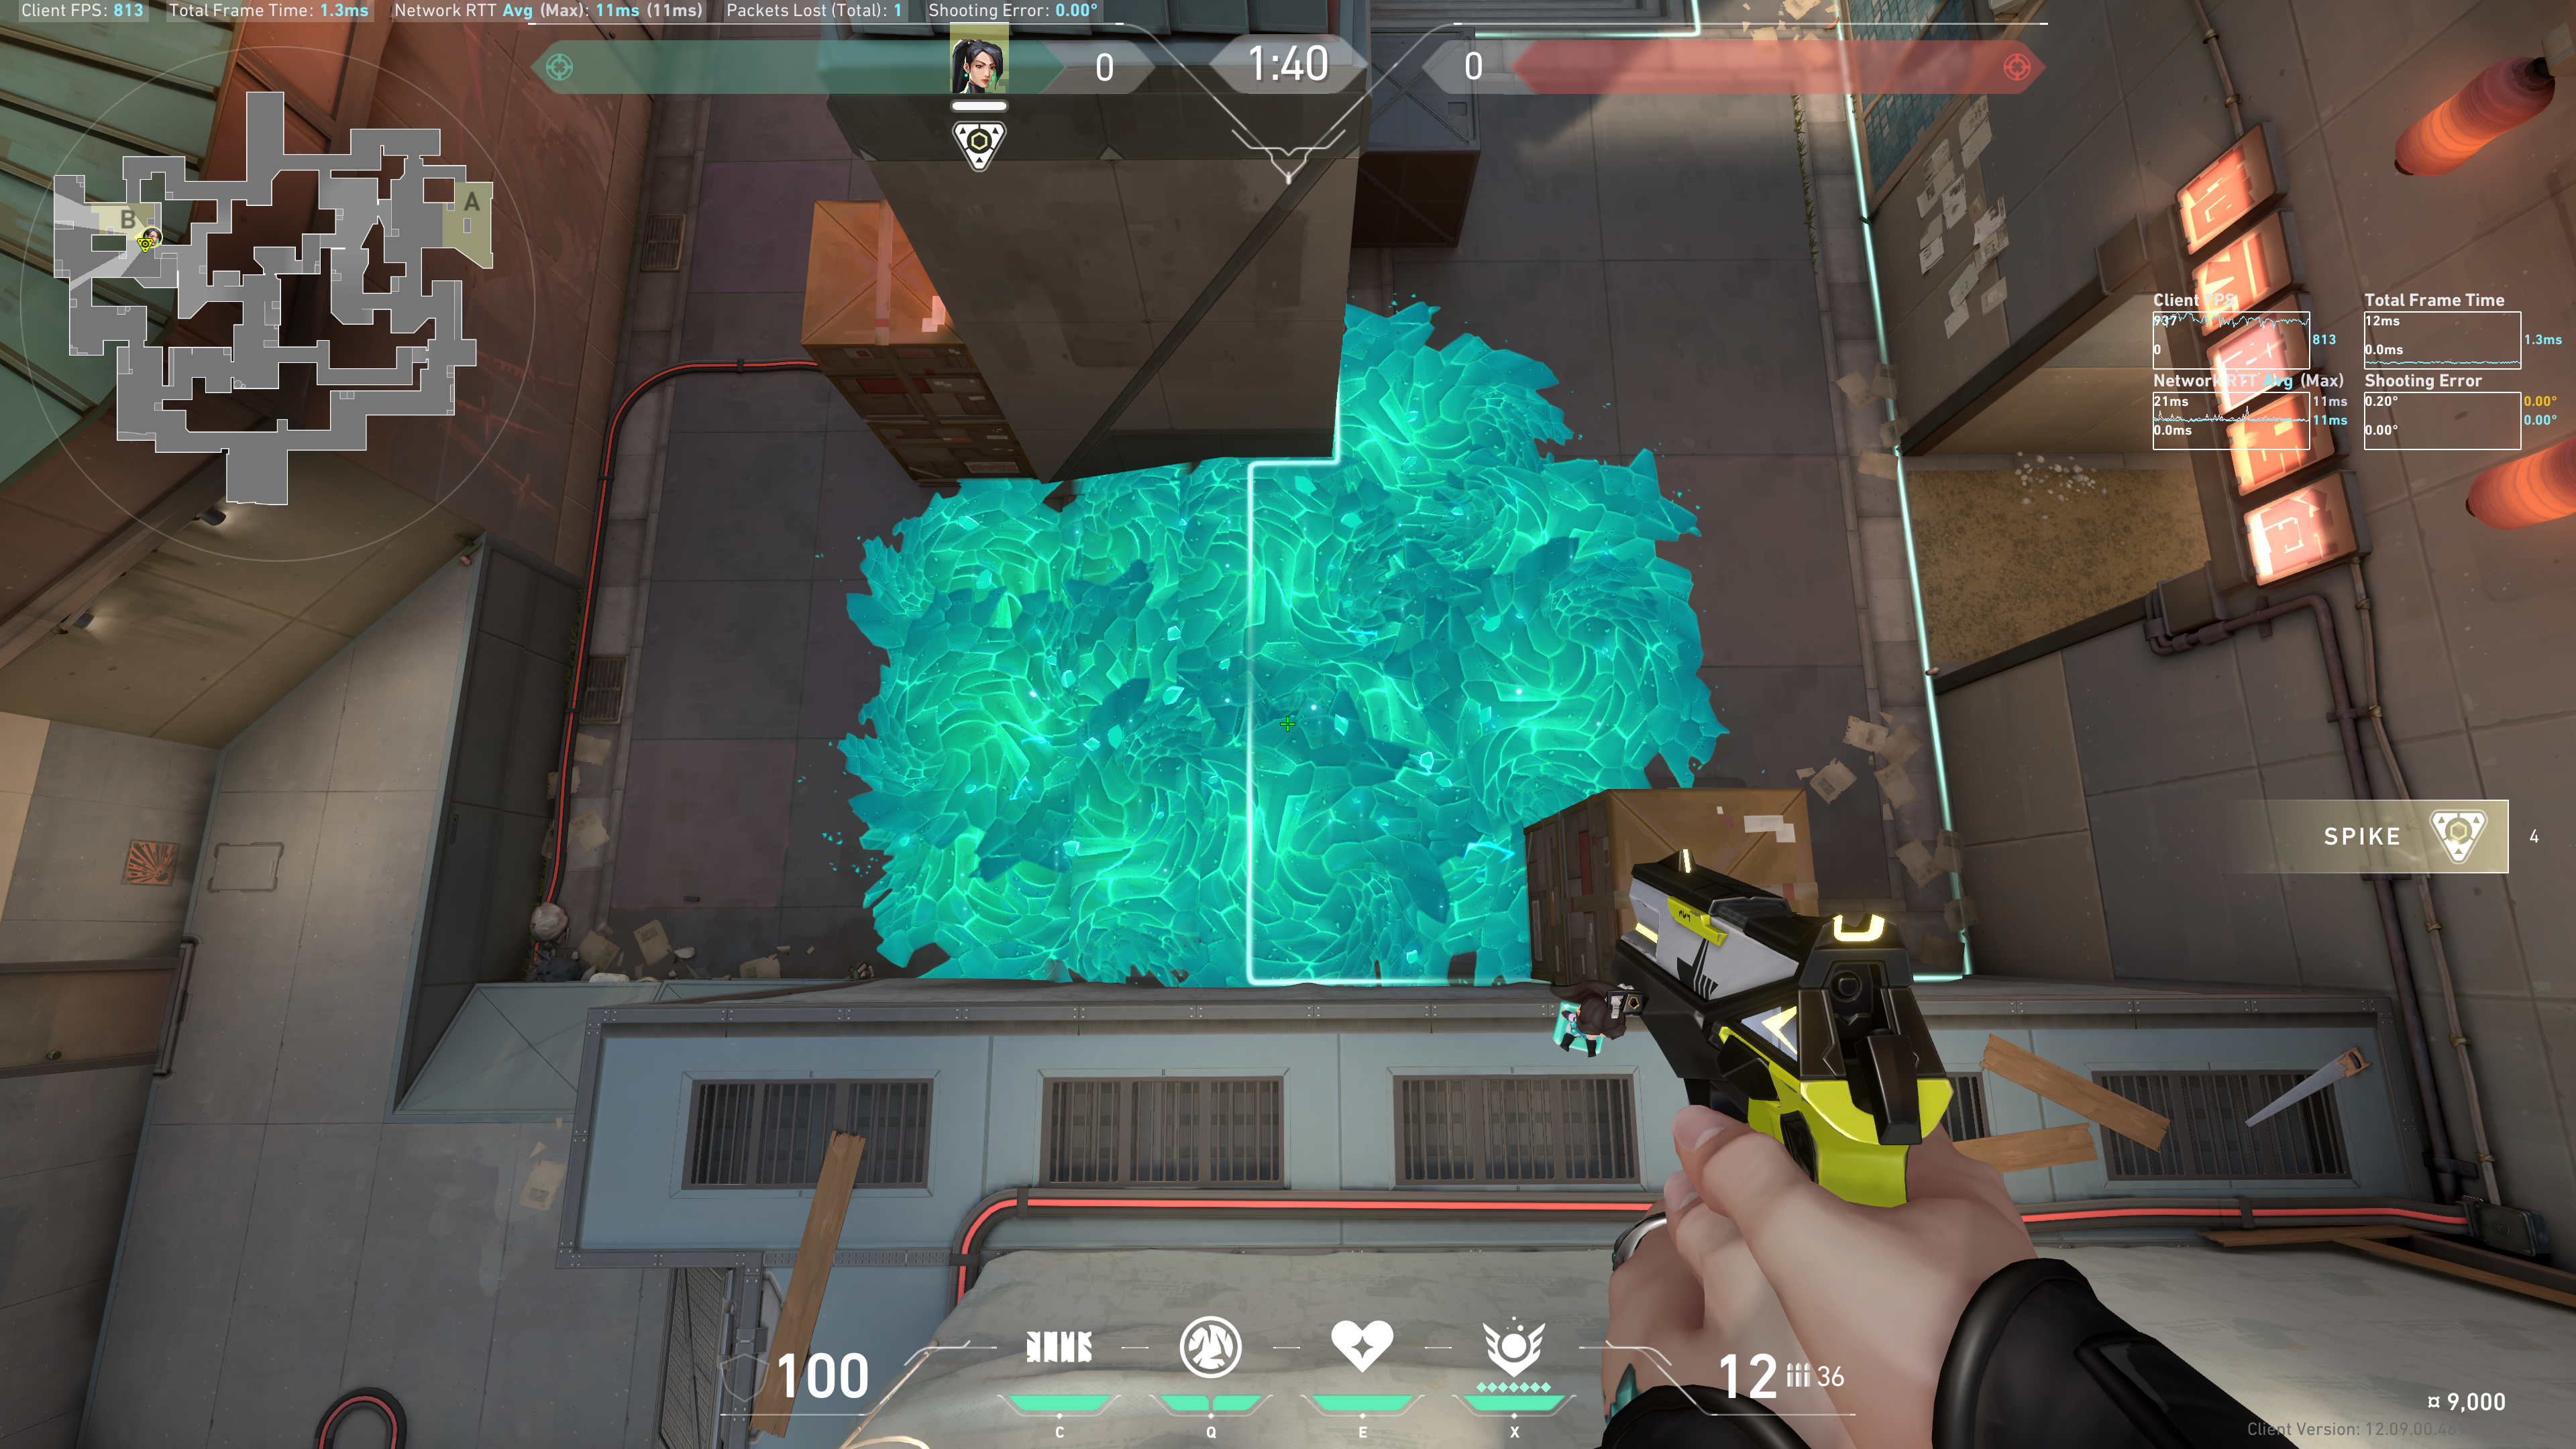
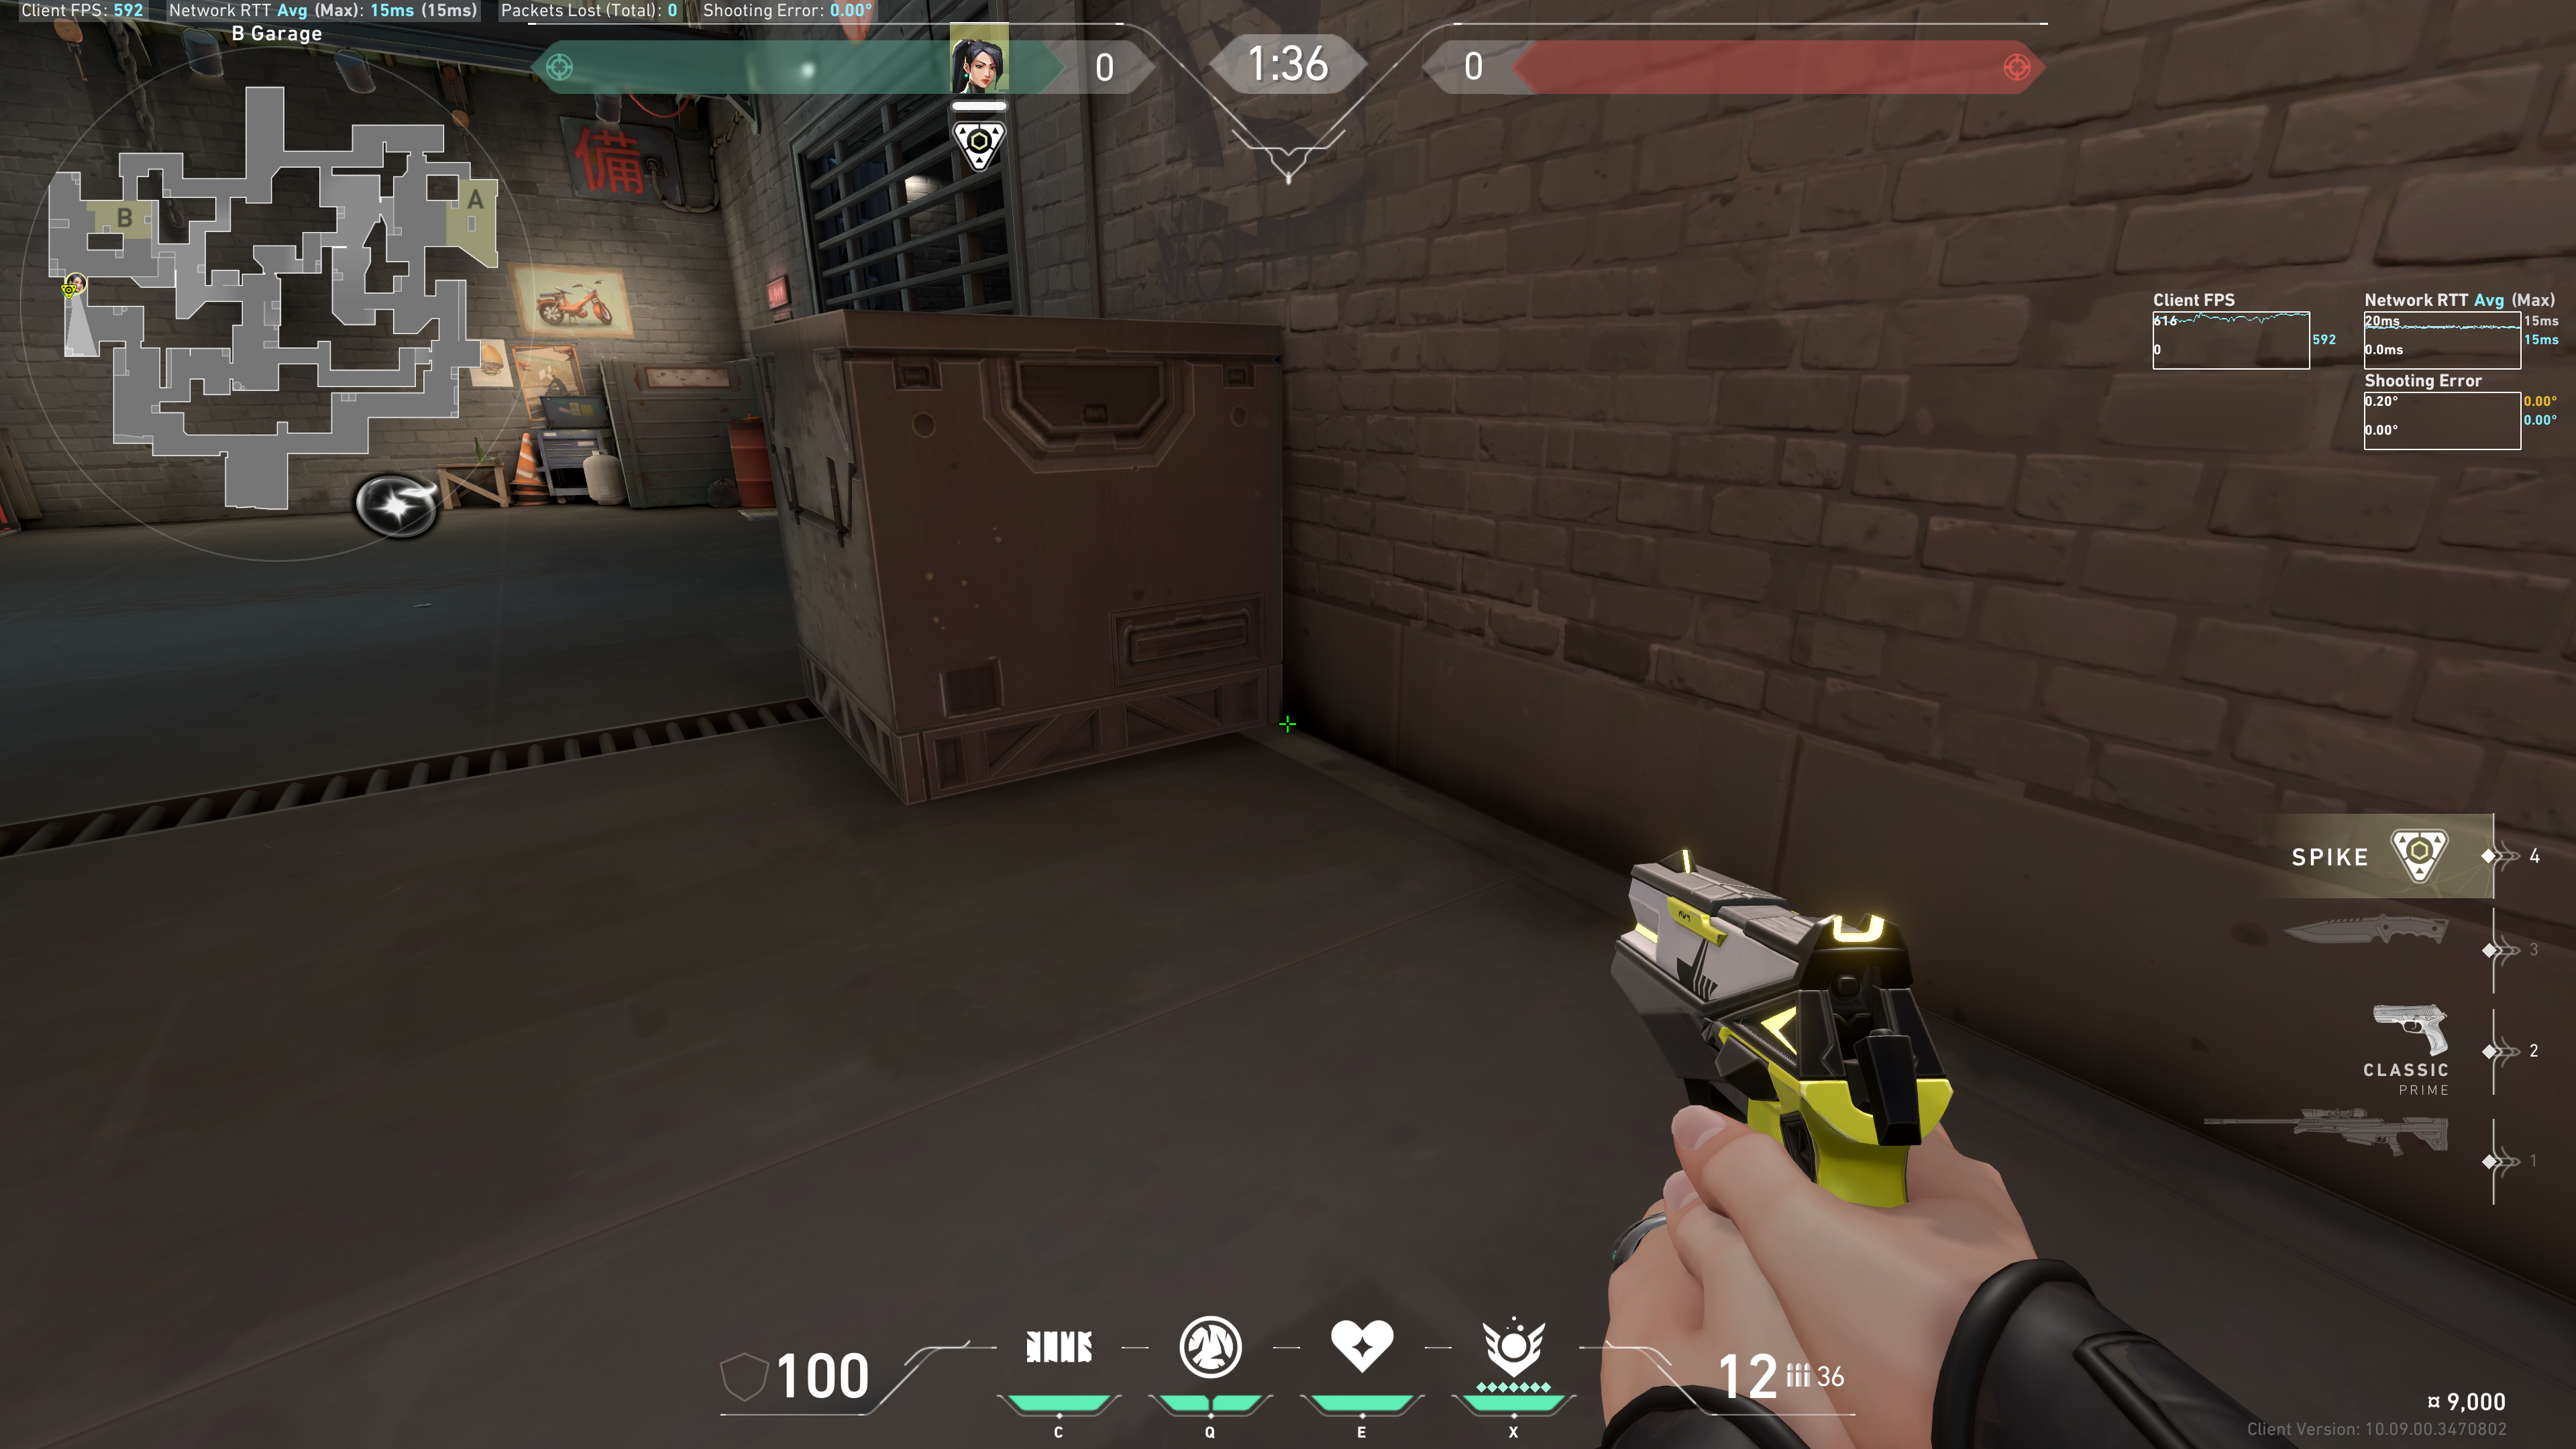
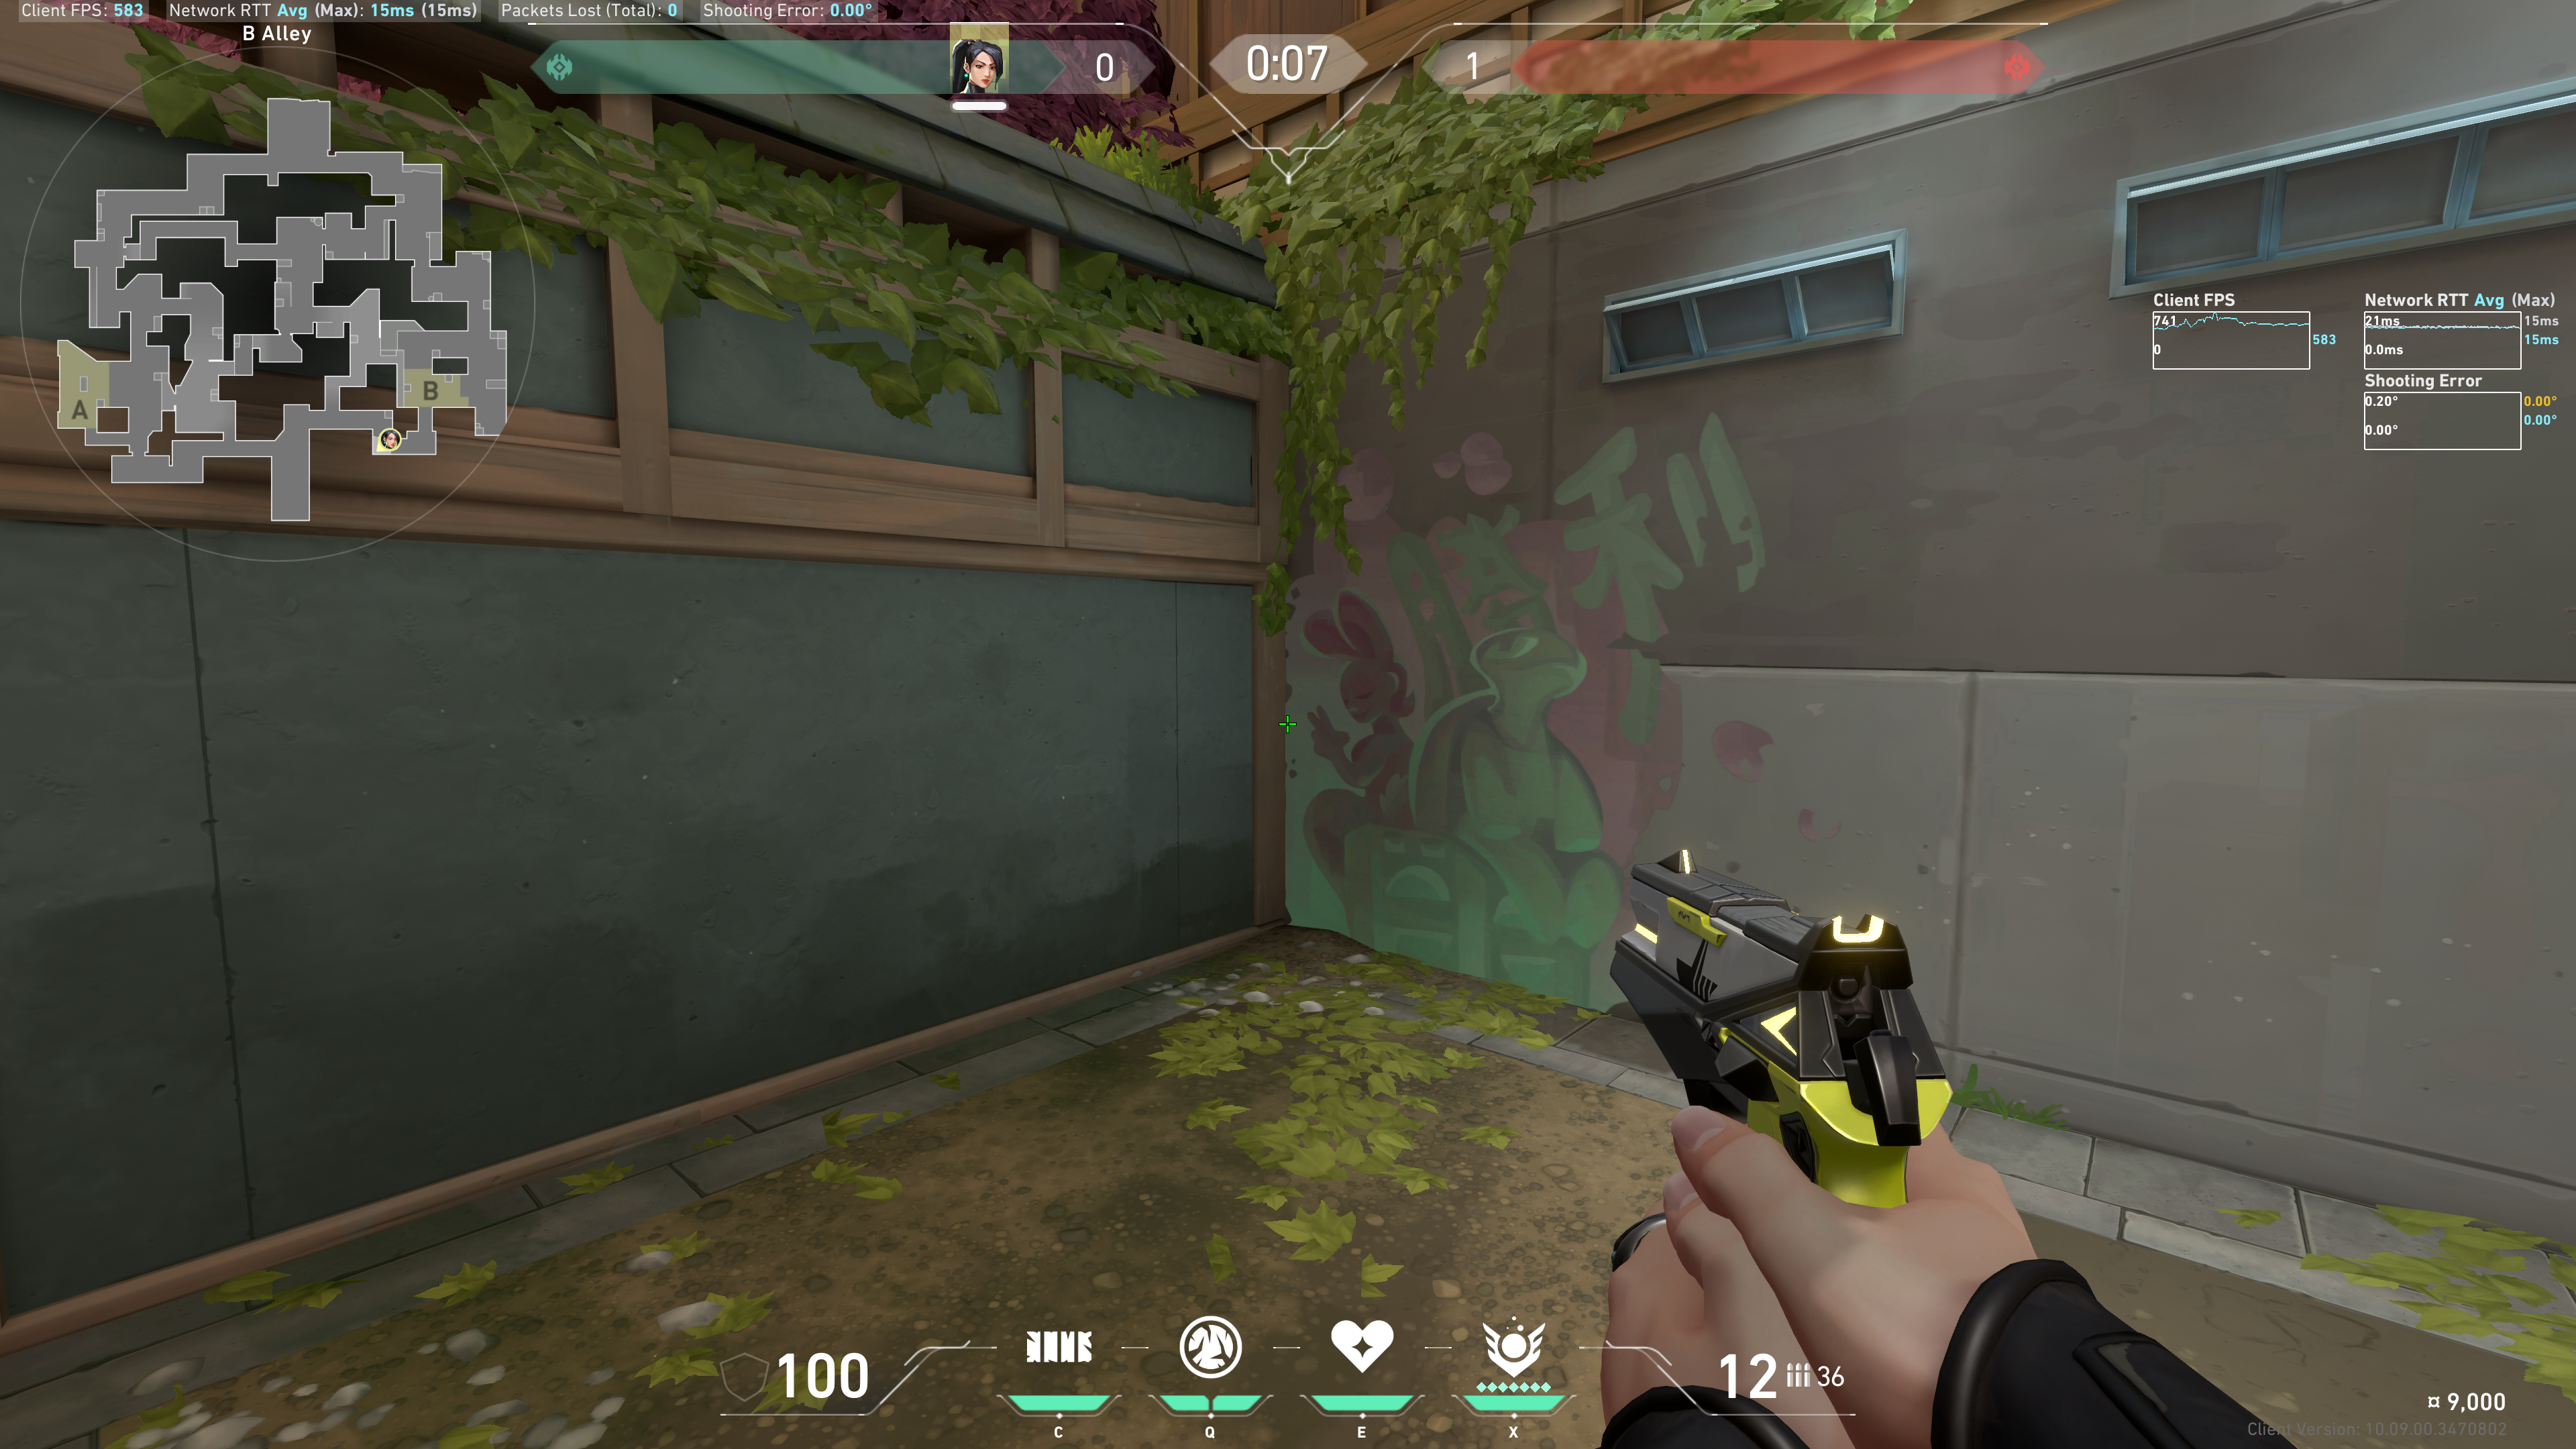
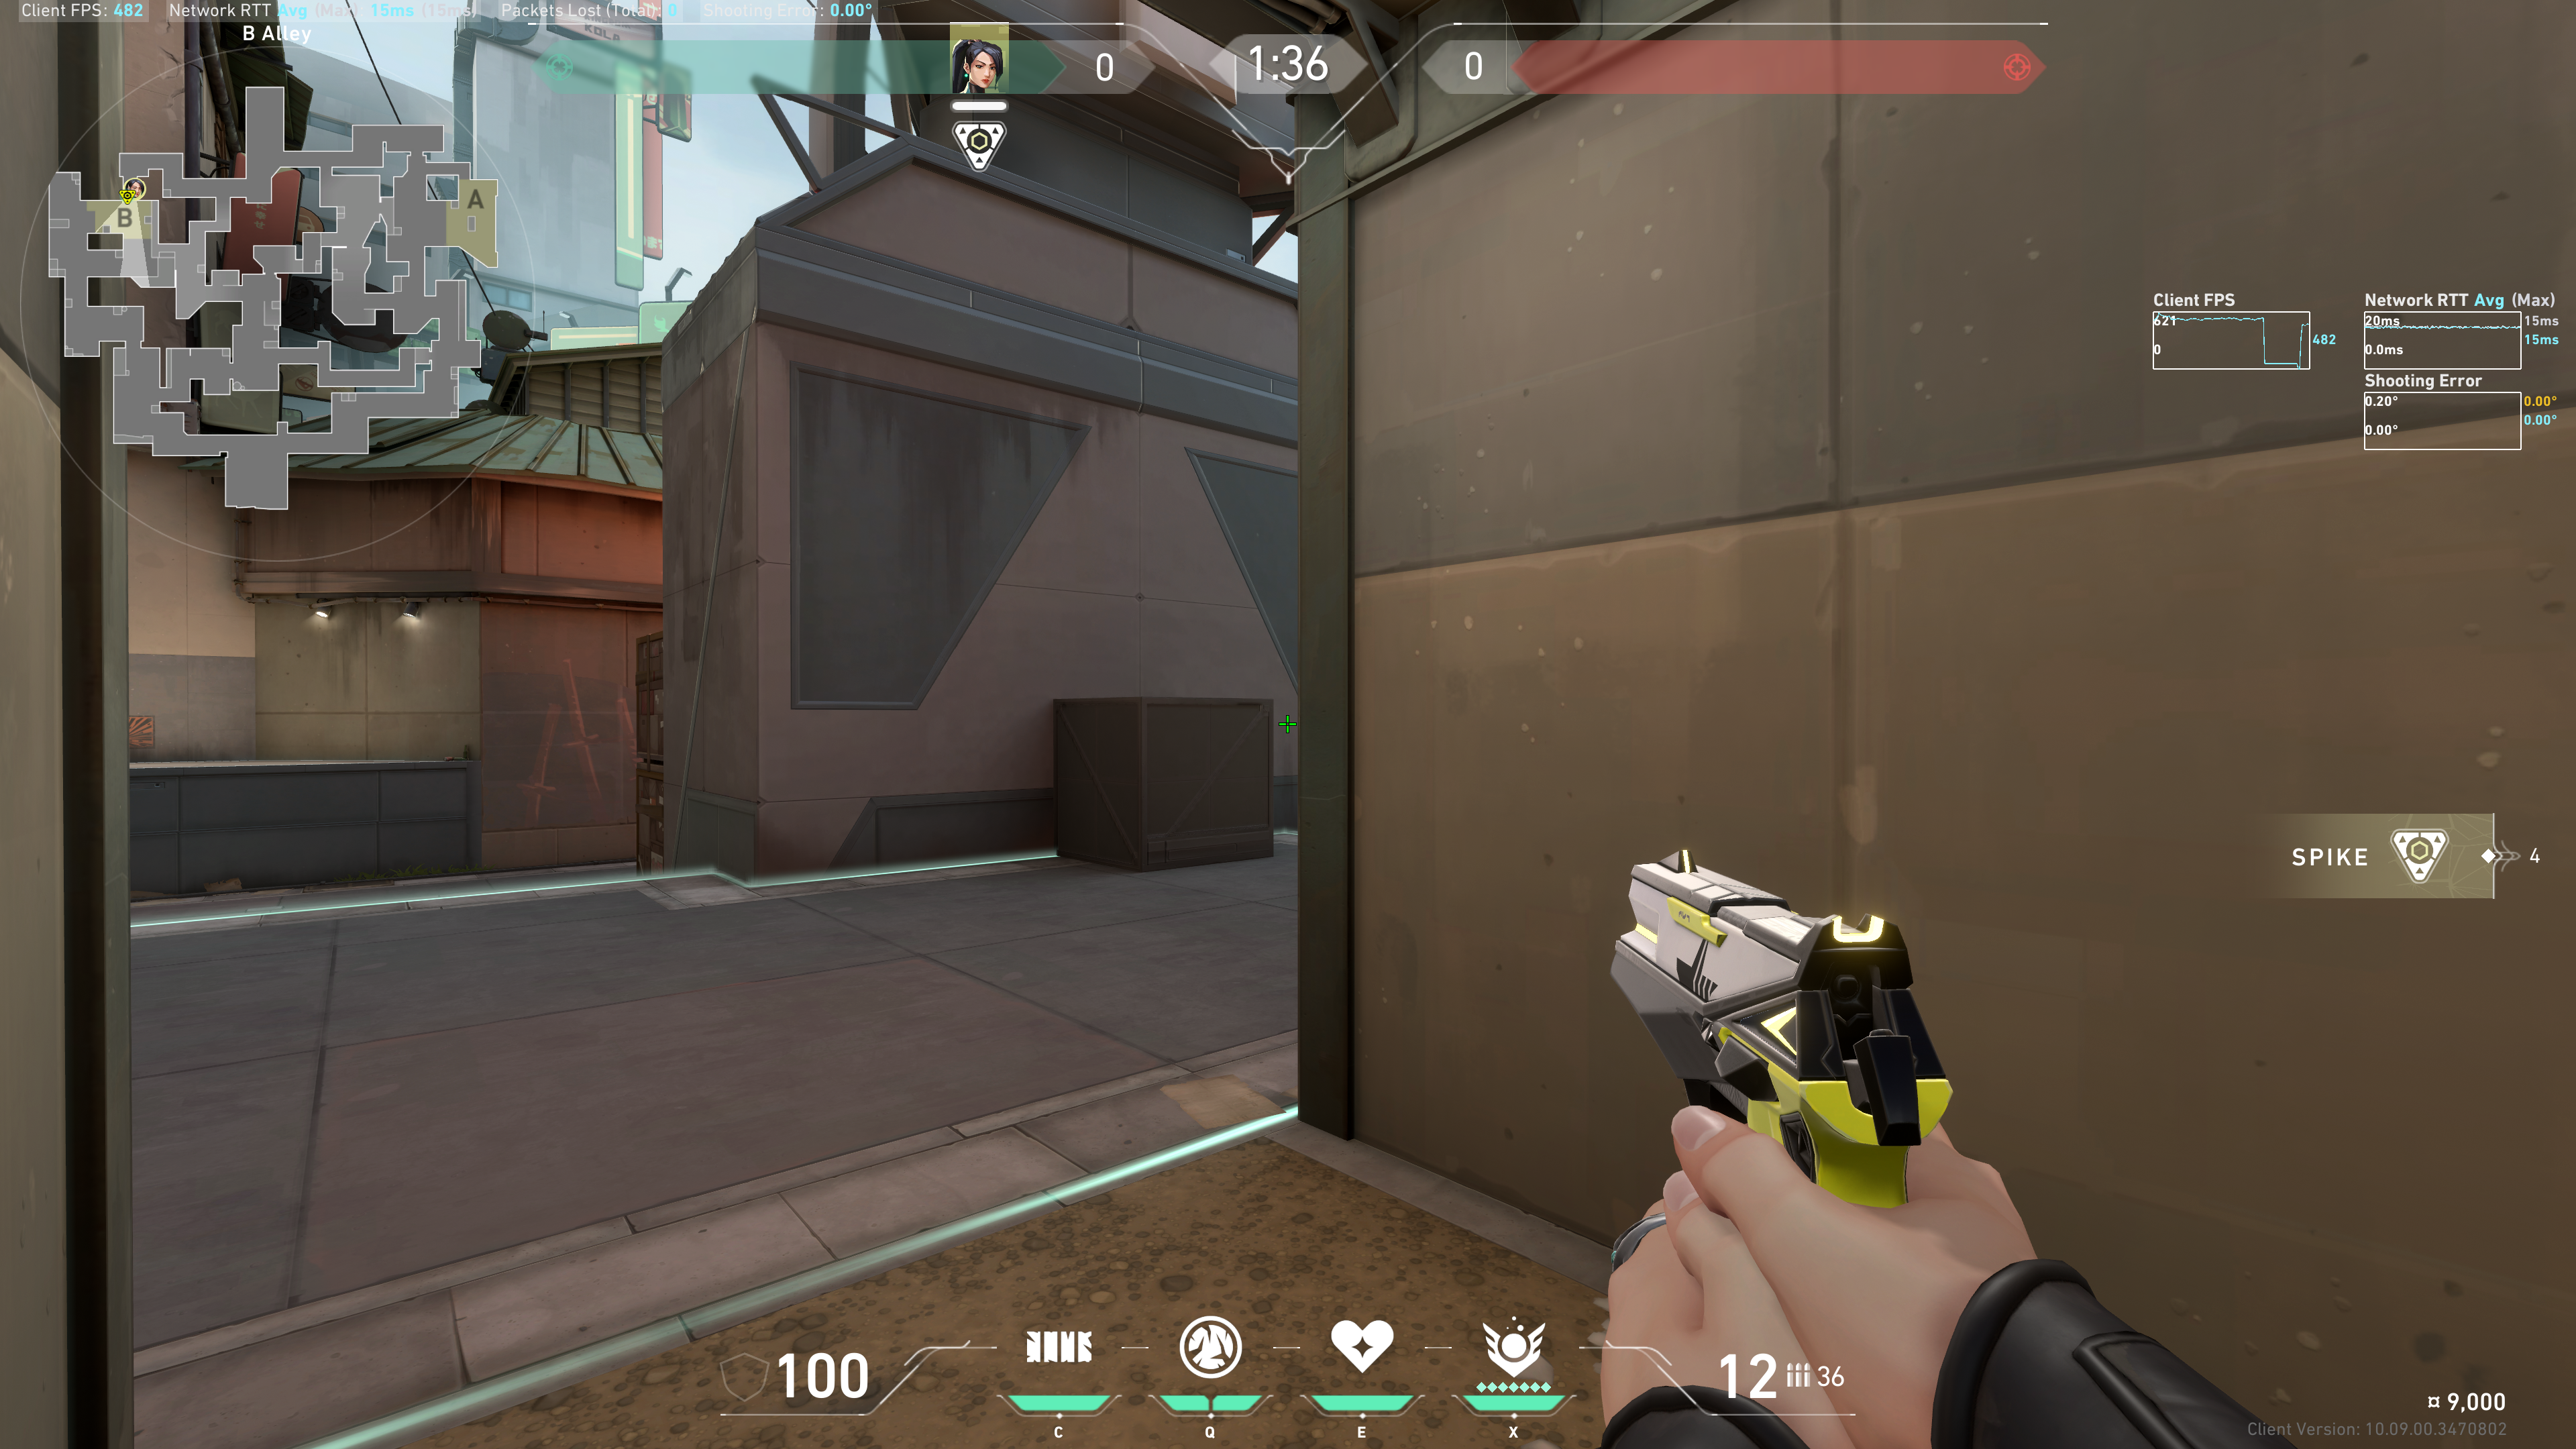
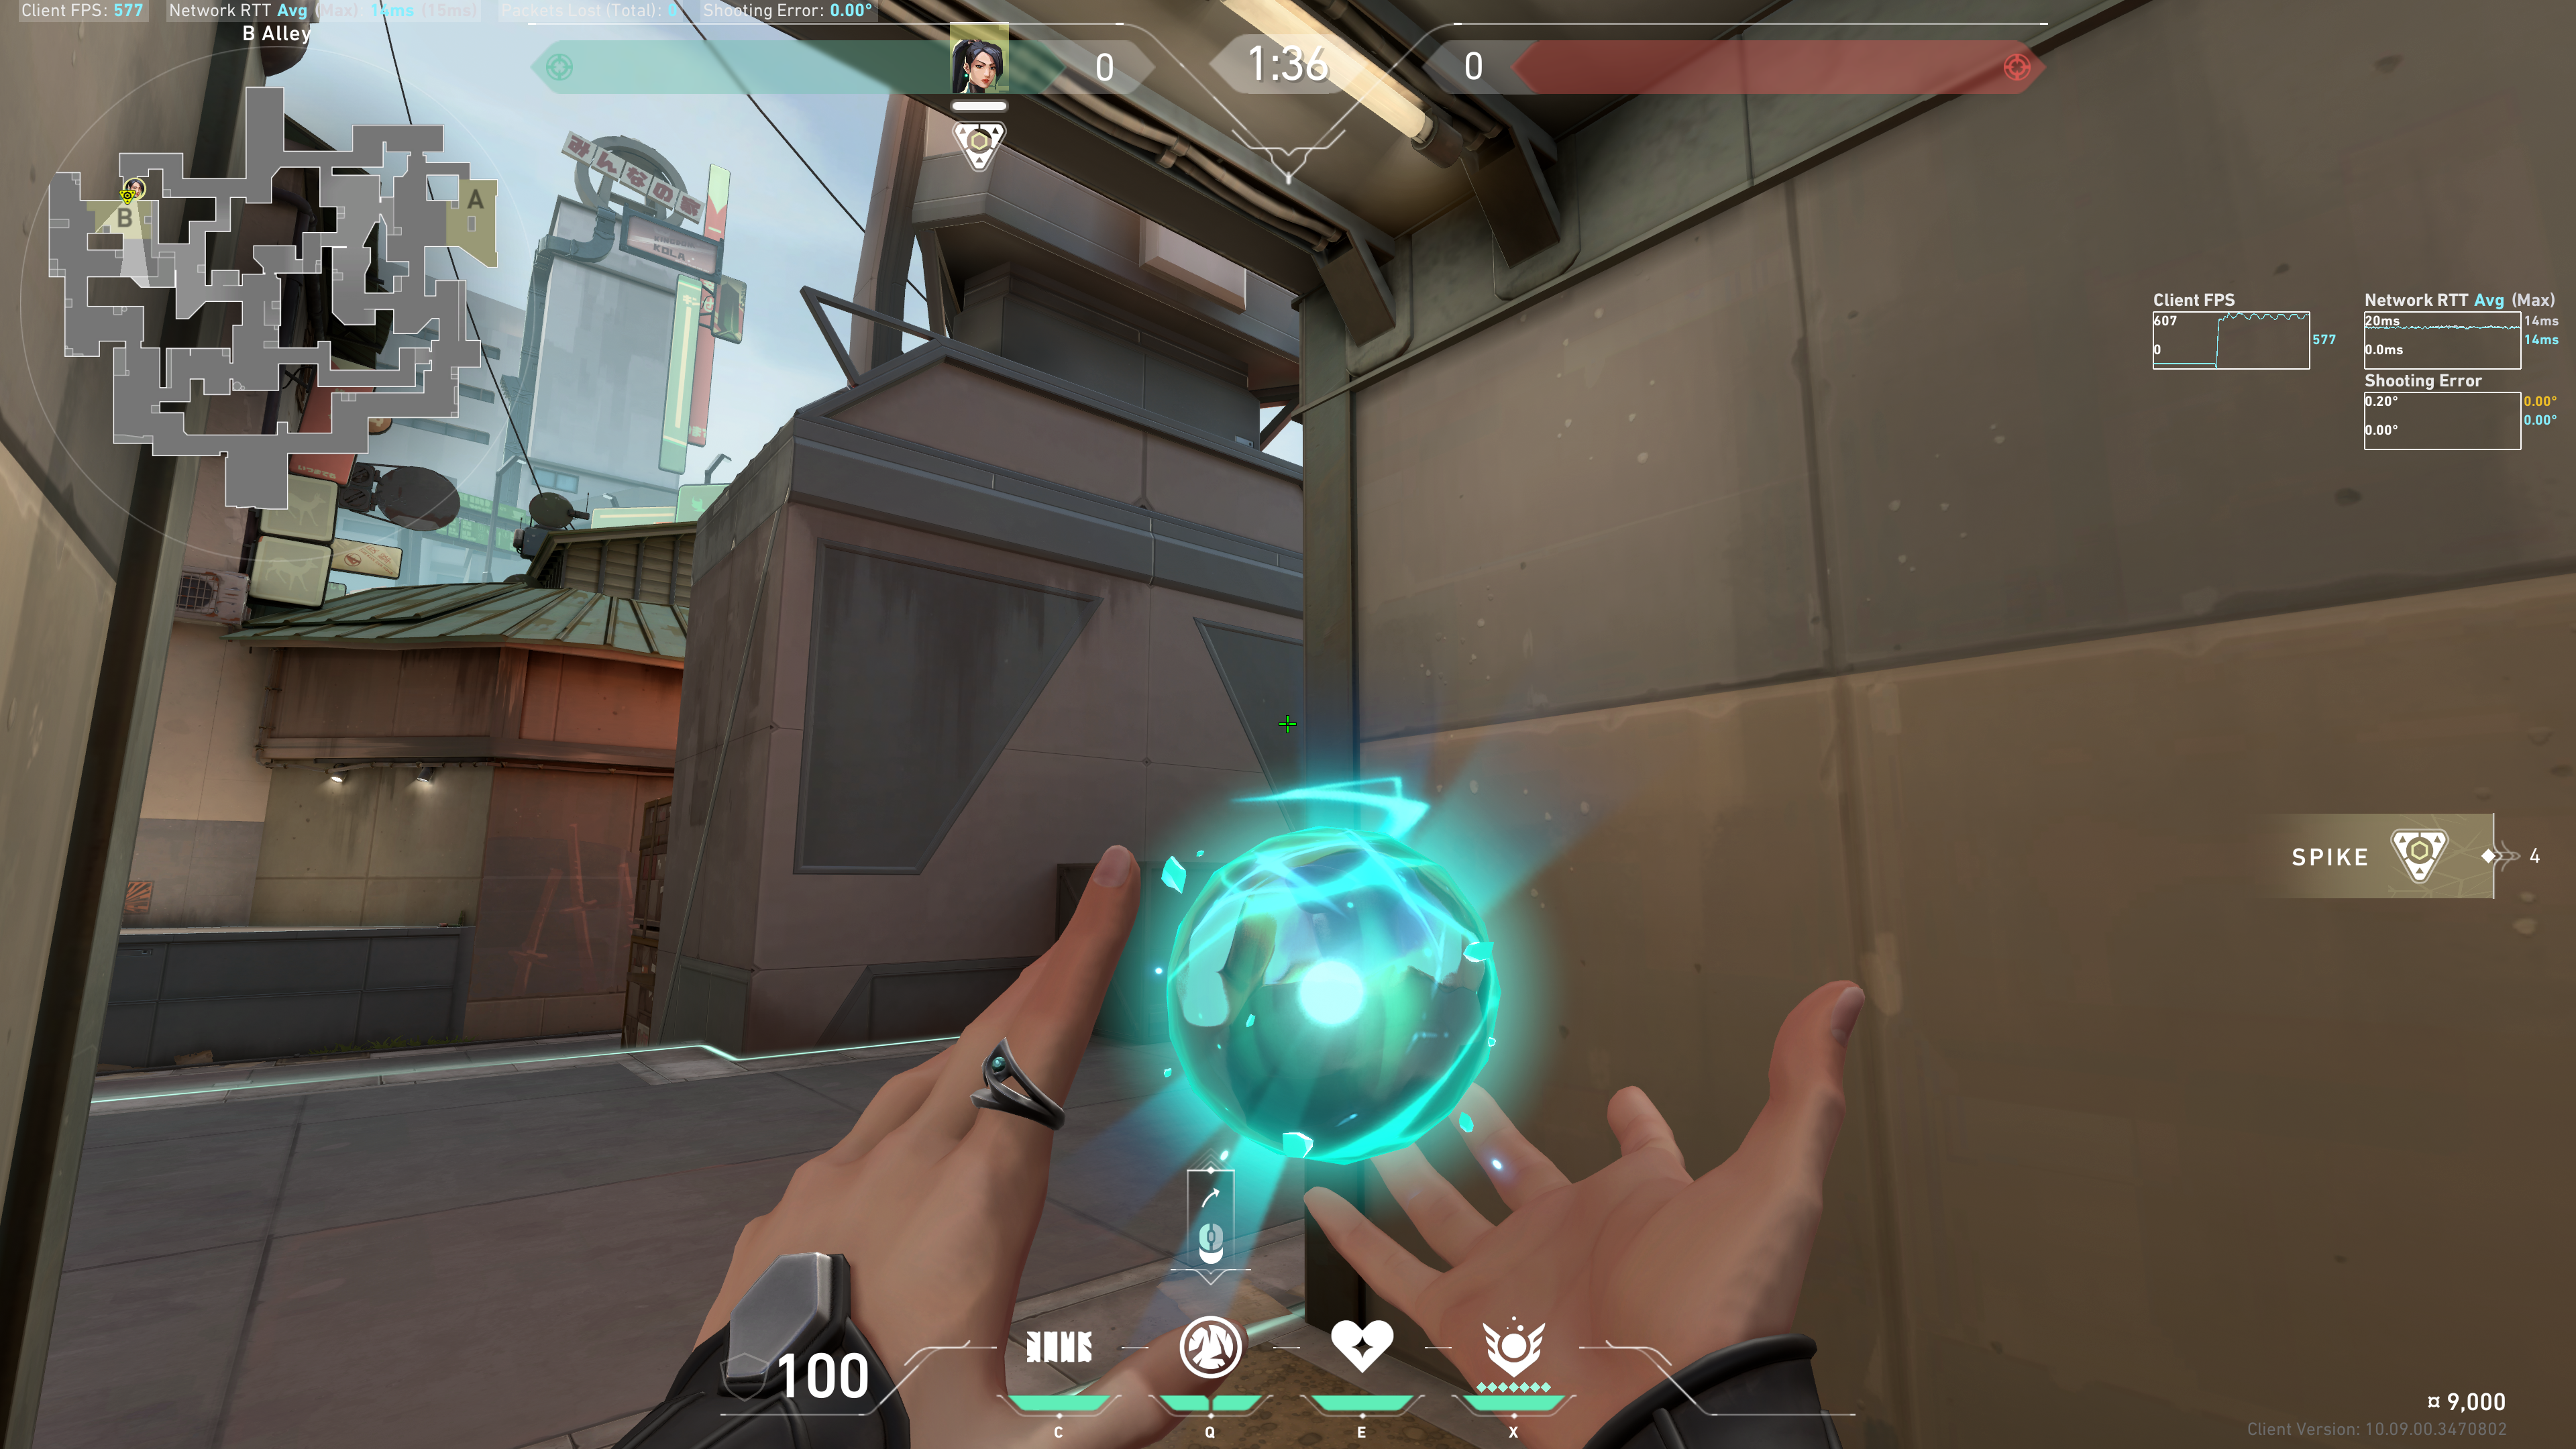
B Site
Round Start
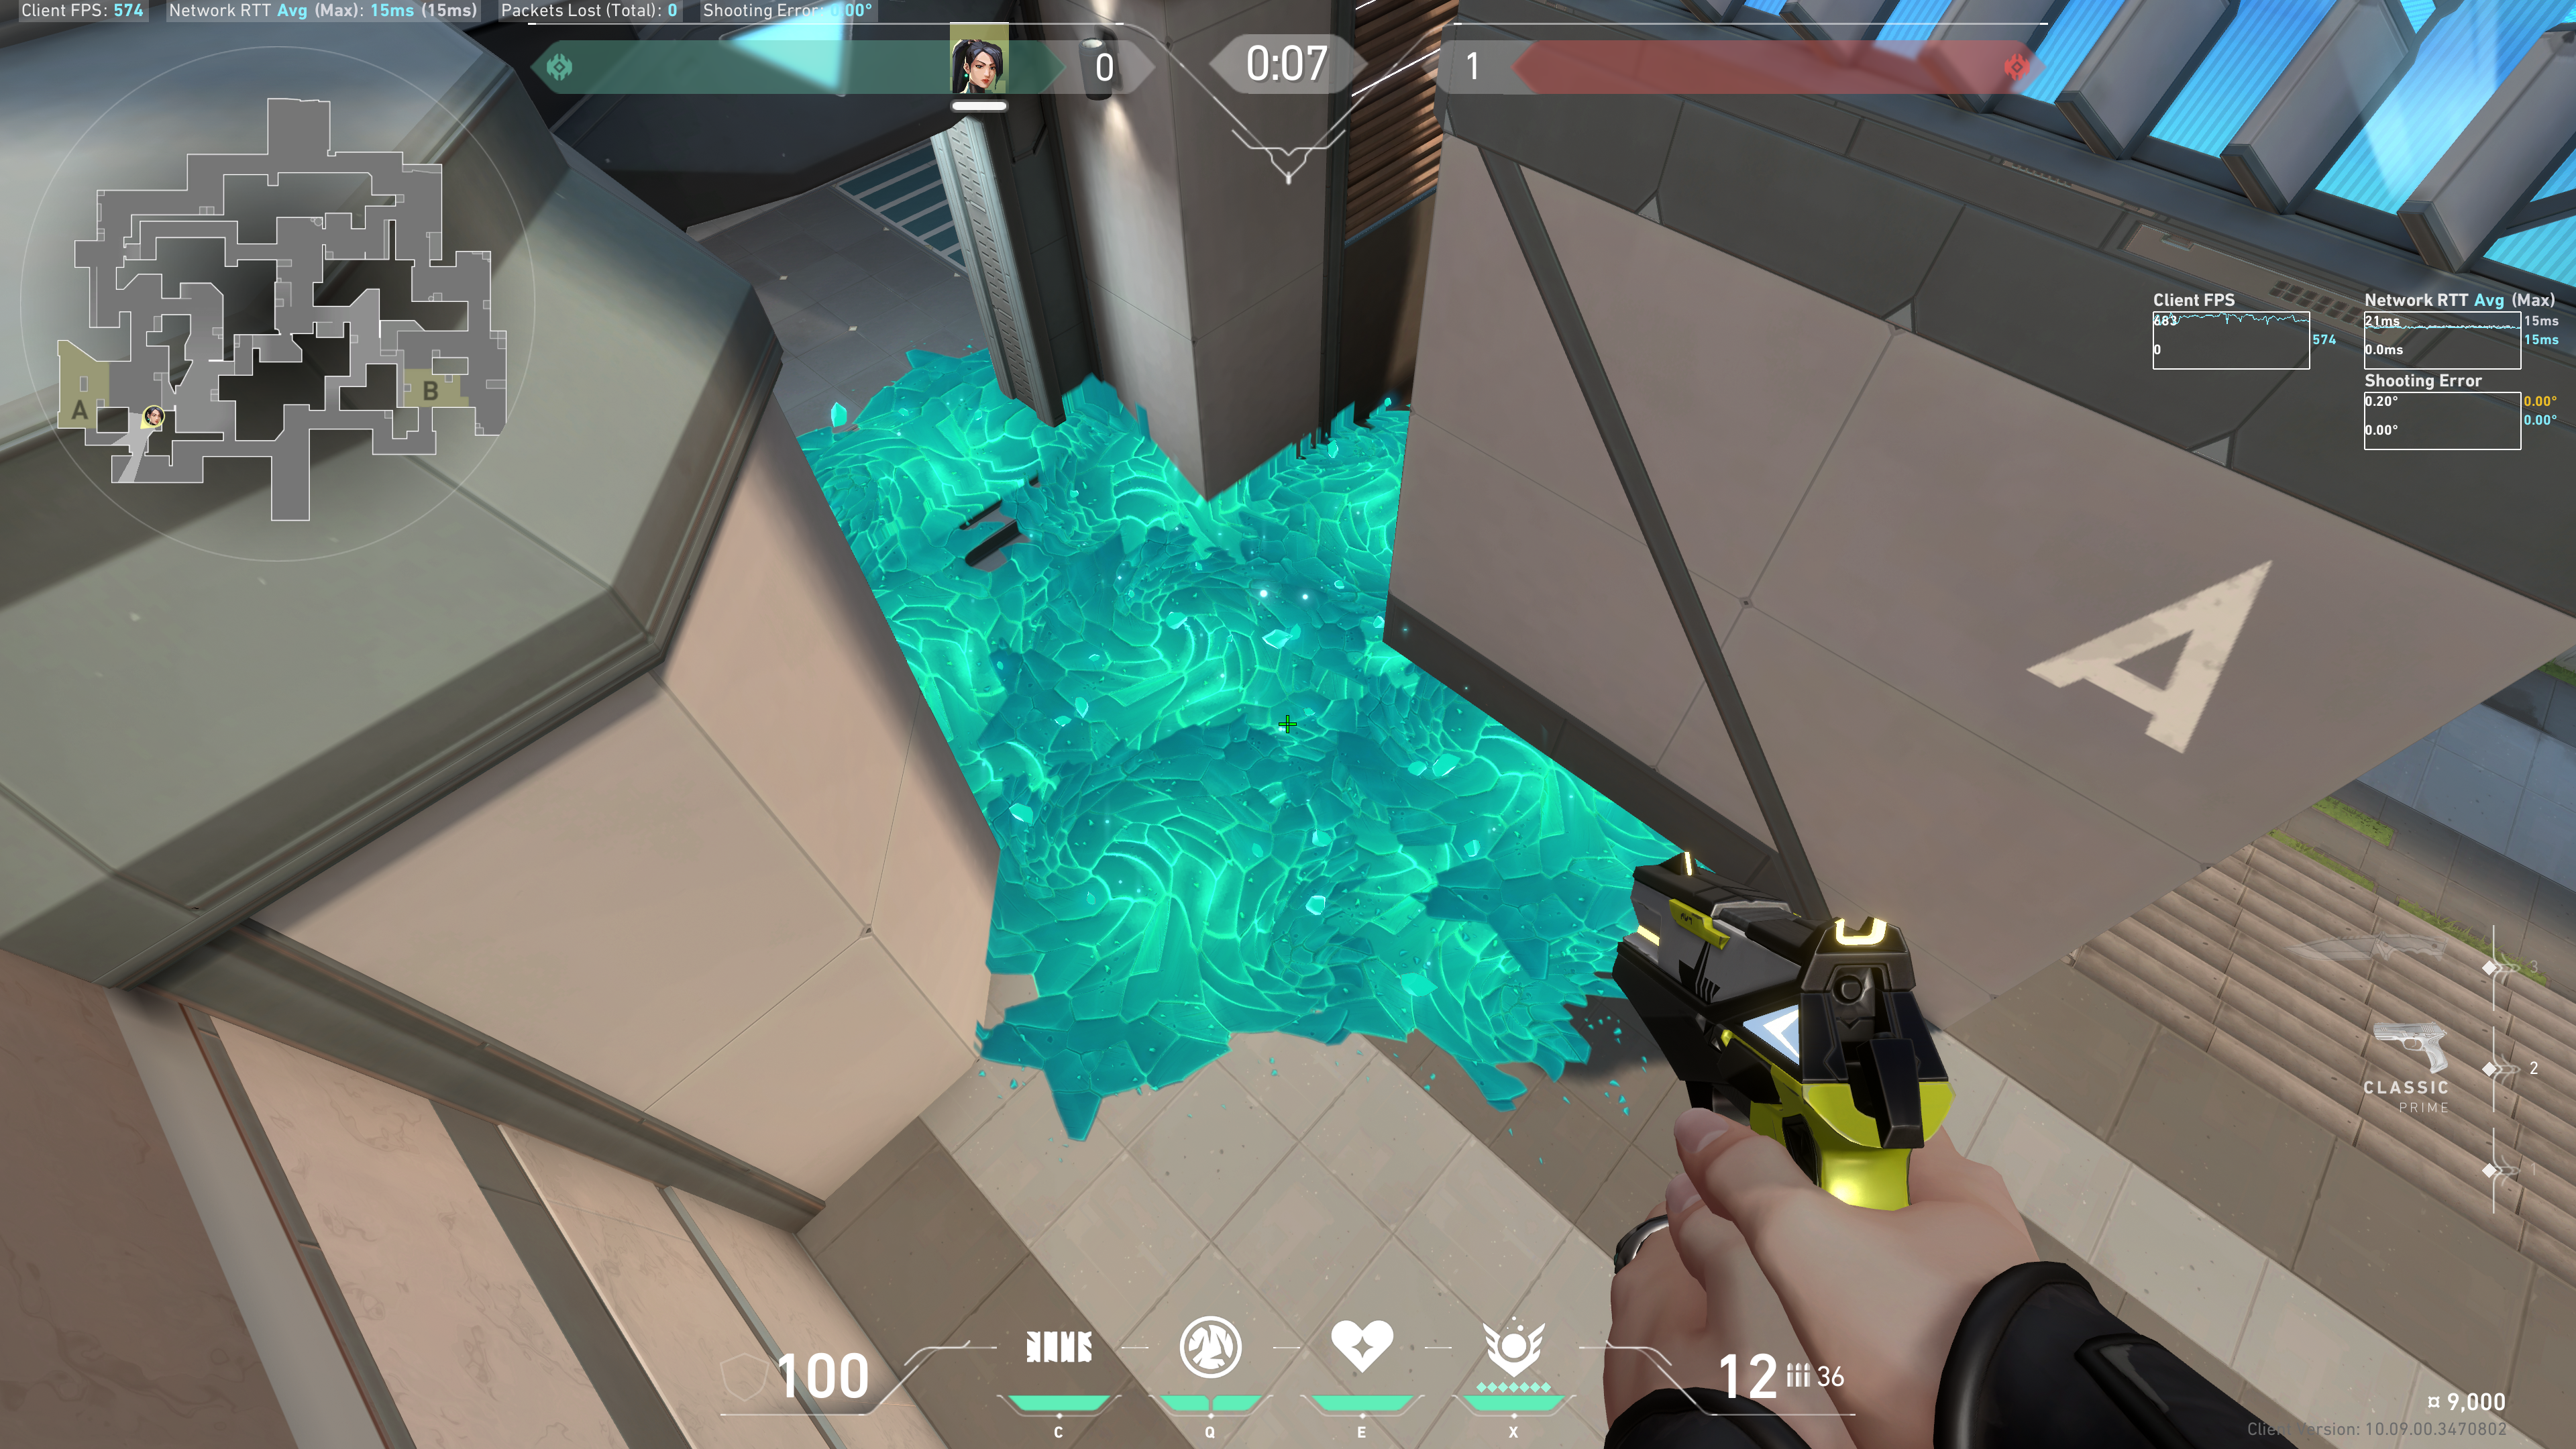
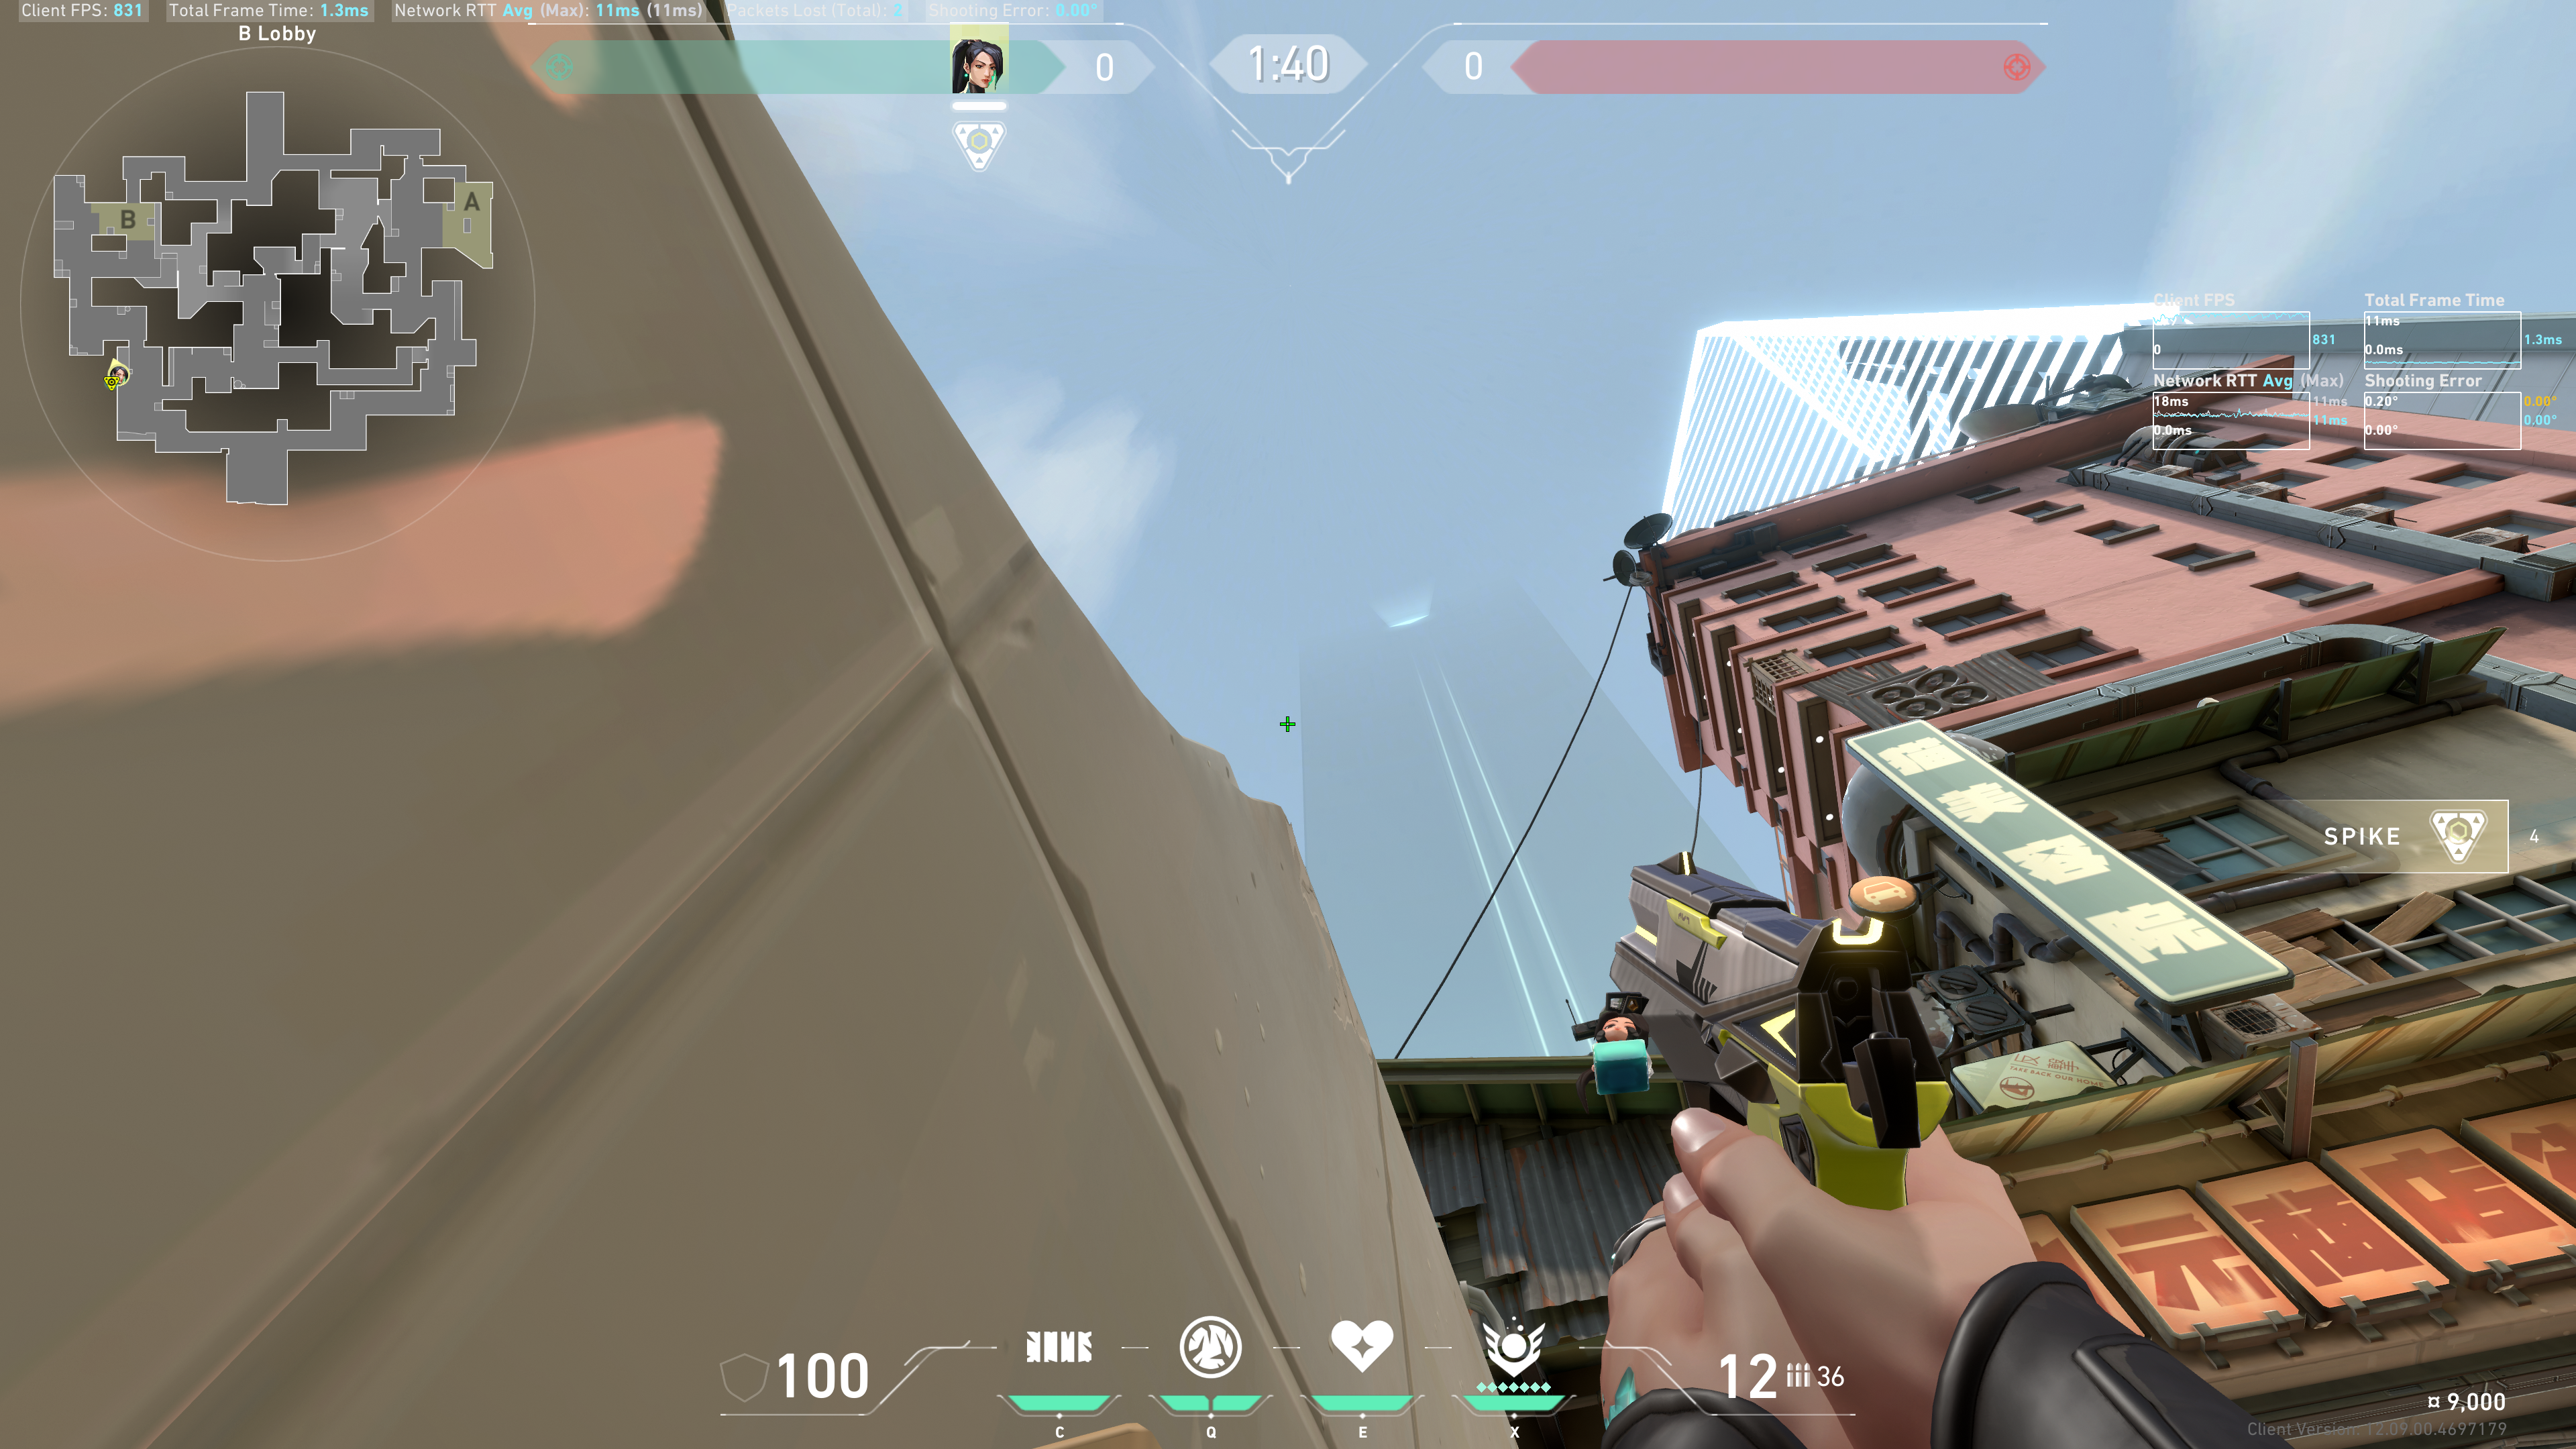
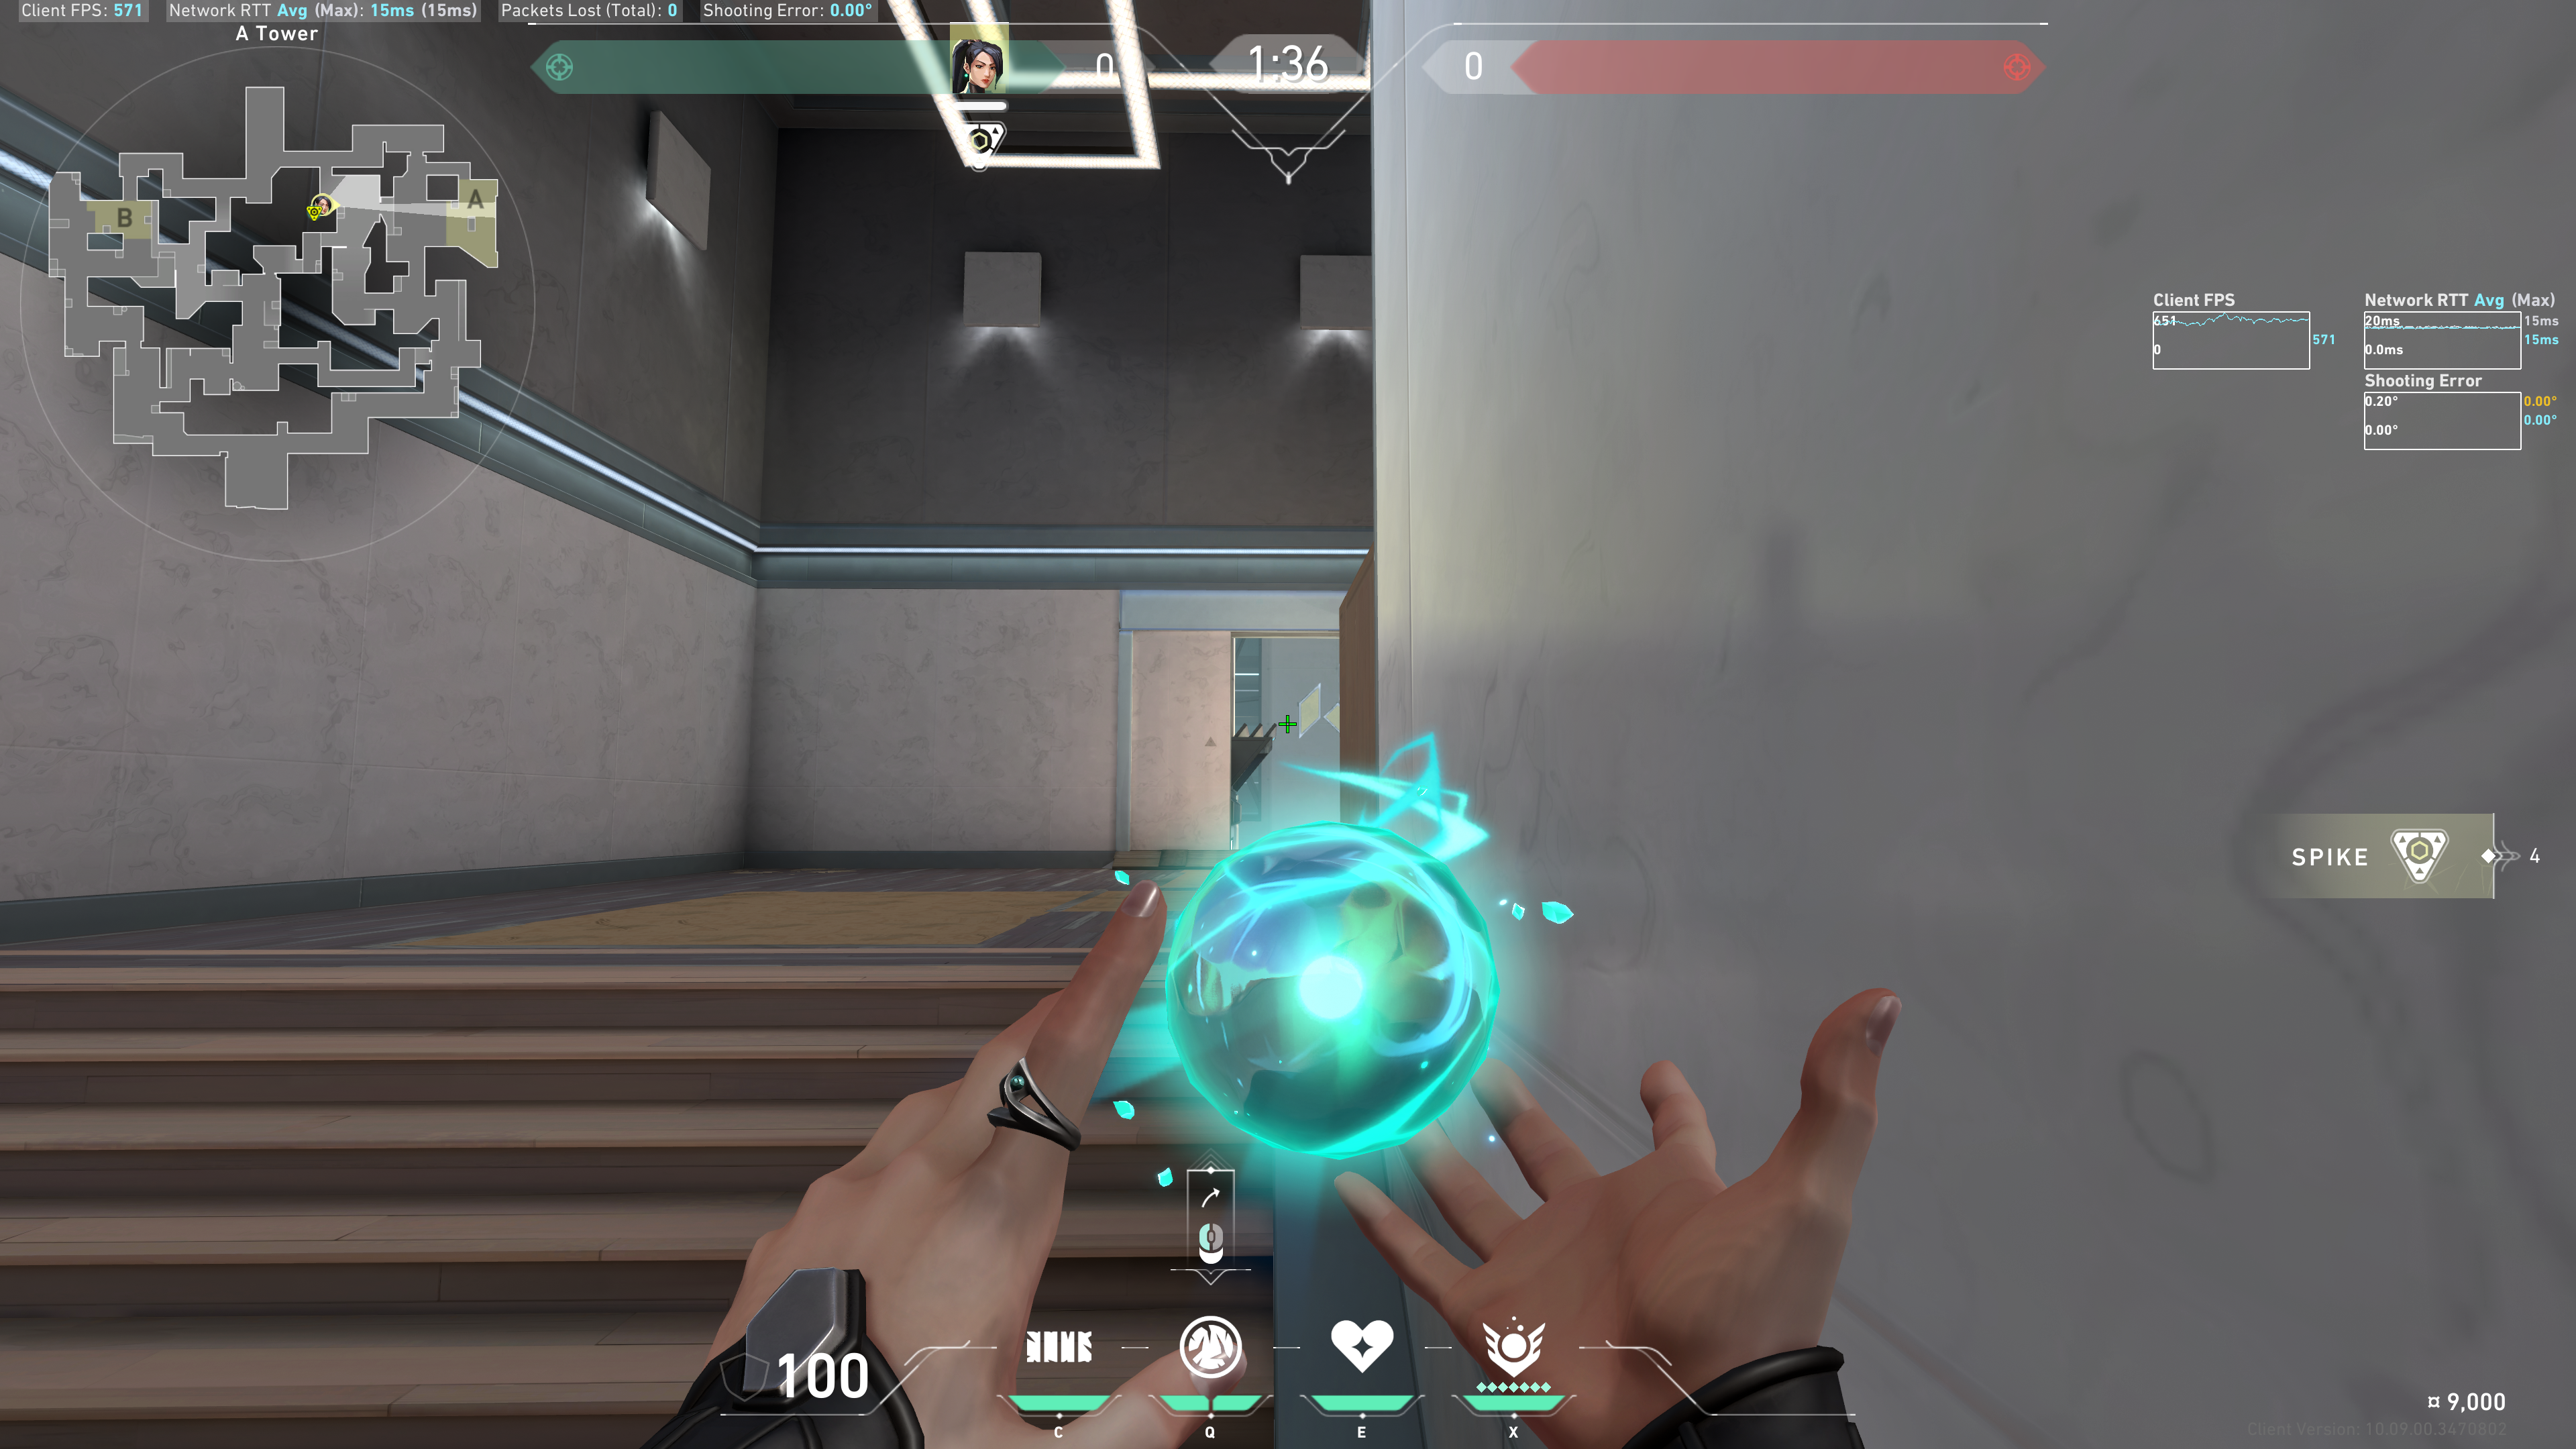
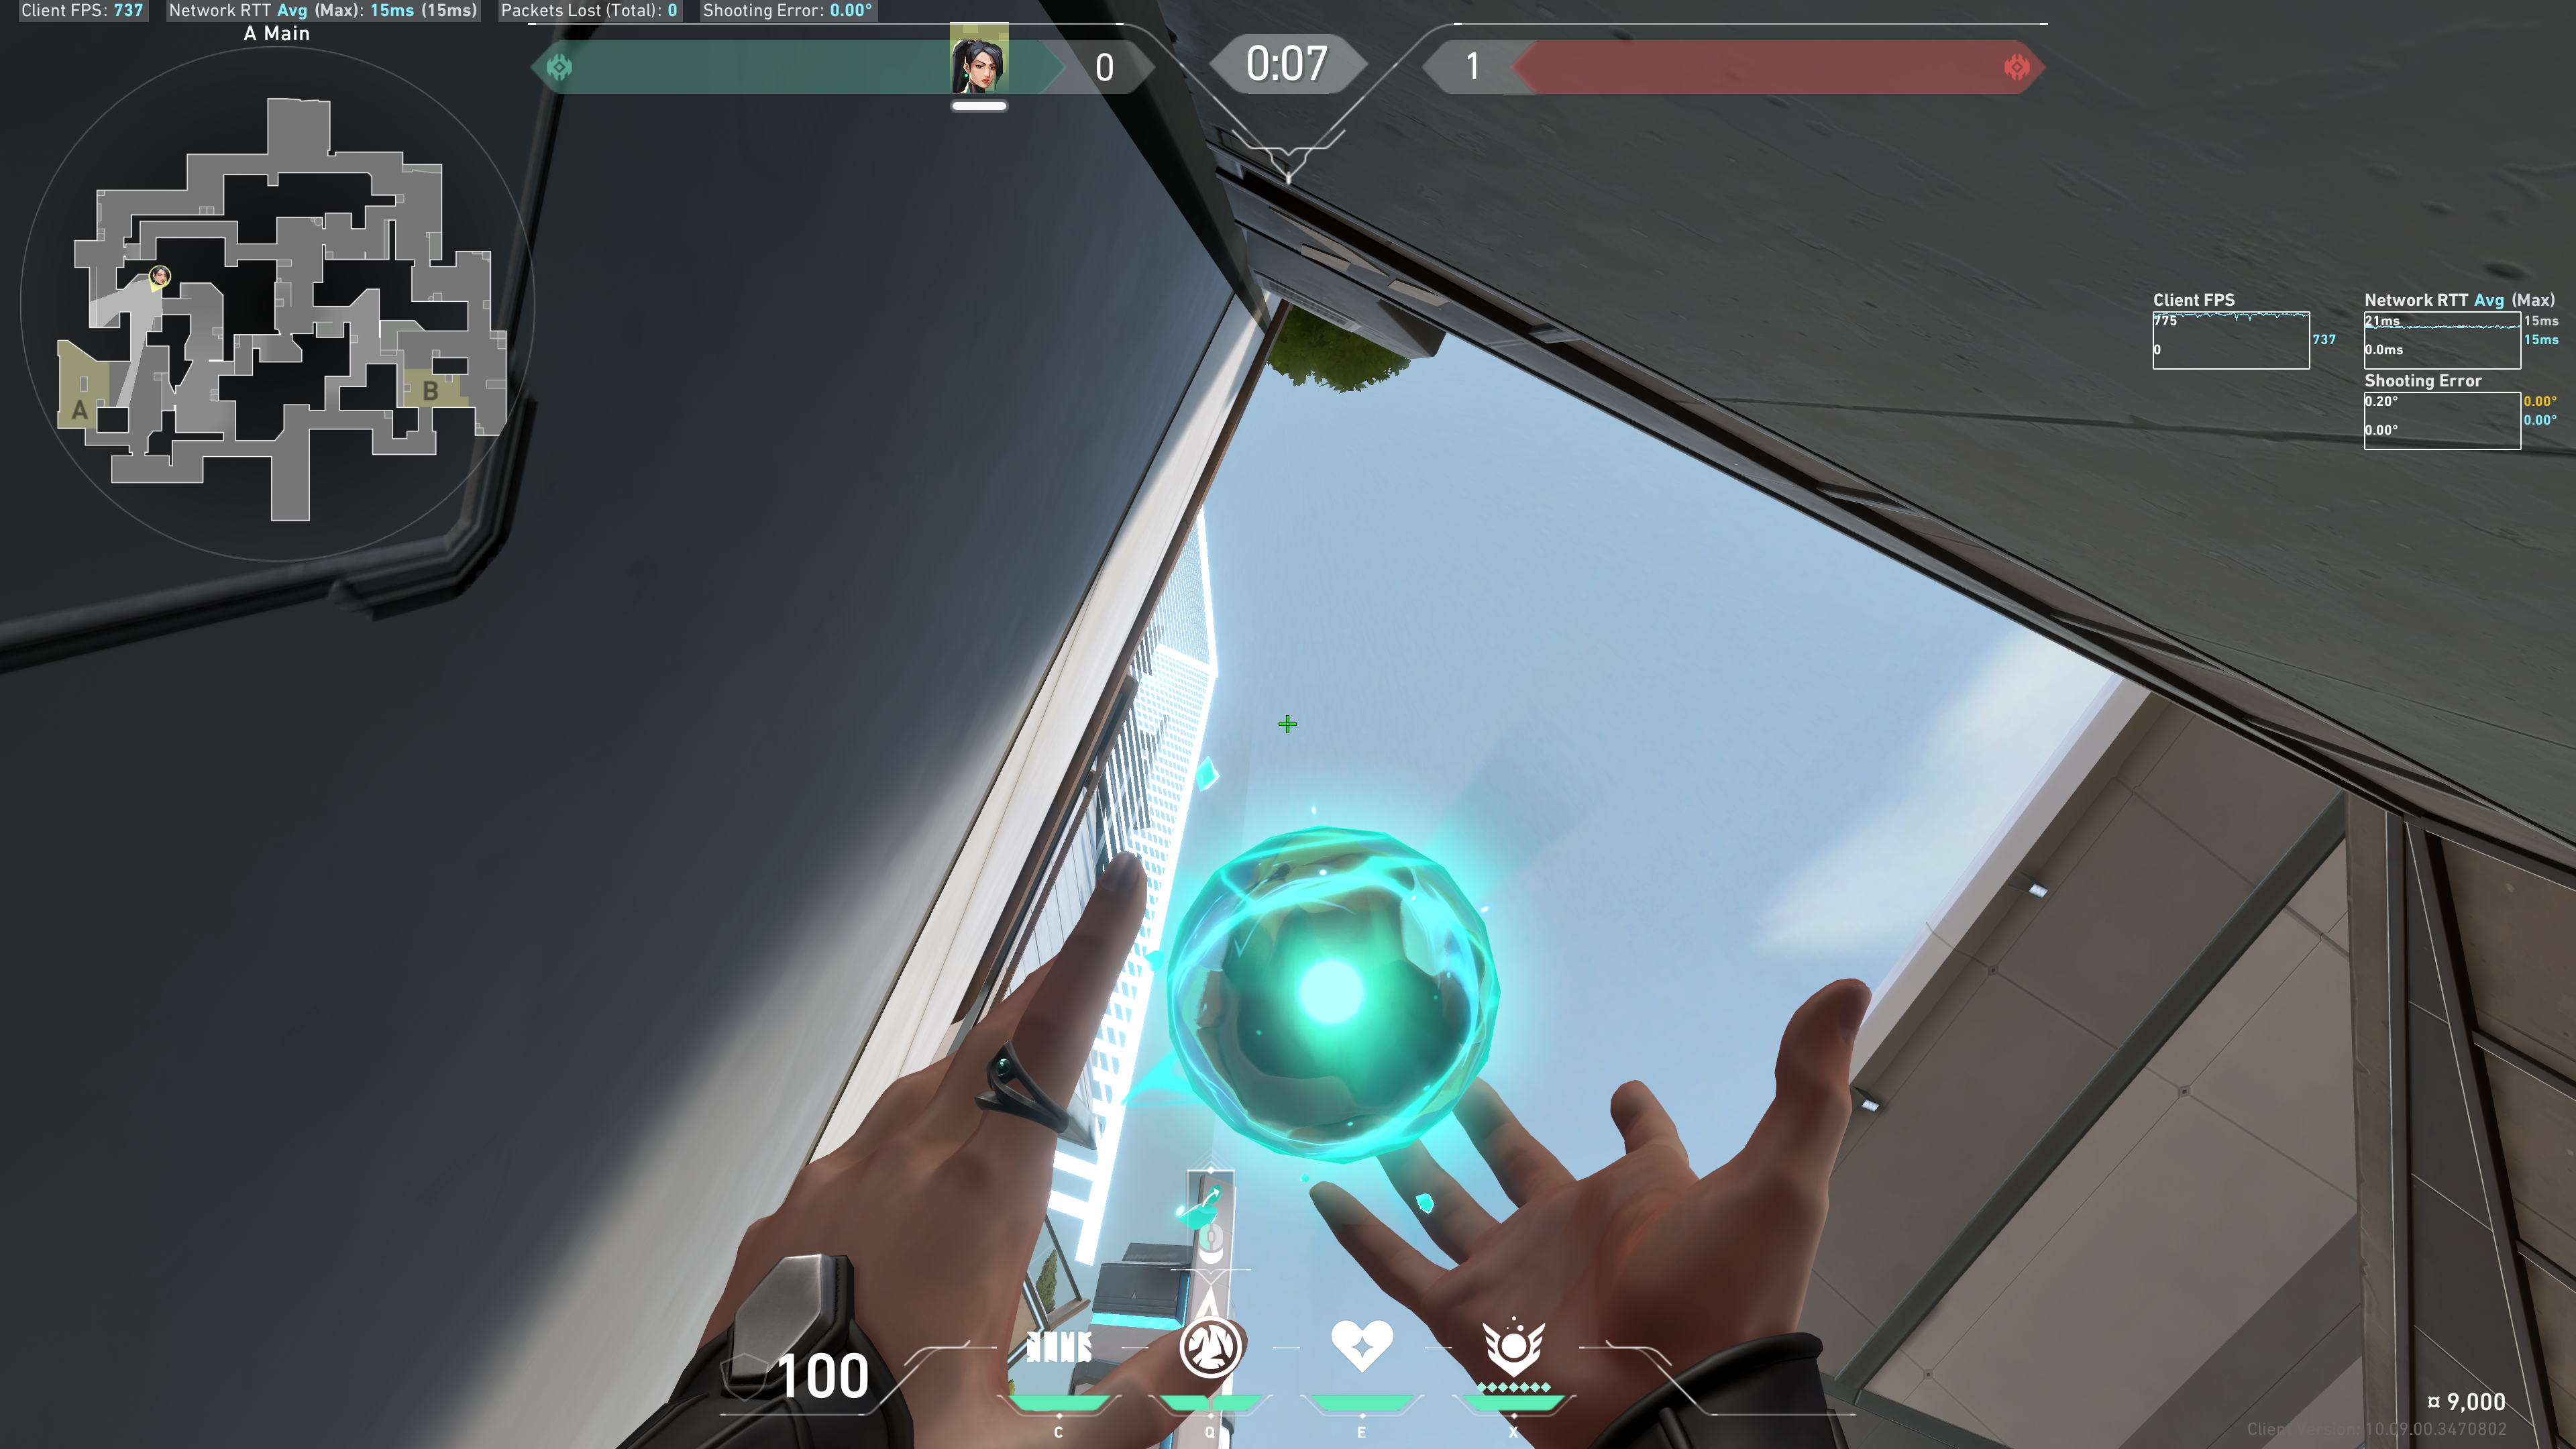
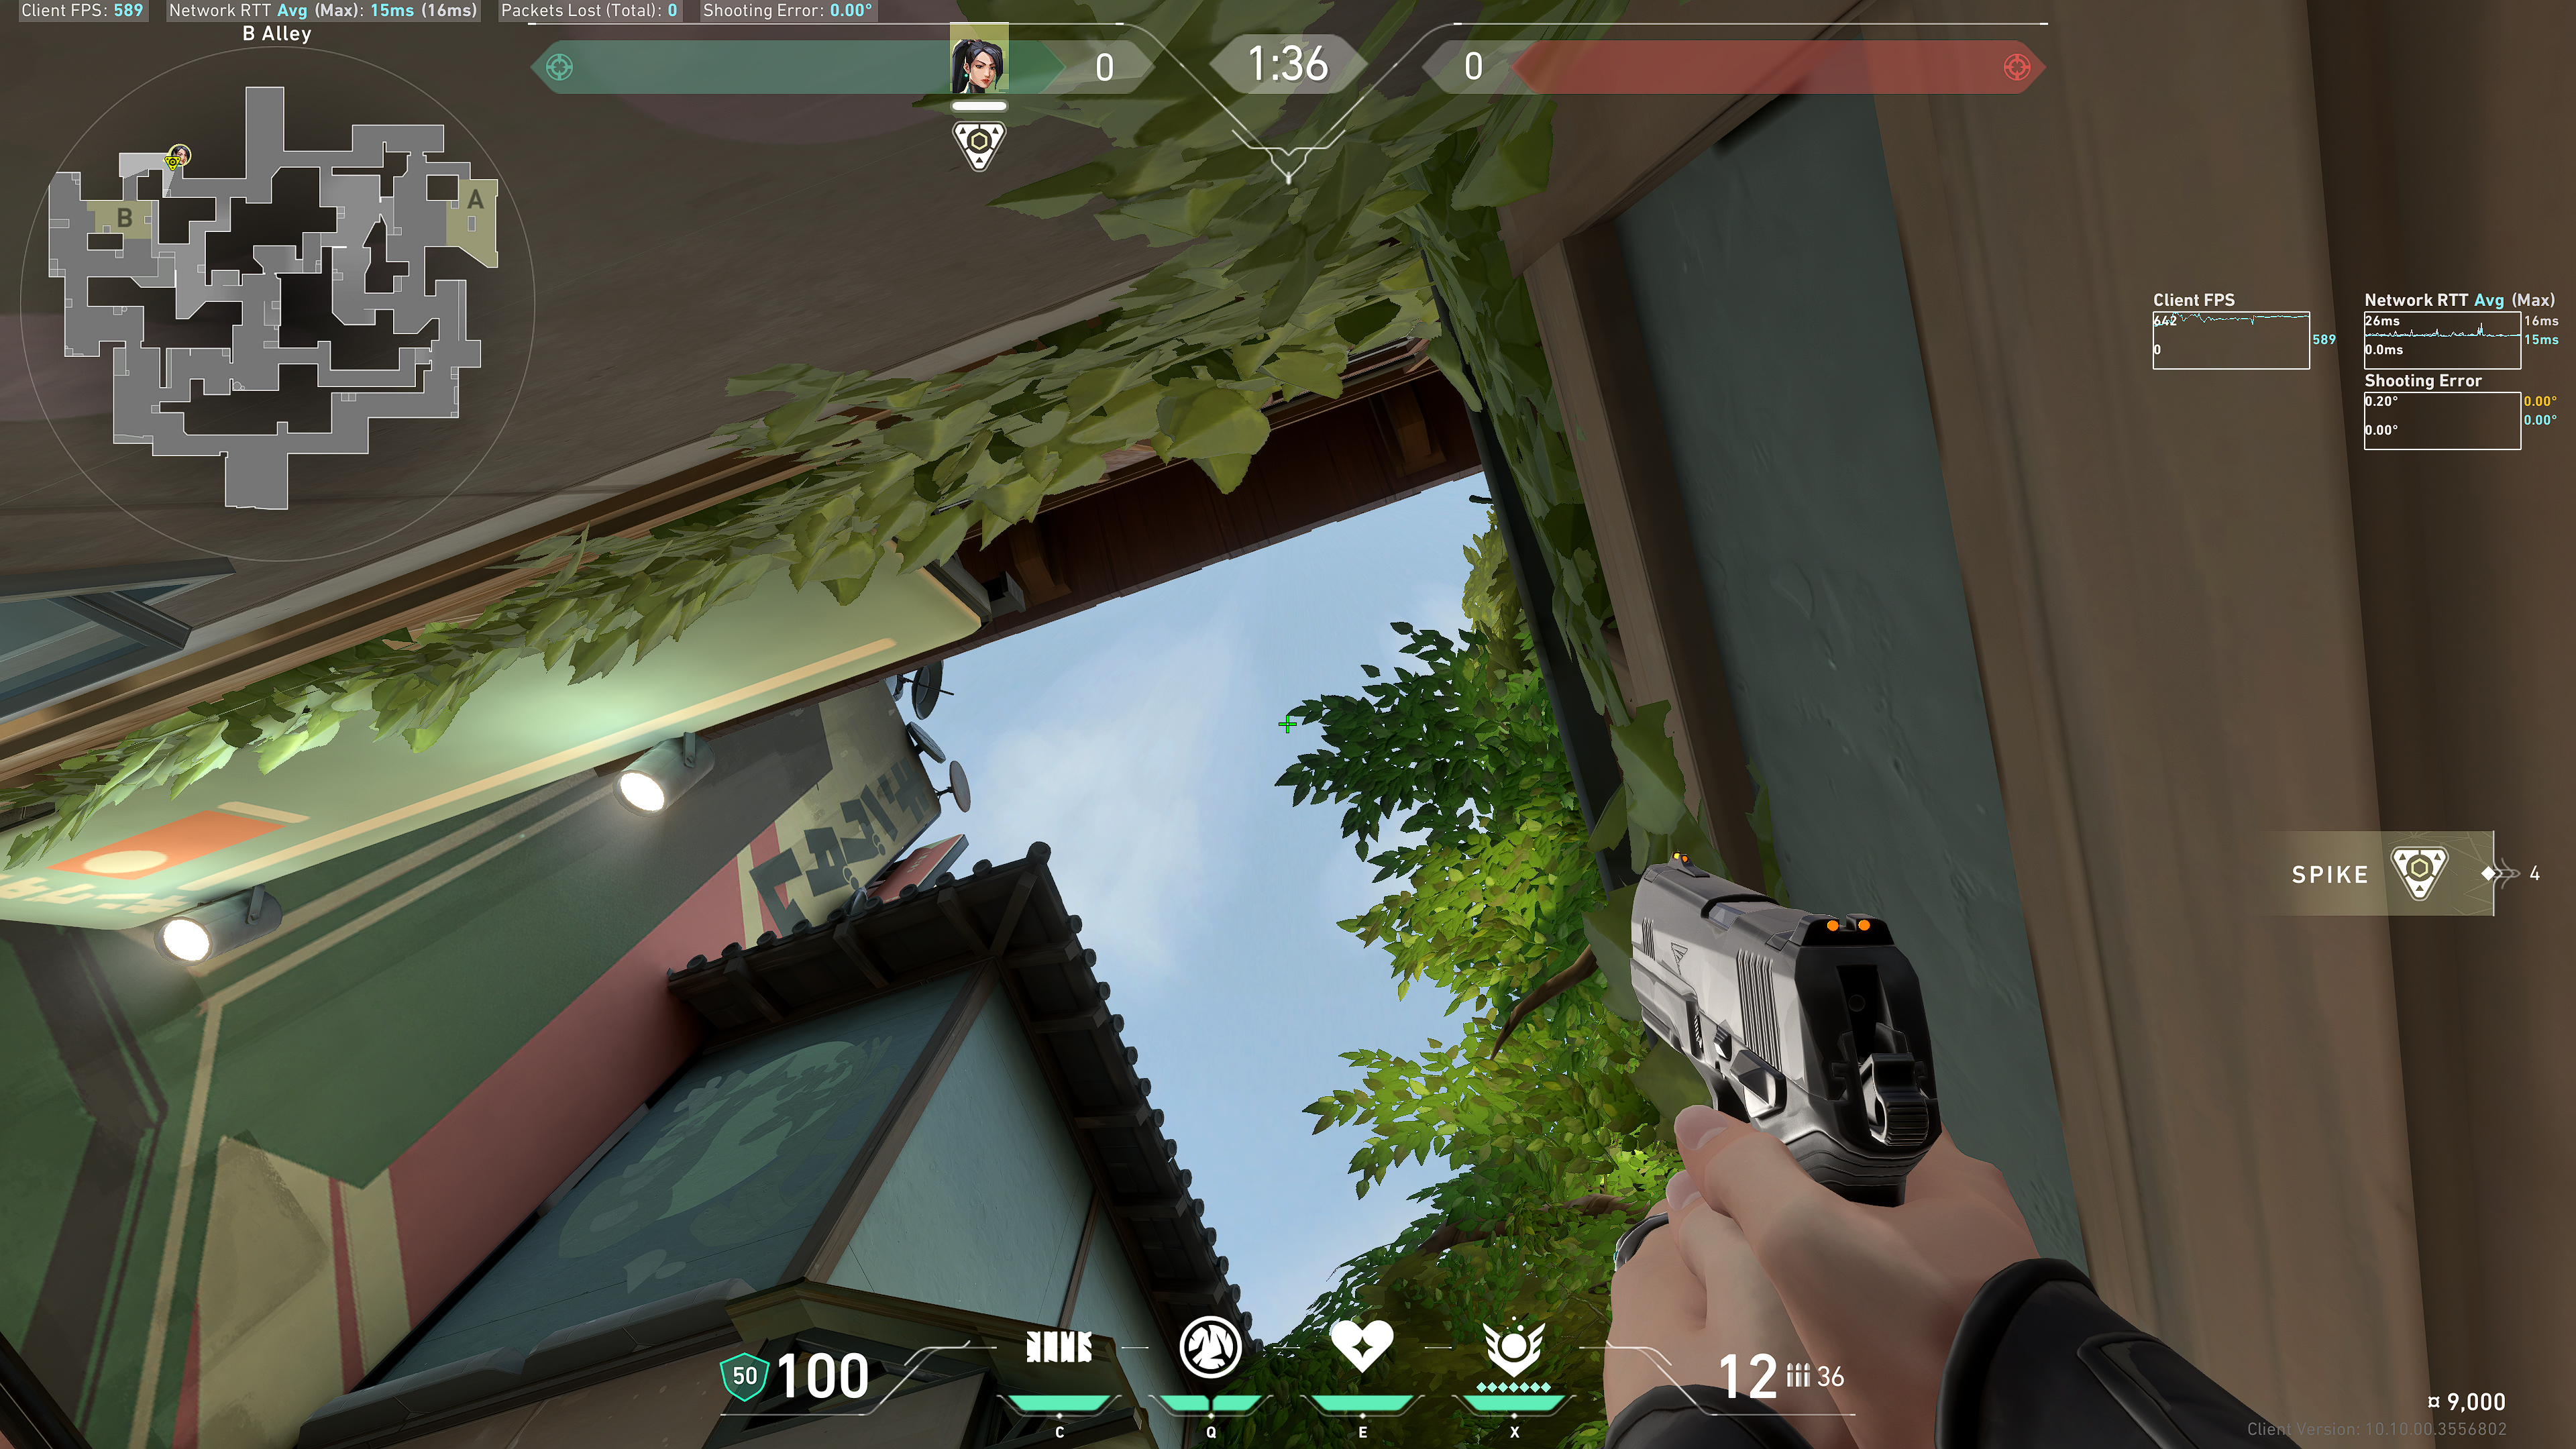
Tuck here:
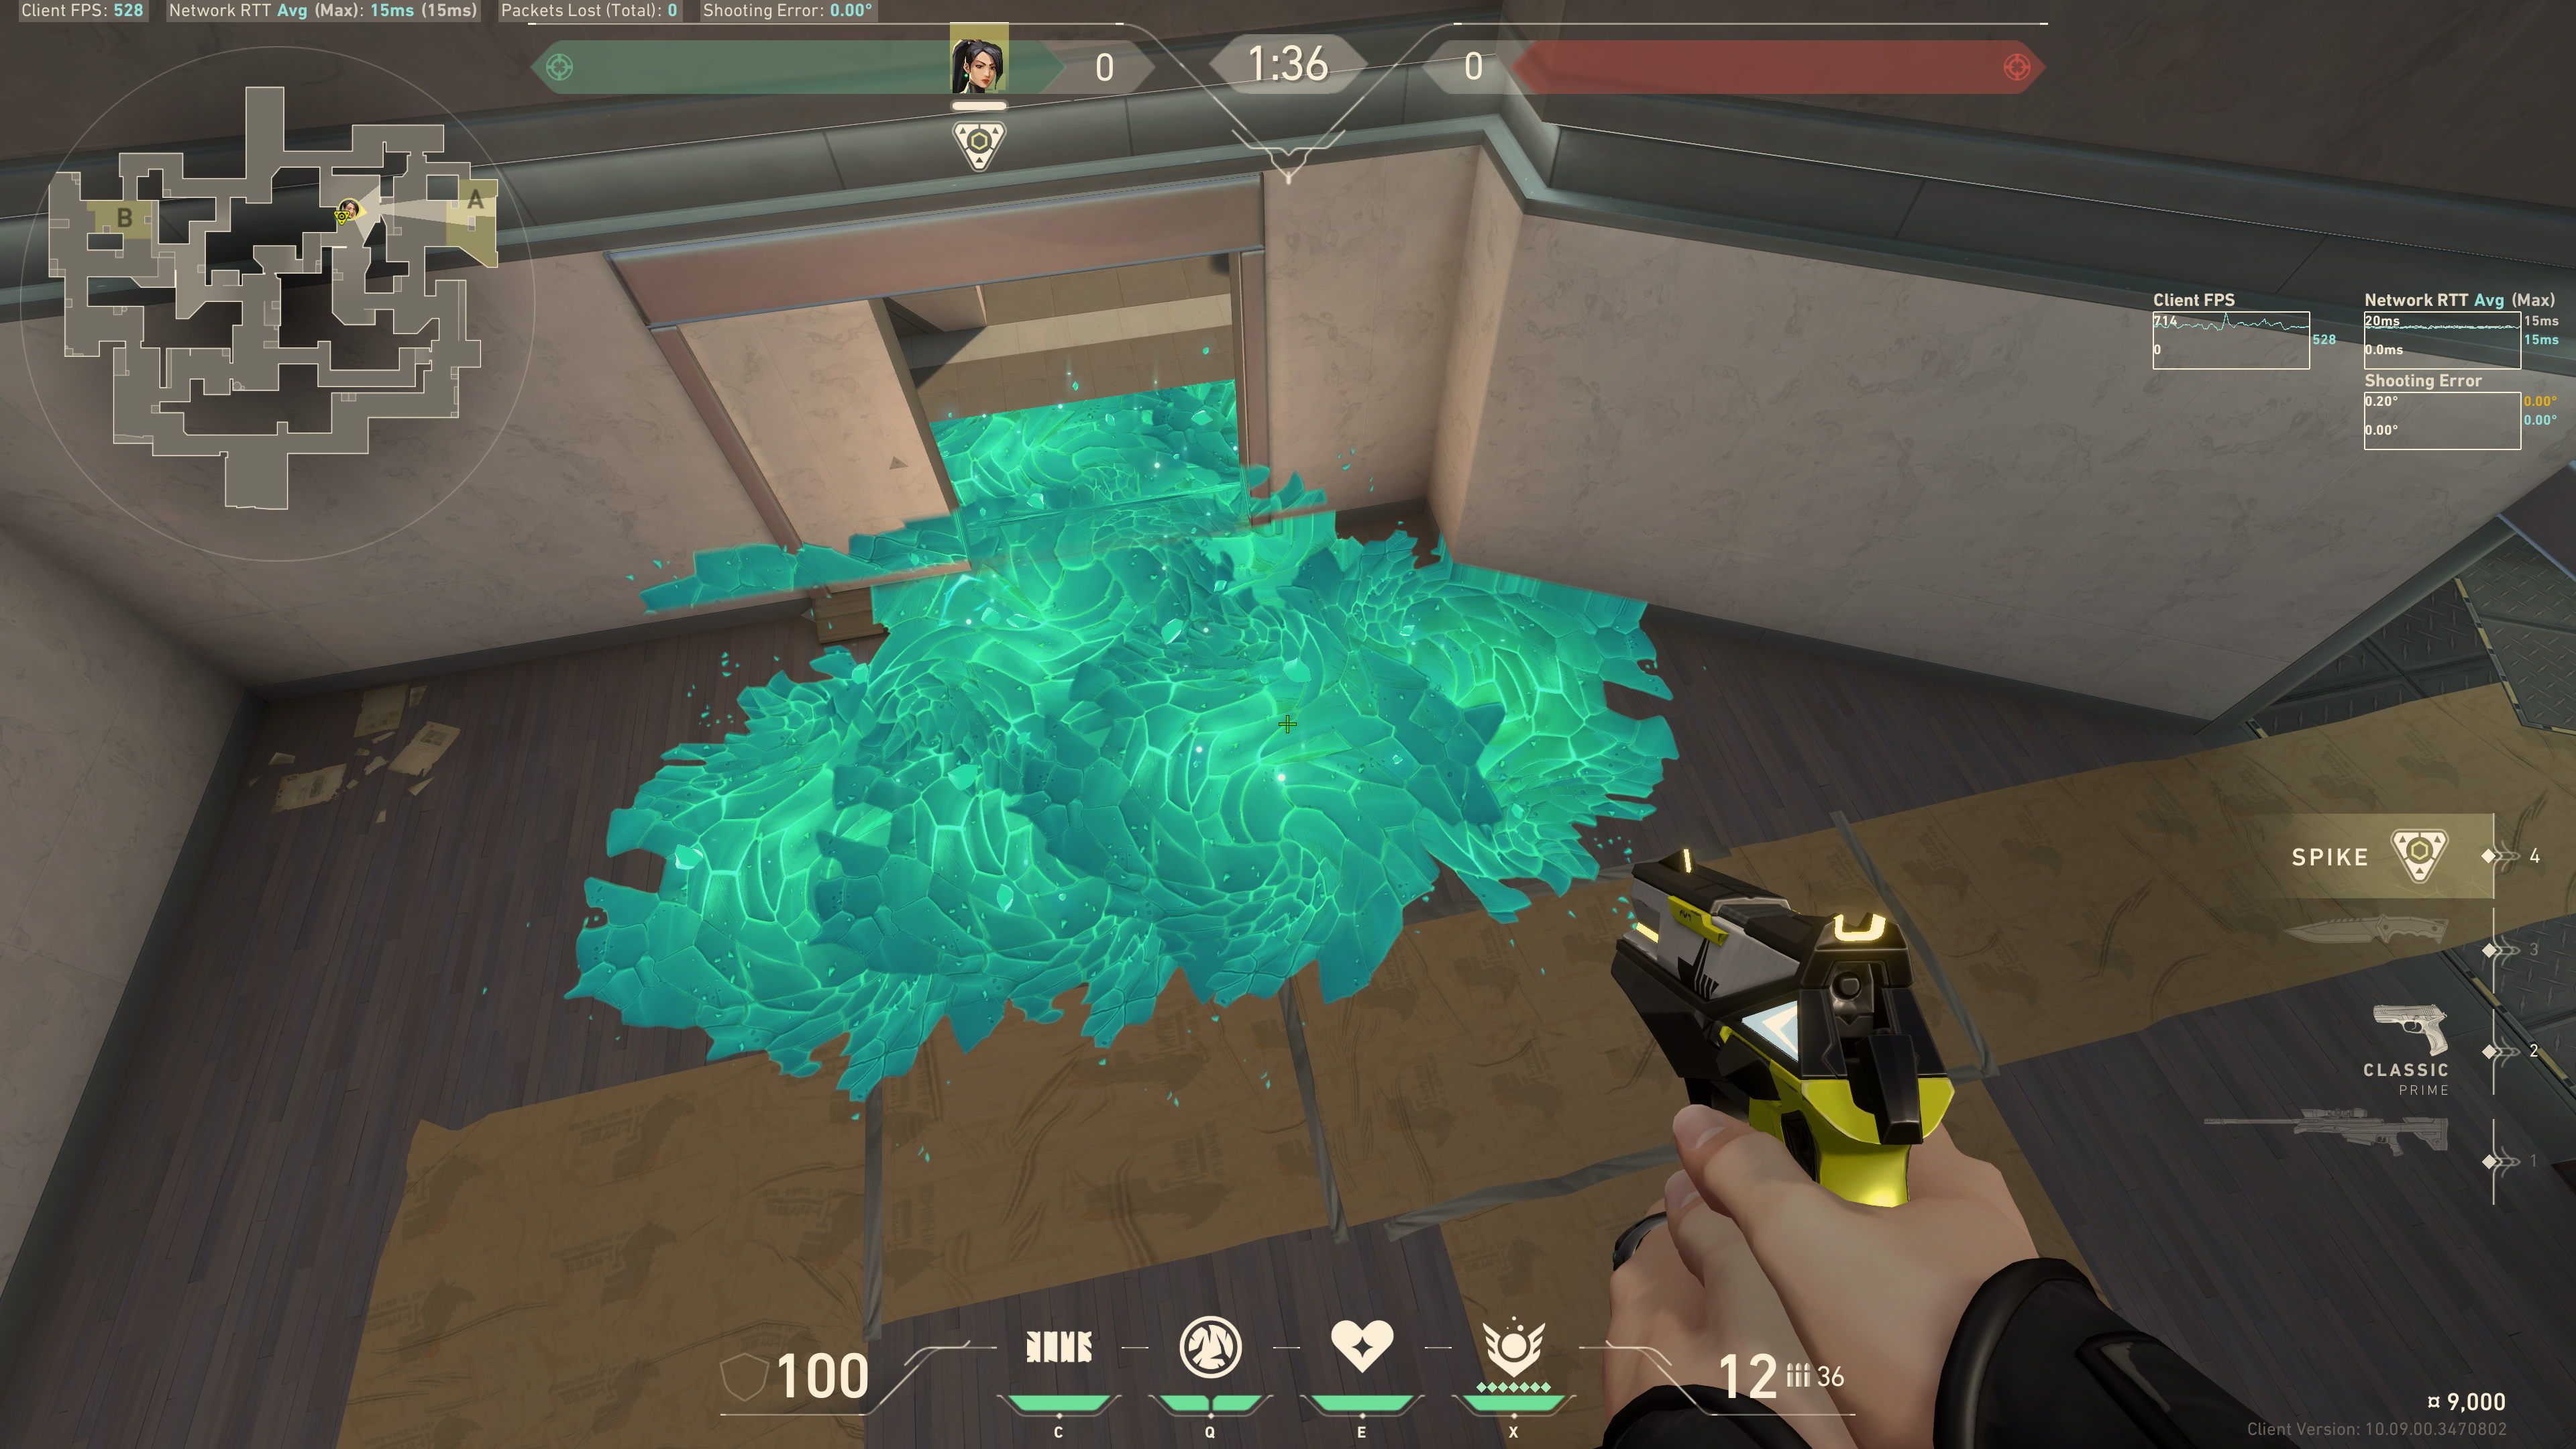
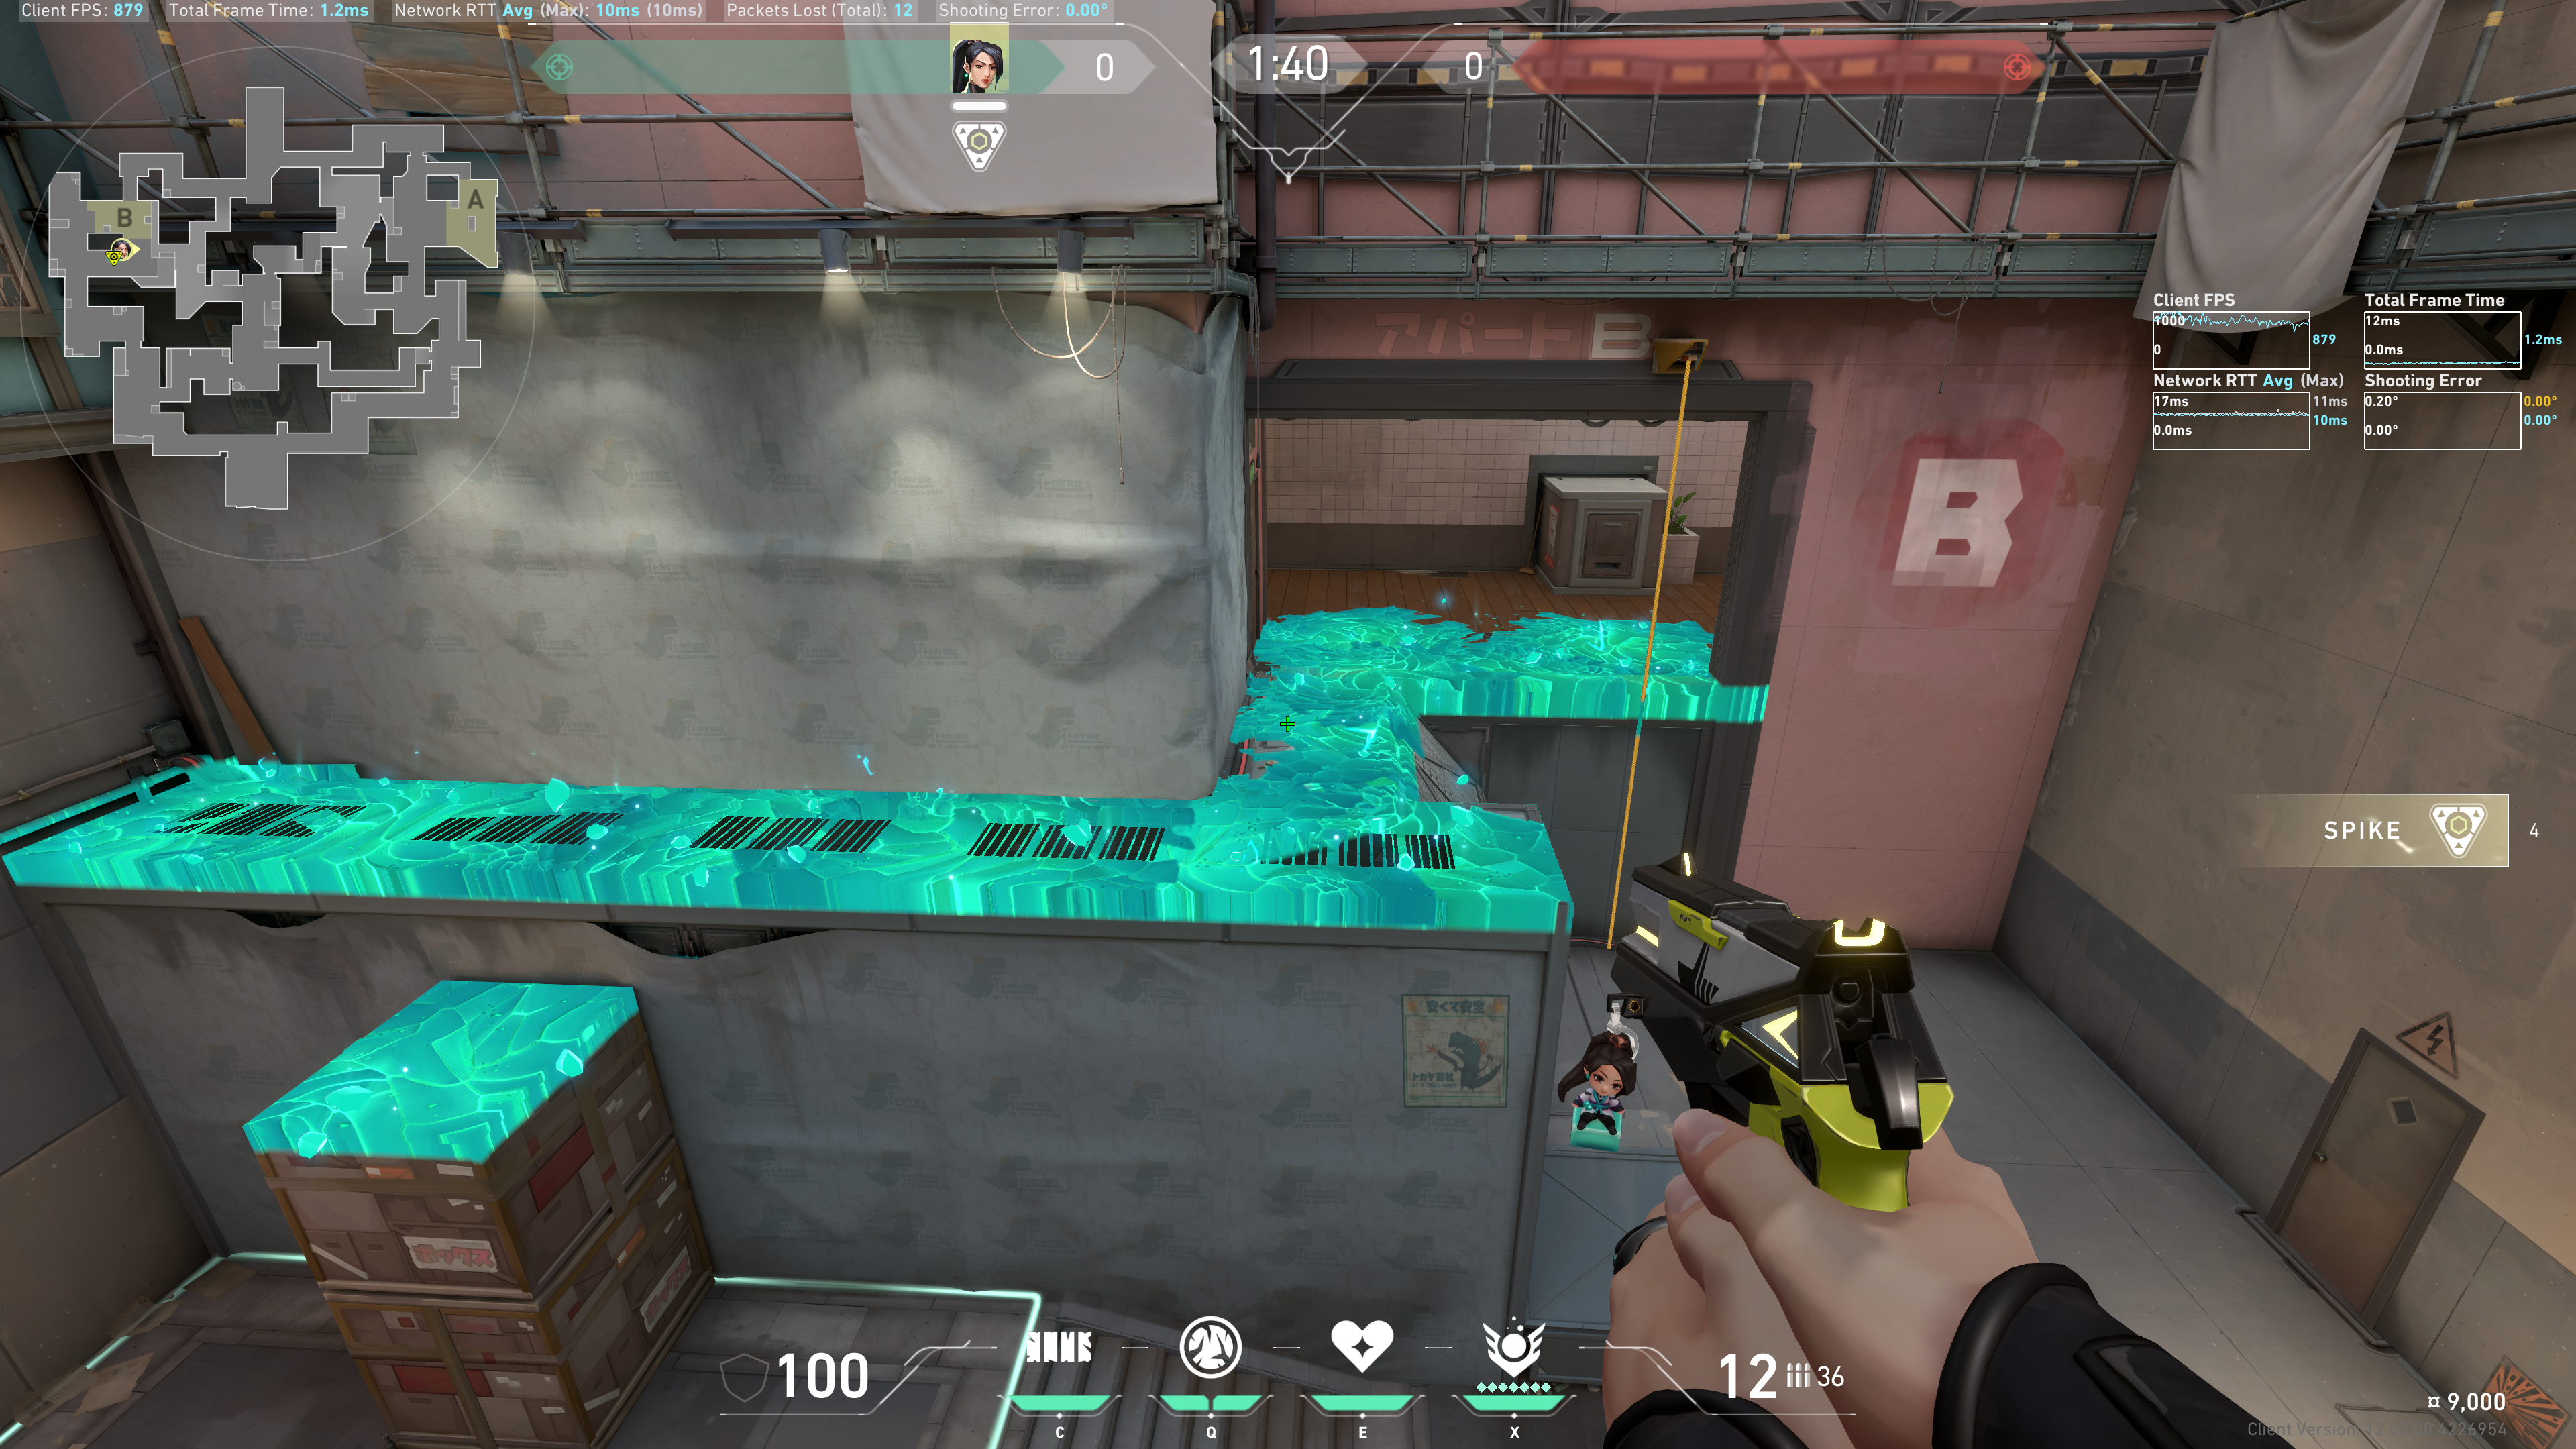
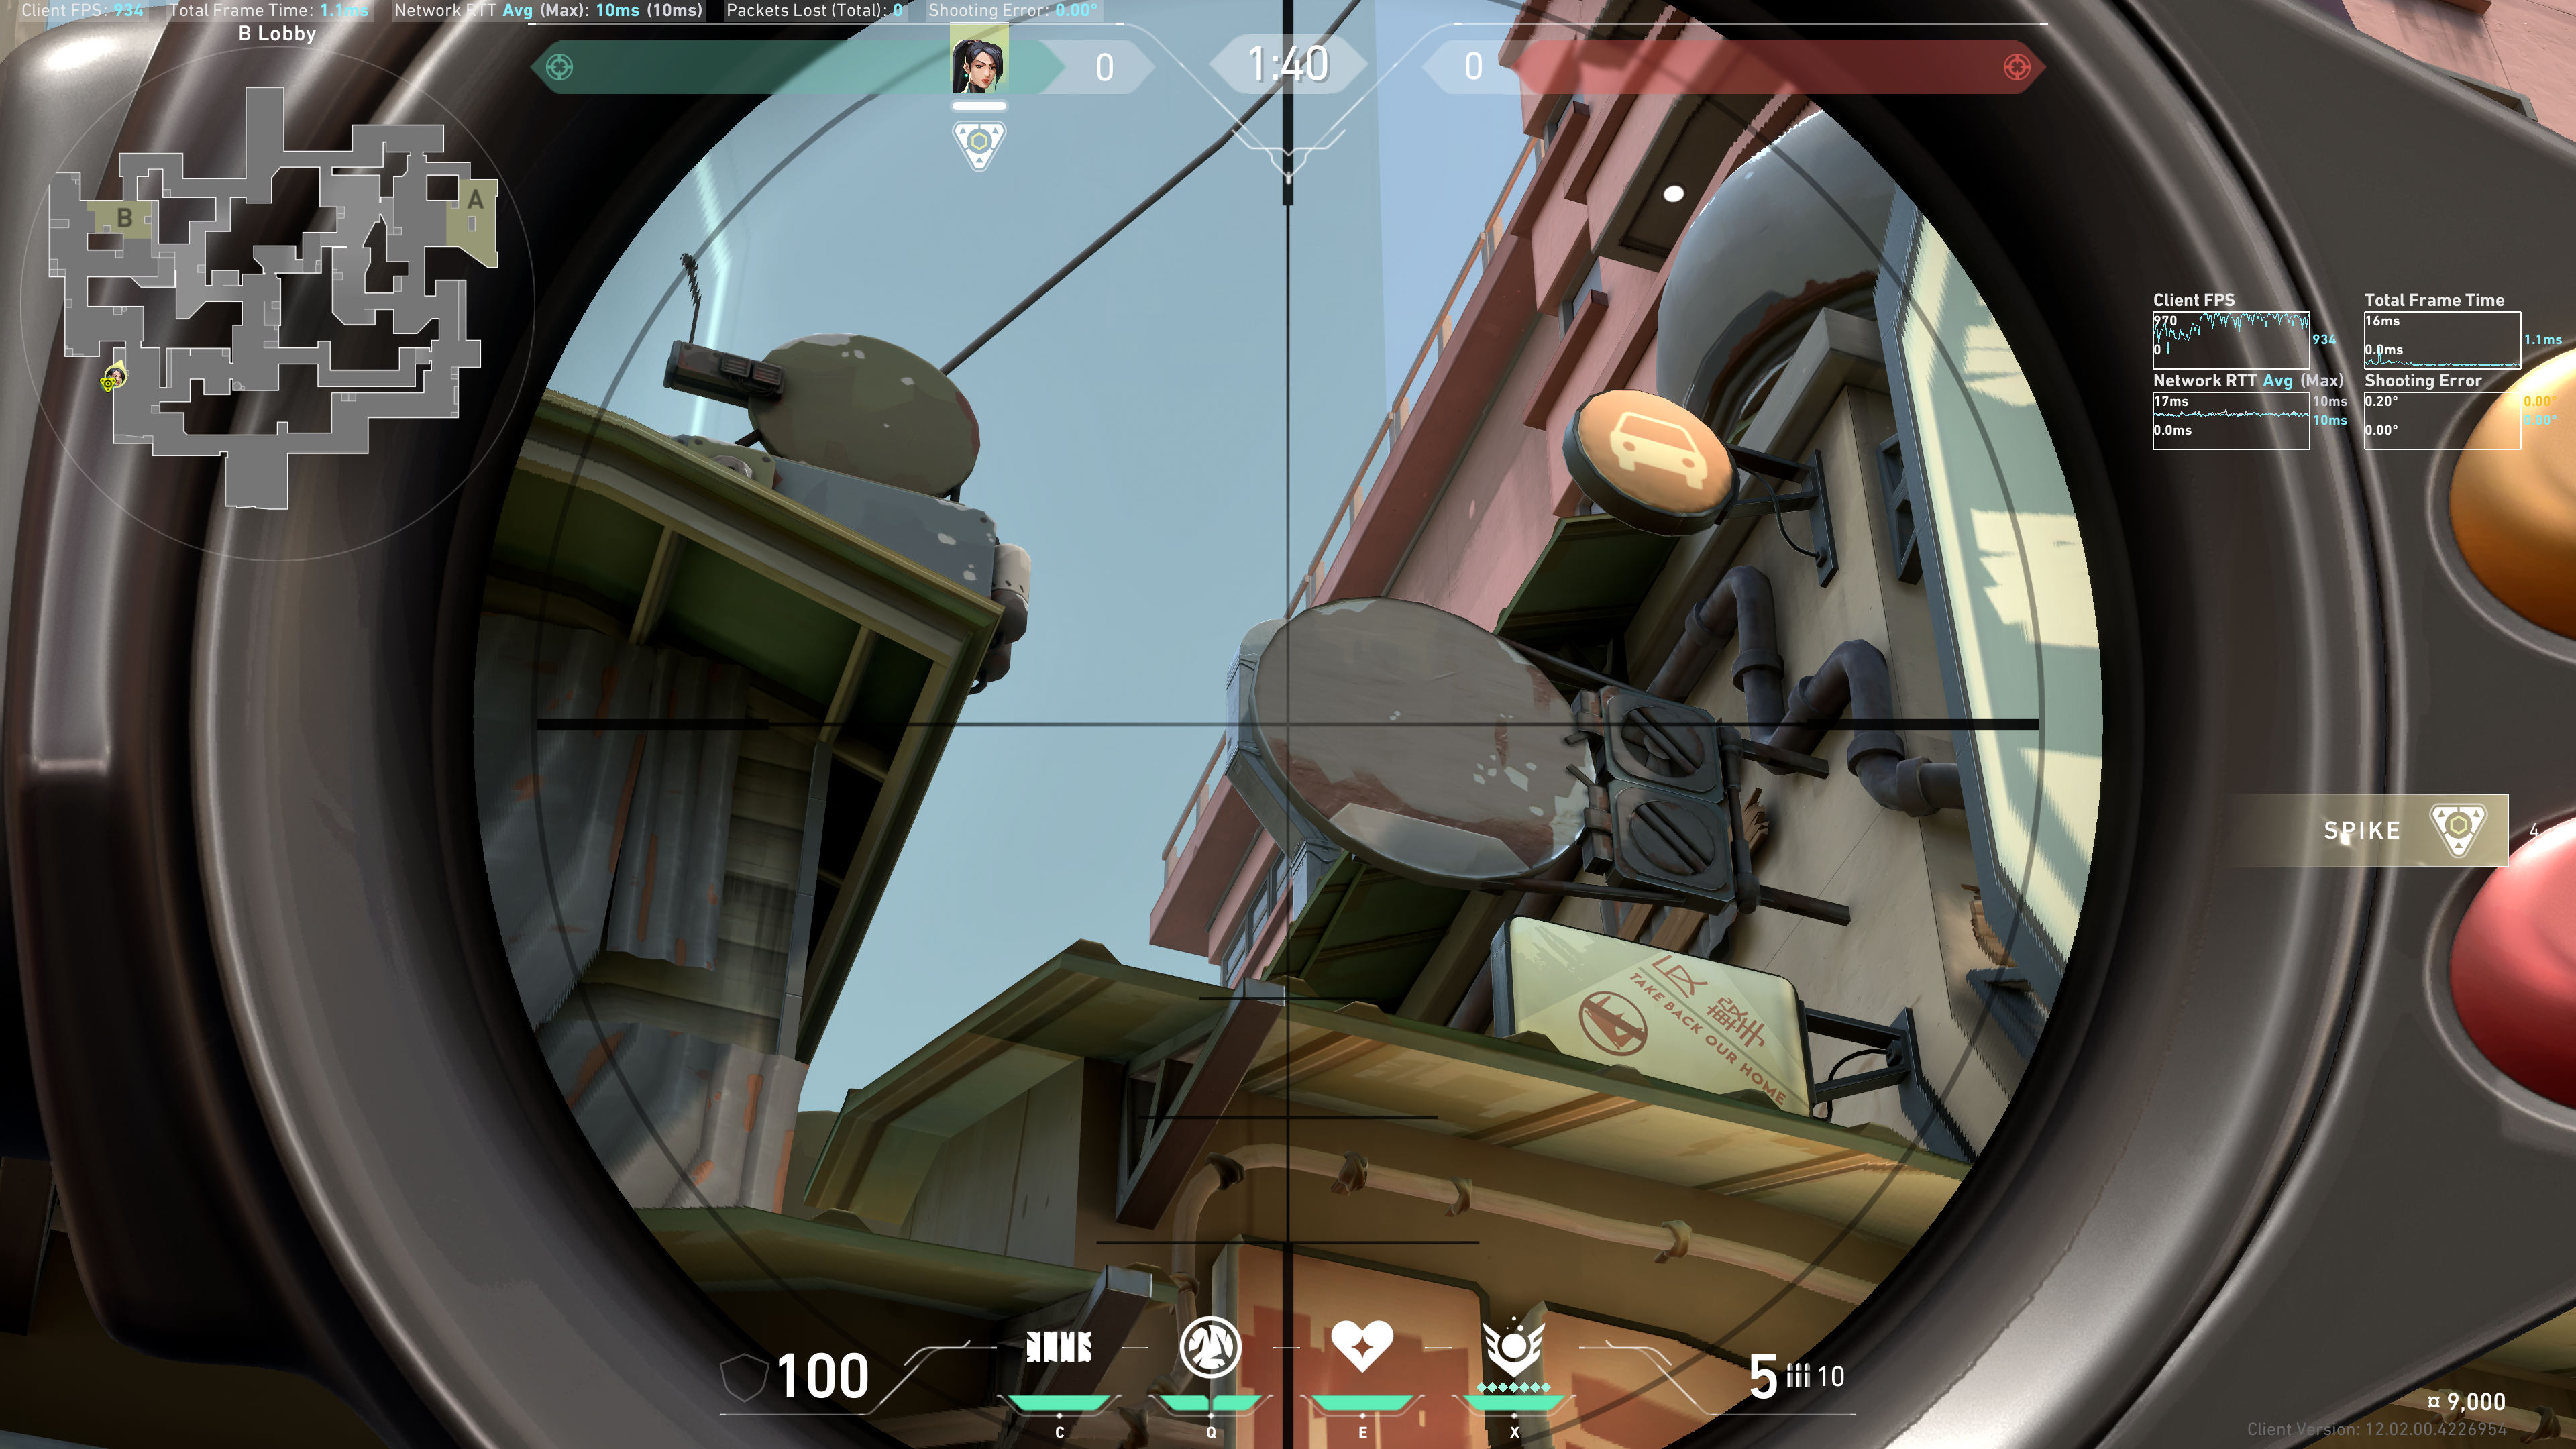
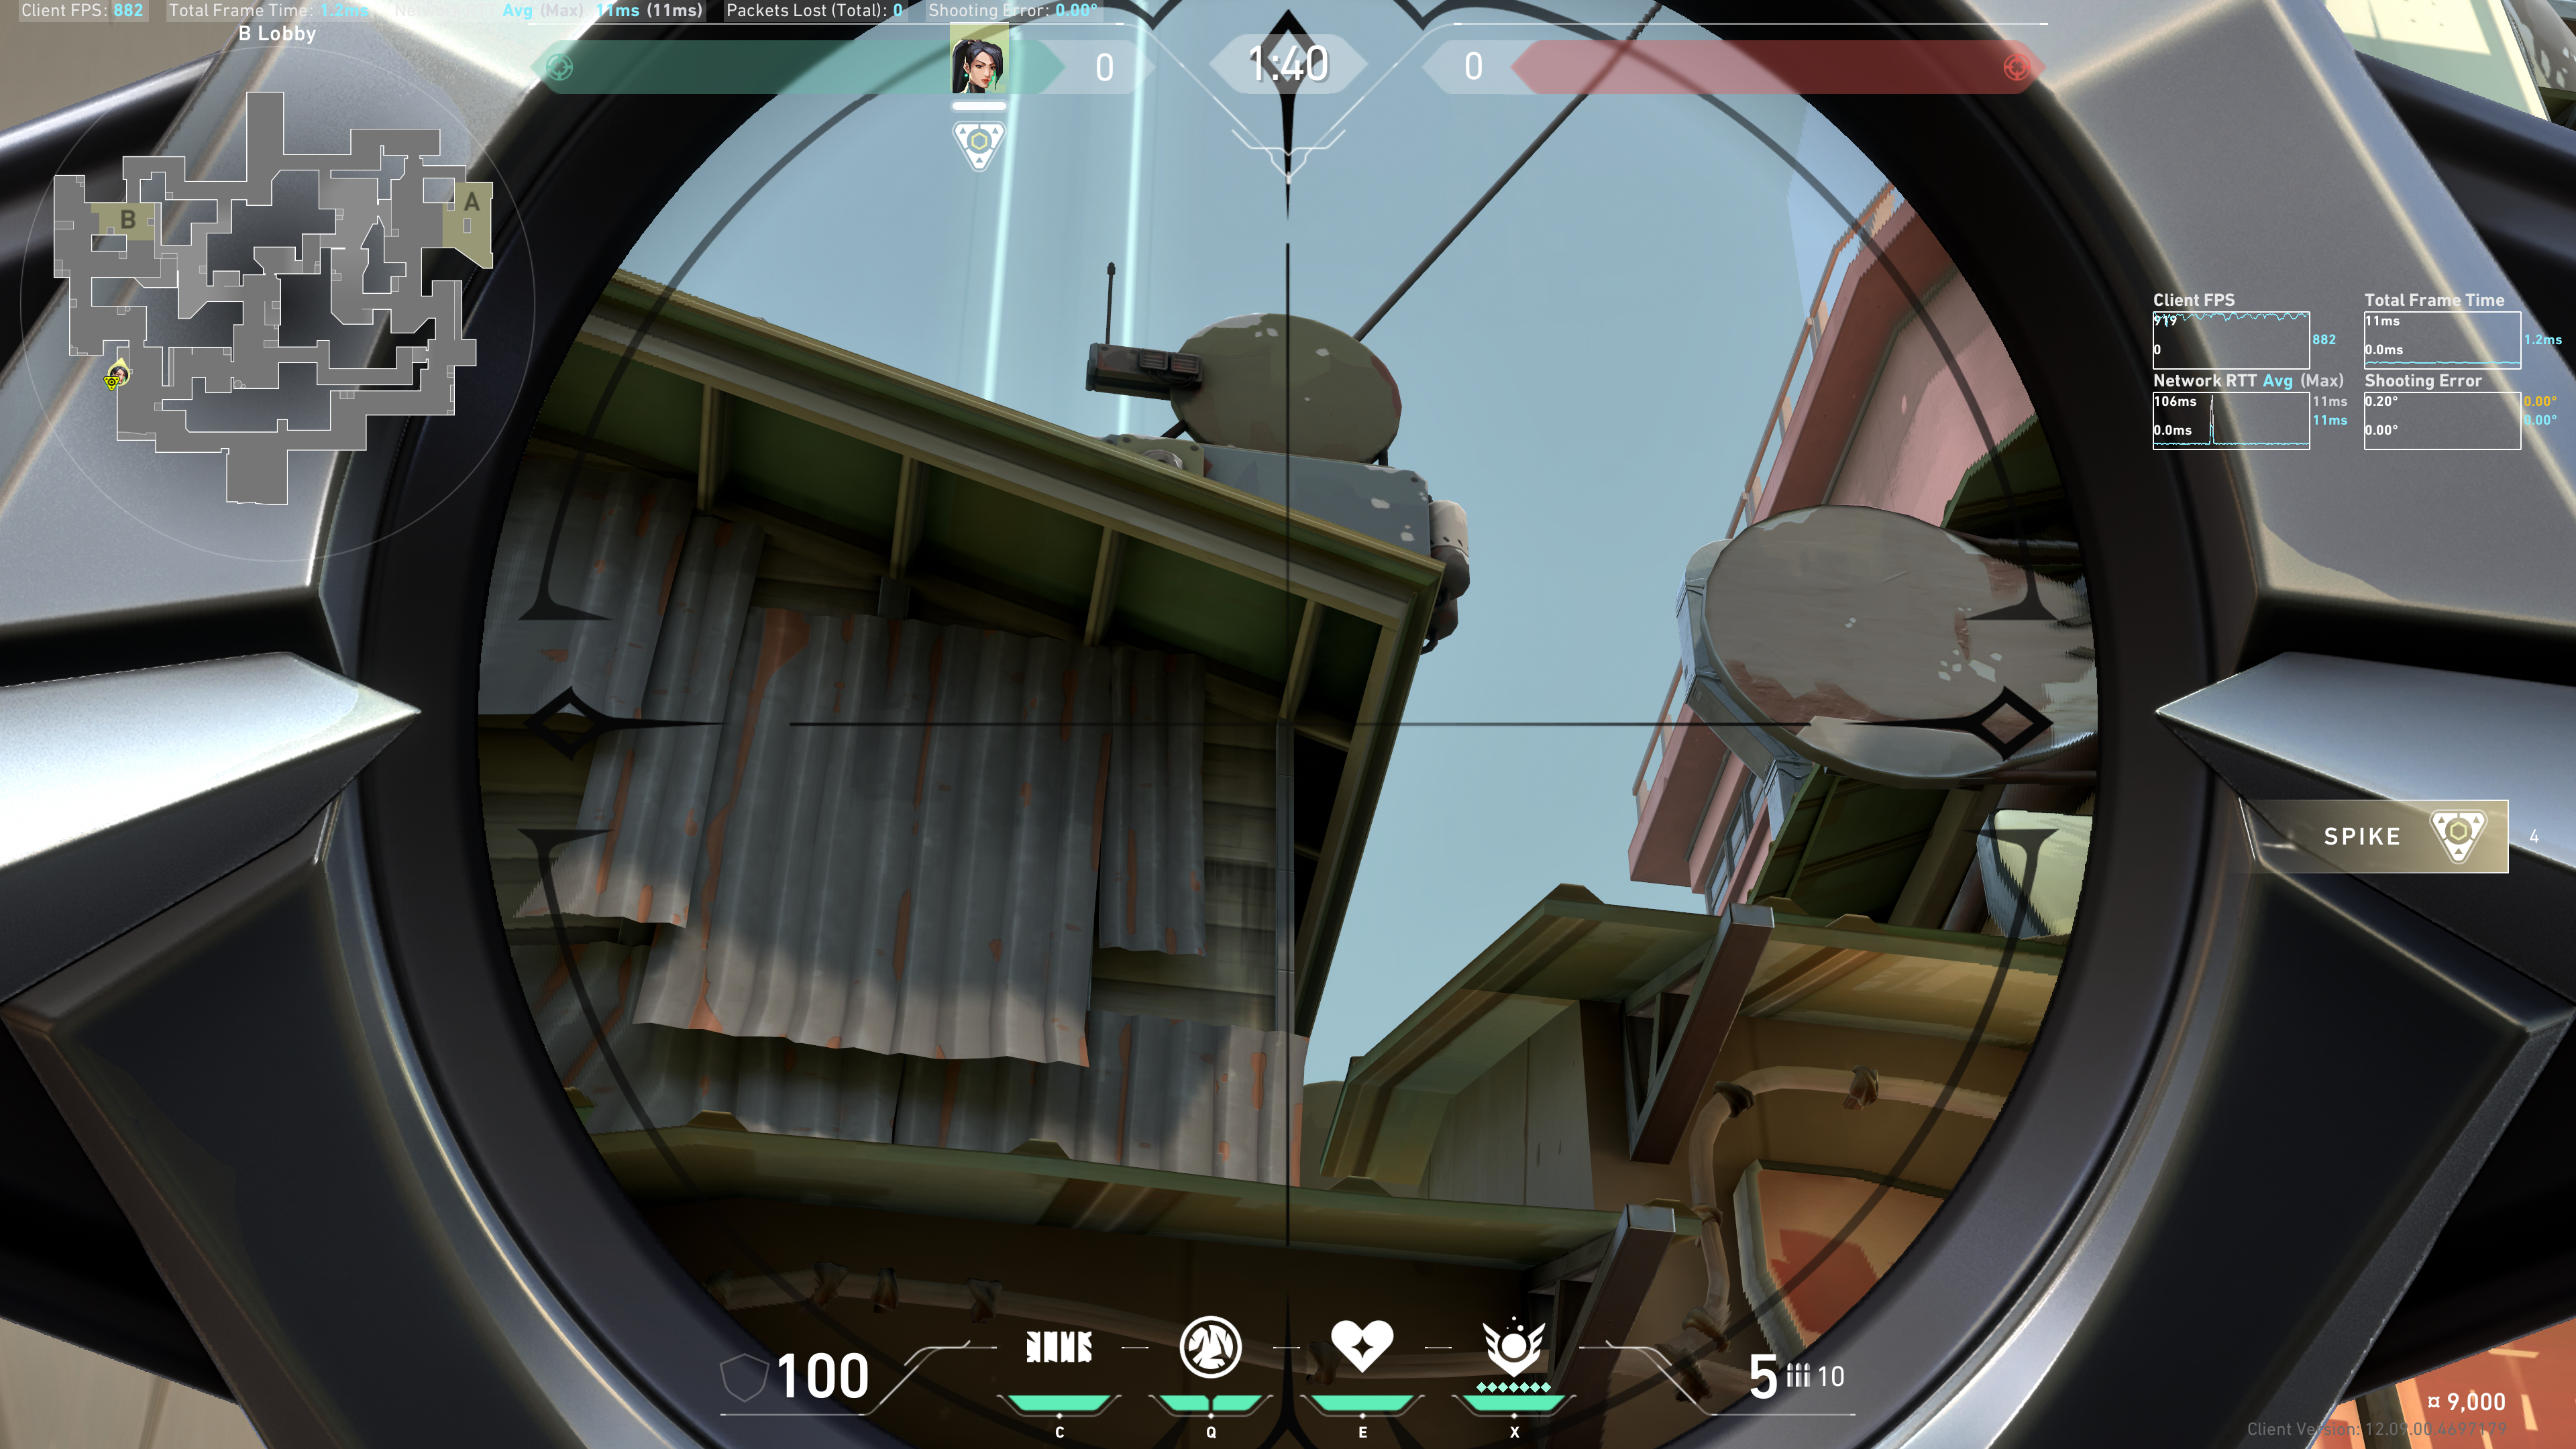
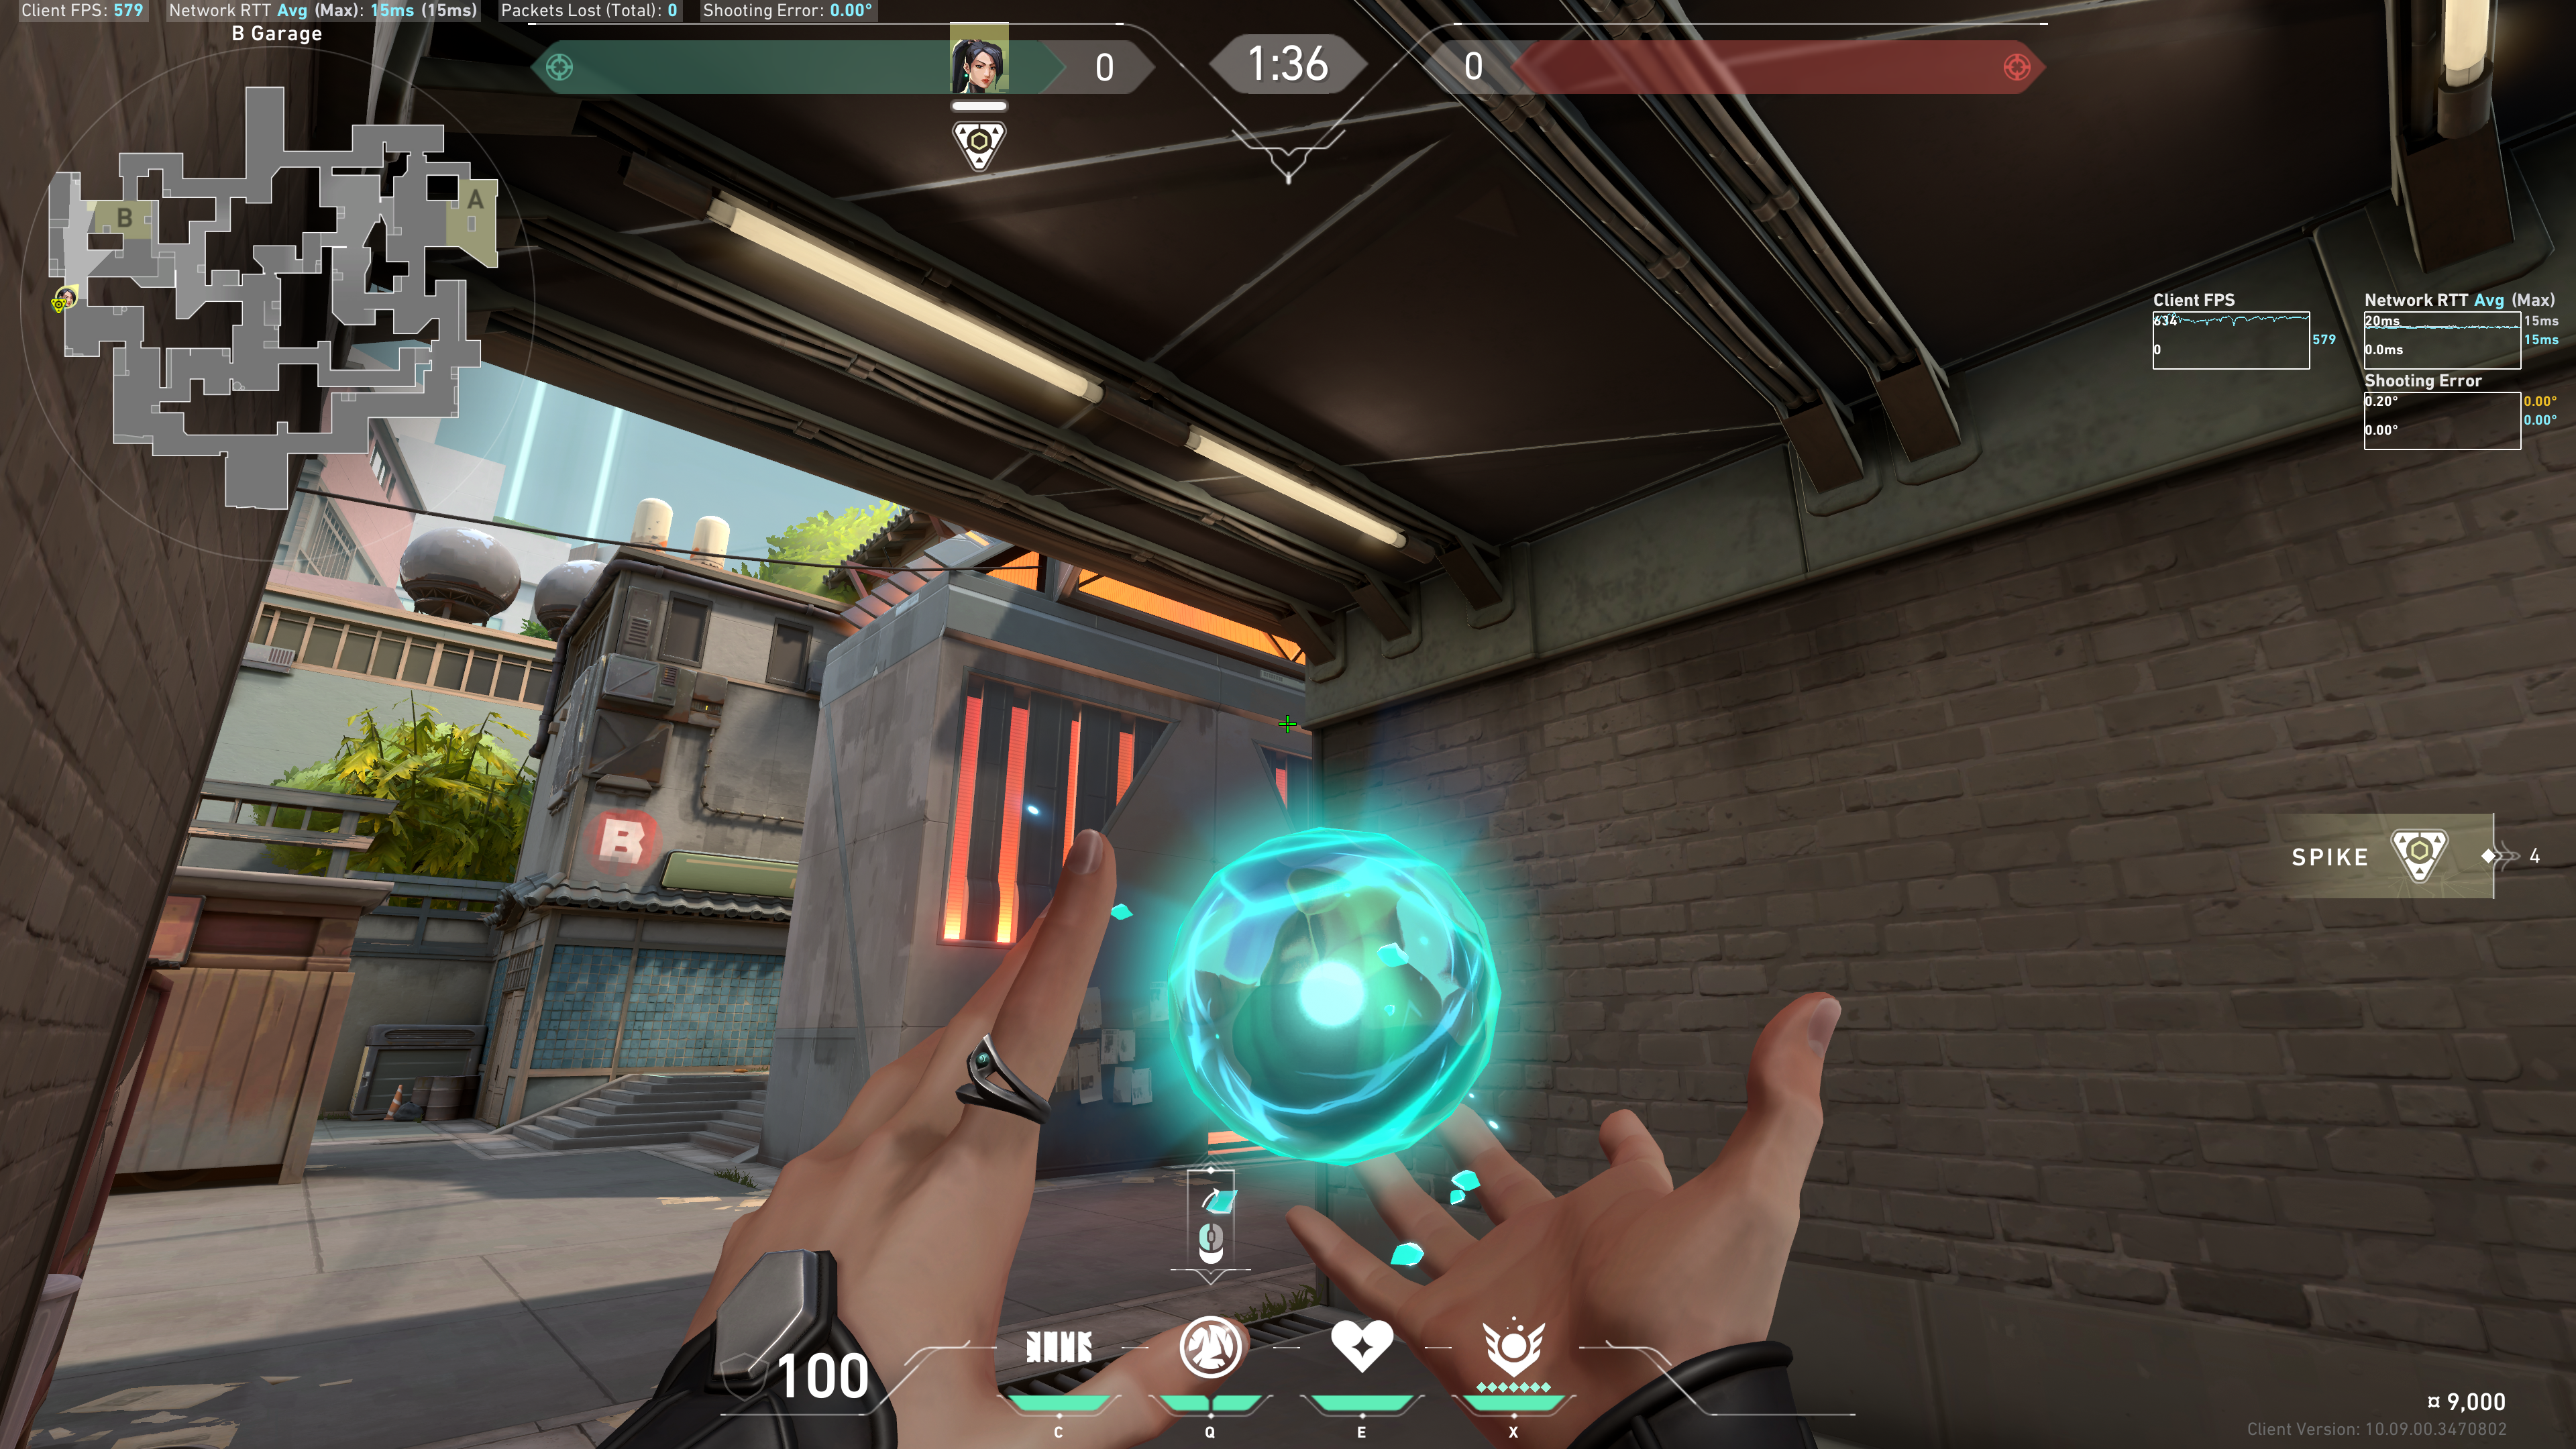
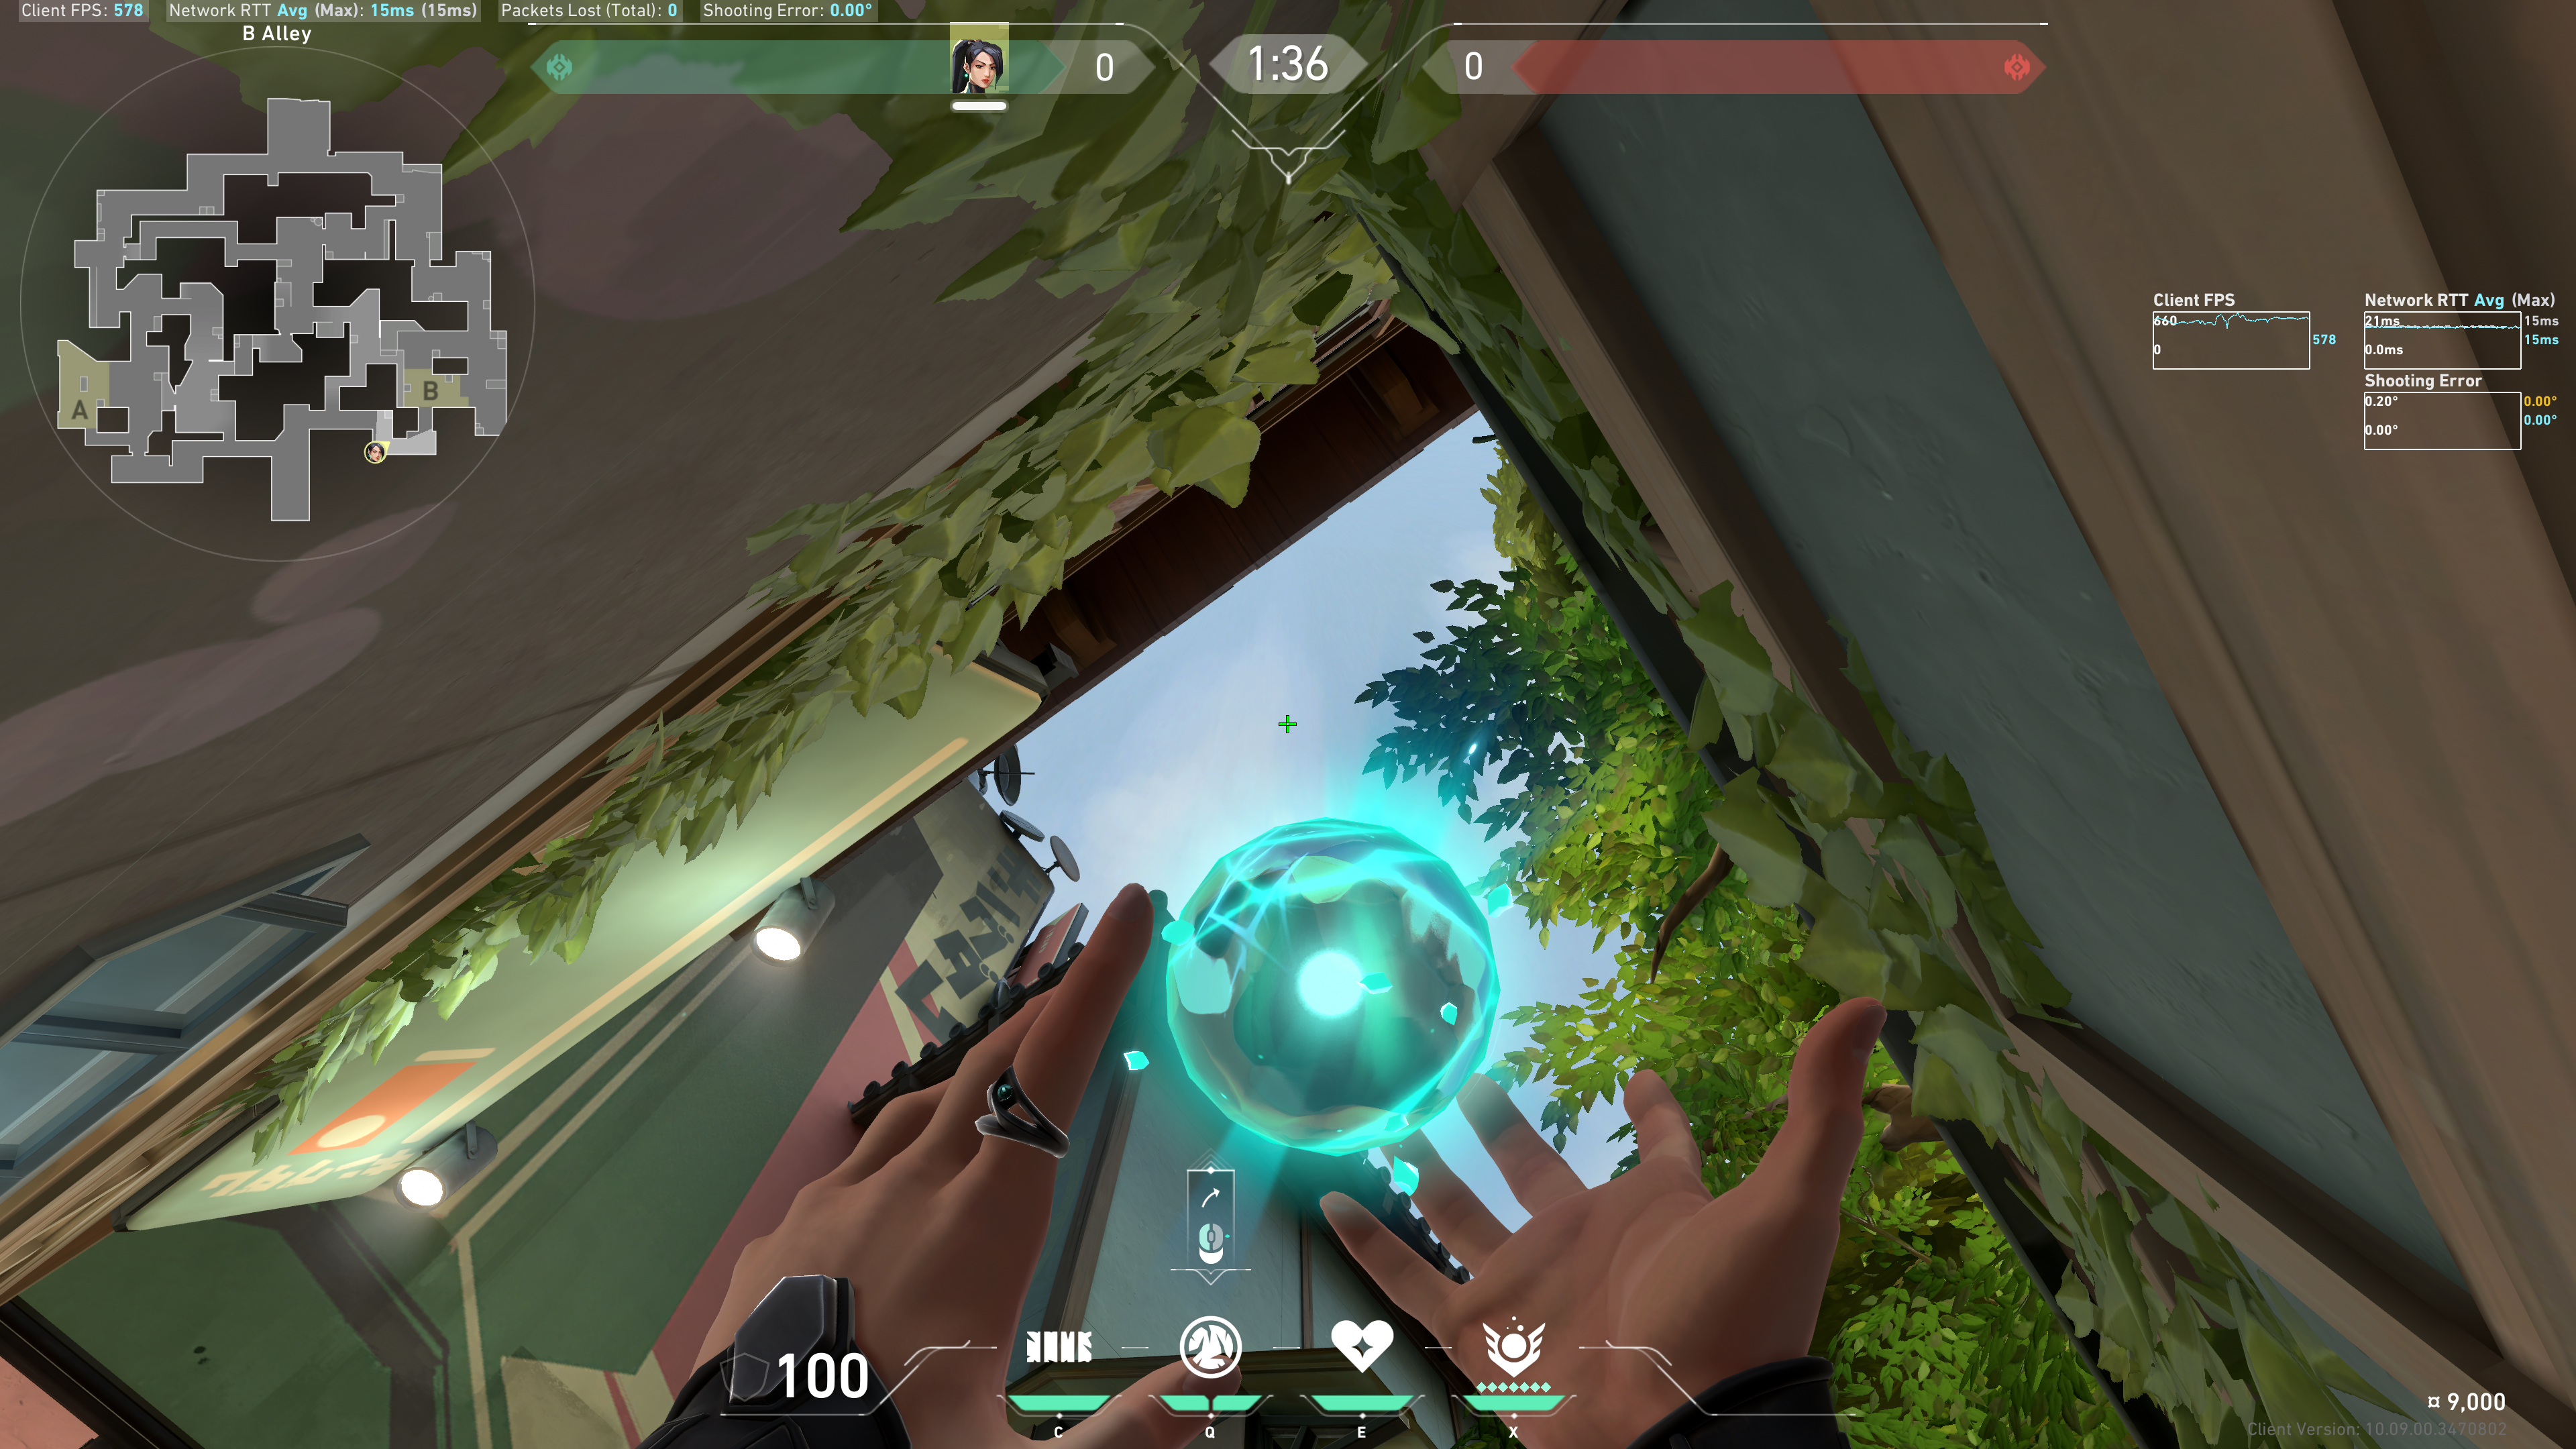
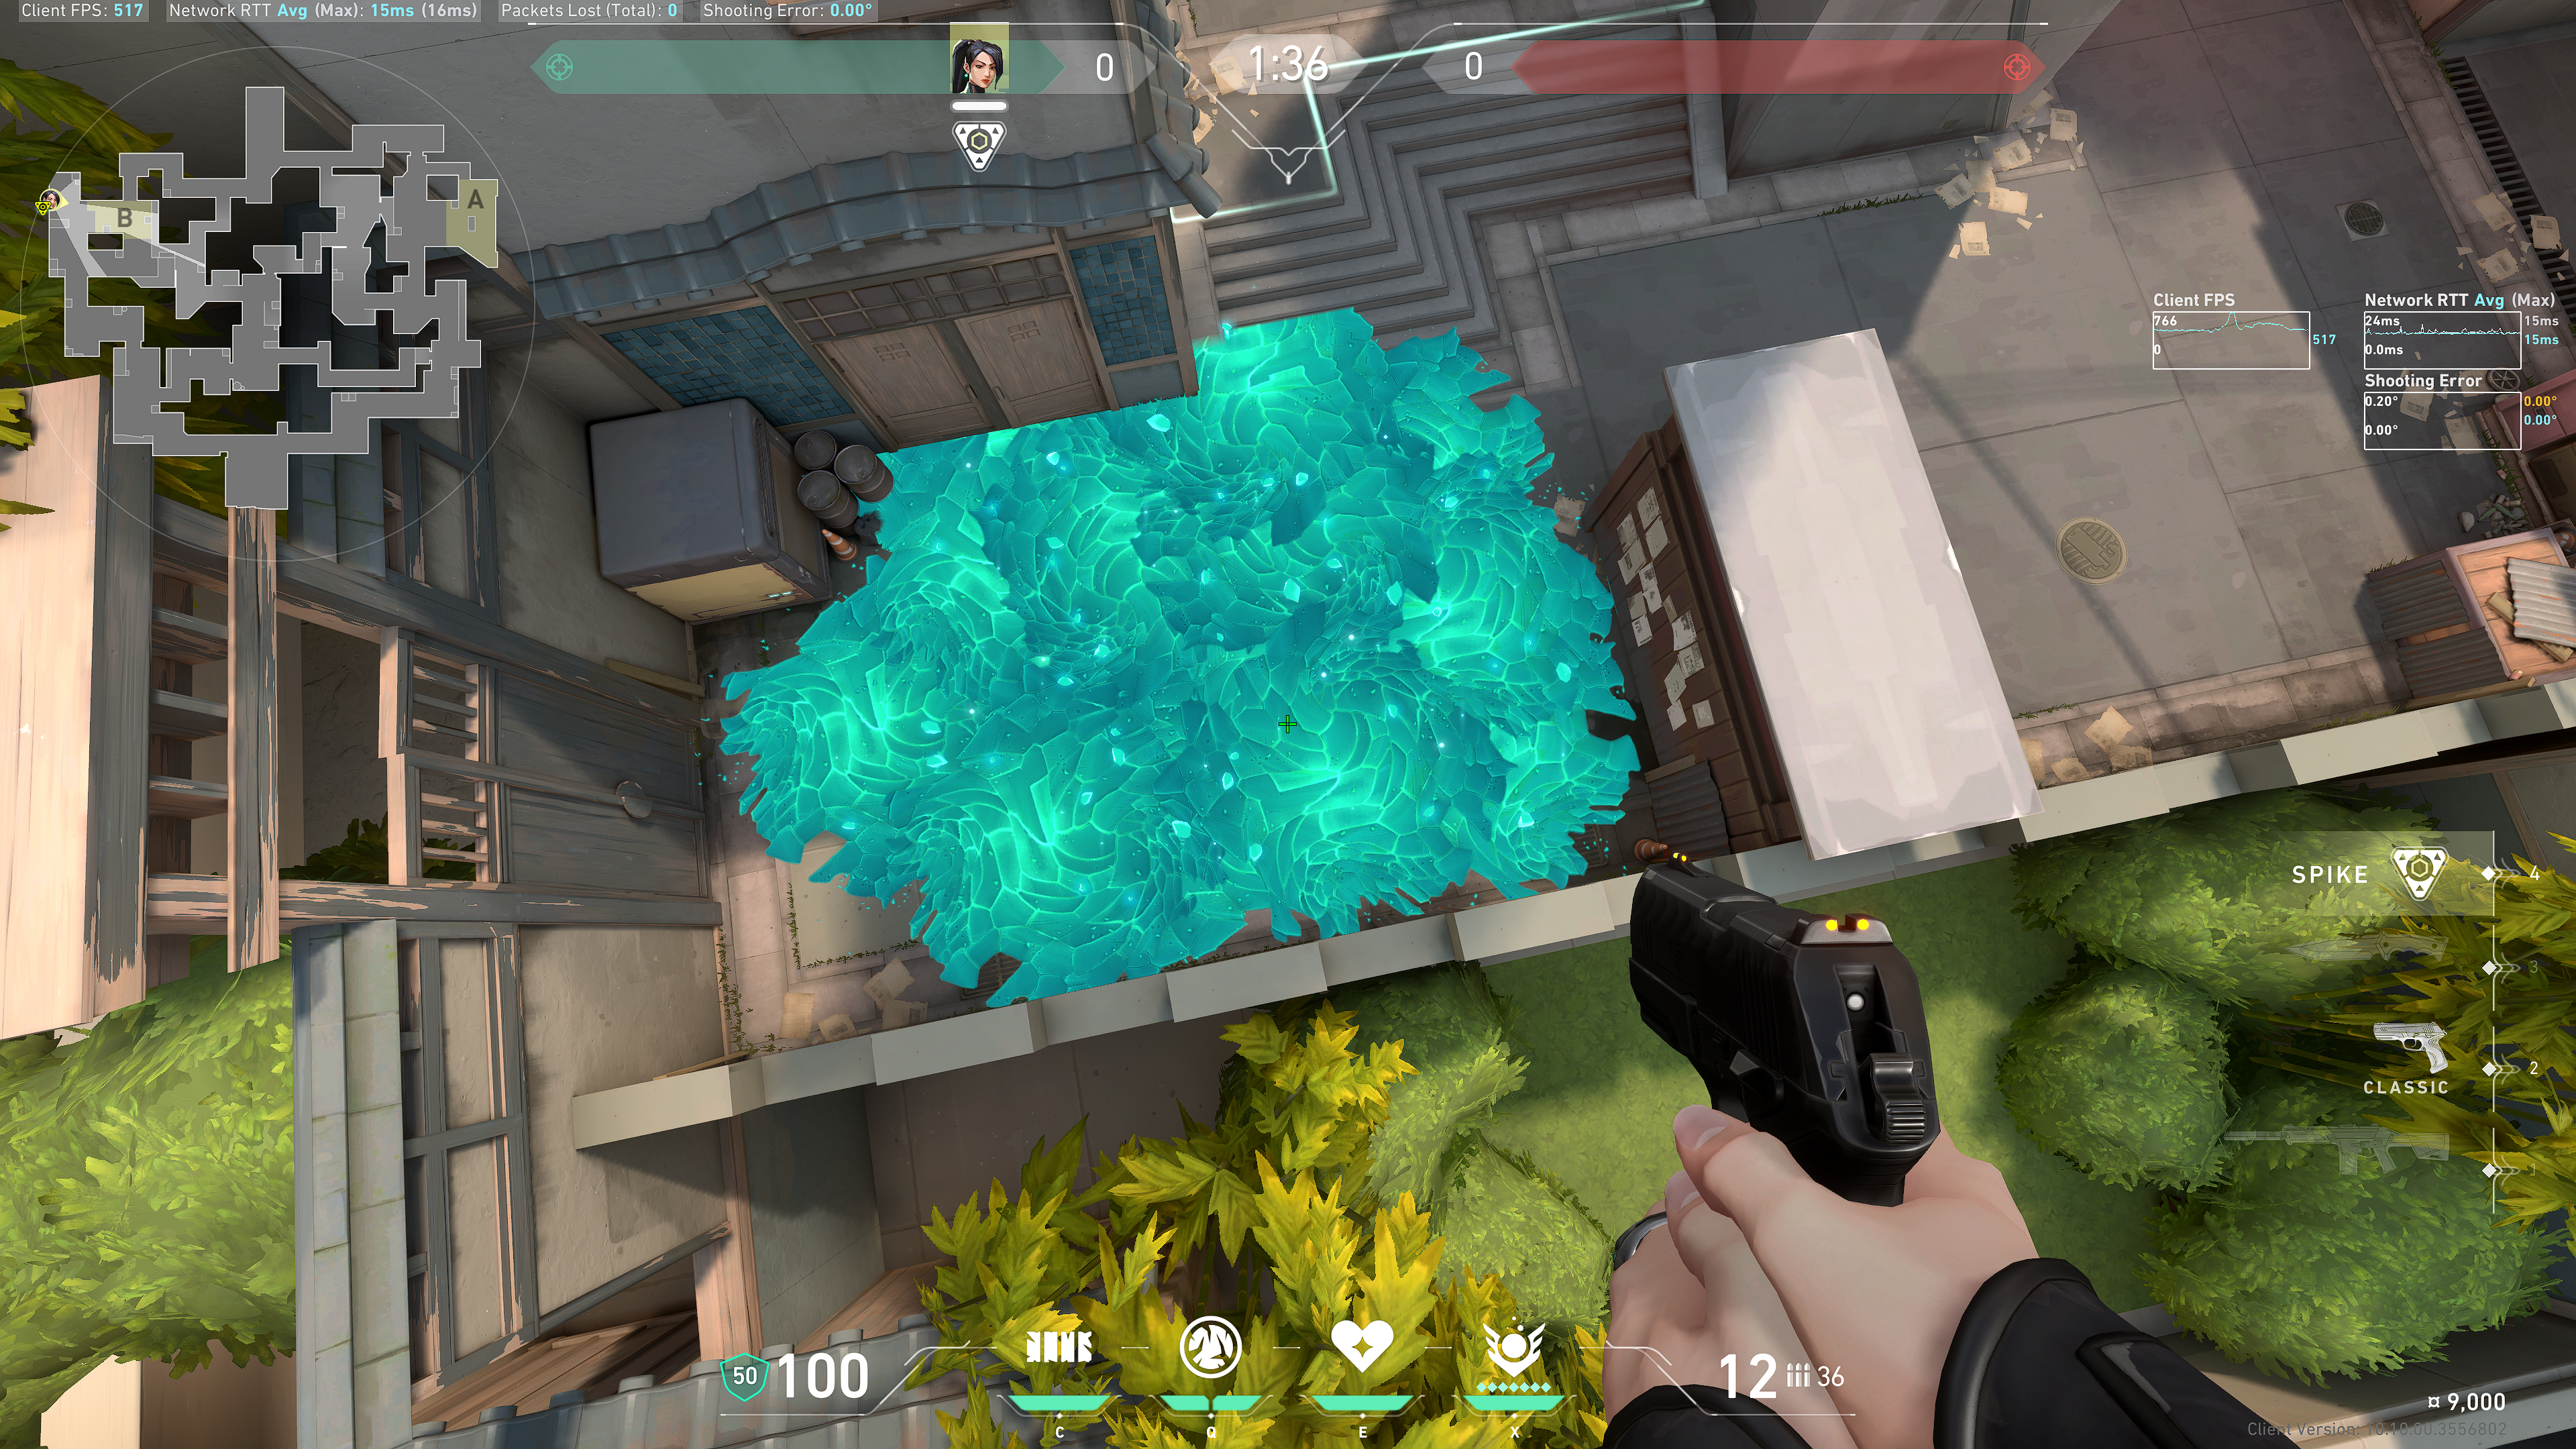
Heaven
Note this cable coming from this satellite:
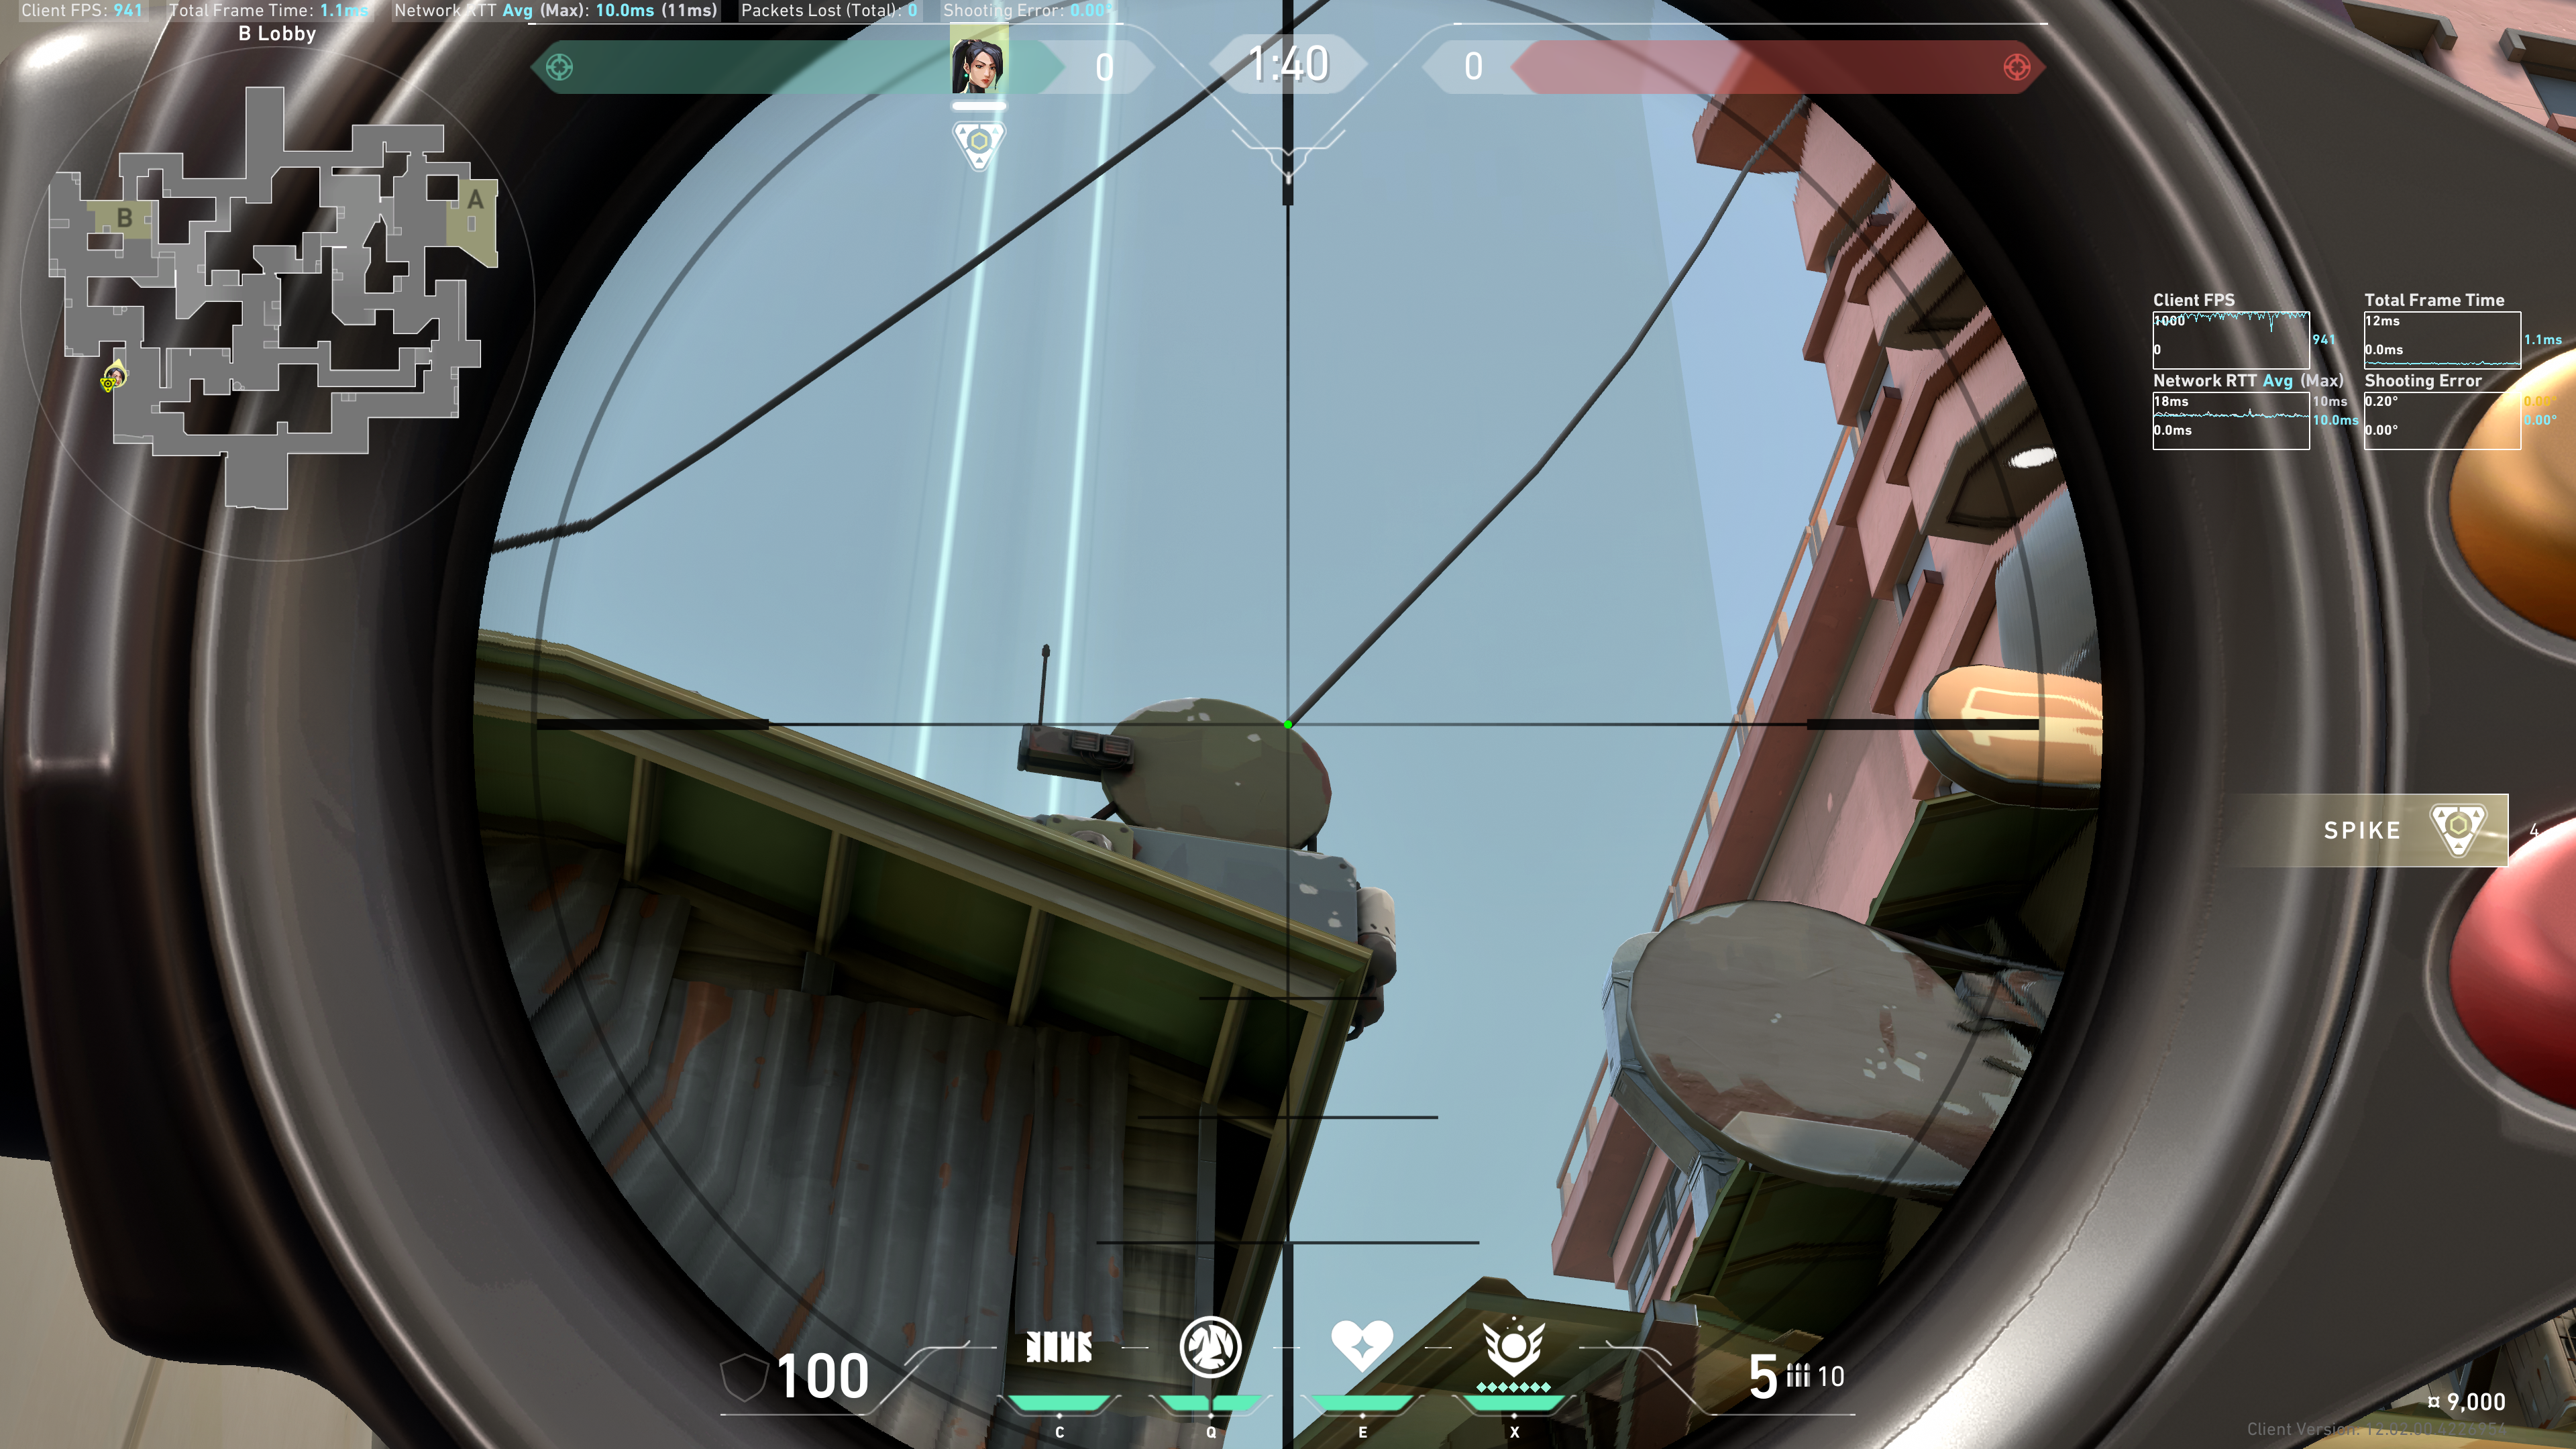
The Slow ability's indicator box, line up the top right corner of it with that cable:
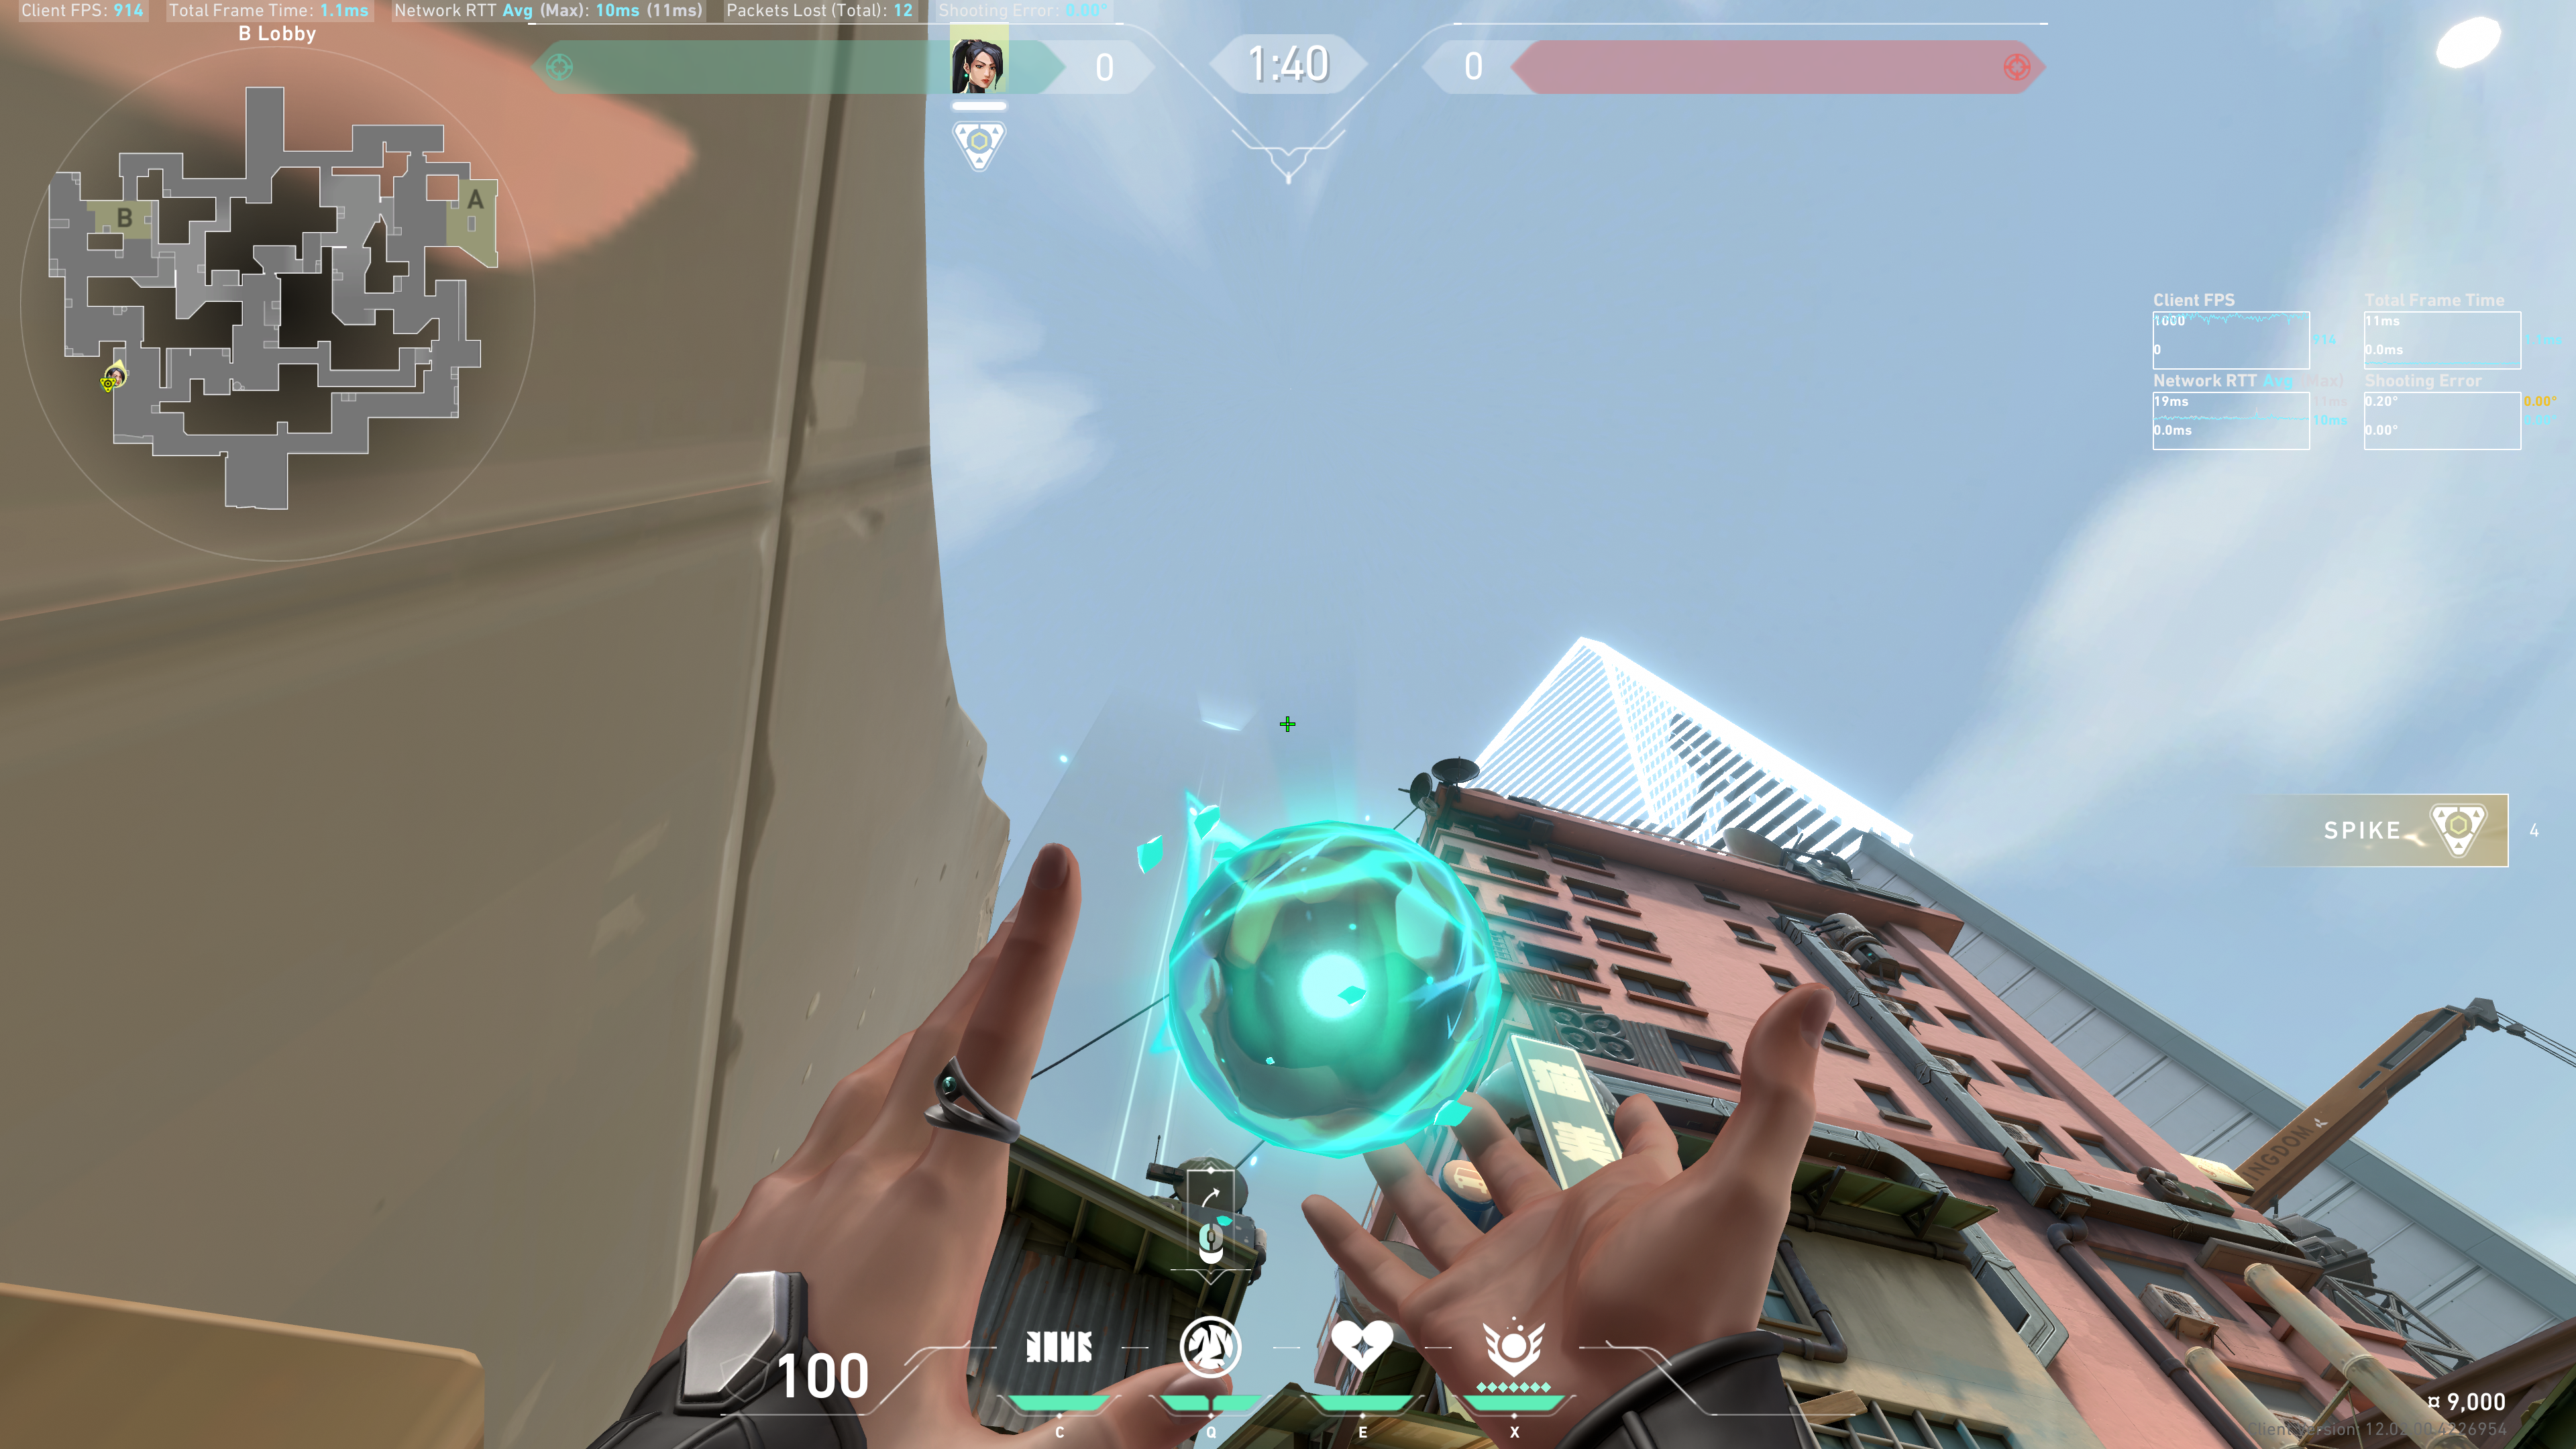
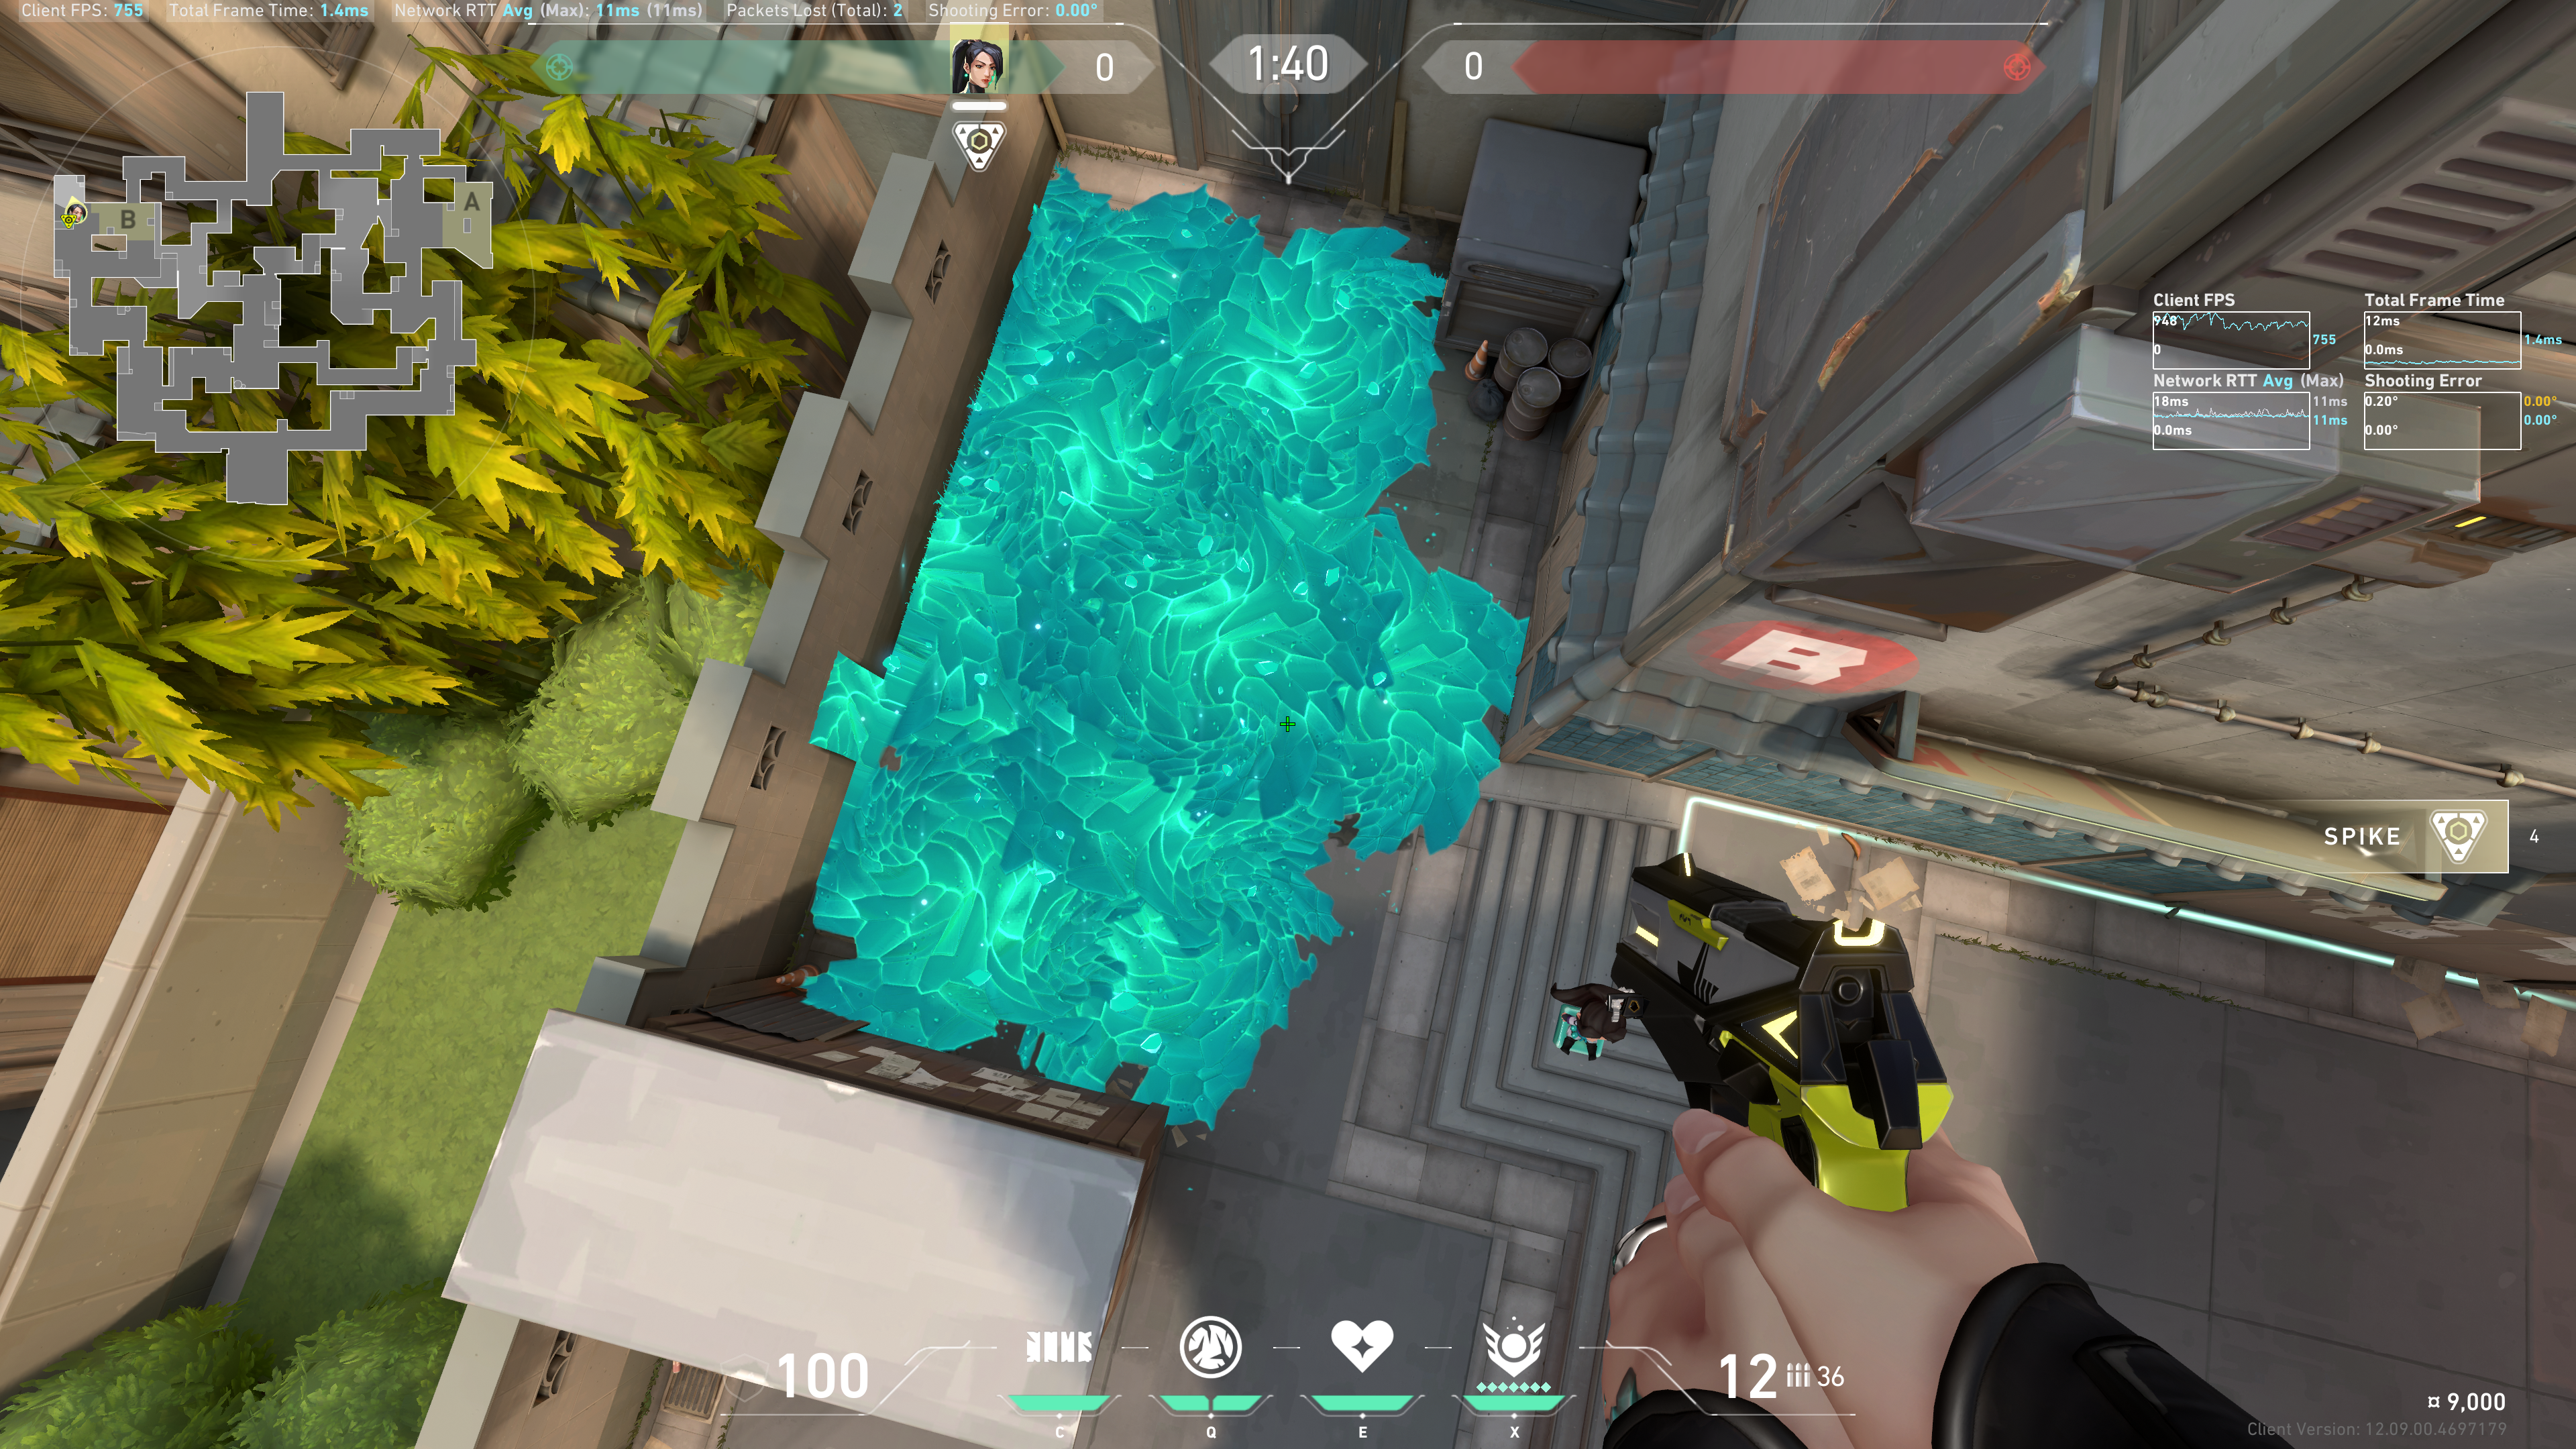
Result:
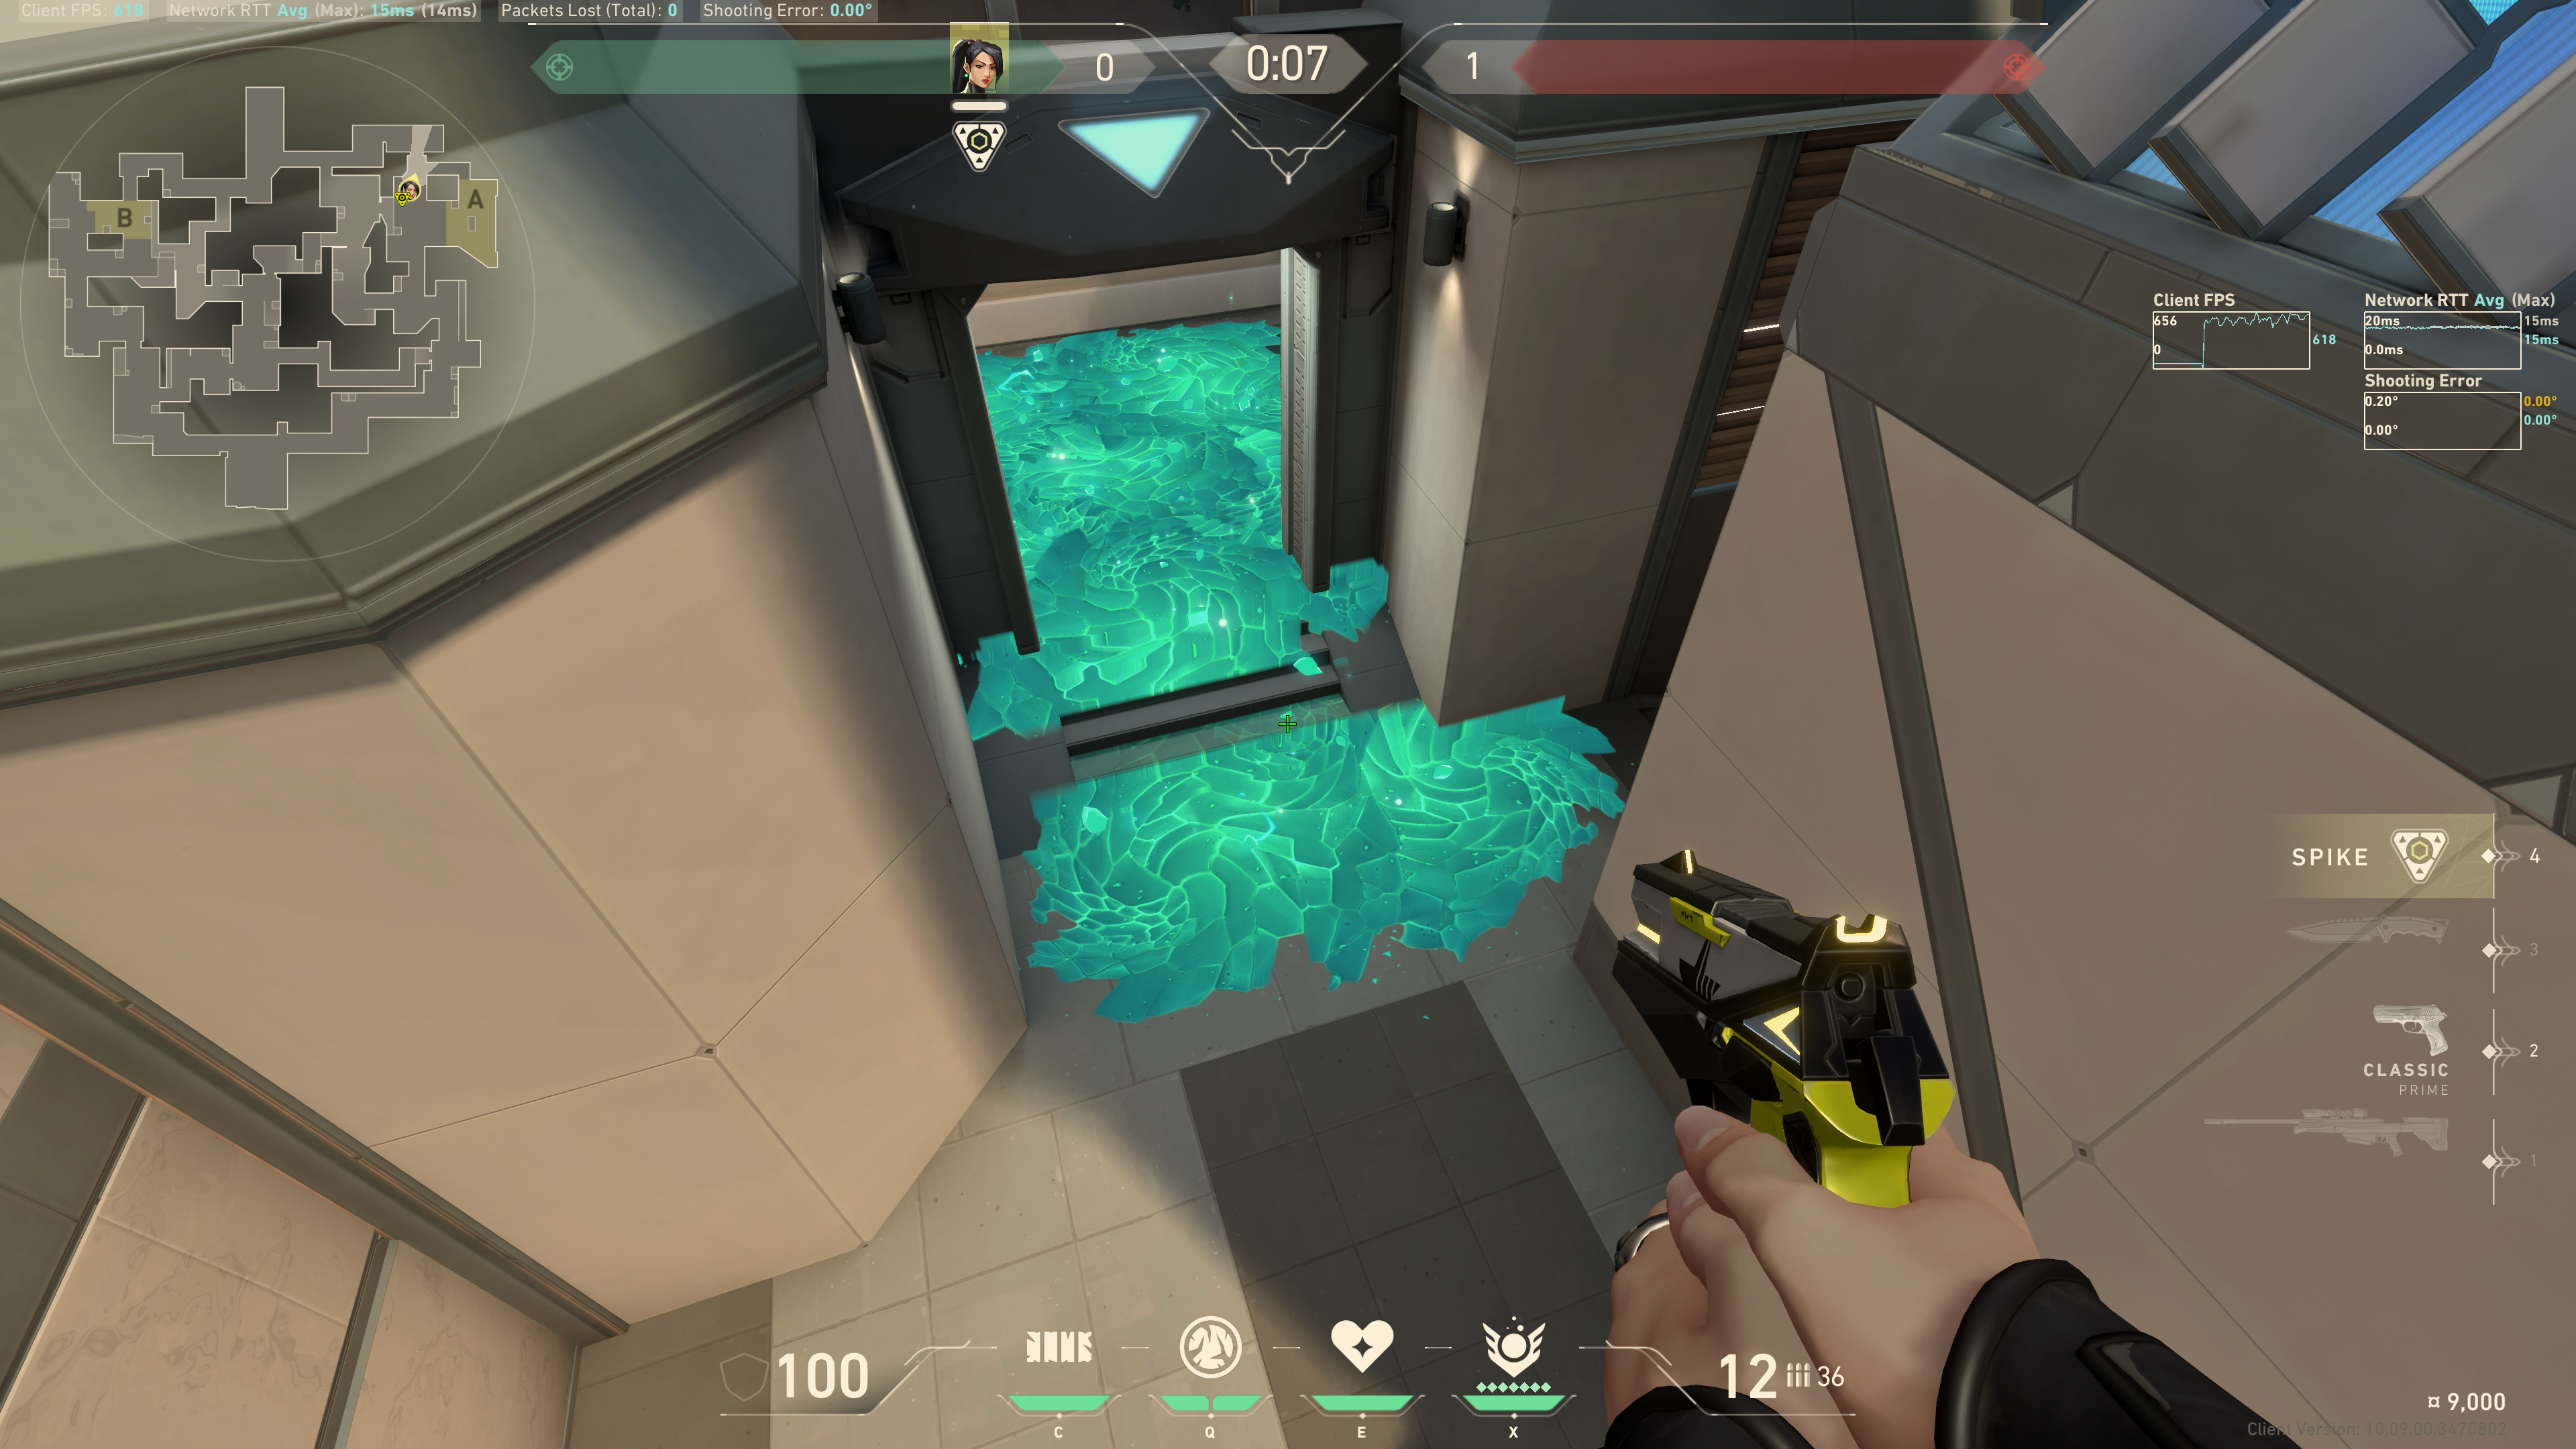
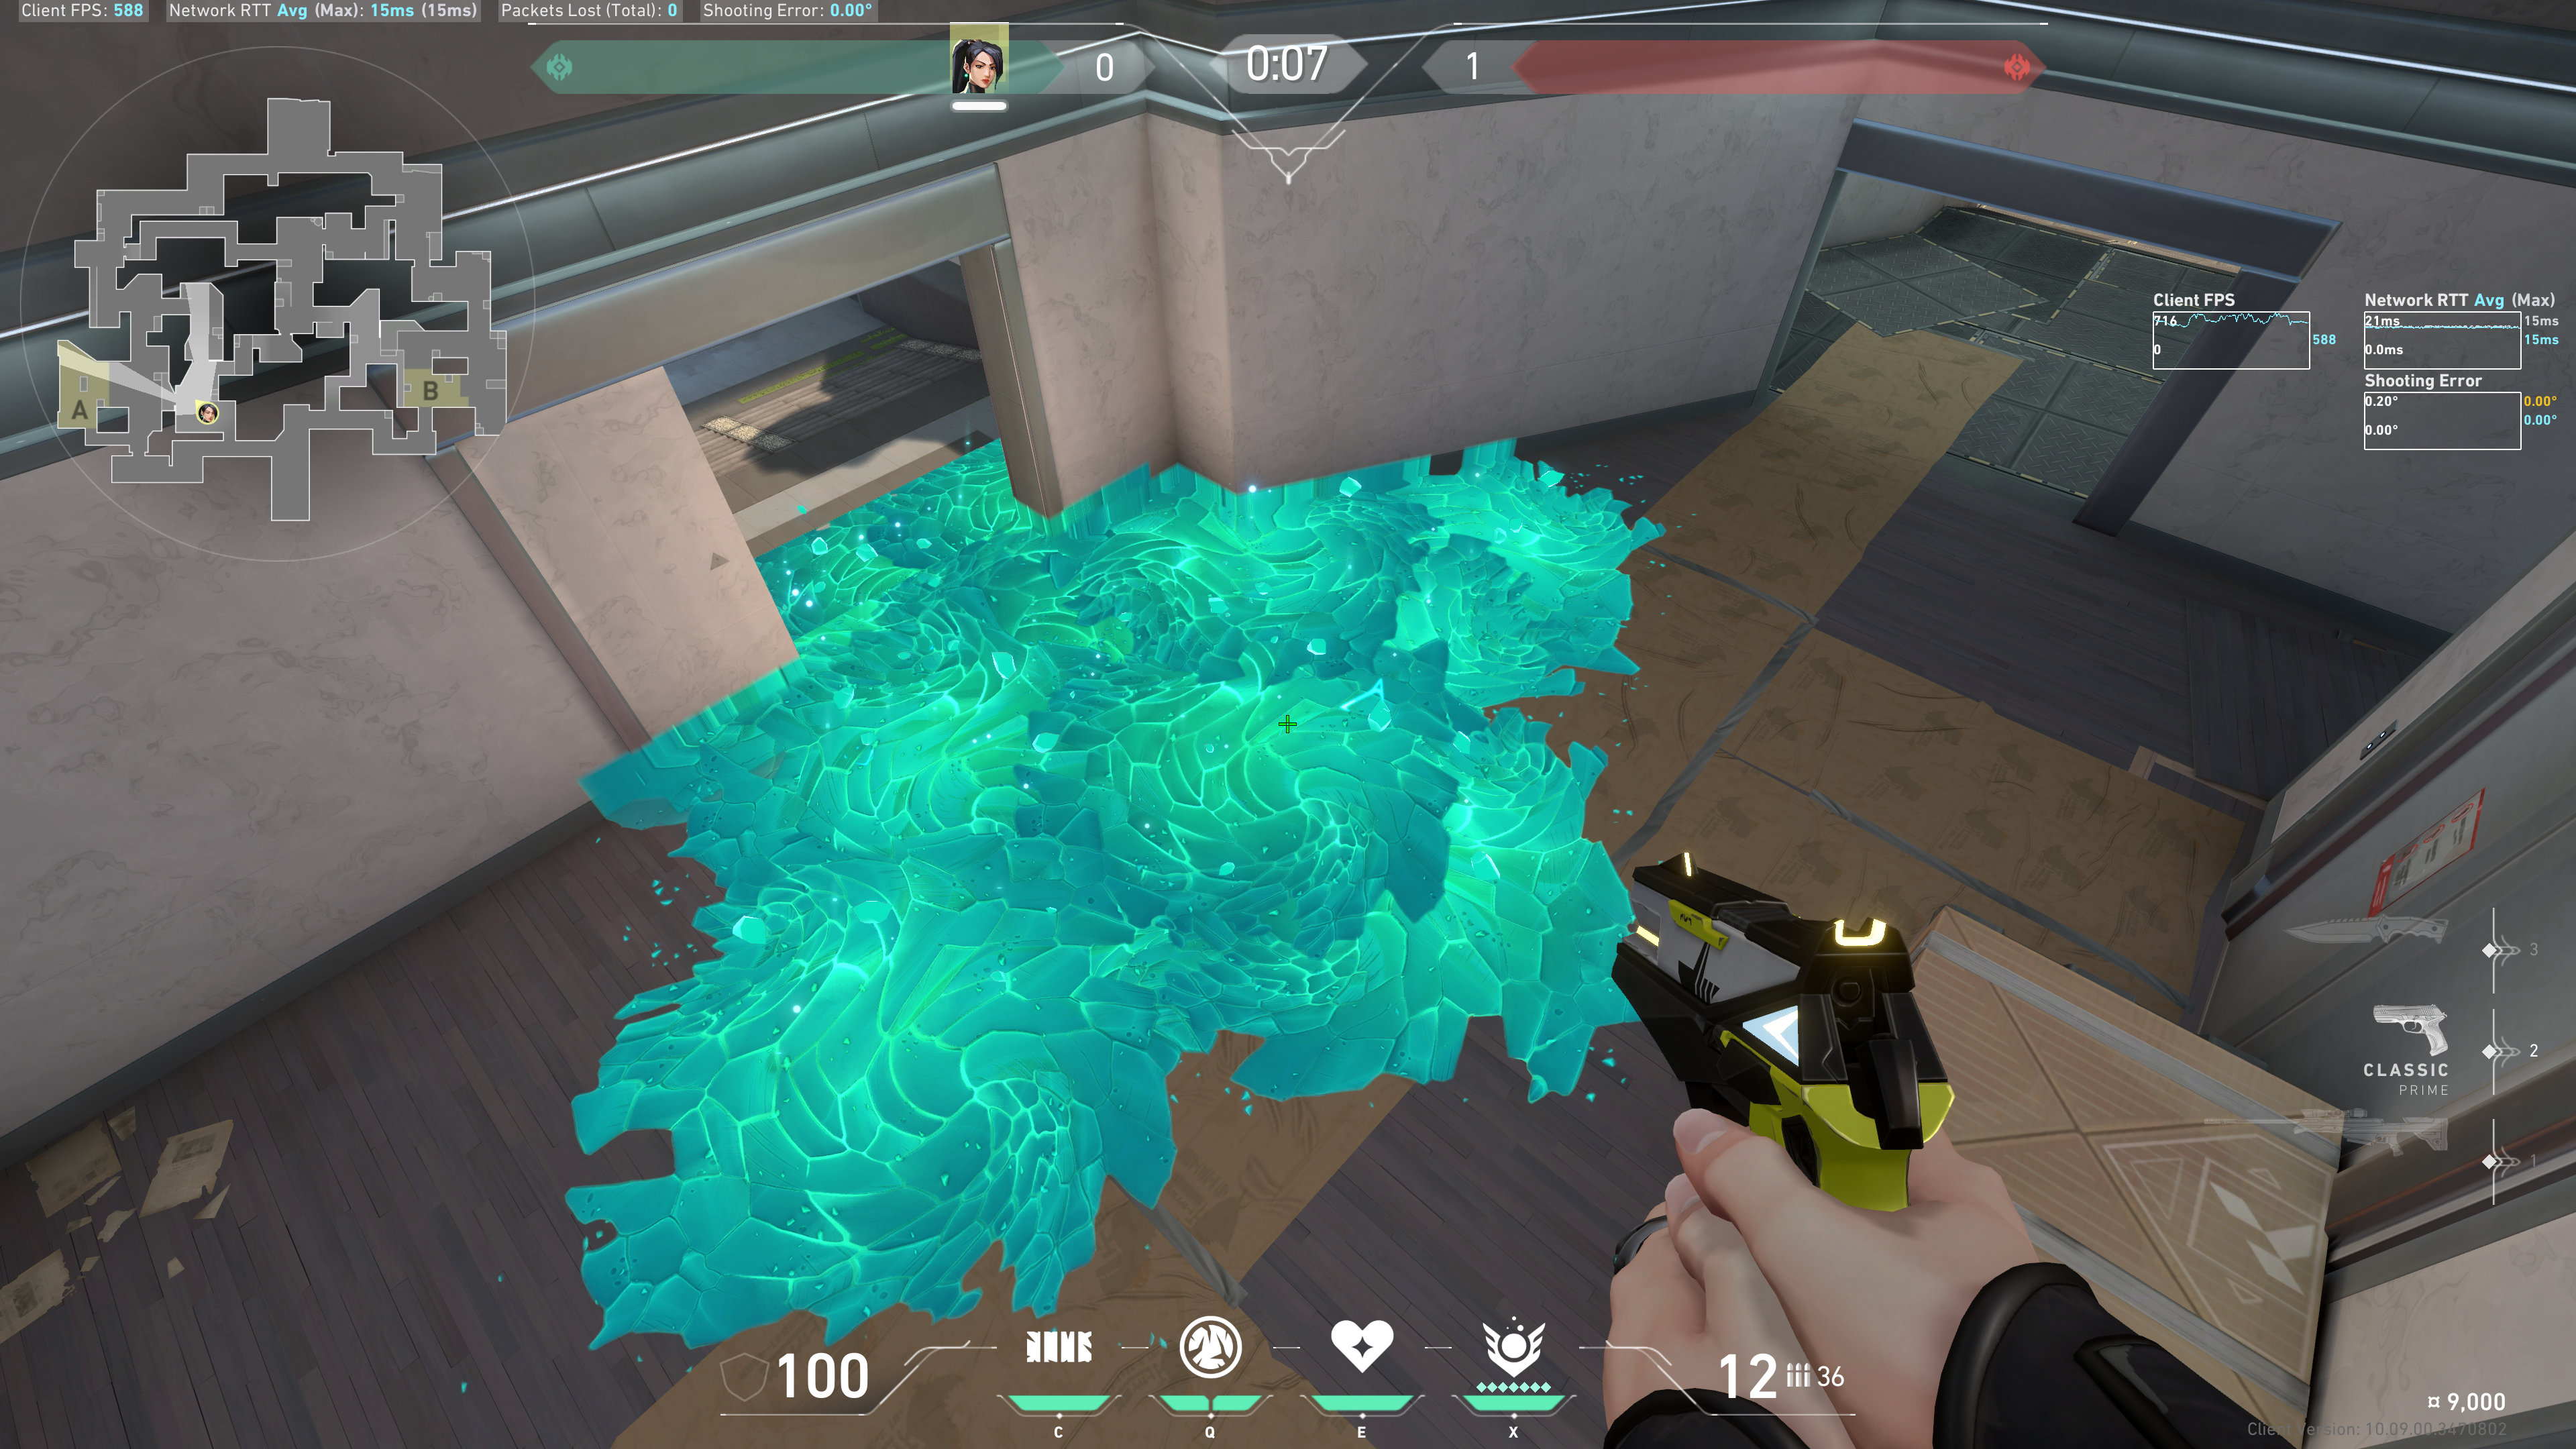
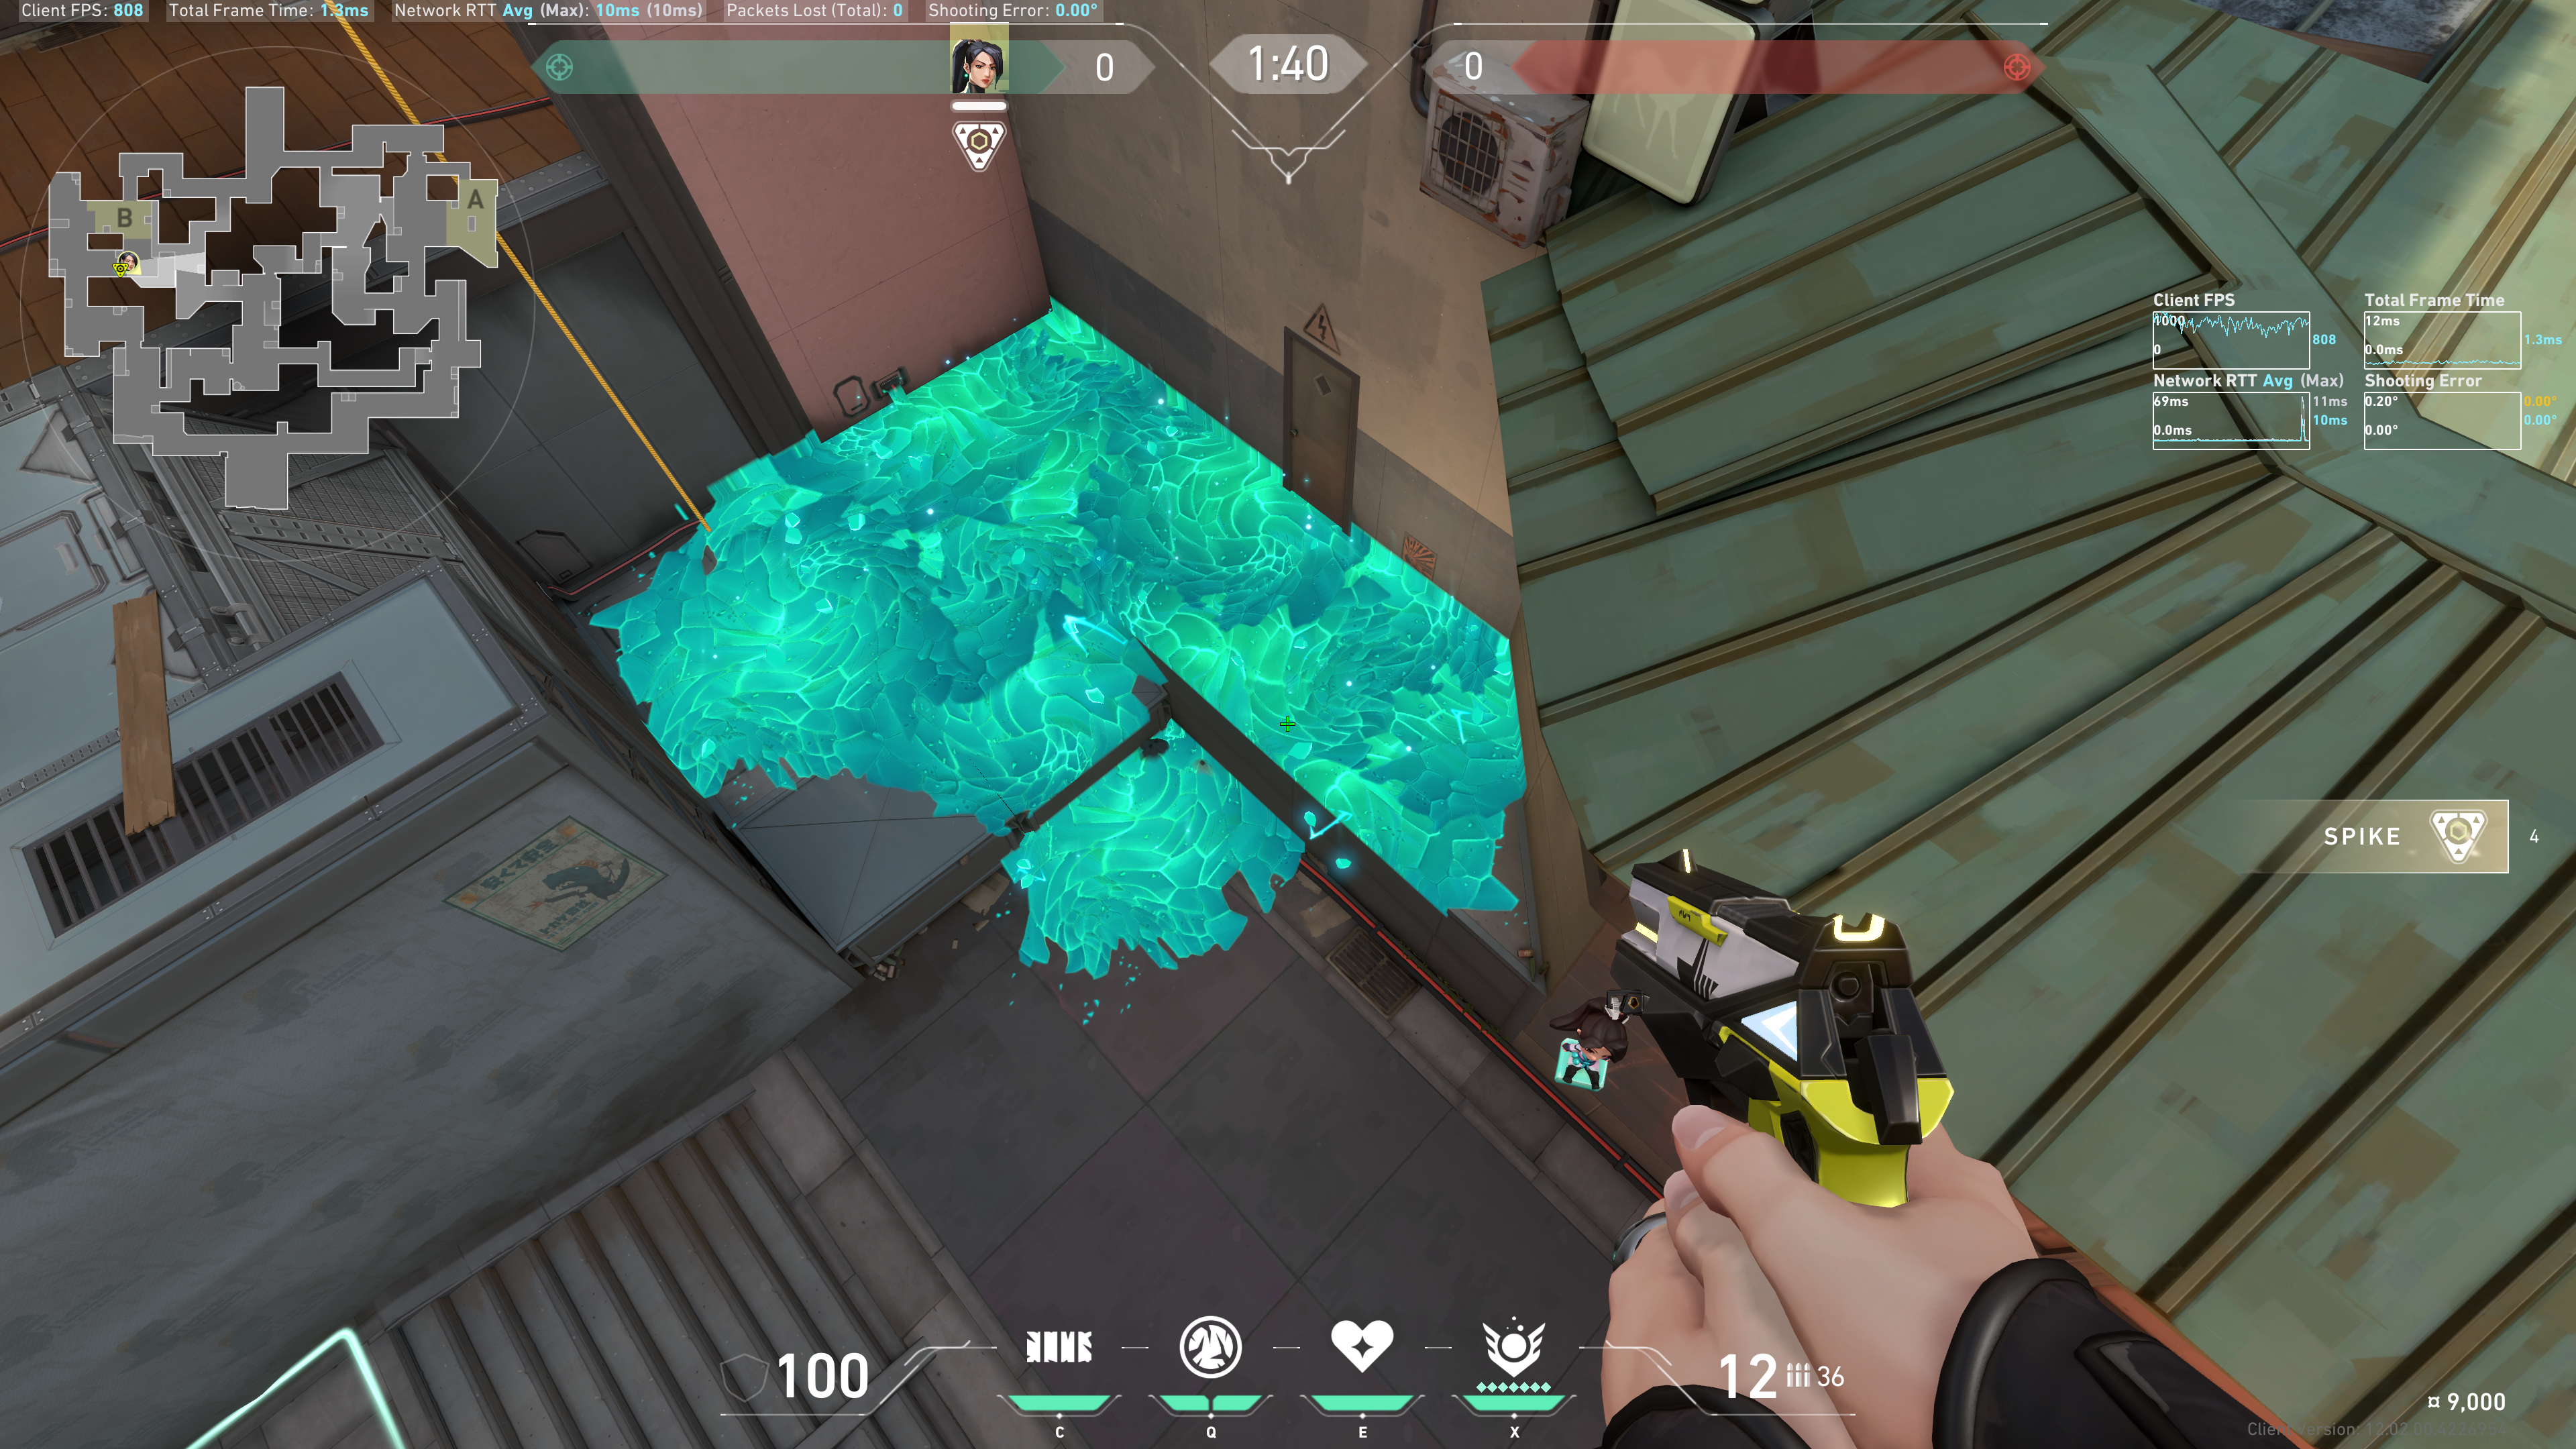
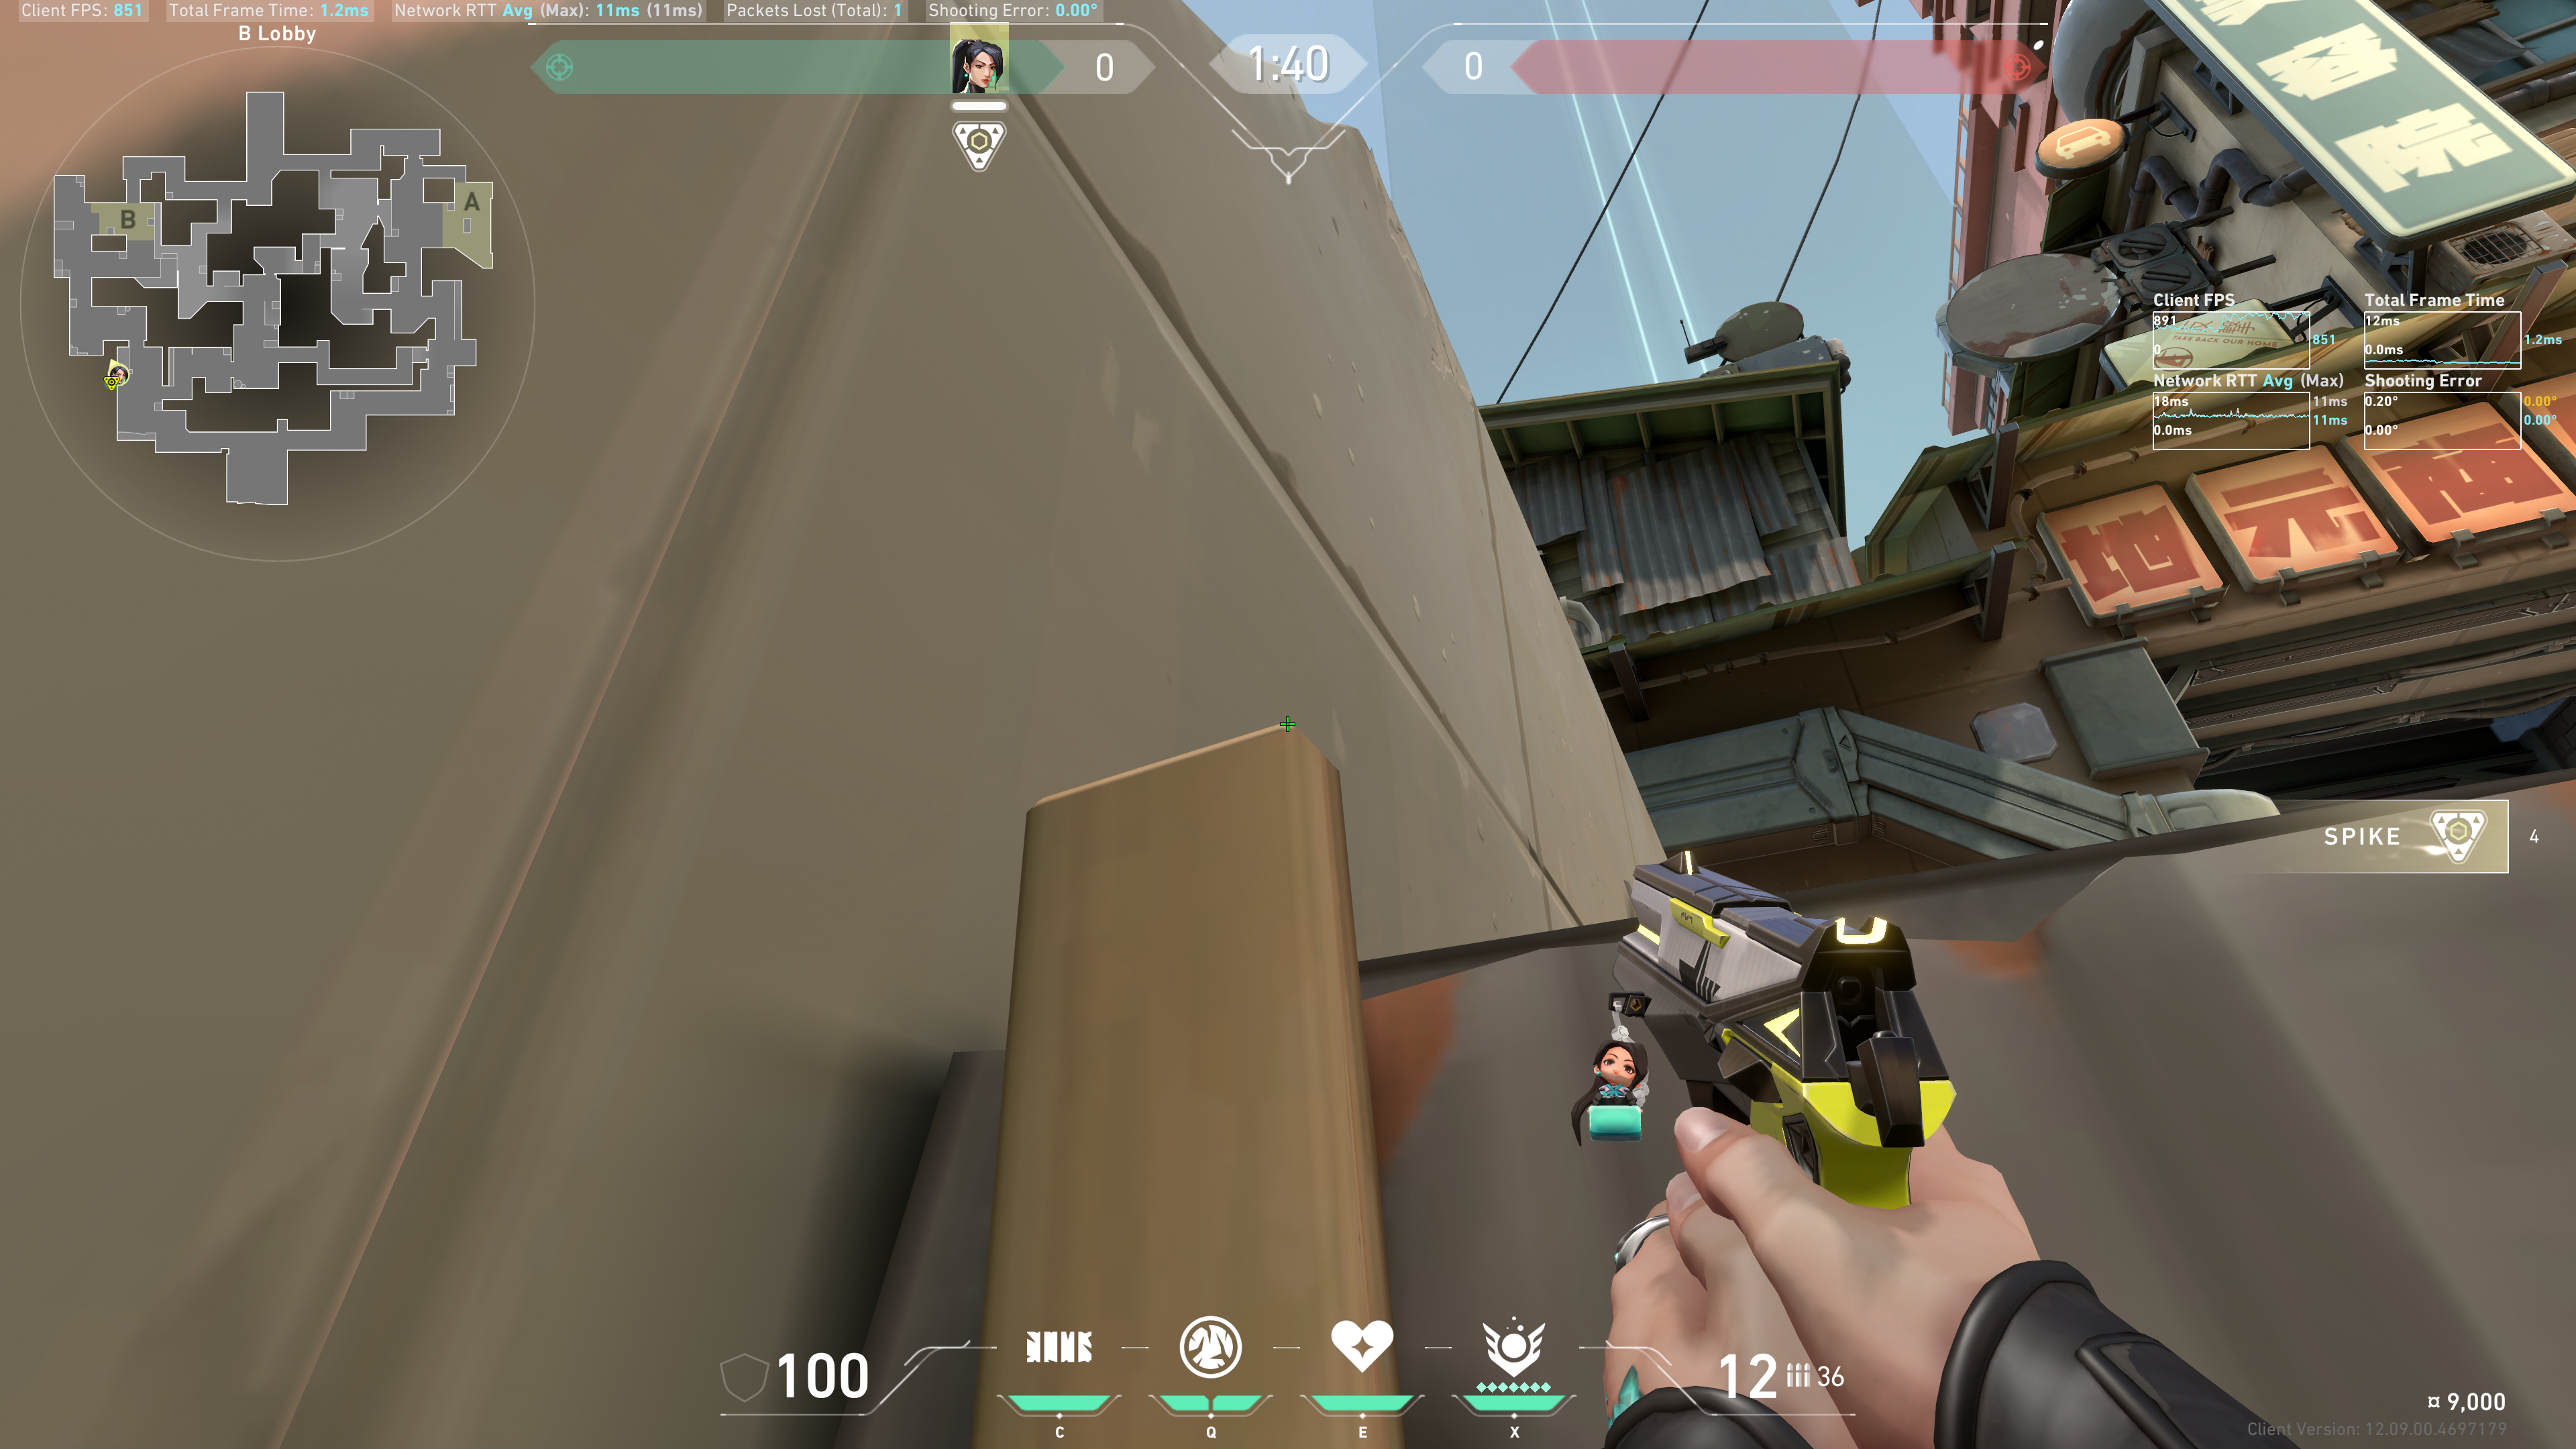
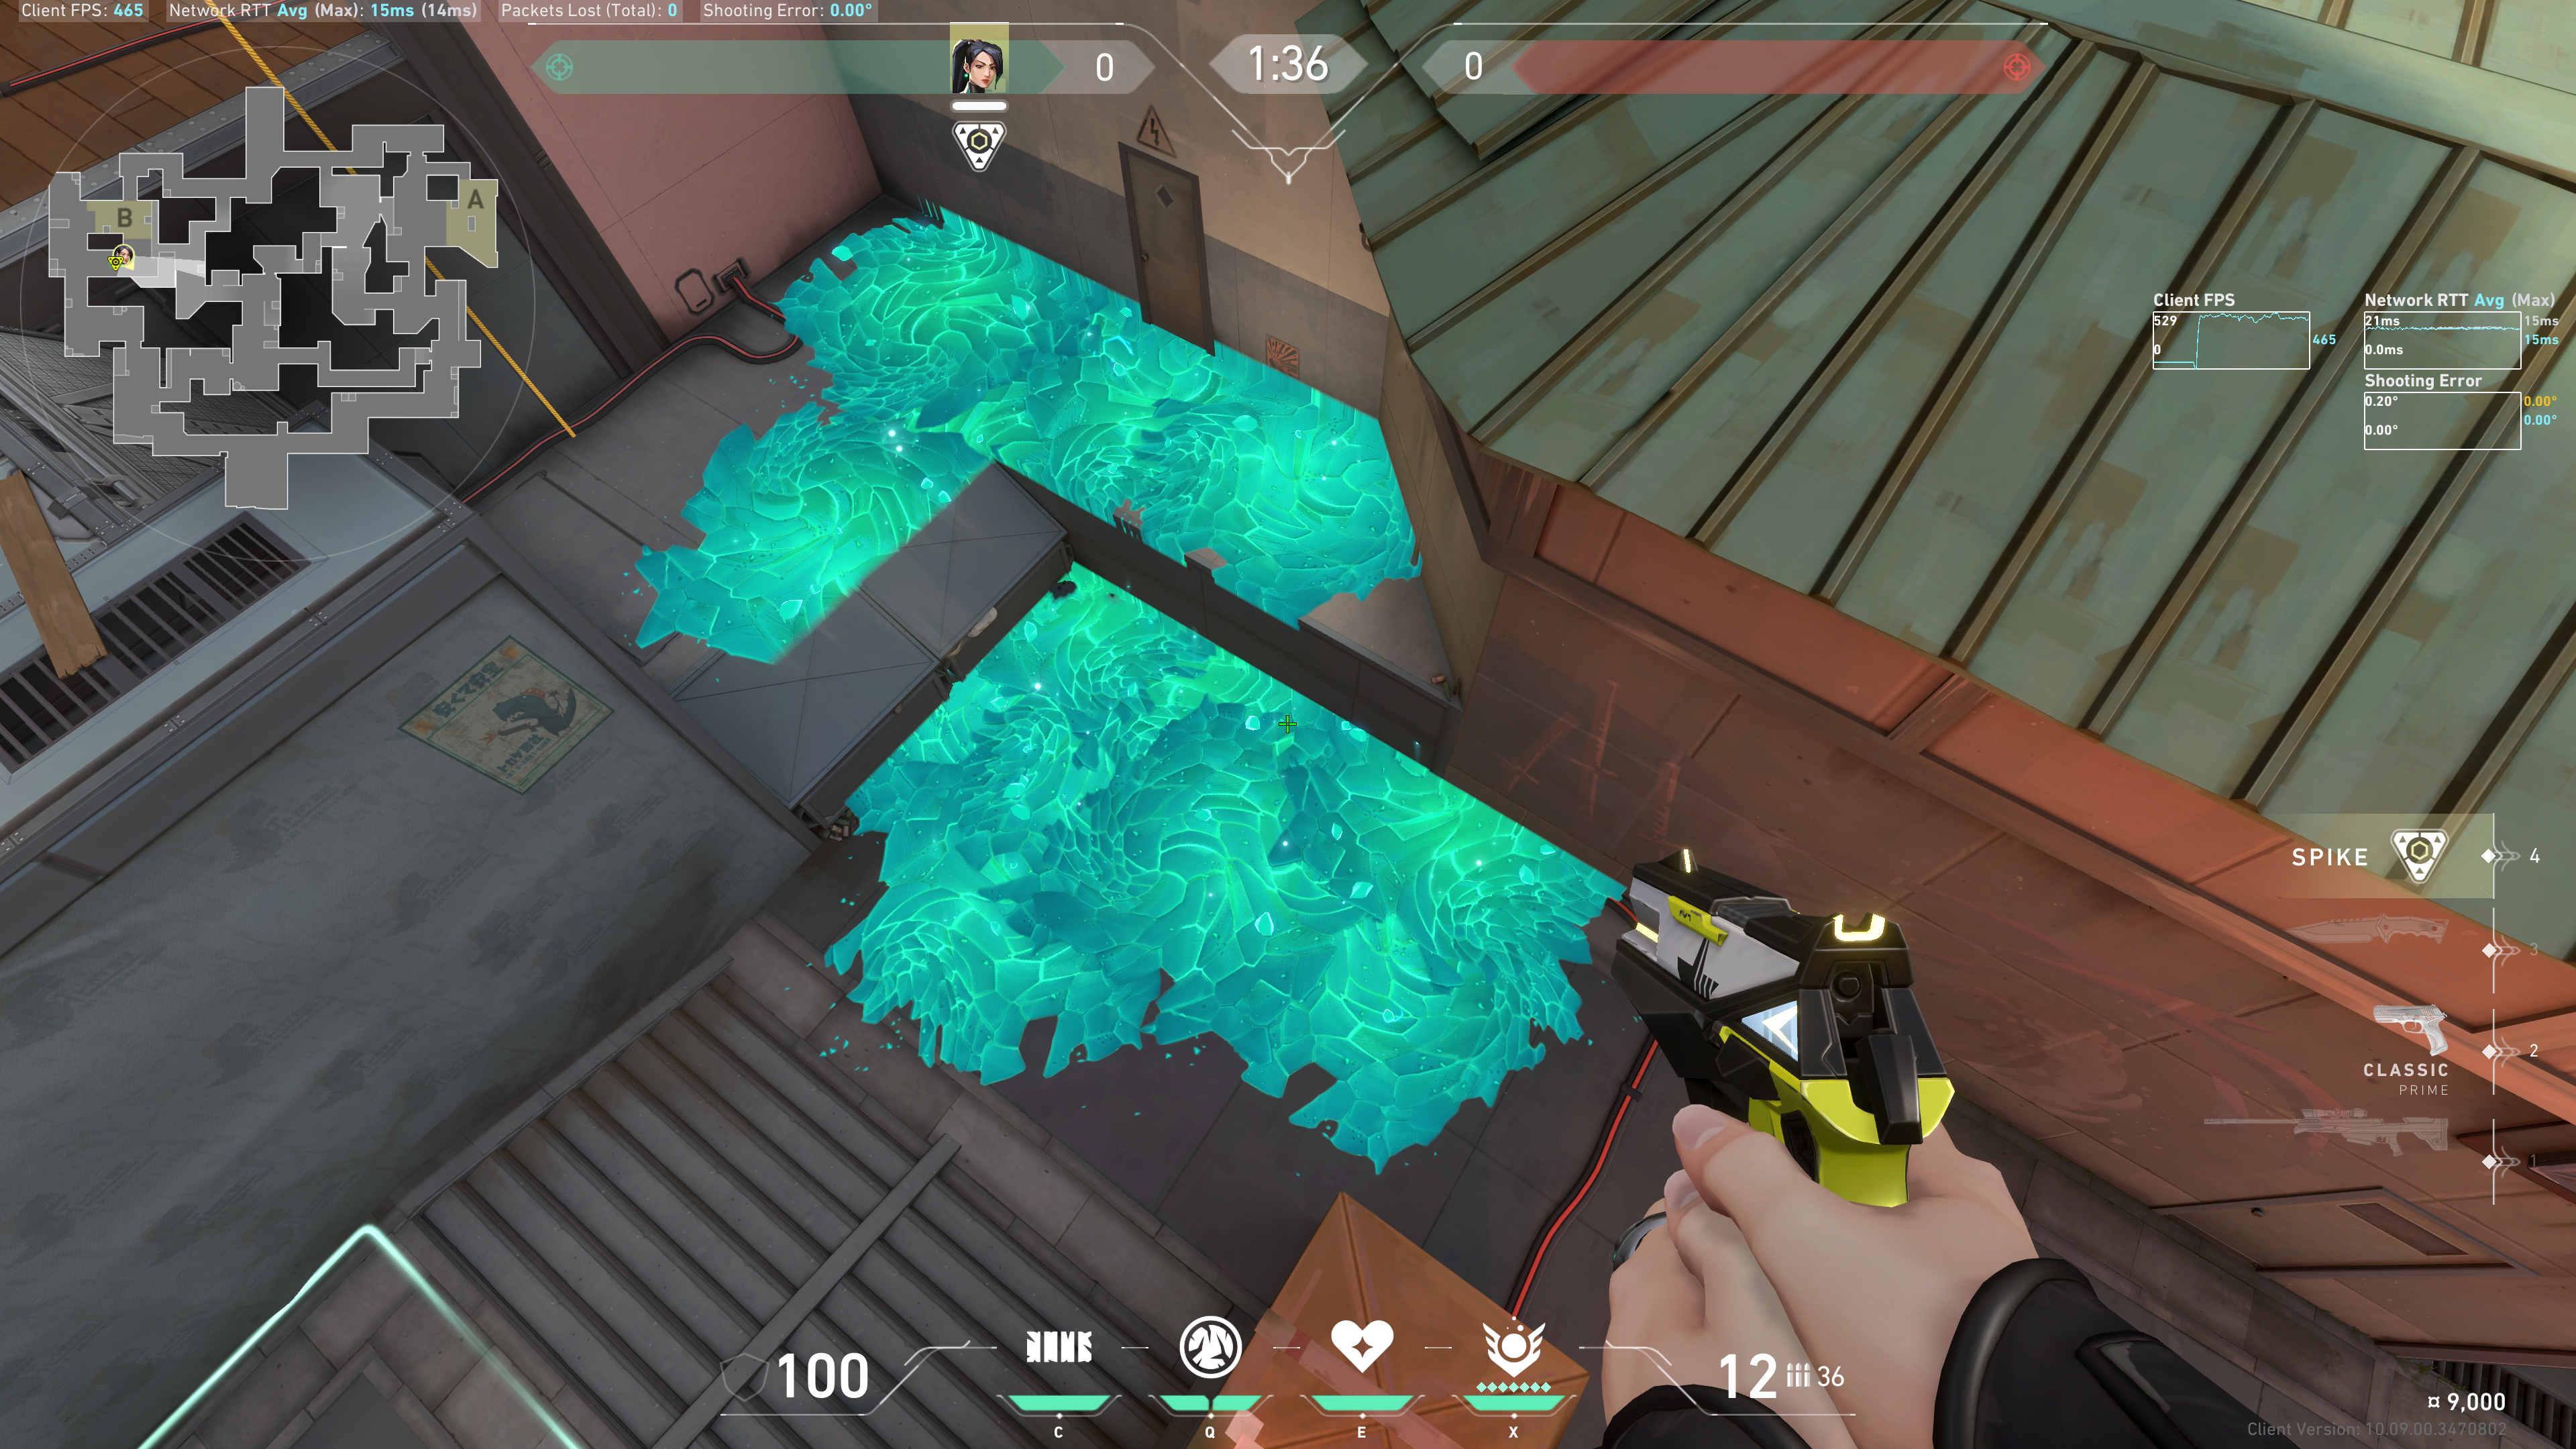
Hell
Note the dirt on this broken mirror:
The separator bar between the Ice Orb and Heart icons; line up the left side of this bar to be slightly above this dirt:
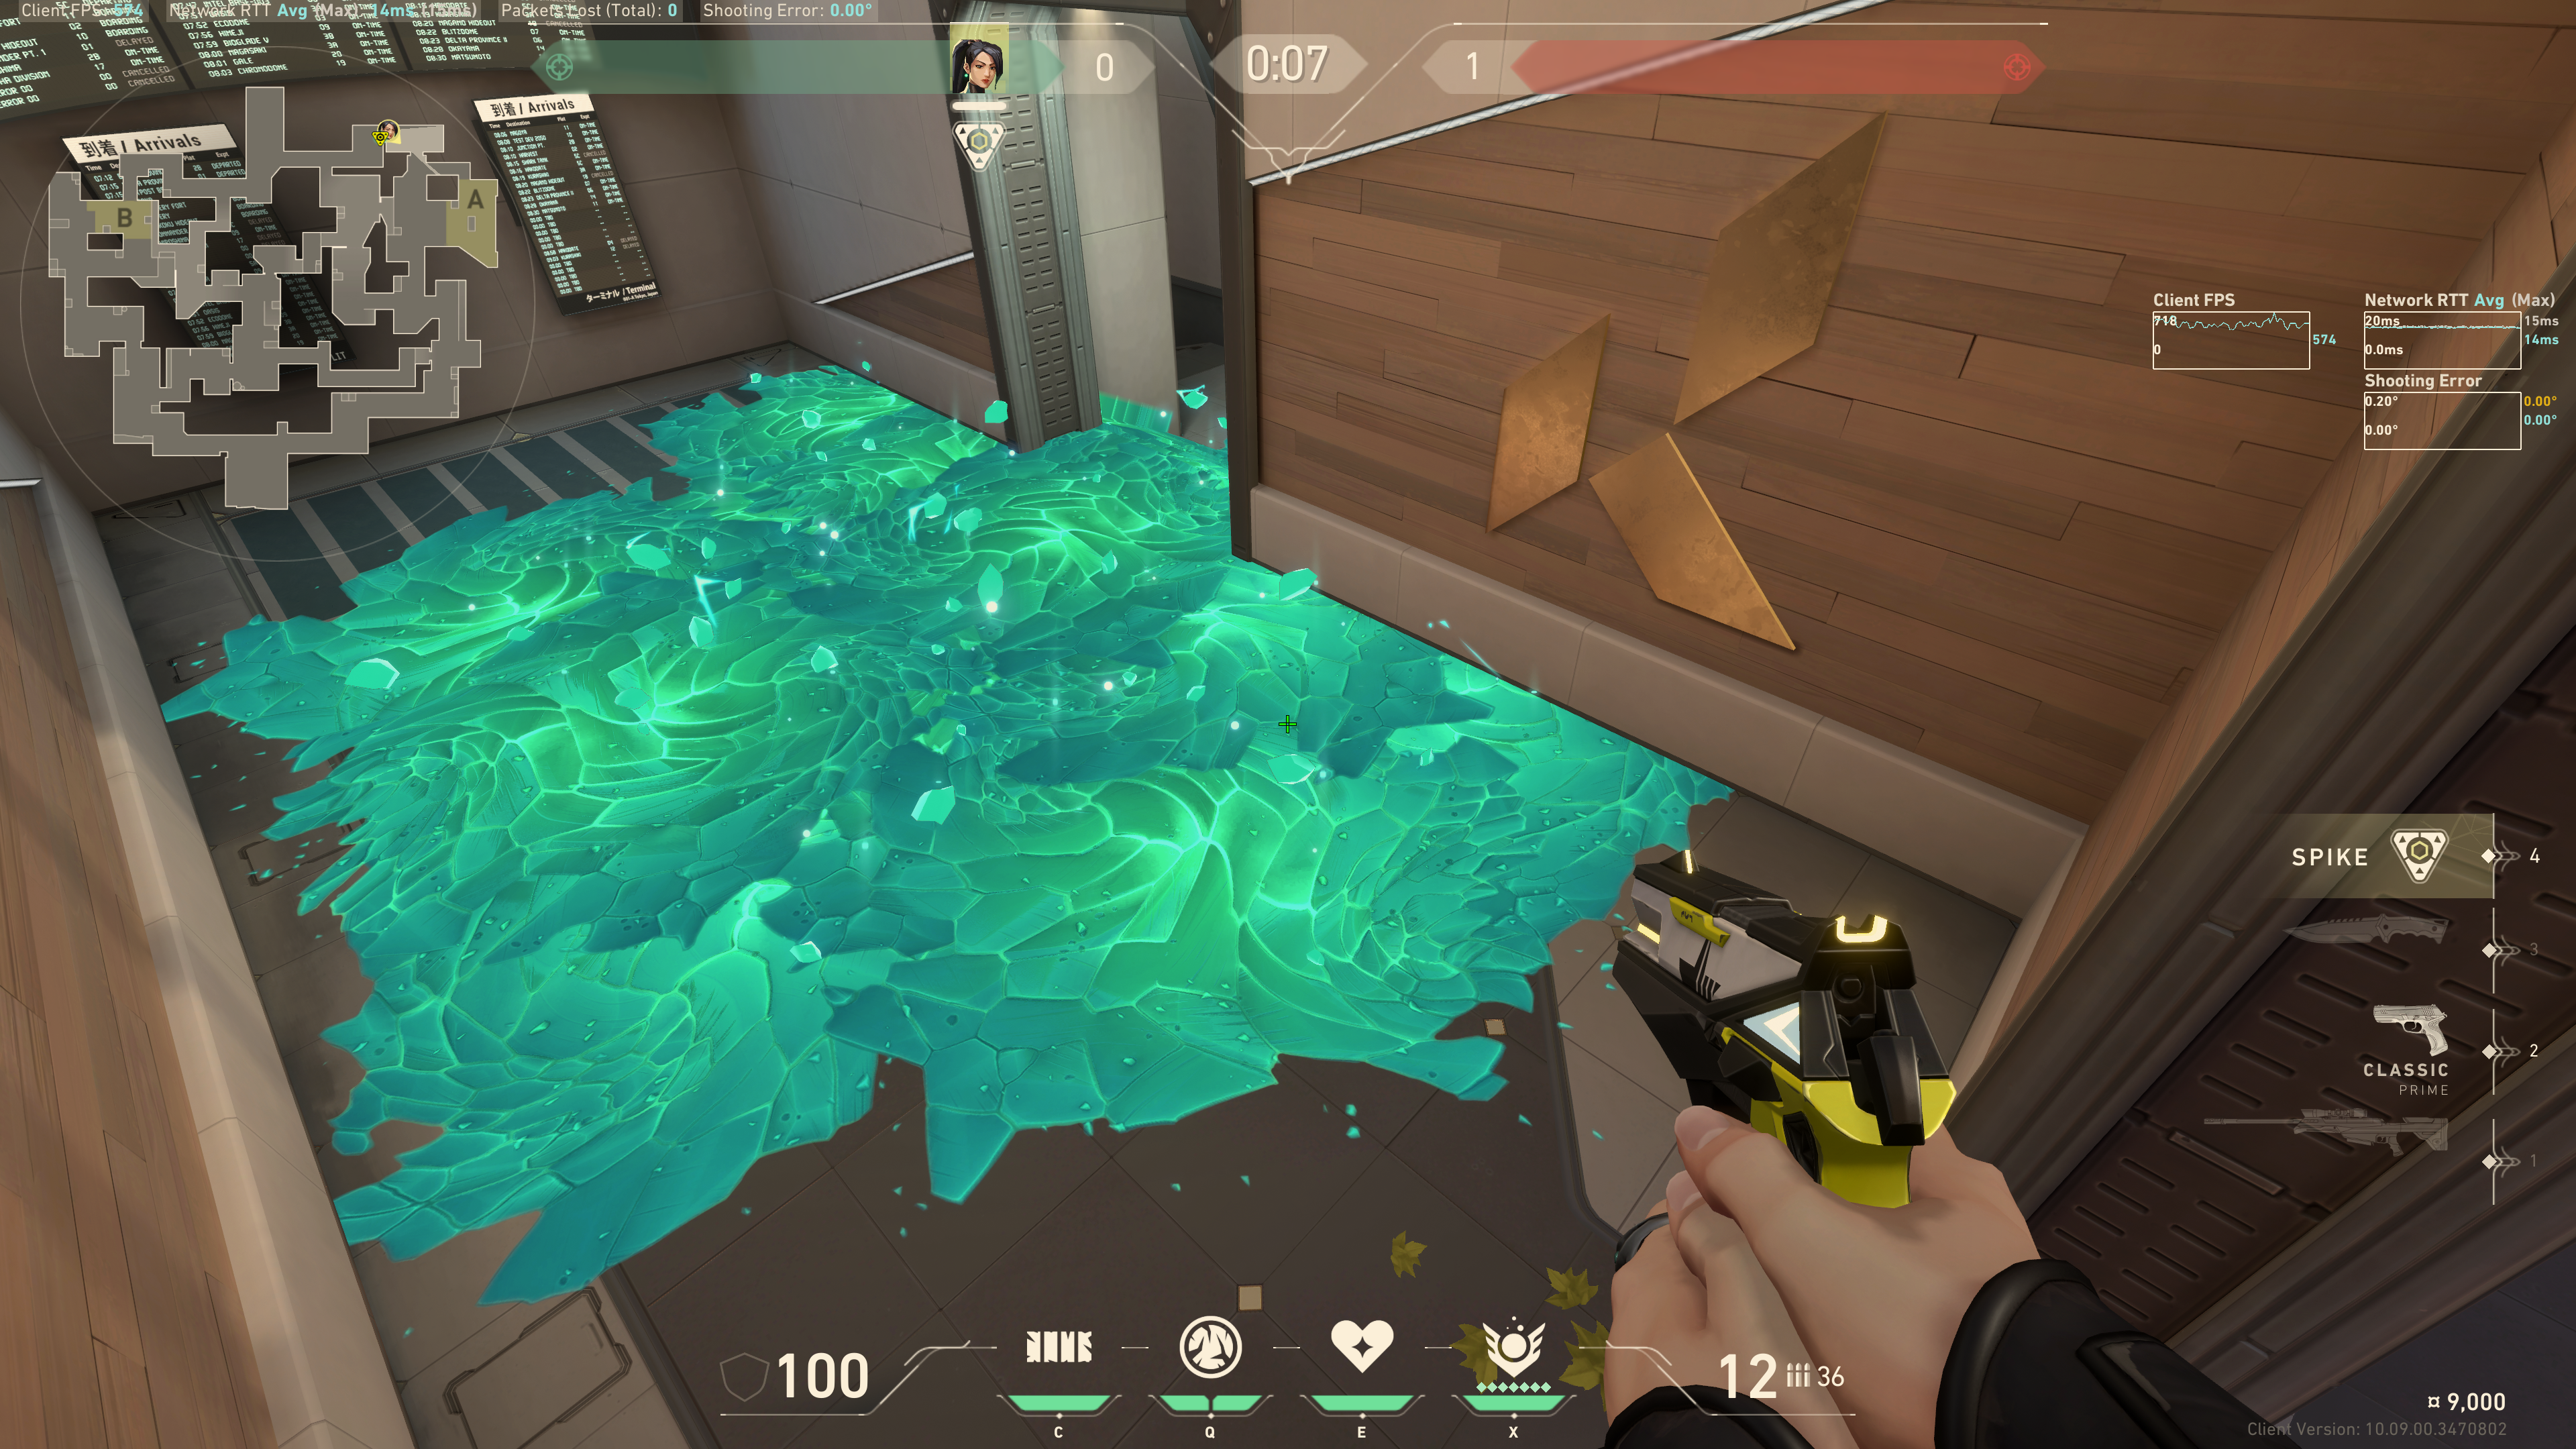
Example result:
Combined results:
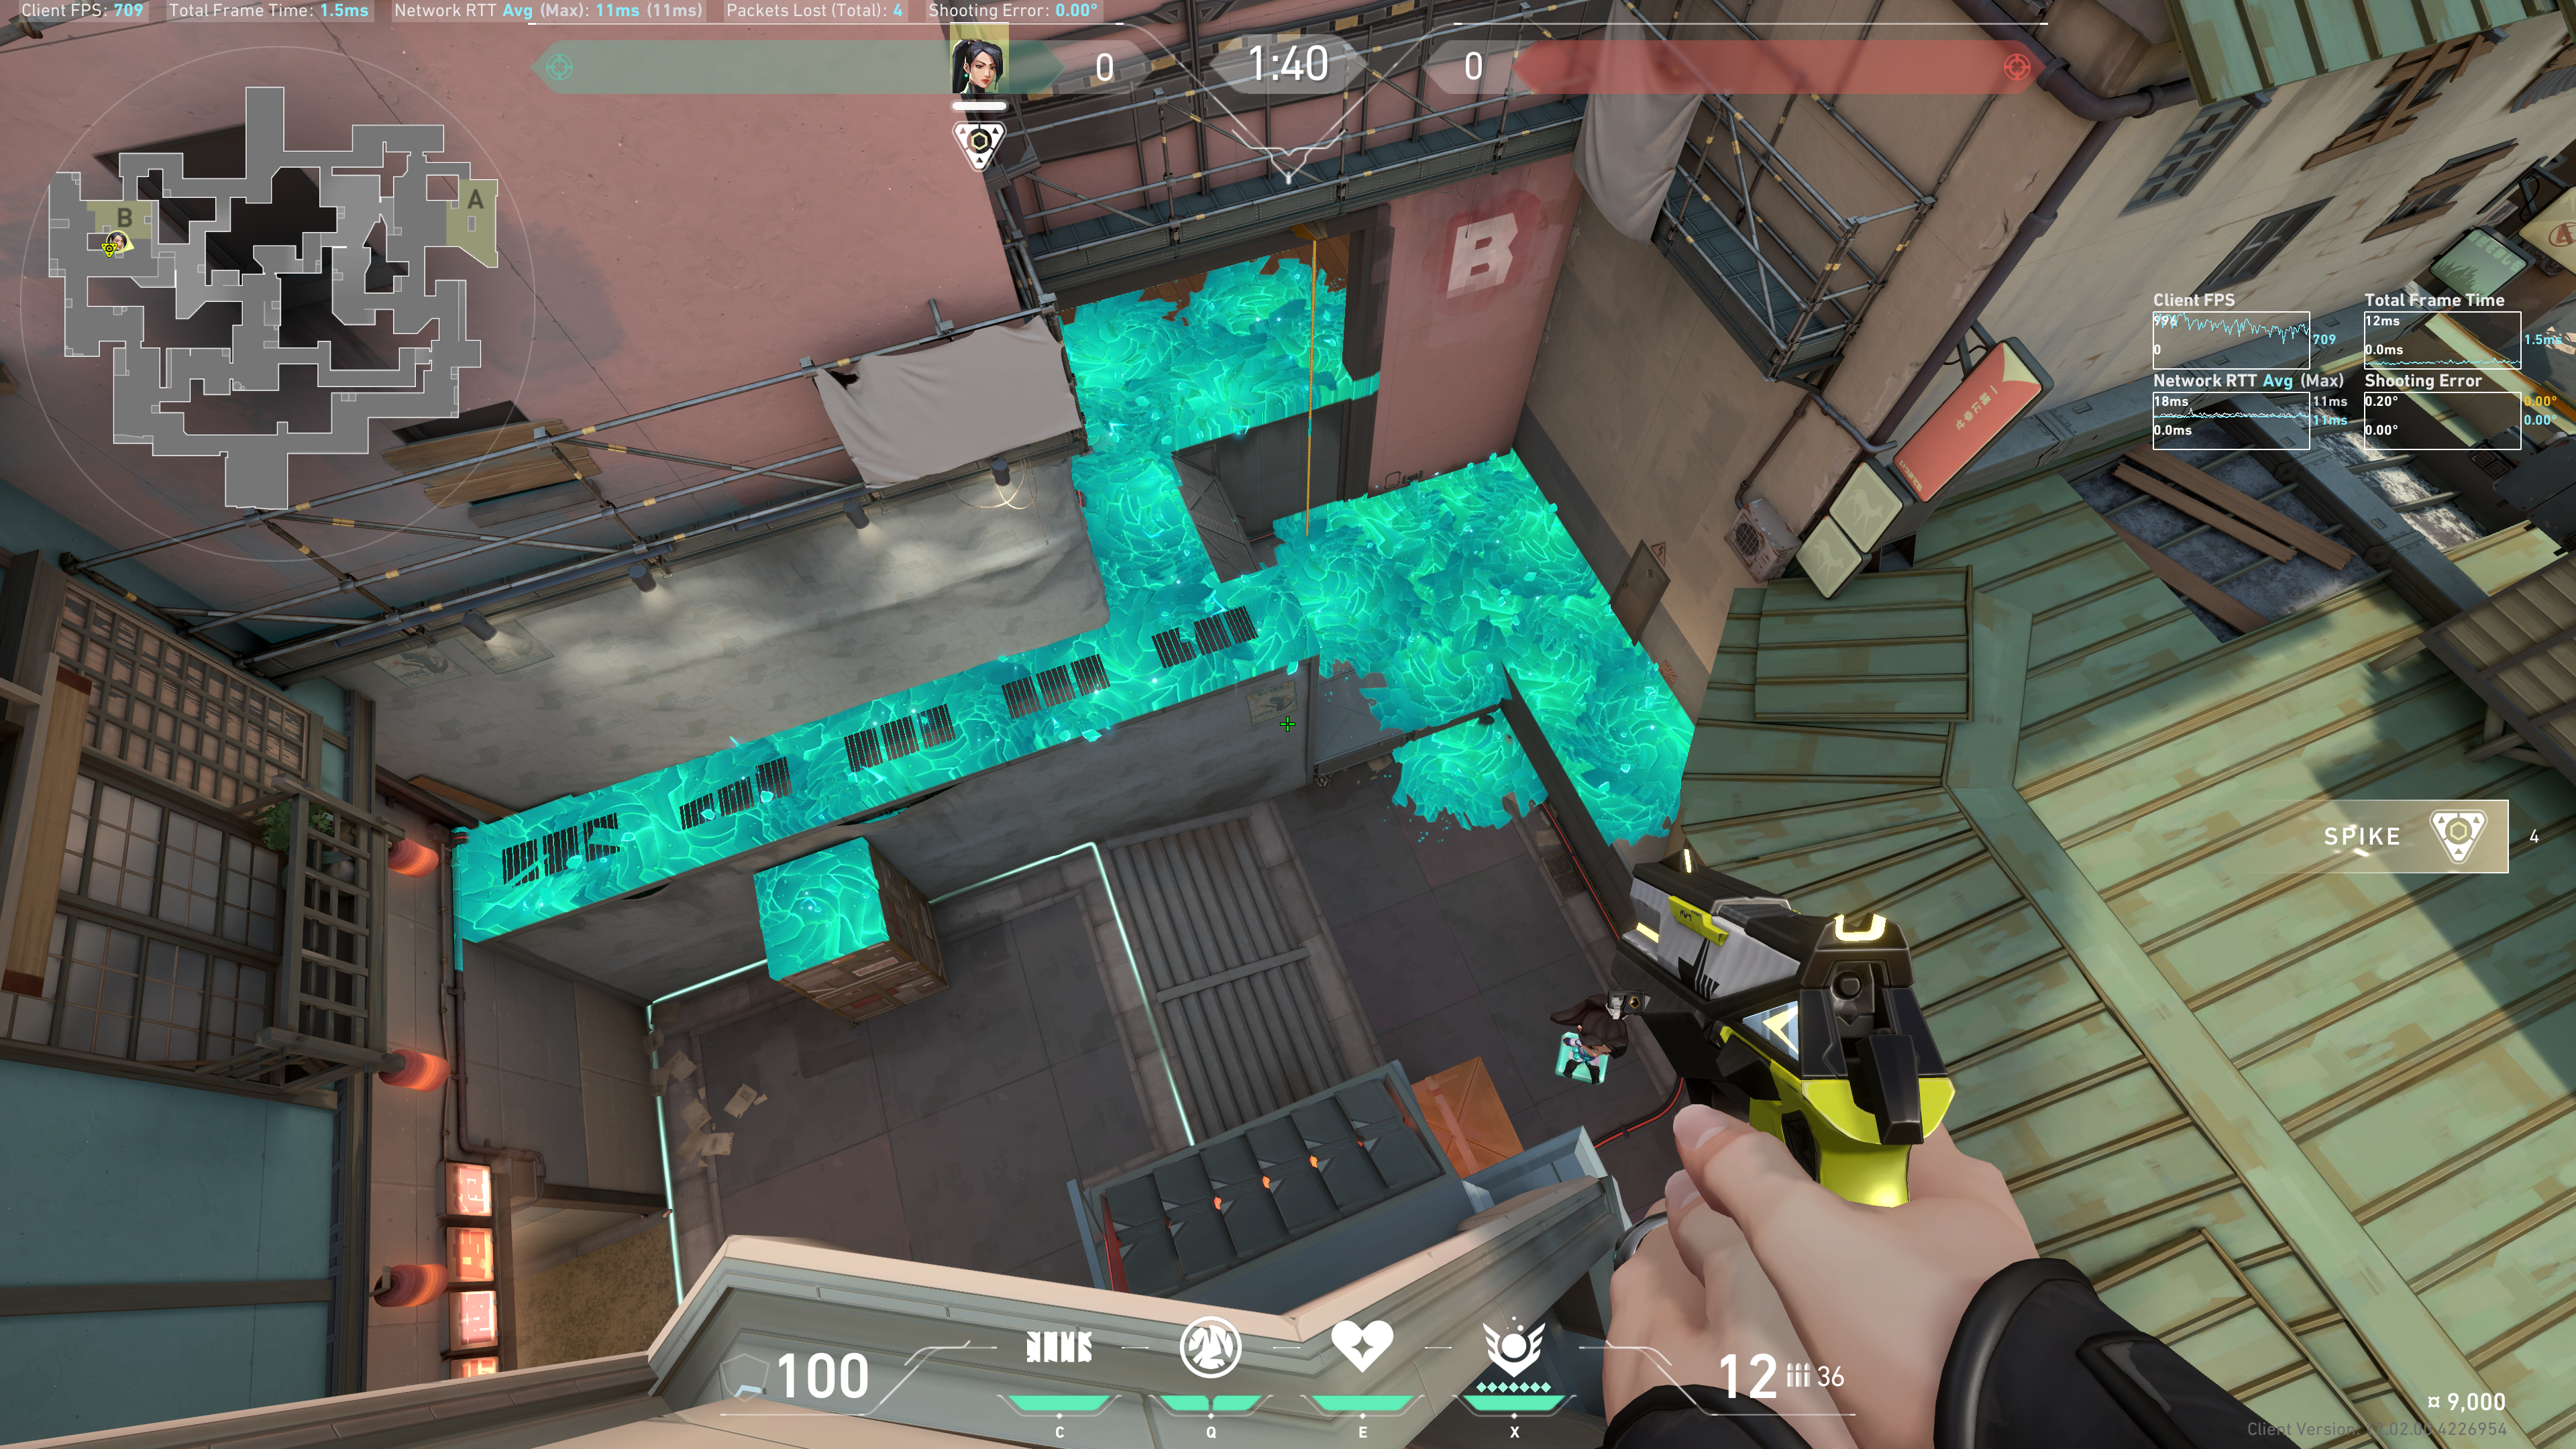
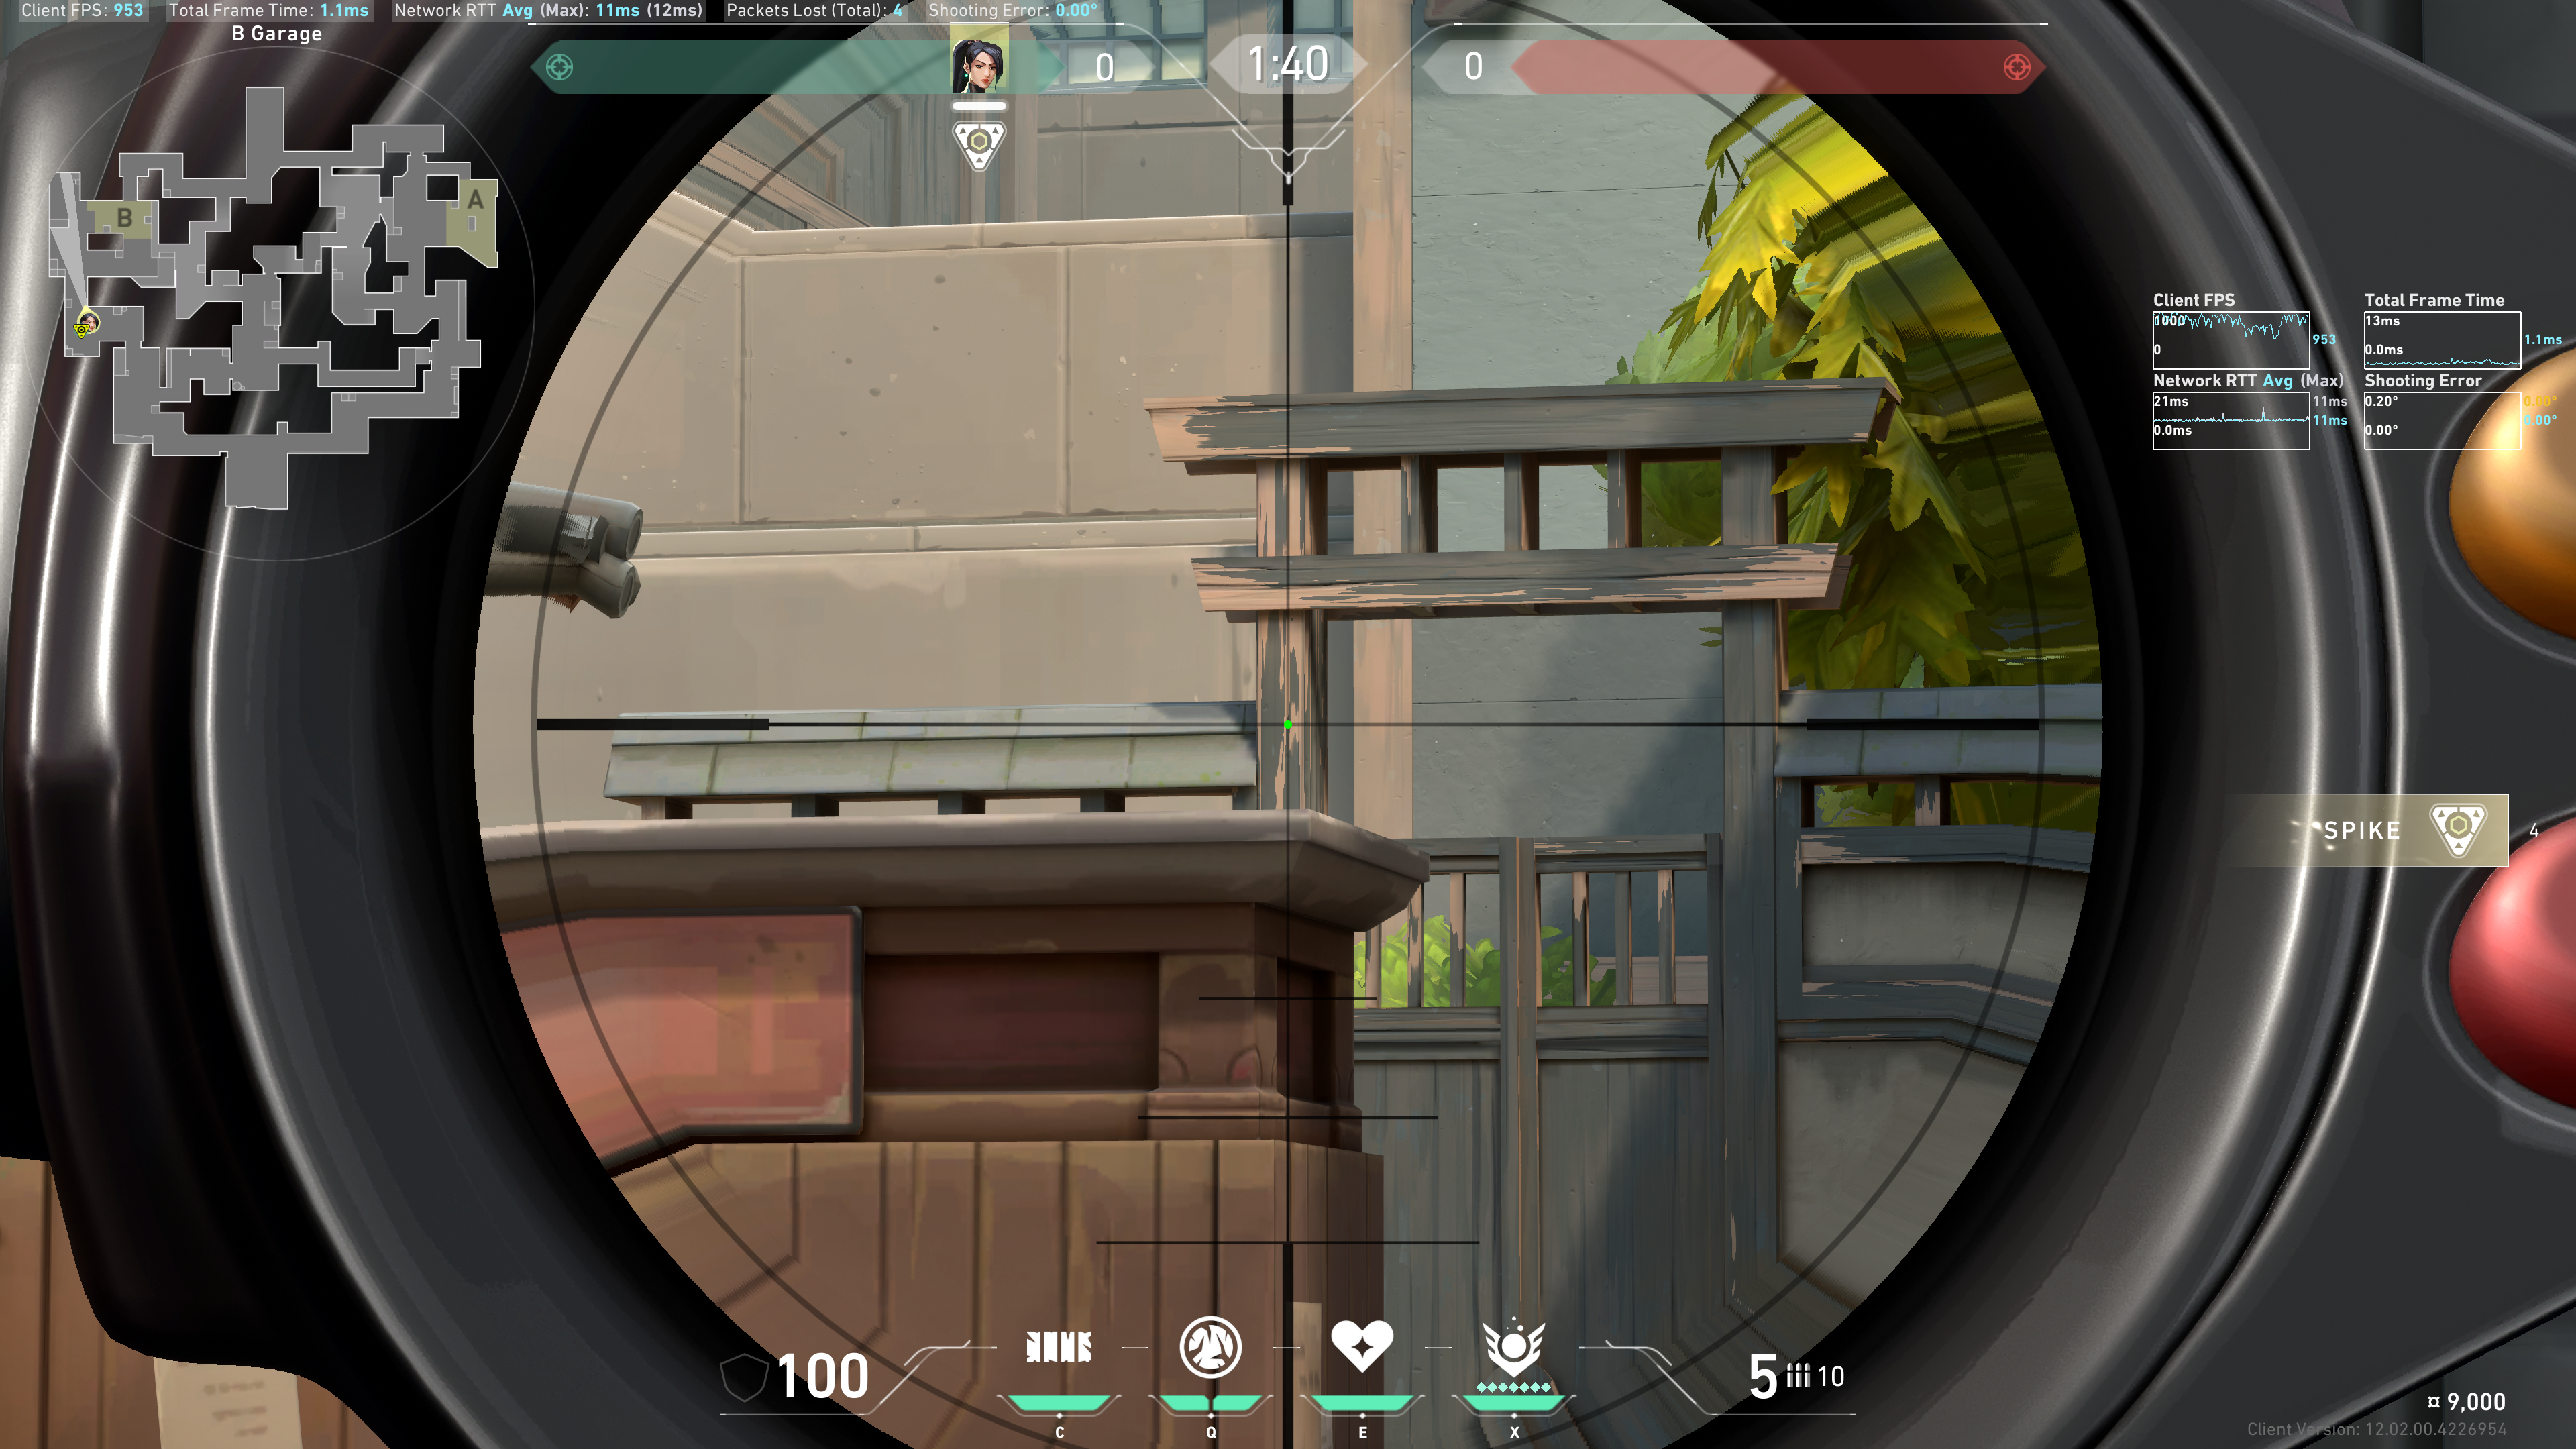
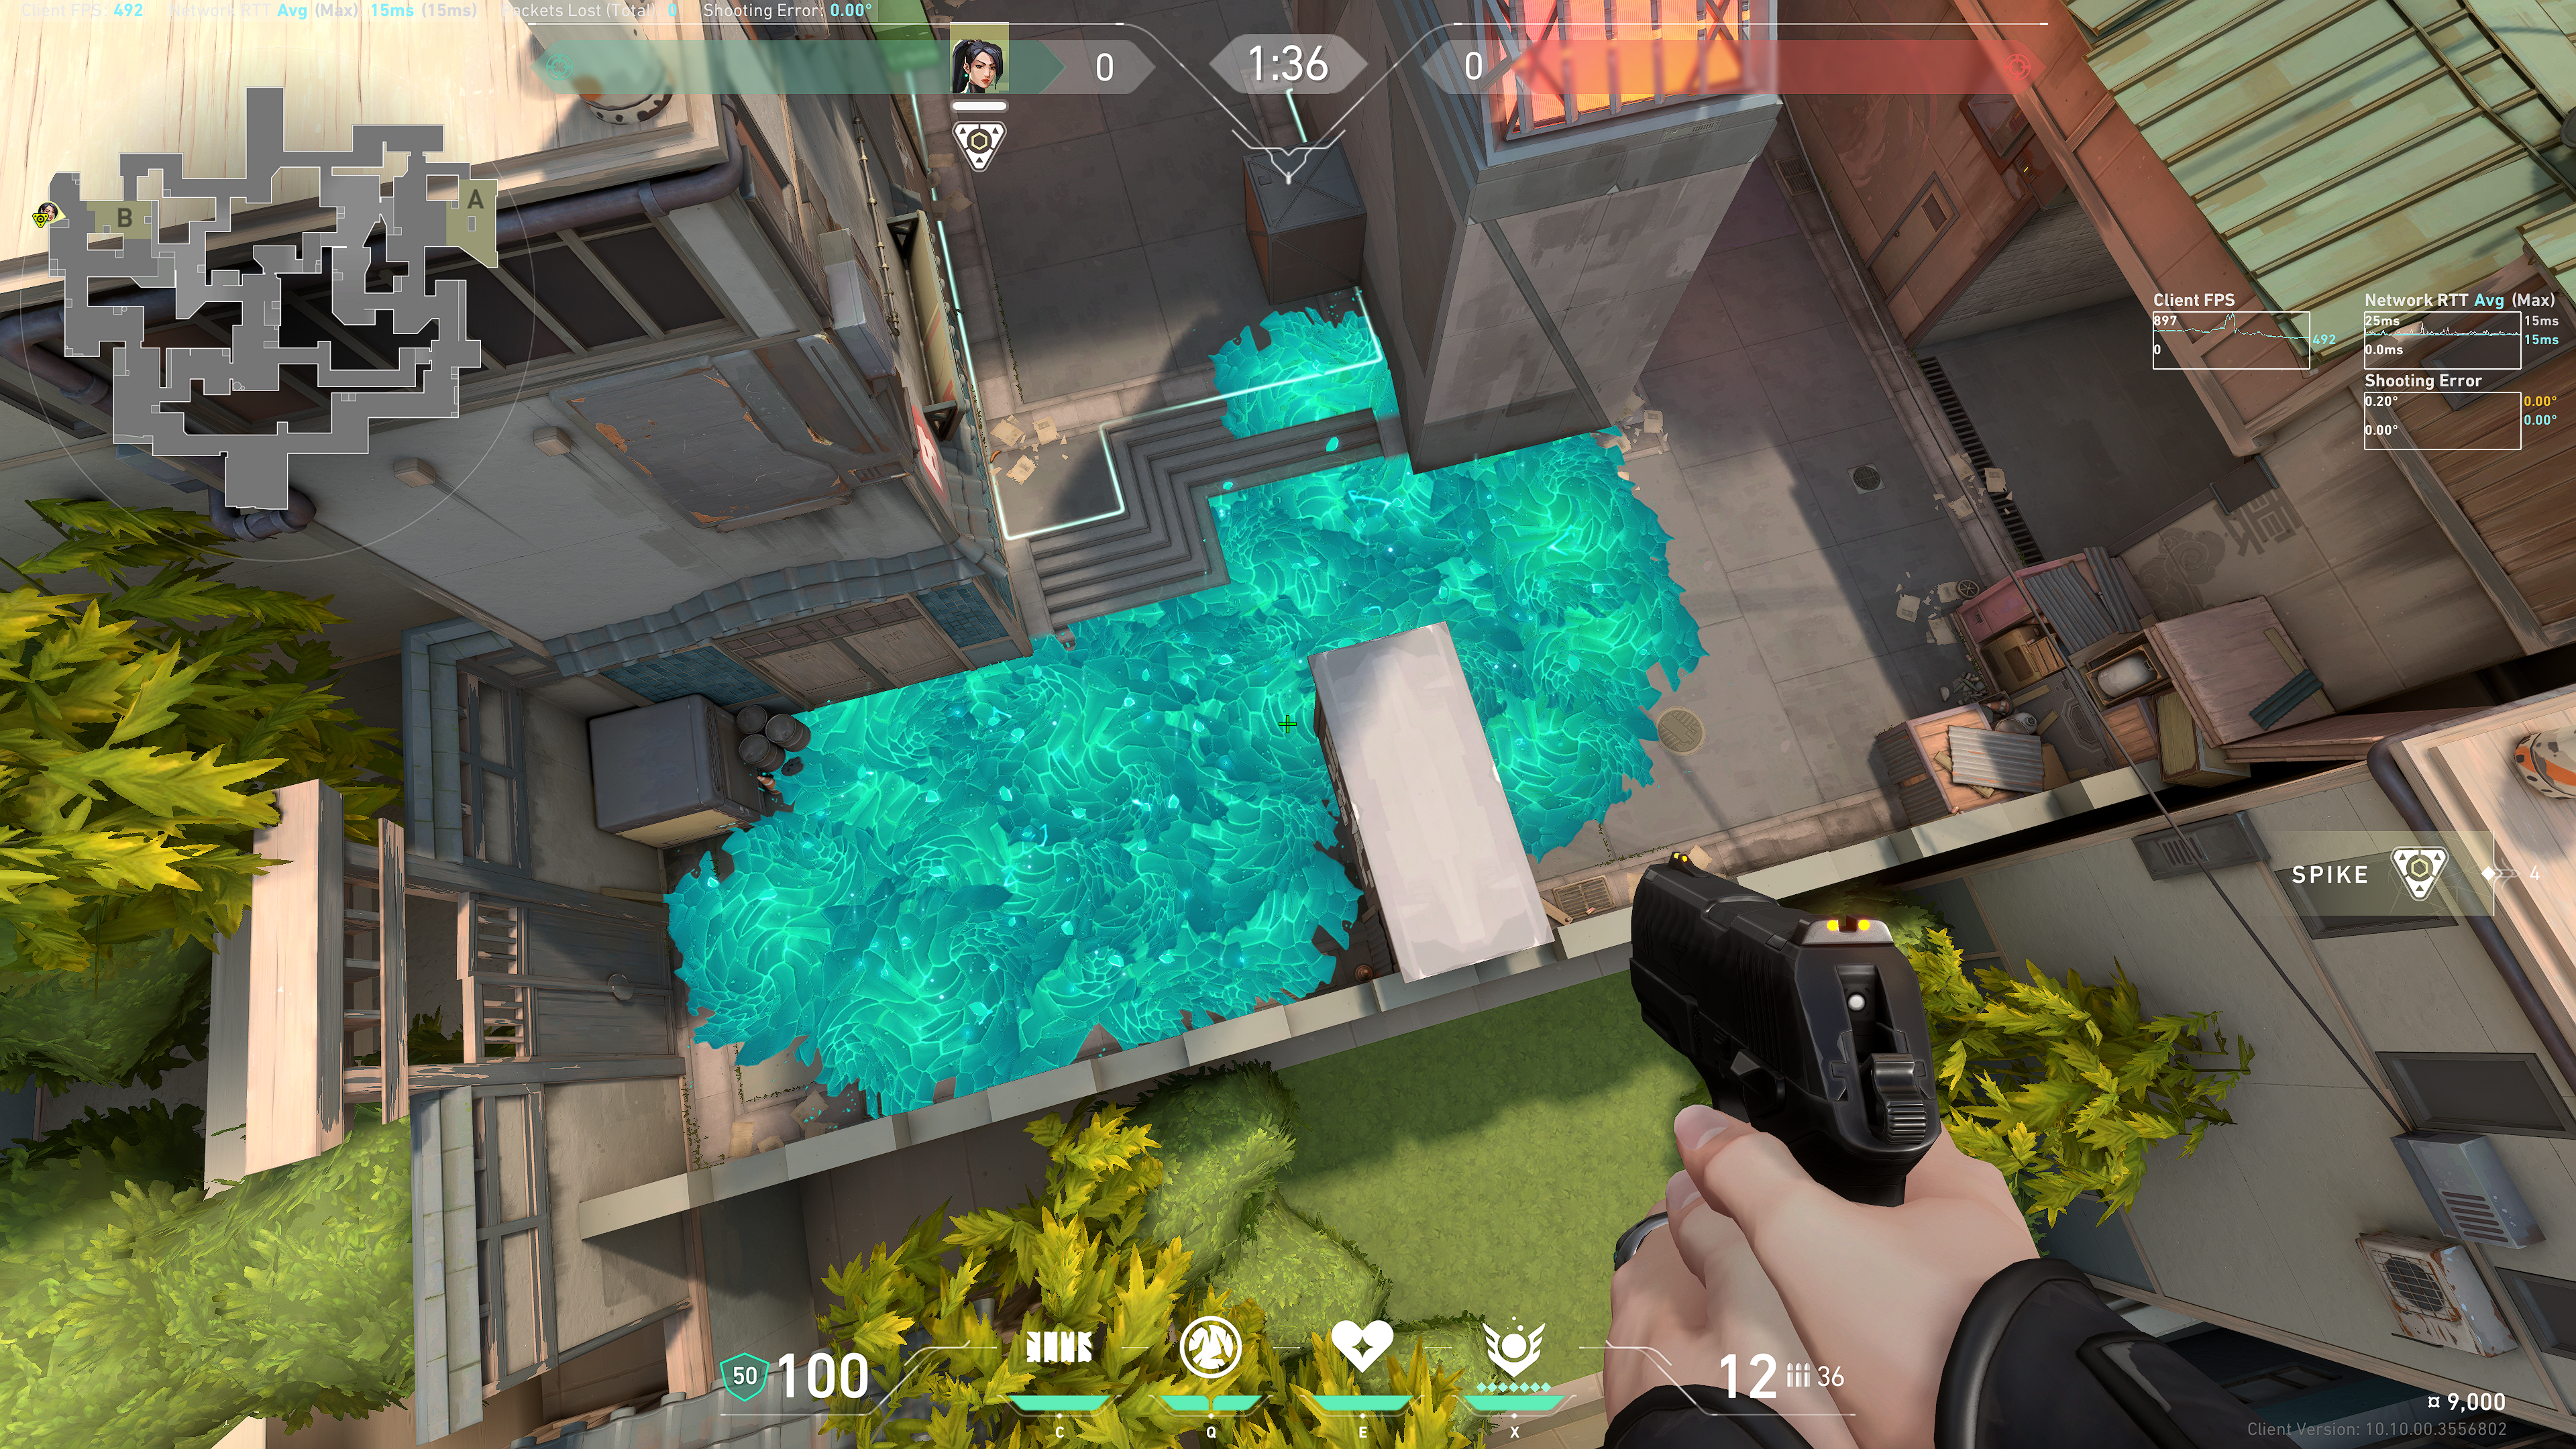
Pillar Right Side
Note this intersection of wood panels in the roof:
The separator bar between the Ice Orb and Heart icons; line up the right side of this bar with this intersection. Ideally tuck it slightly toward the right wood piece for slightly better spread.
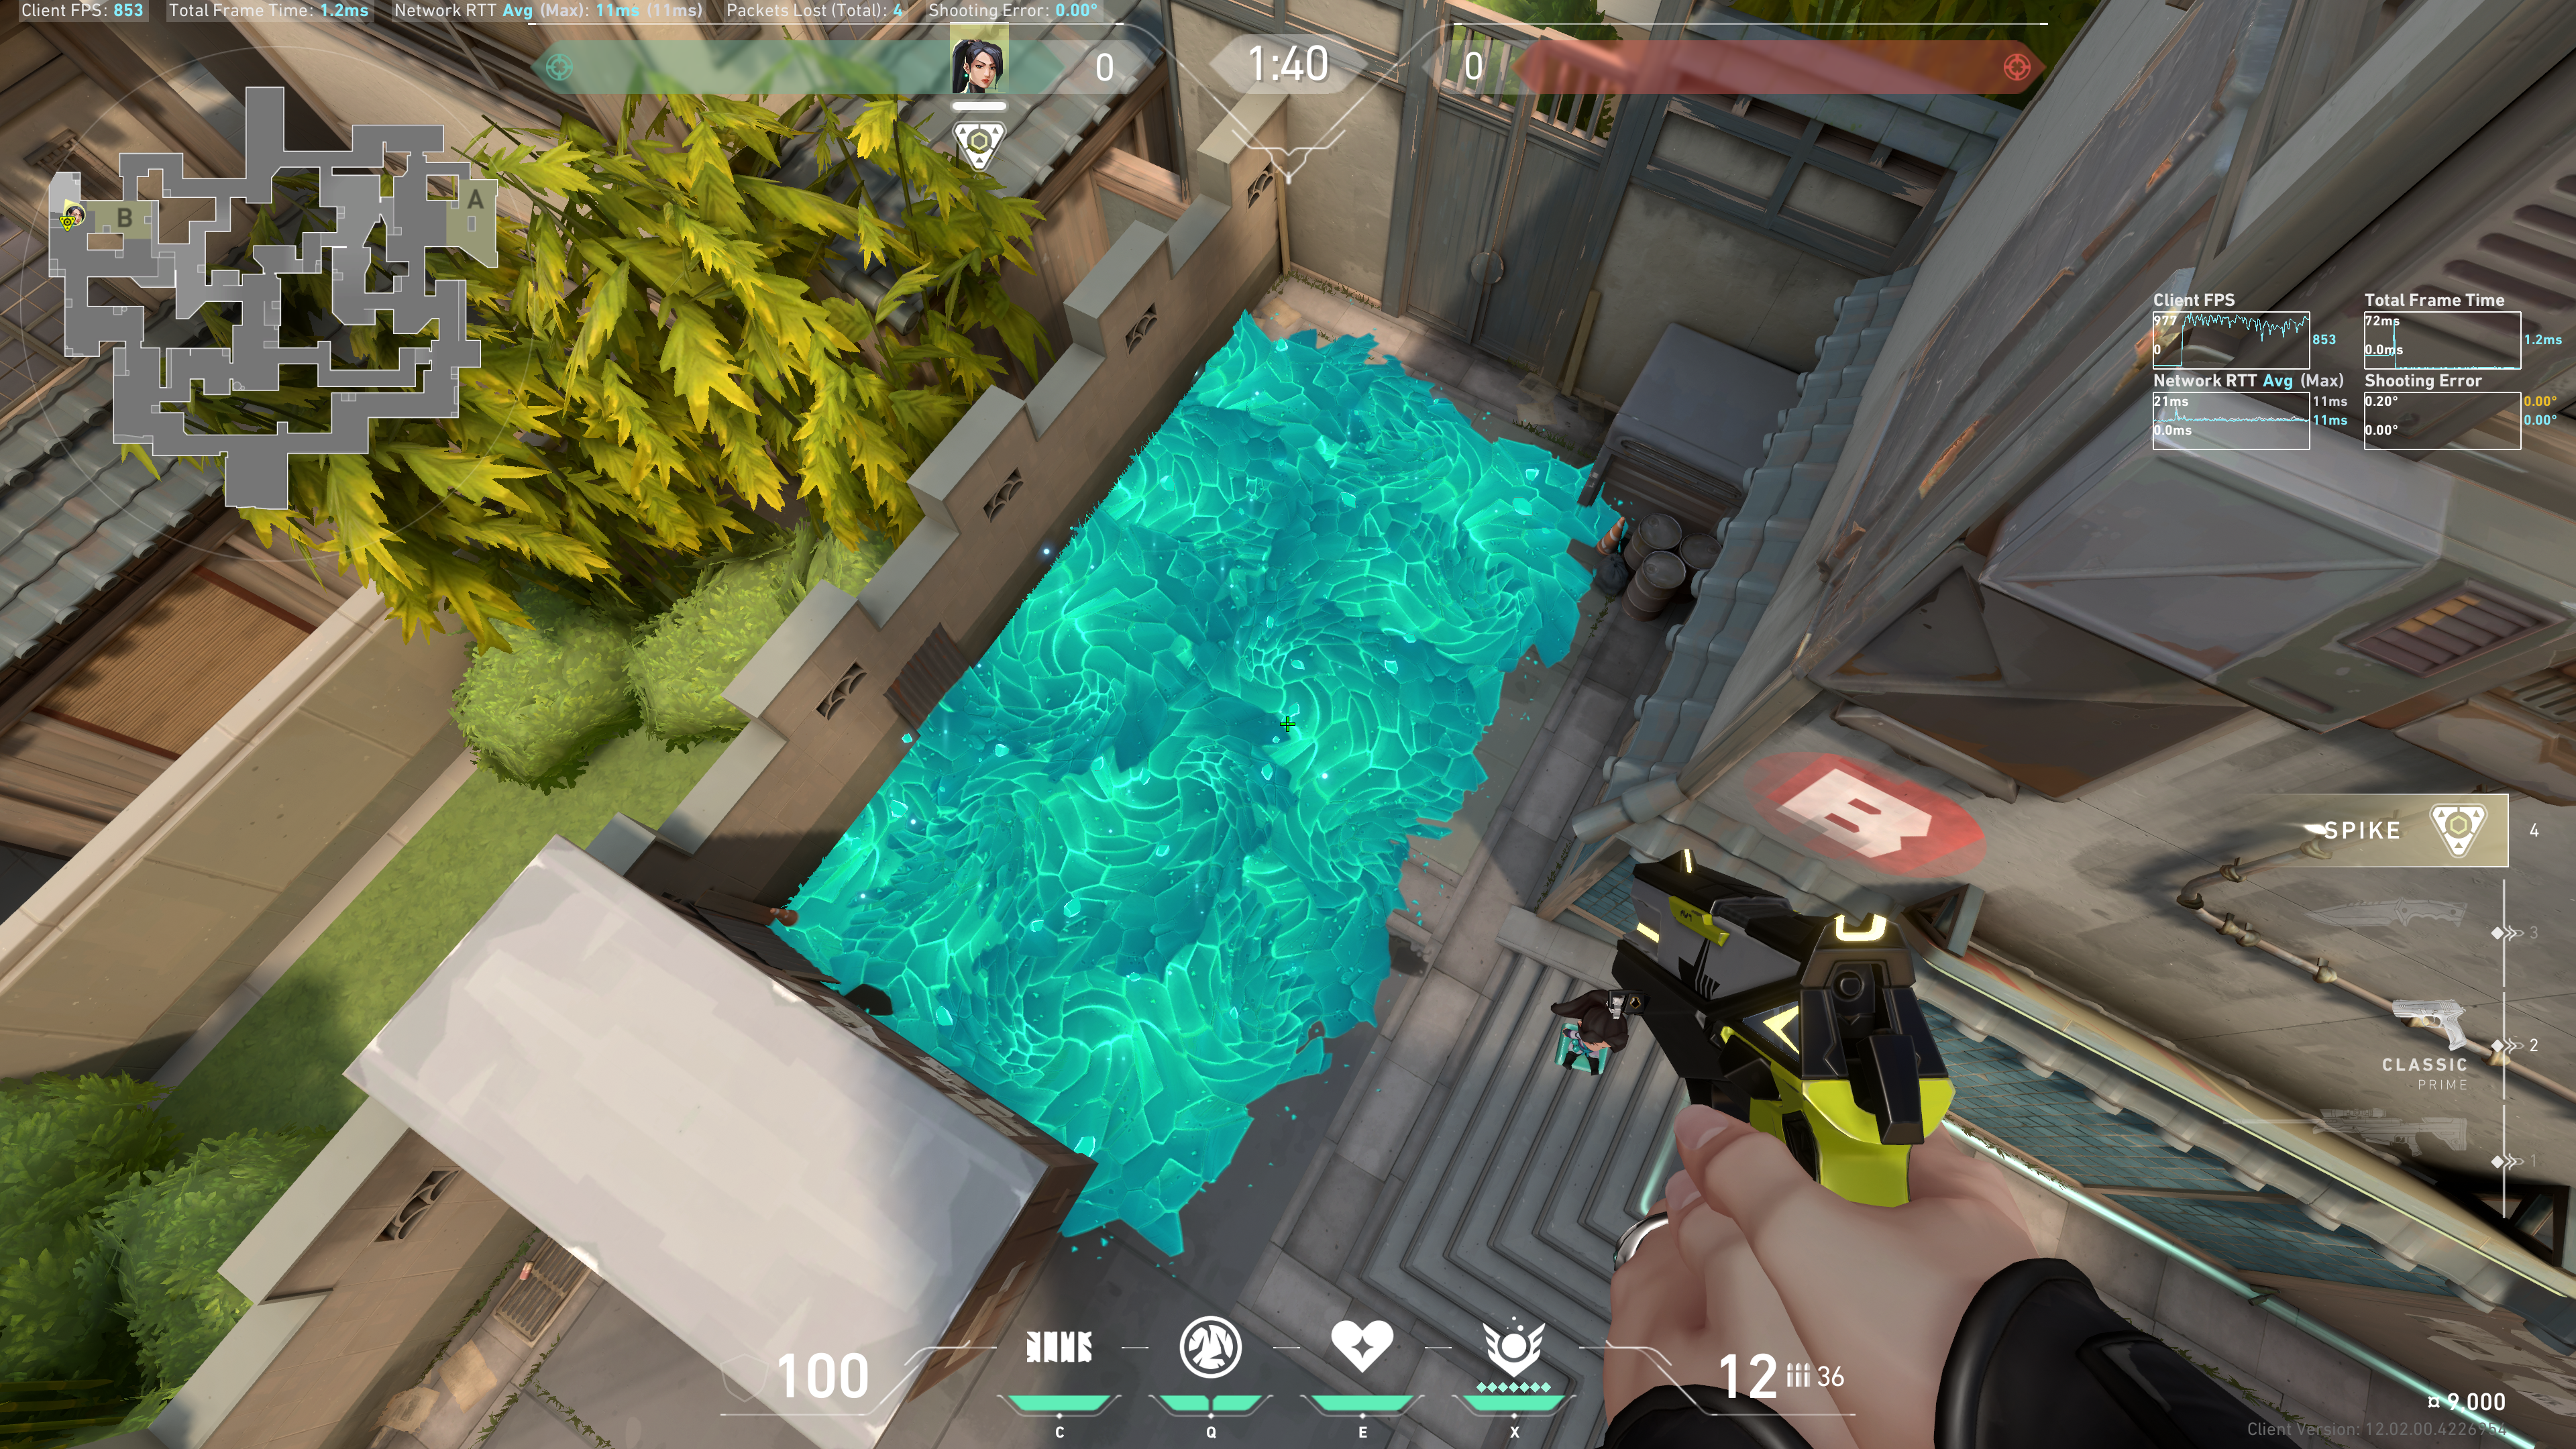
Example result:
Back Site
Notice this corner of the wooden plank:
Line up the corner of that wooden plank in between the Wall and Ice Orb counter outlines. Then for optimal Ice spread, look up slightly so that the letter "C" is no longer touching the wooden plank:
Result:
Back site (impromptu)
Aim at this wooden frame, using it as a backboard. Run and throw so it bounces back as much as possible:
Note: results may vary slightly depending on angle and toss, but generally the result is good enough. Example result:
Hell (impromptu)
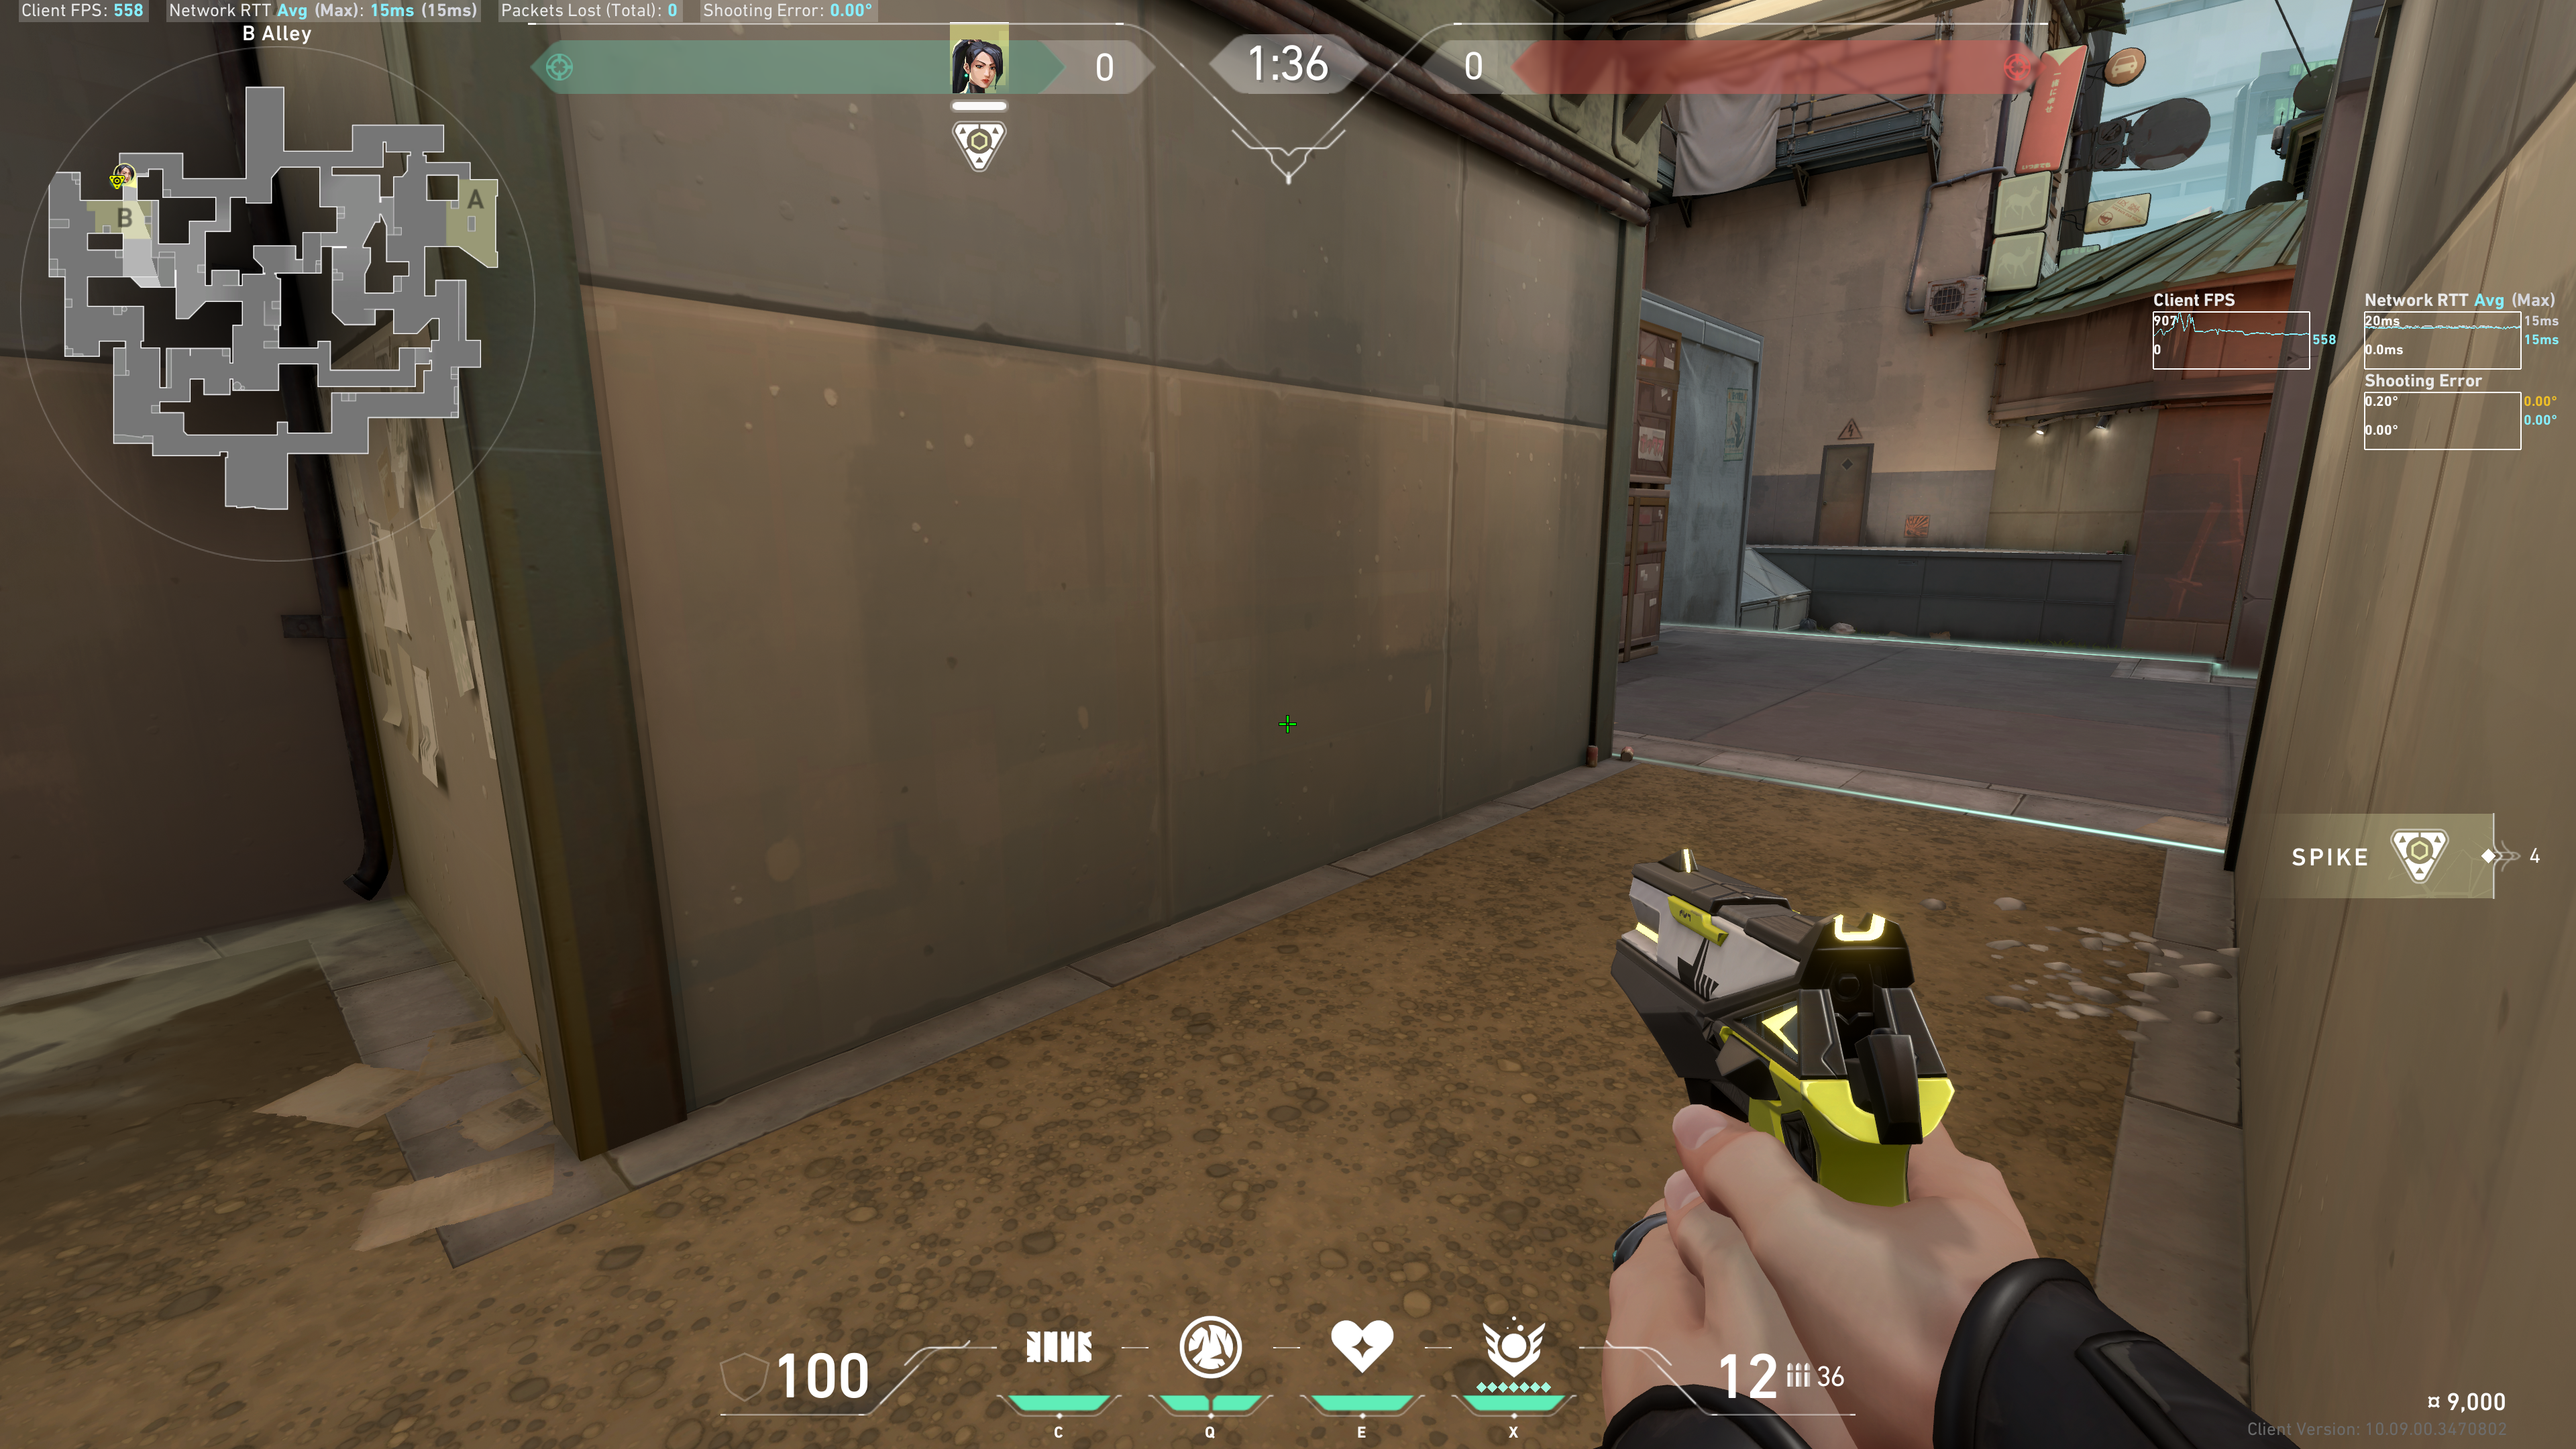
Tuck here:
Using this wall as a backboard, run and throw:
Result:
Defense
A Site Retake
From Heaven
Tuck here:
Sign / Back site
Aim in between the roof and the K symbol:
Result:
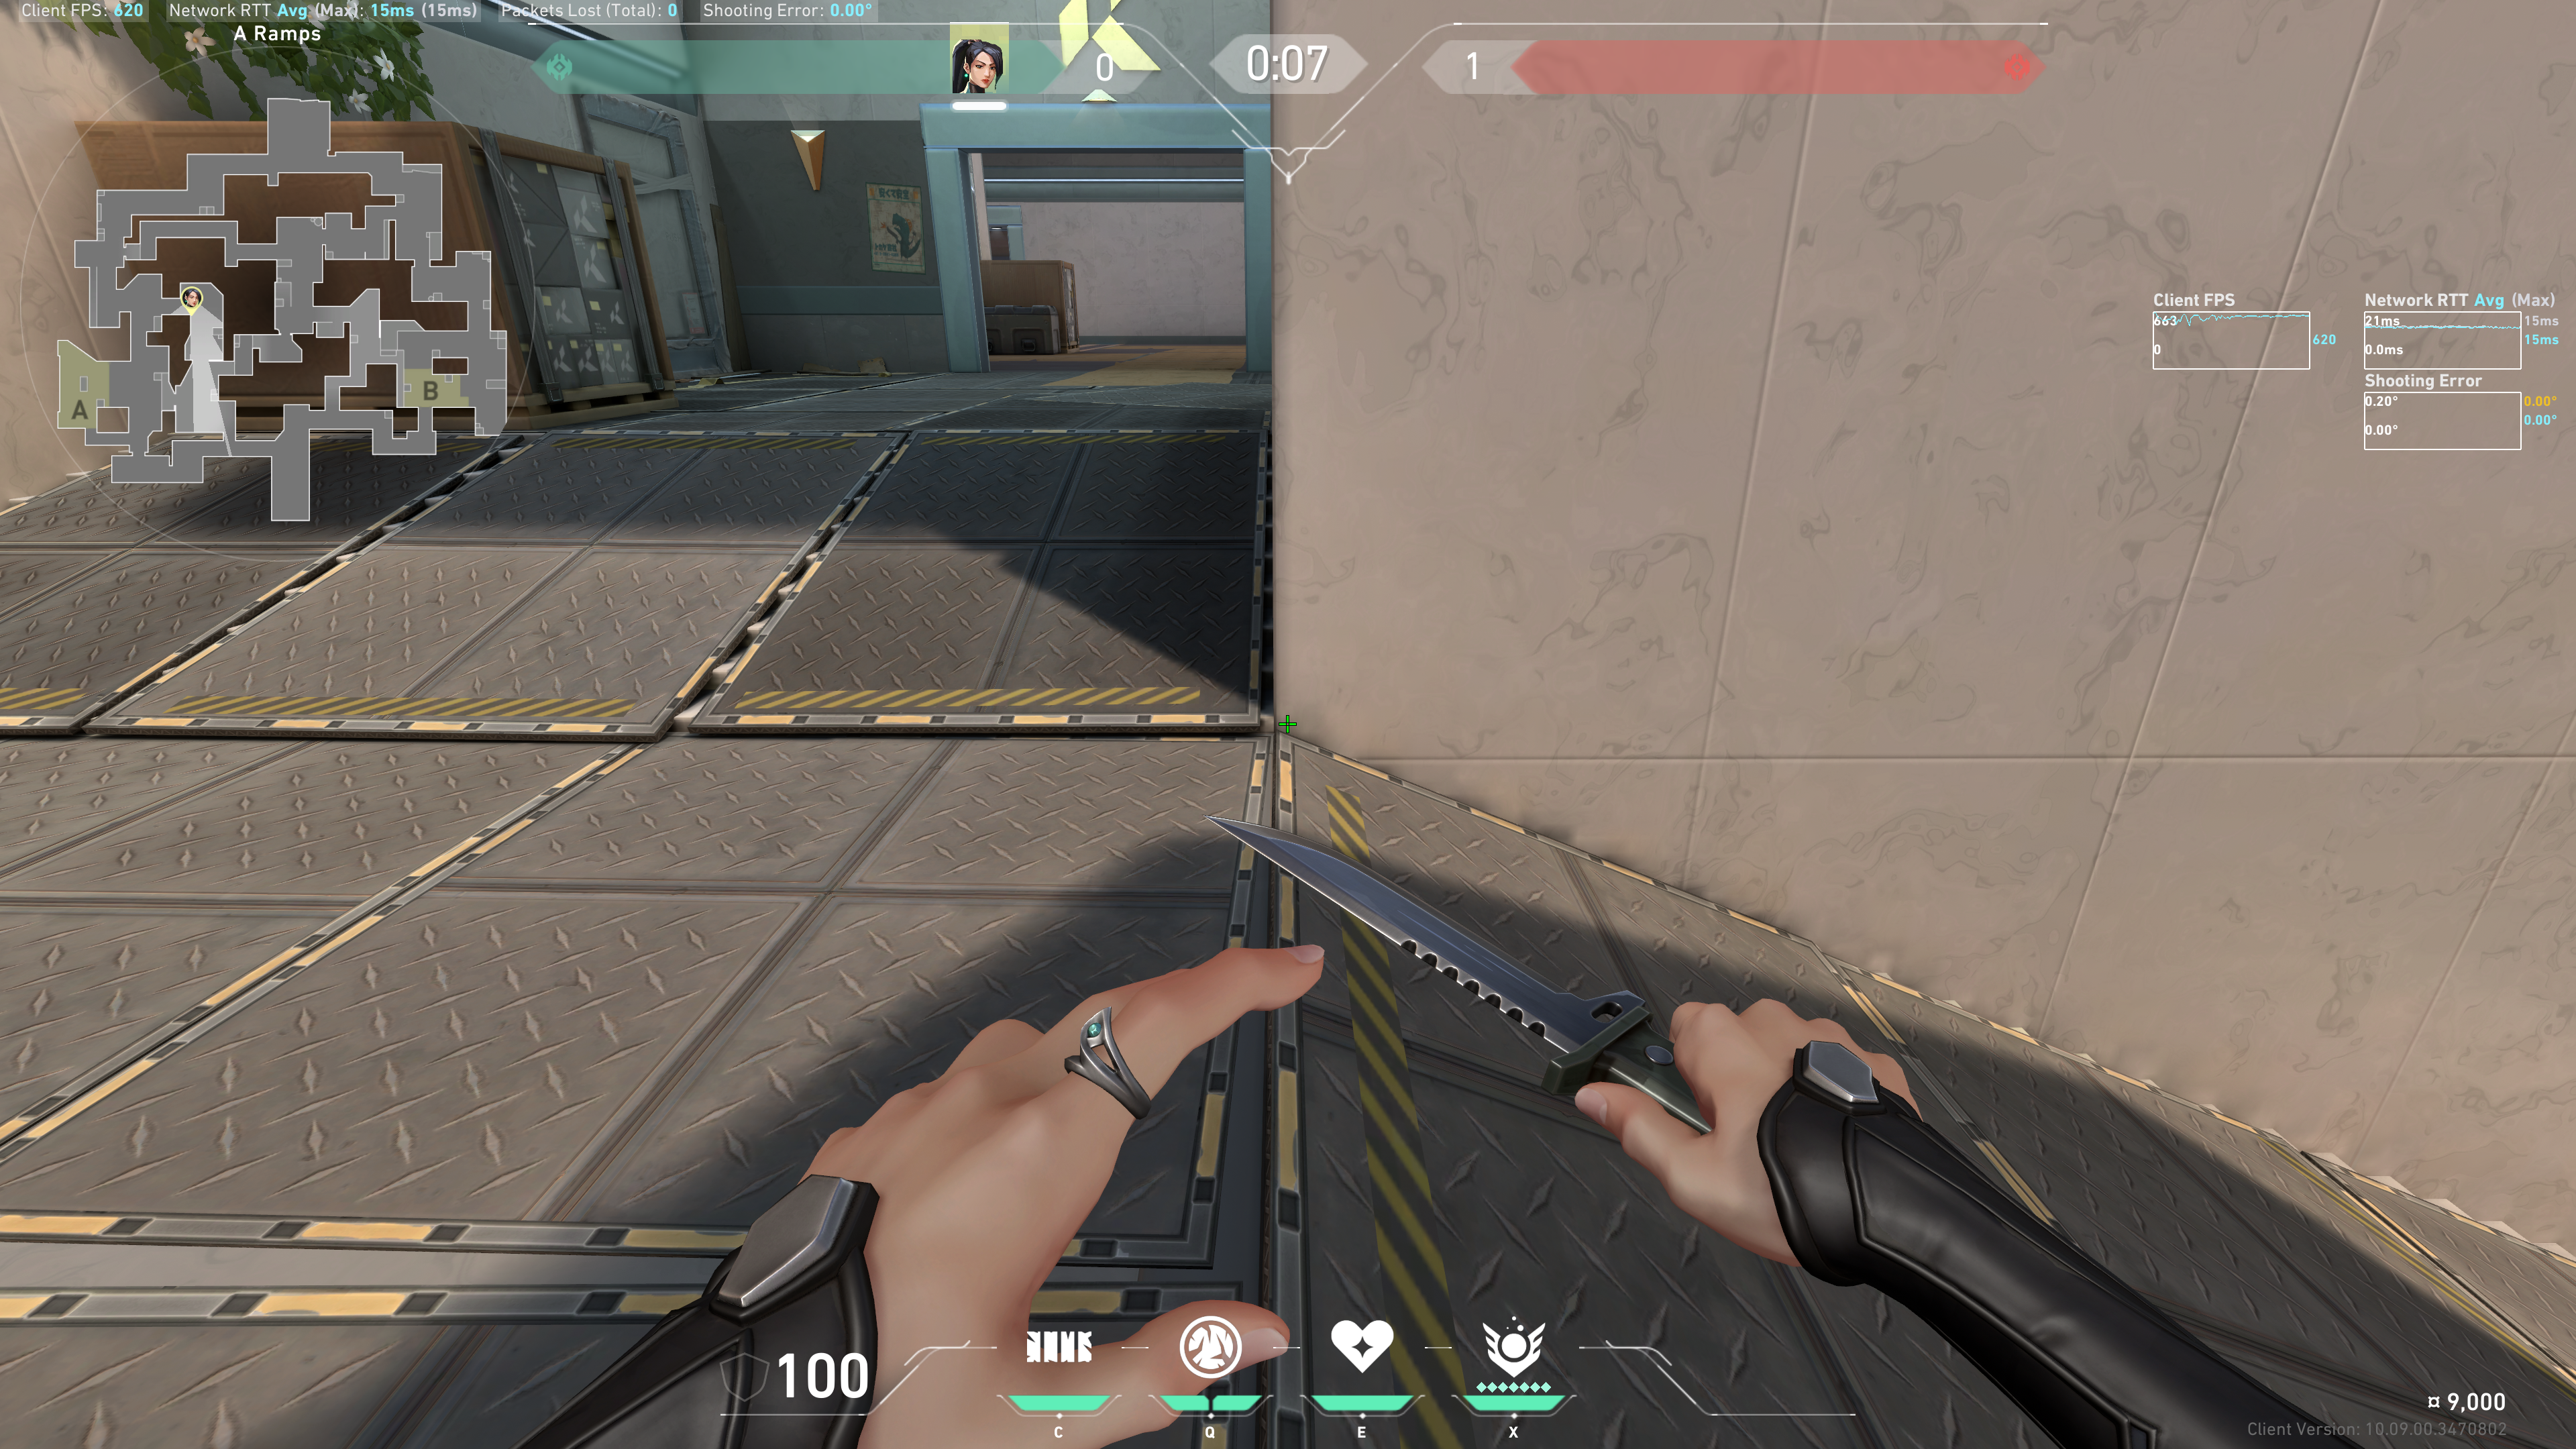
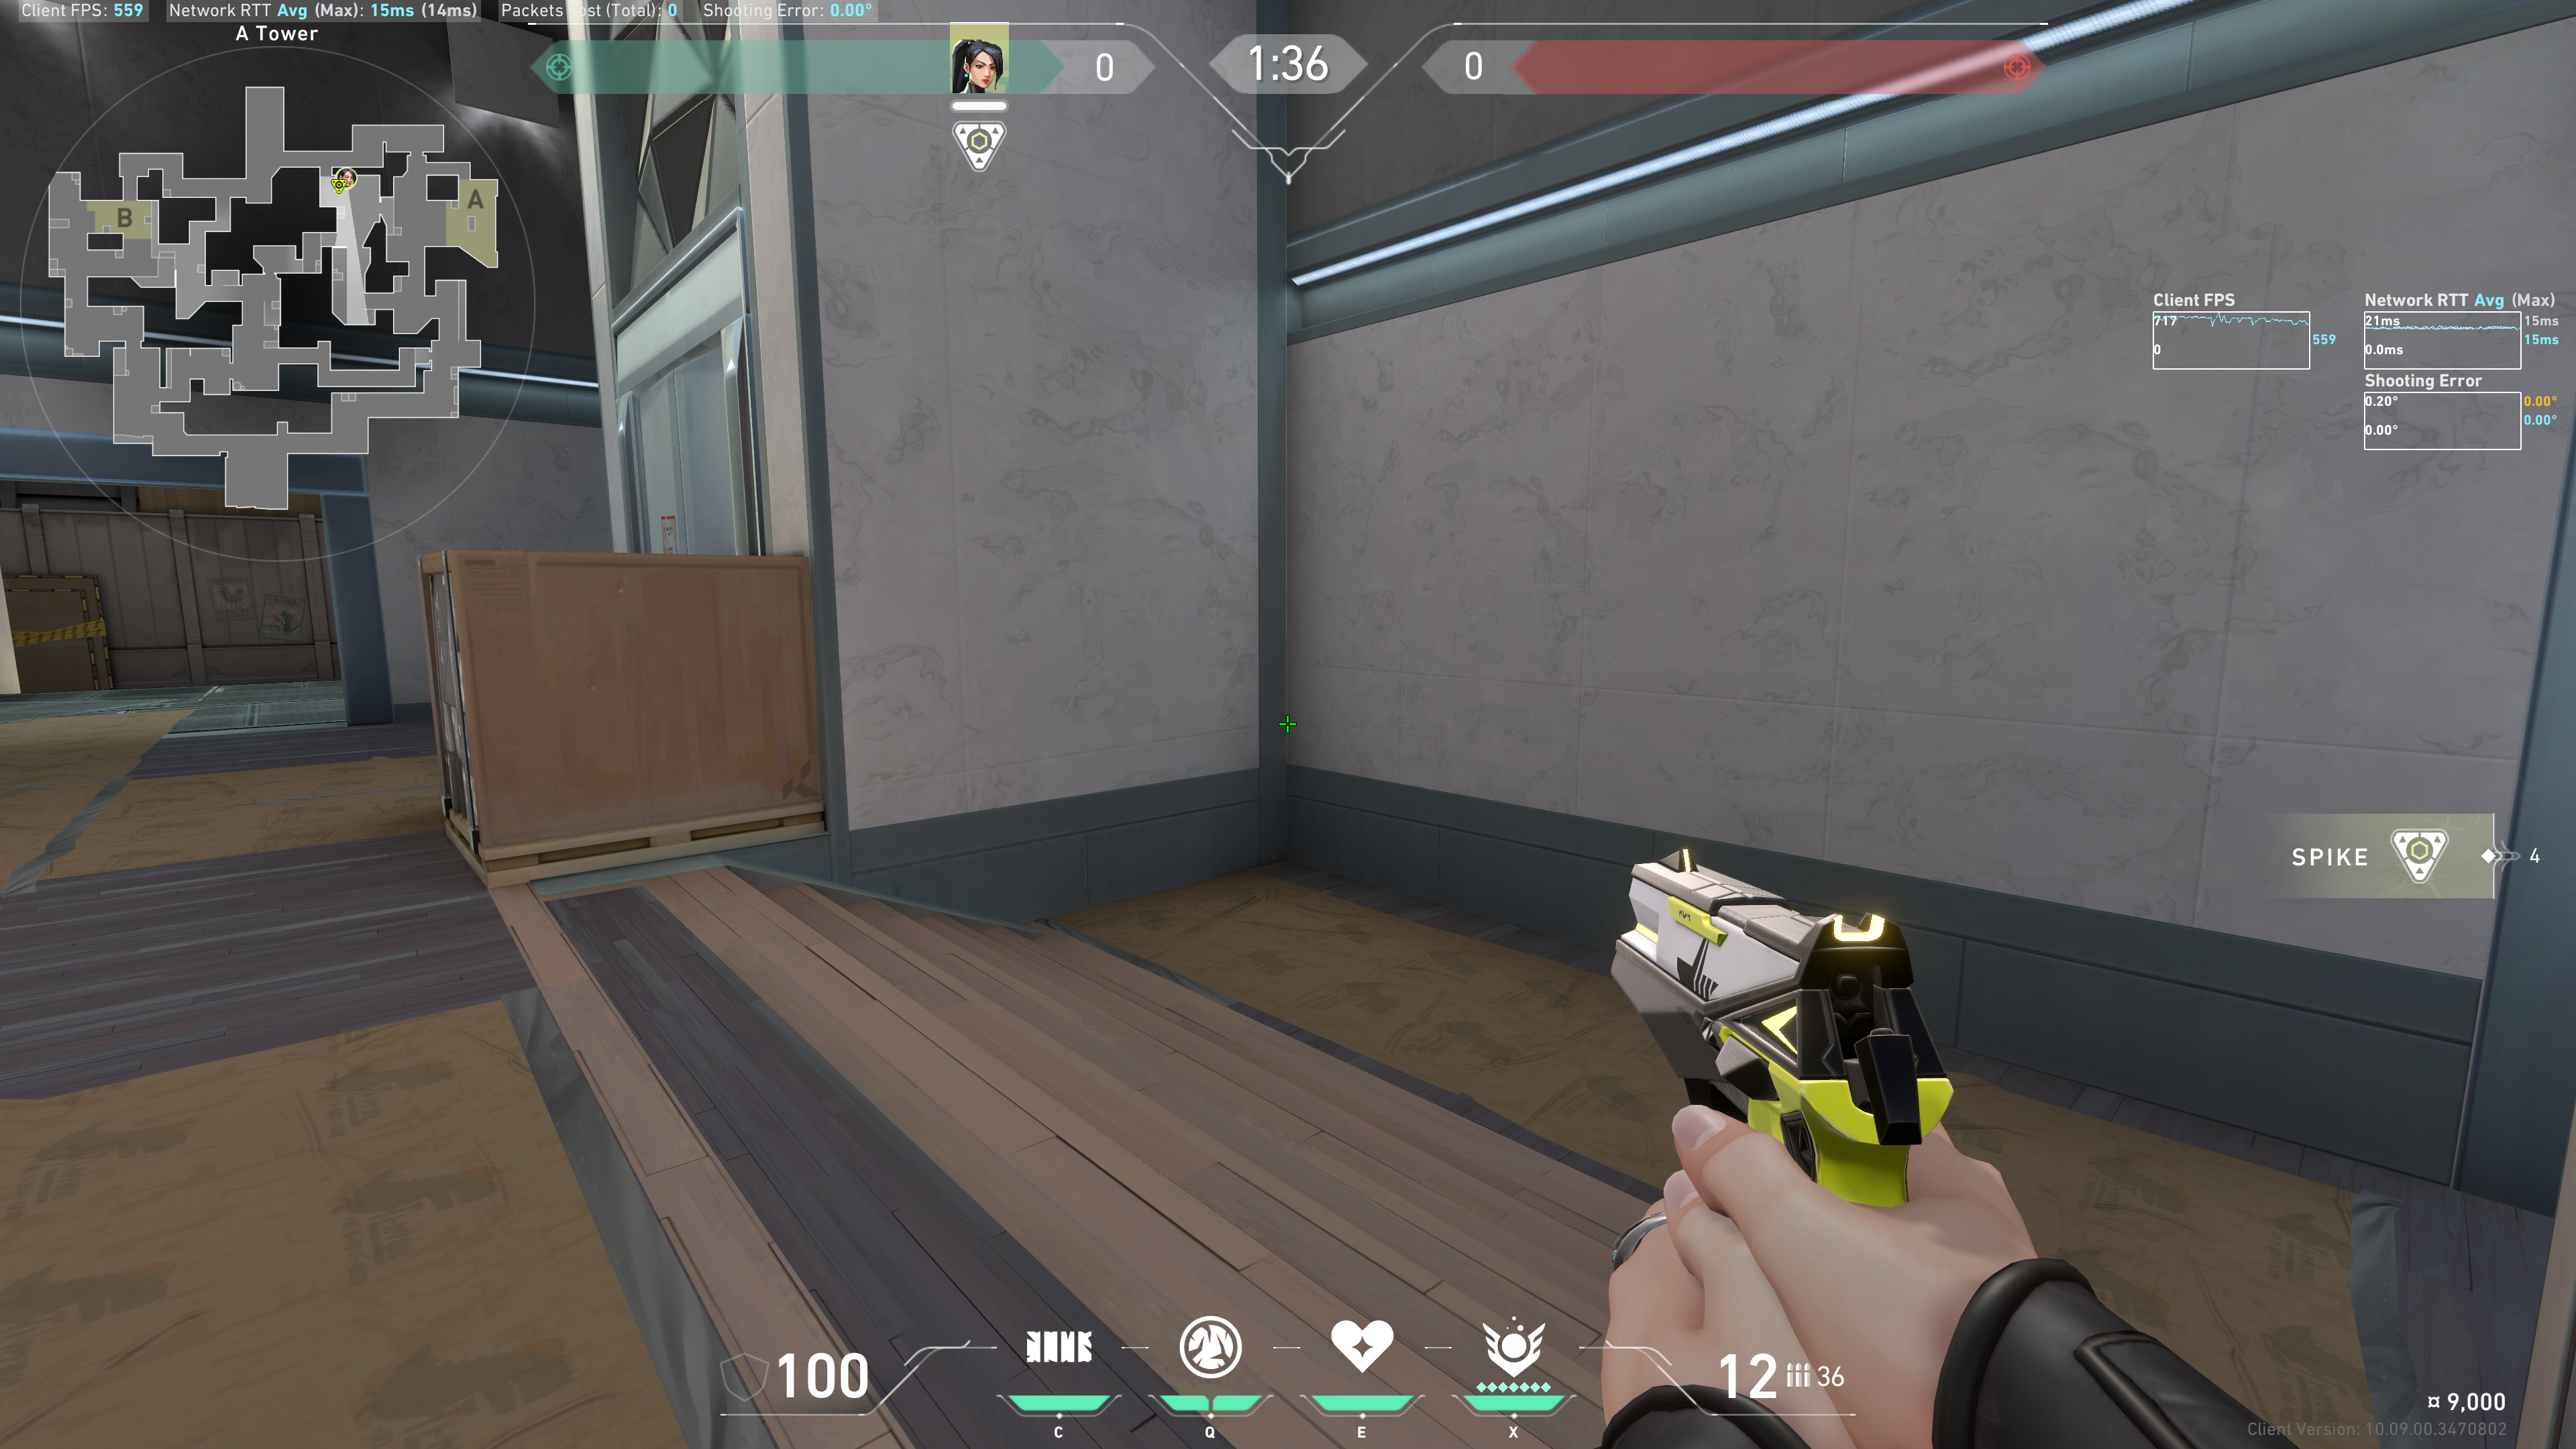
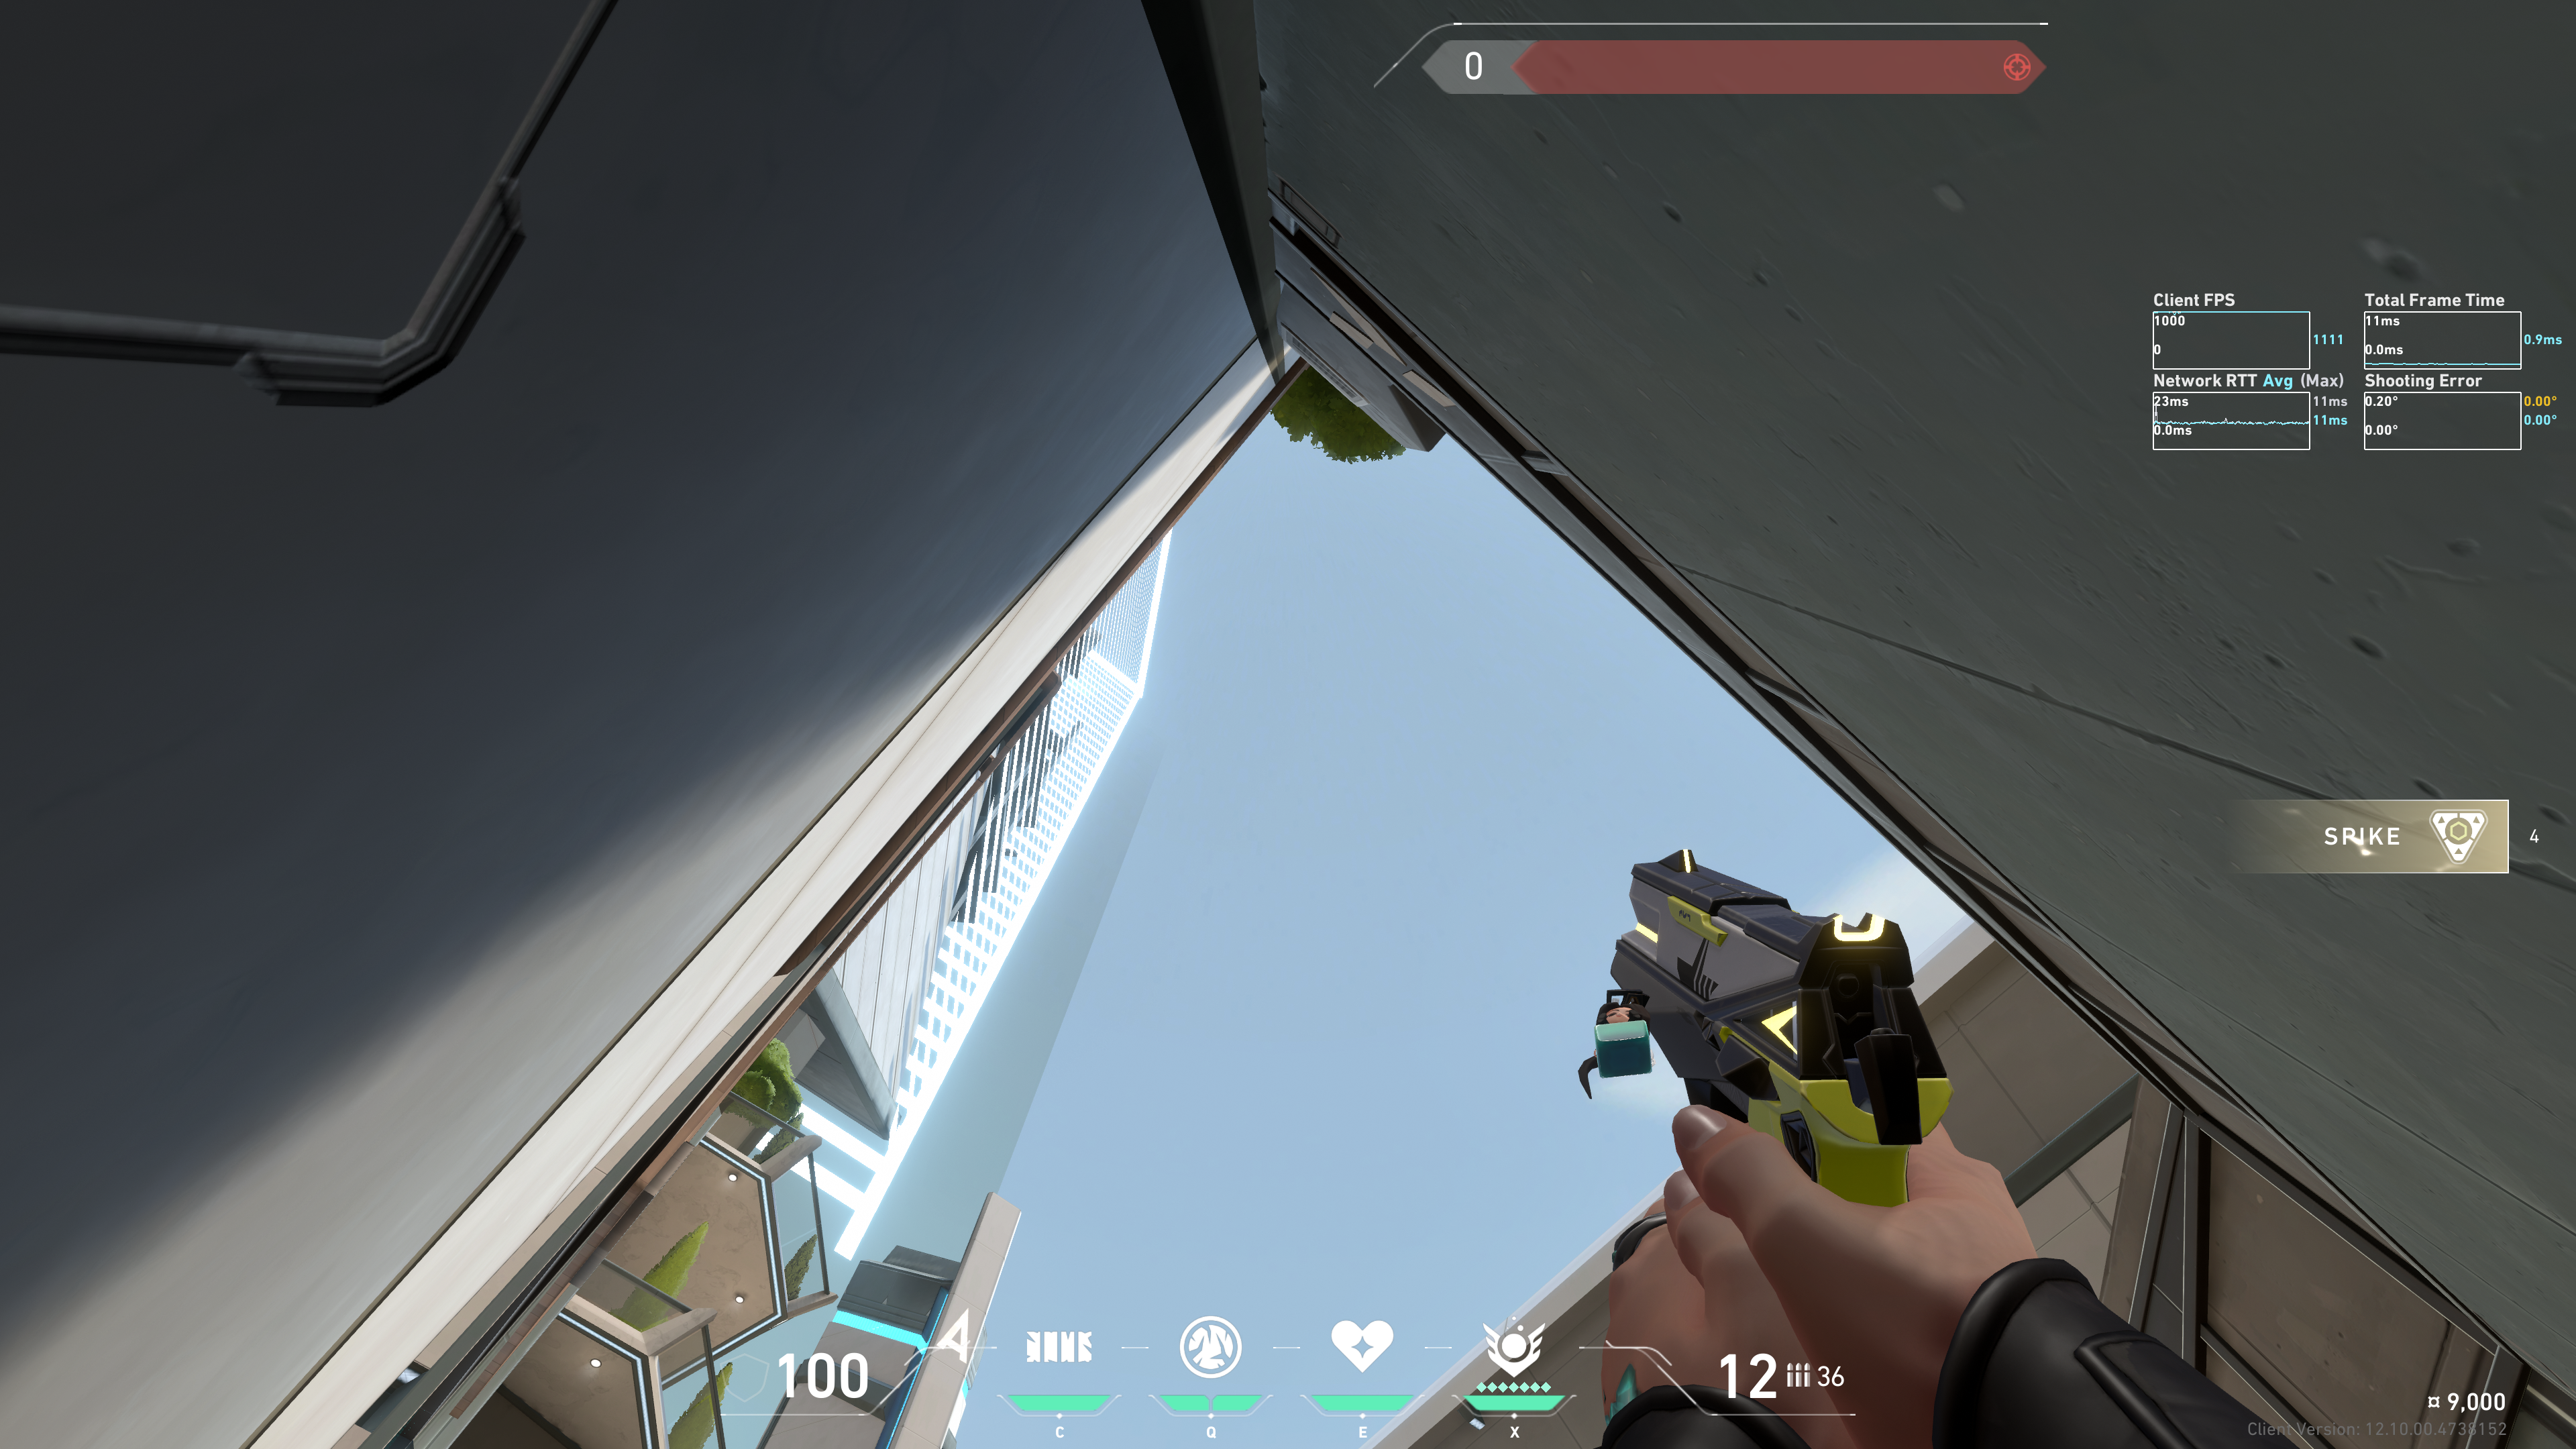
From A Main
Tuck here:
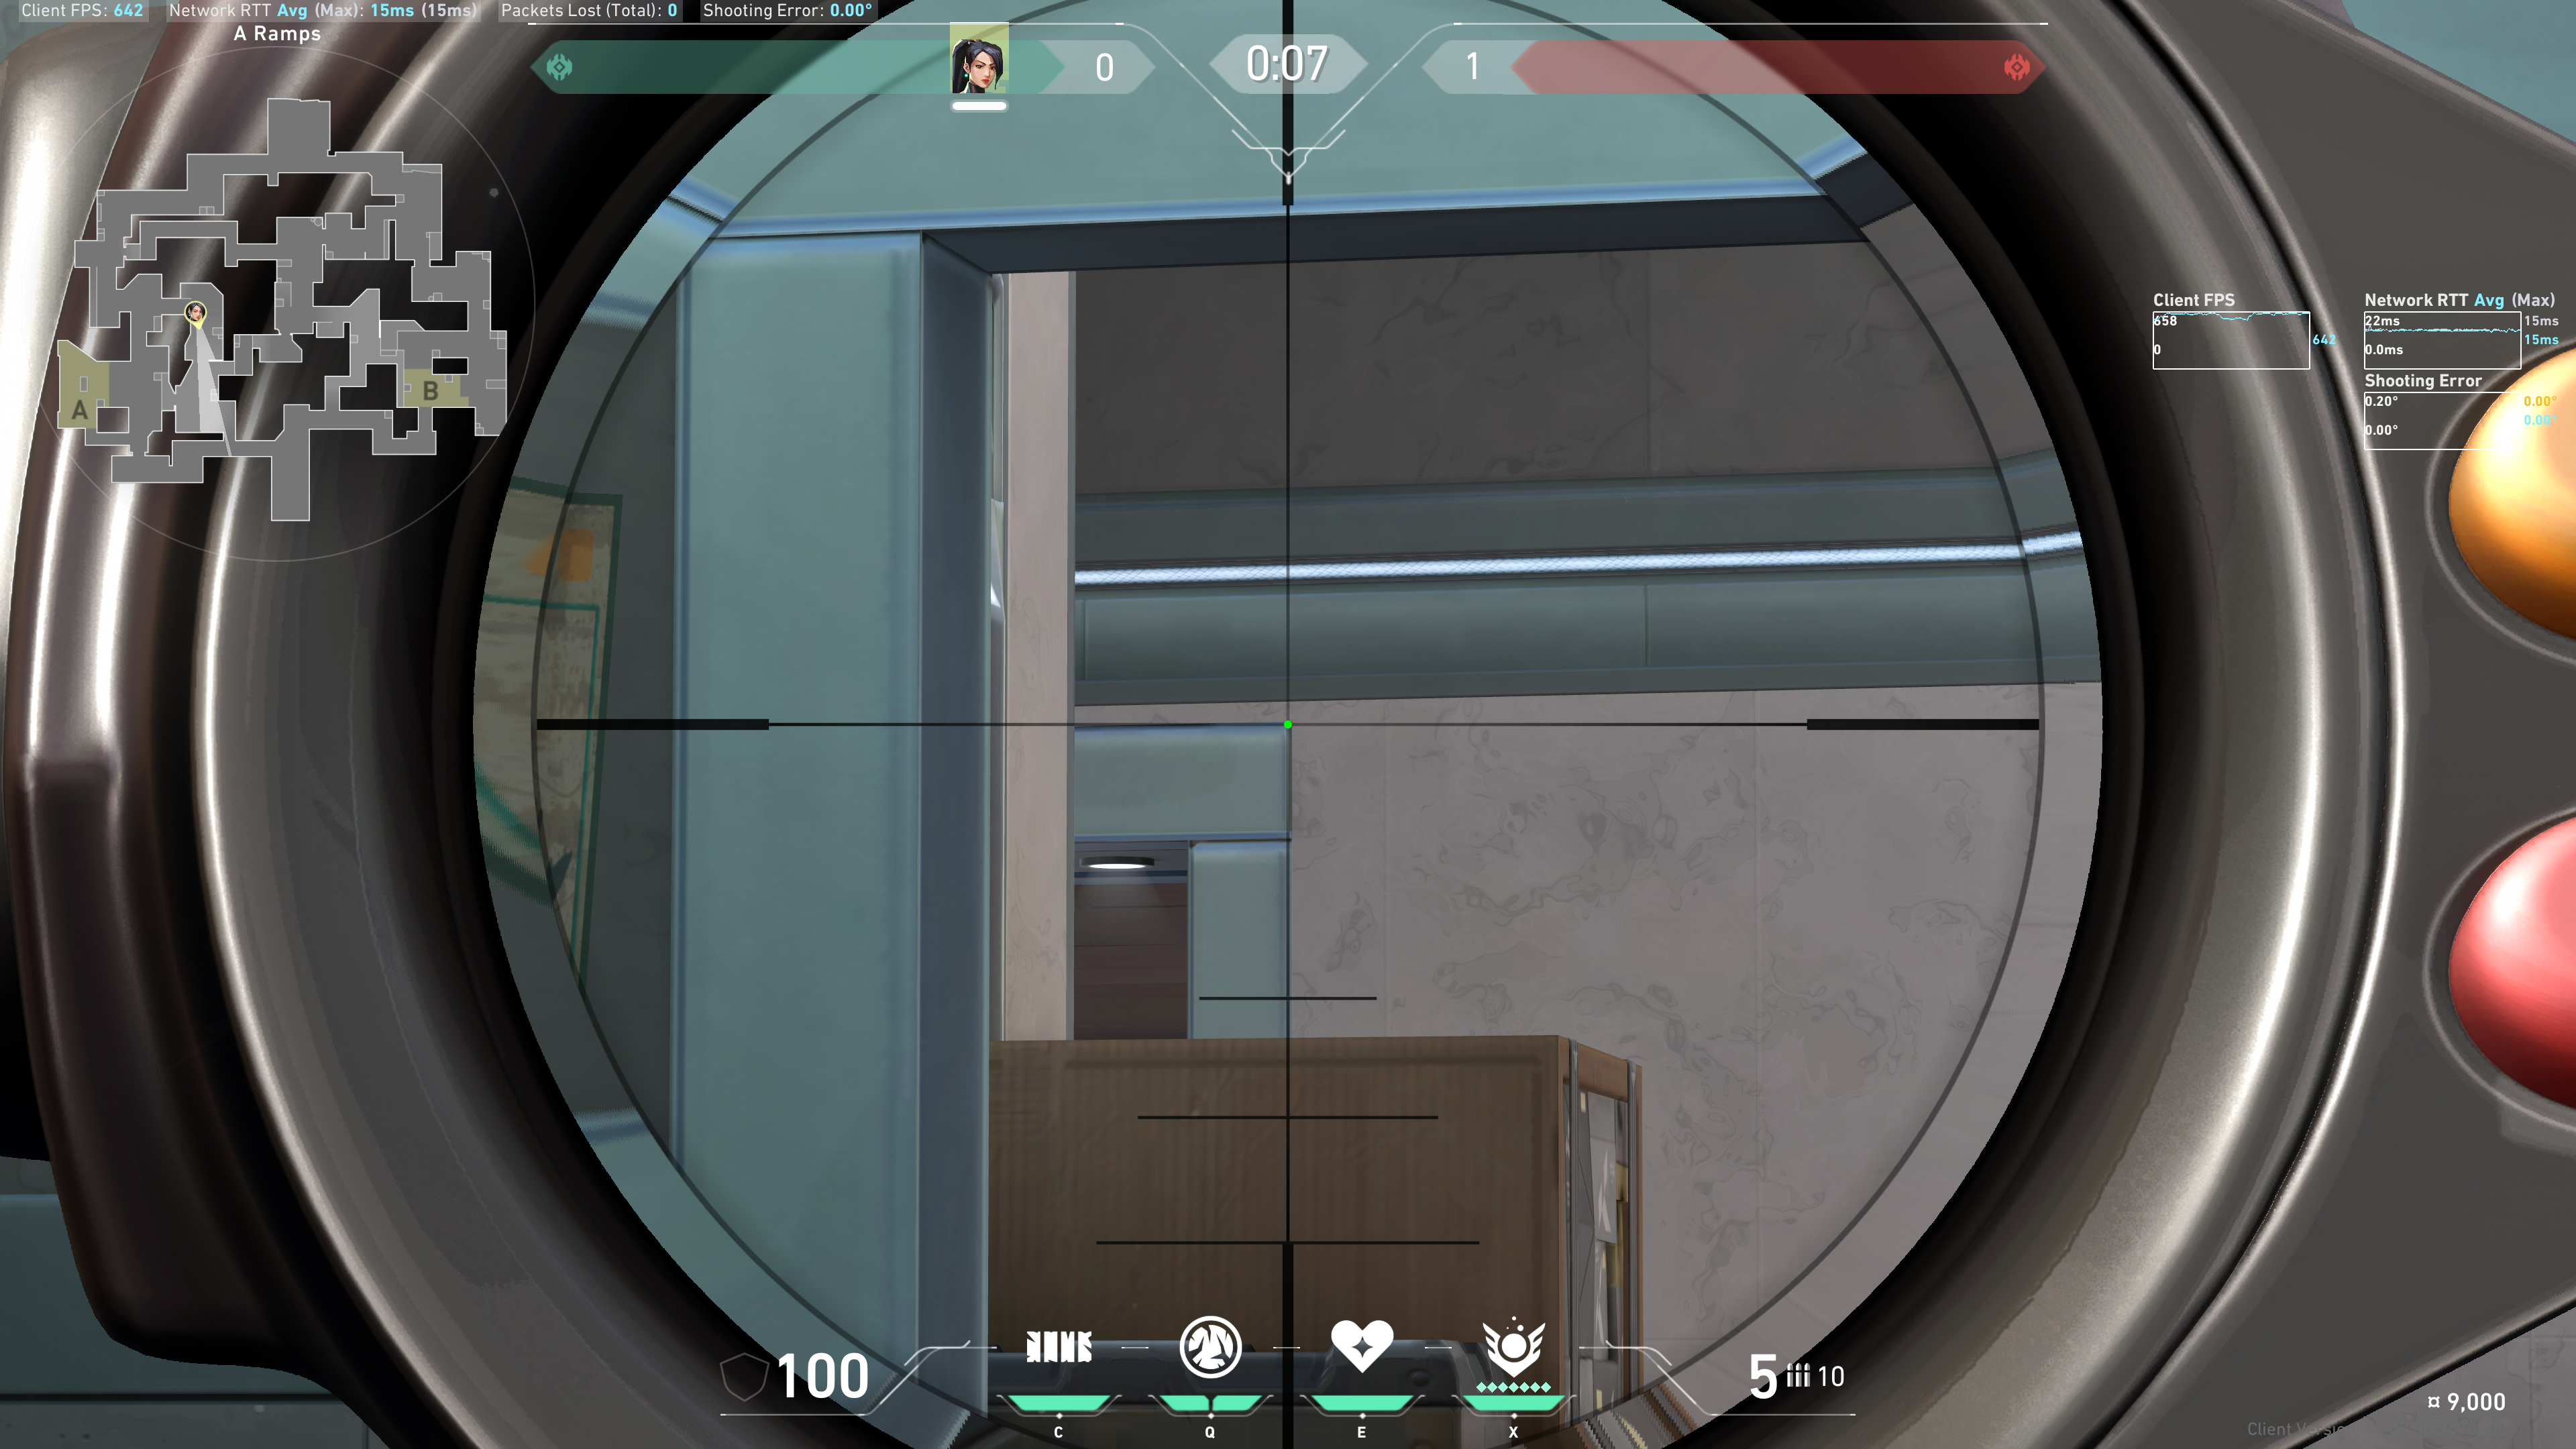
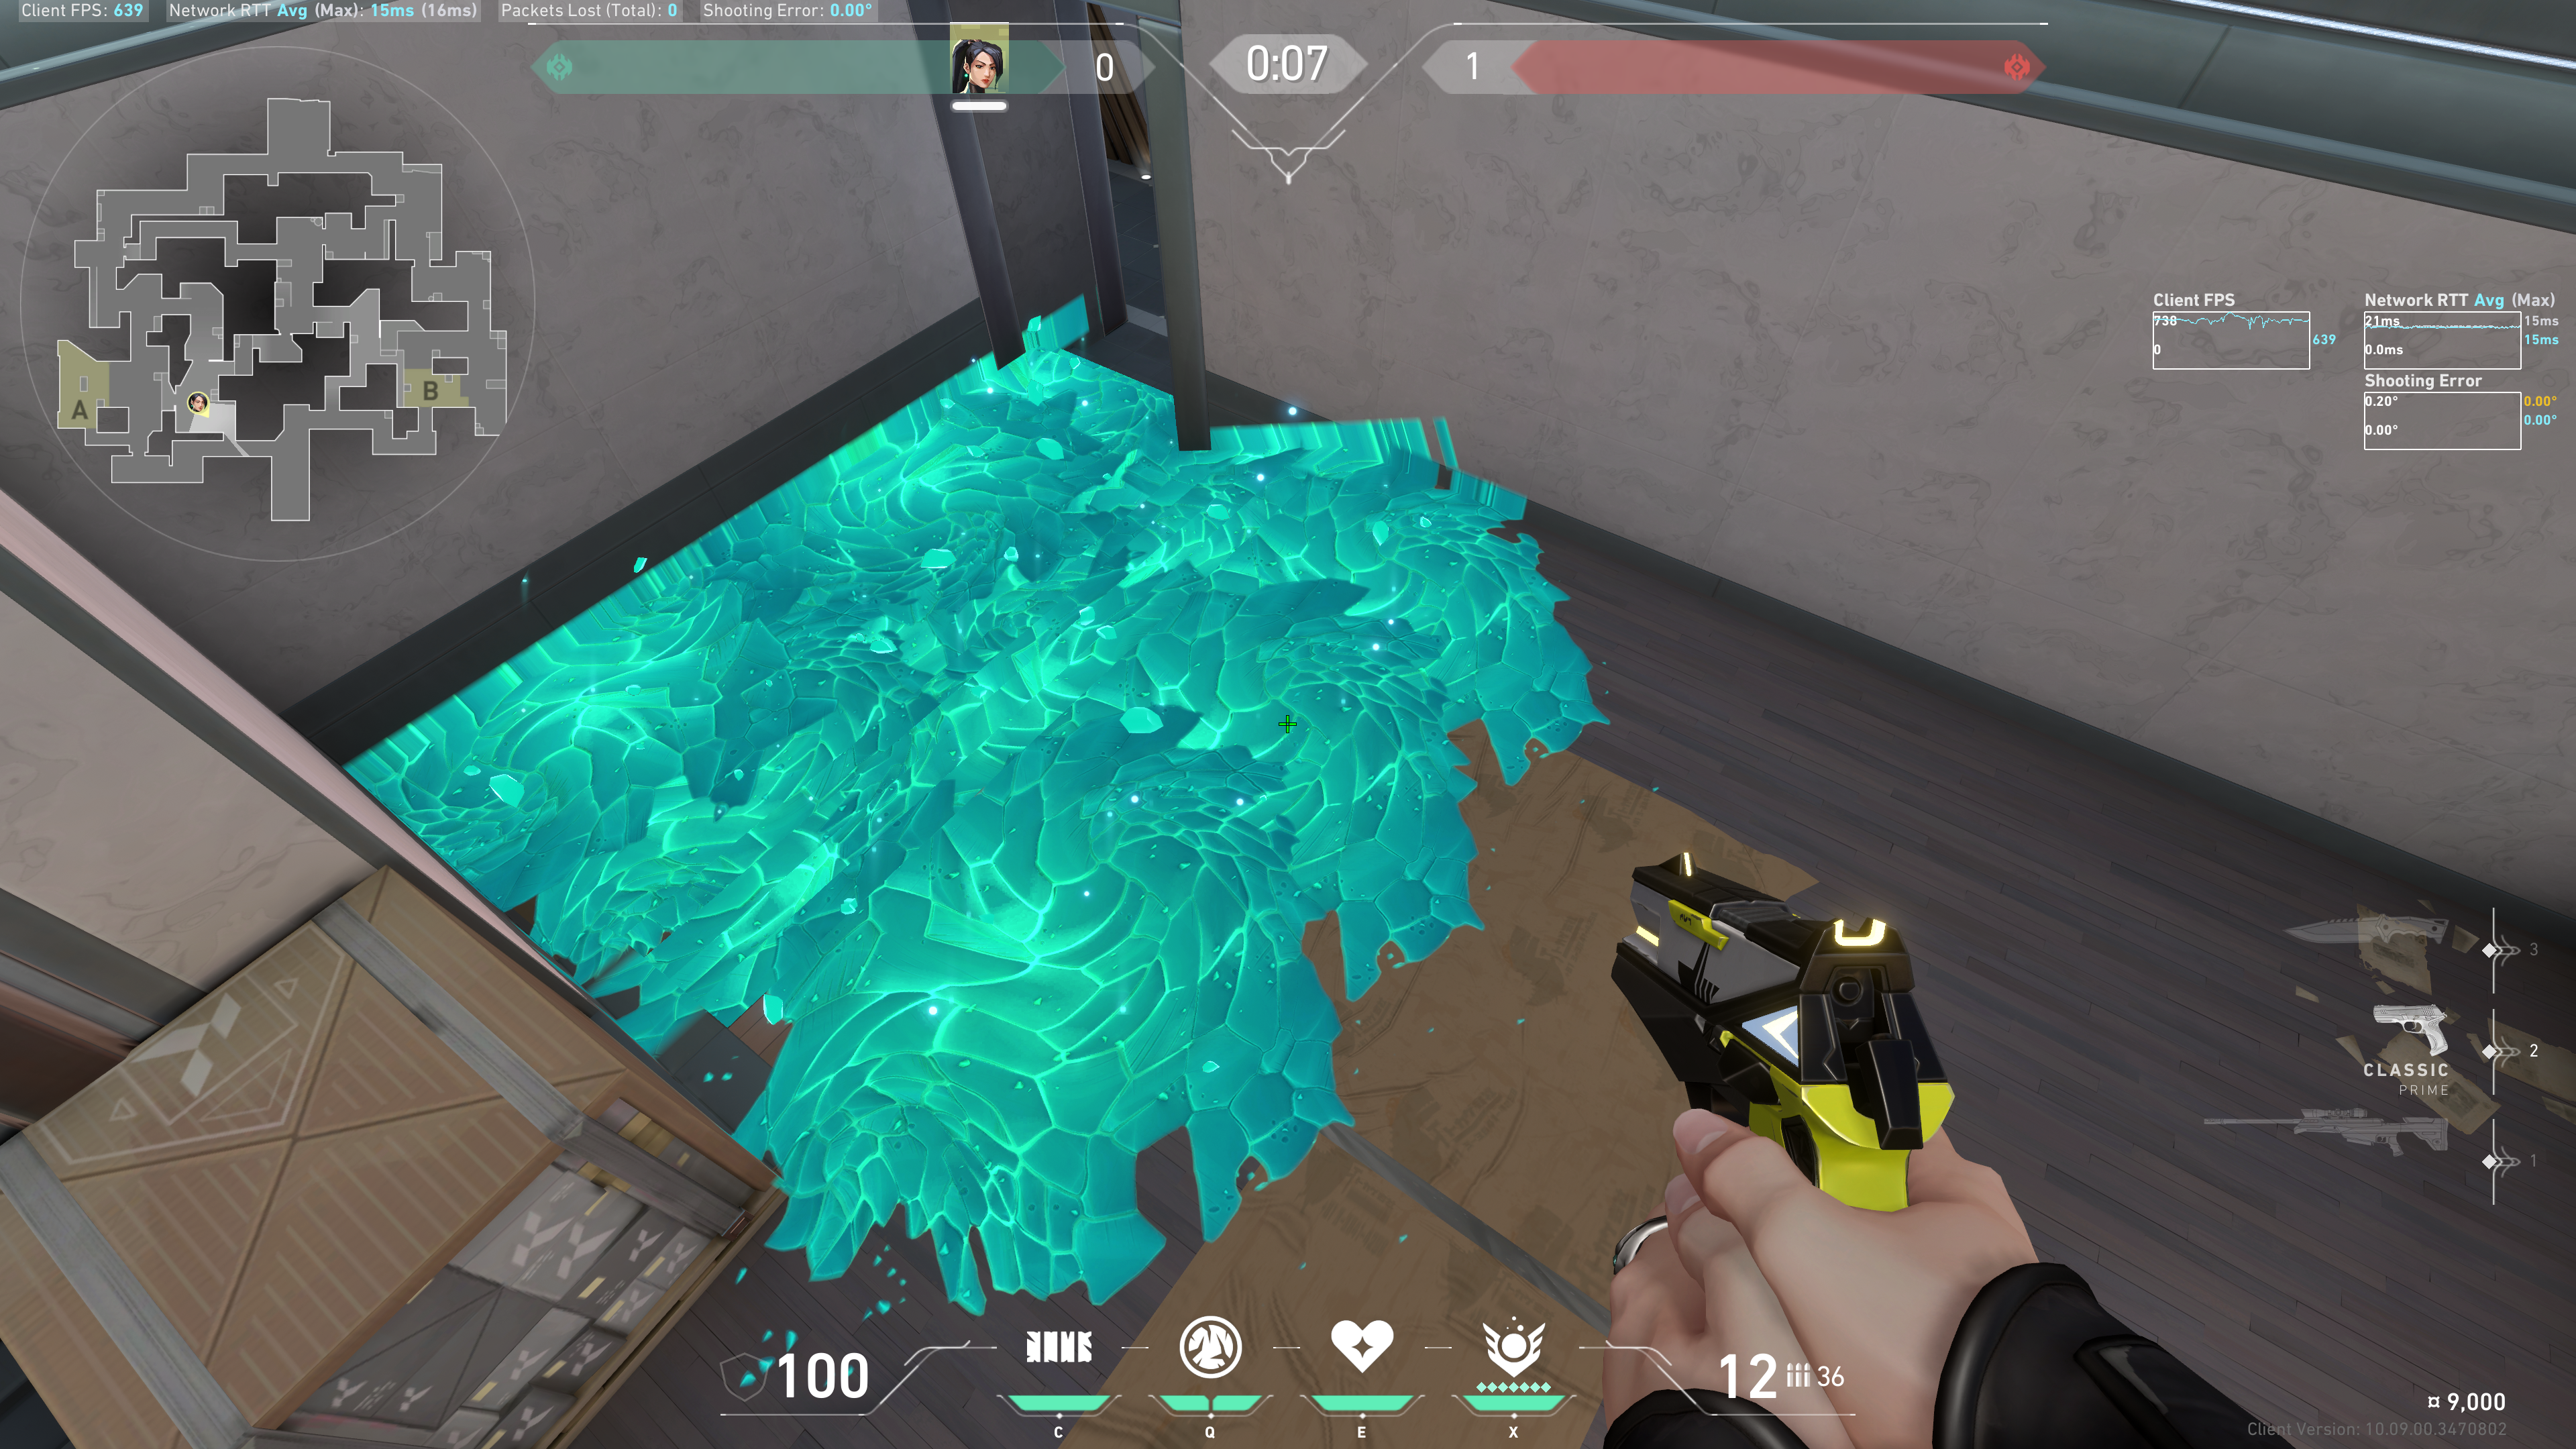
Back site / Elbow
Line up the tip of the Q ability arrow with the A on the building:
Warning: ensure that the tips are touching; even intersecting is okay. Do not leave a gap, as it may cause the Ice Orb to bounce off the roof shingles and land in unexpected spots (still relatively useful spots, but probably not the ideal spots that you want).
Result:
Sign / Back site
Take note of this railing in front of the tree:
Line up the bottom left line of your HUD with the intersection of the railing and edge of the tree:
Result:
Combined results:
Note: when combining these two lineups, shoot the Elbow lineup first (since it usually takes longer to prepare, due to requiring Q ability HUD), then shoot the Sign lineup next (since it uses always-on HUD). Also when retaking from A Main, you typically want Elbow slowed first anyways.
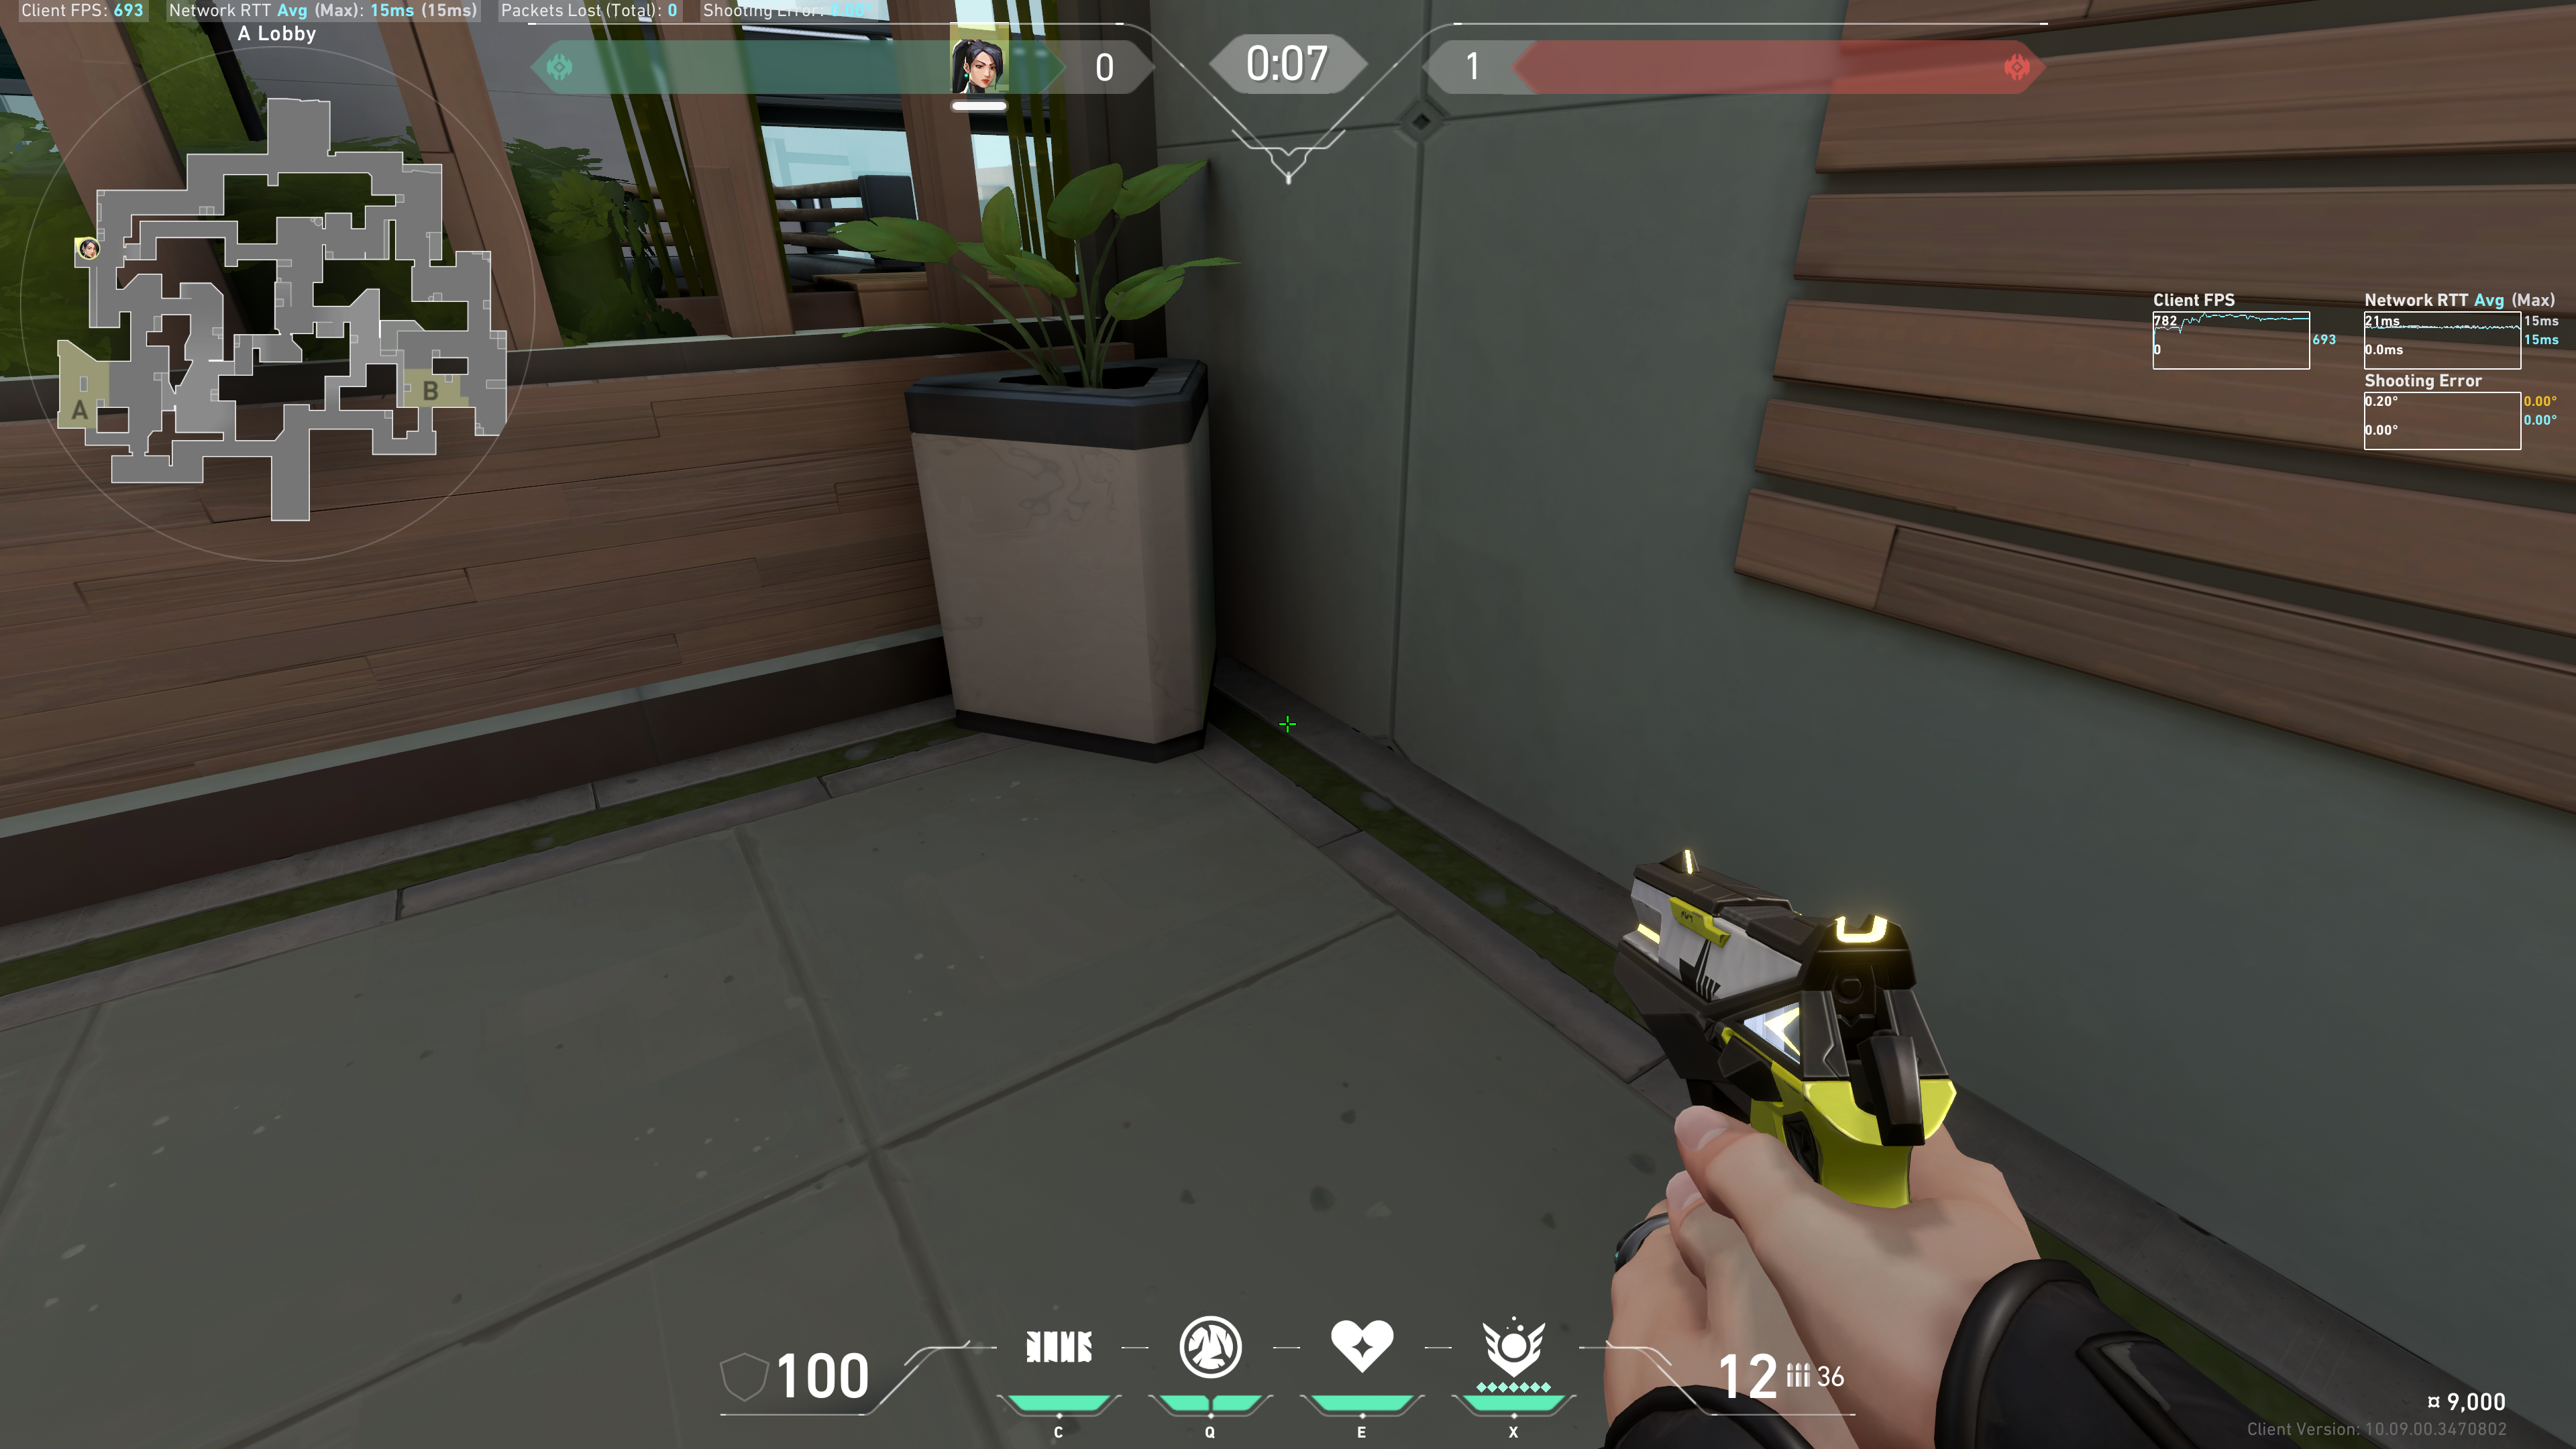
B Site Retake
Tuck here:
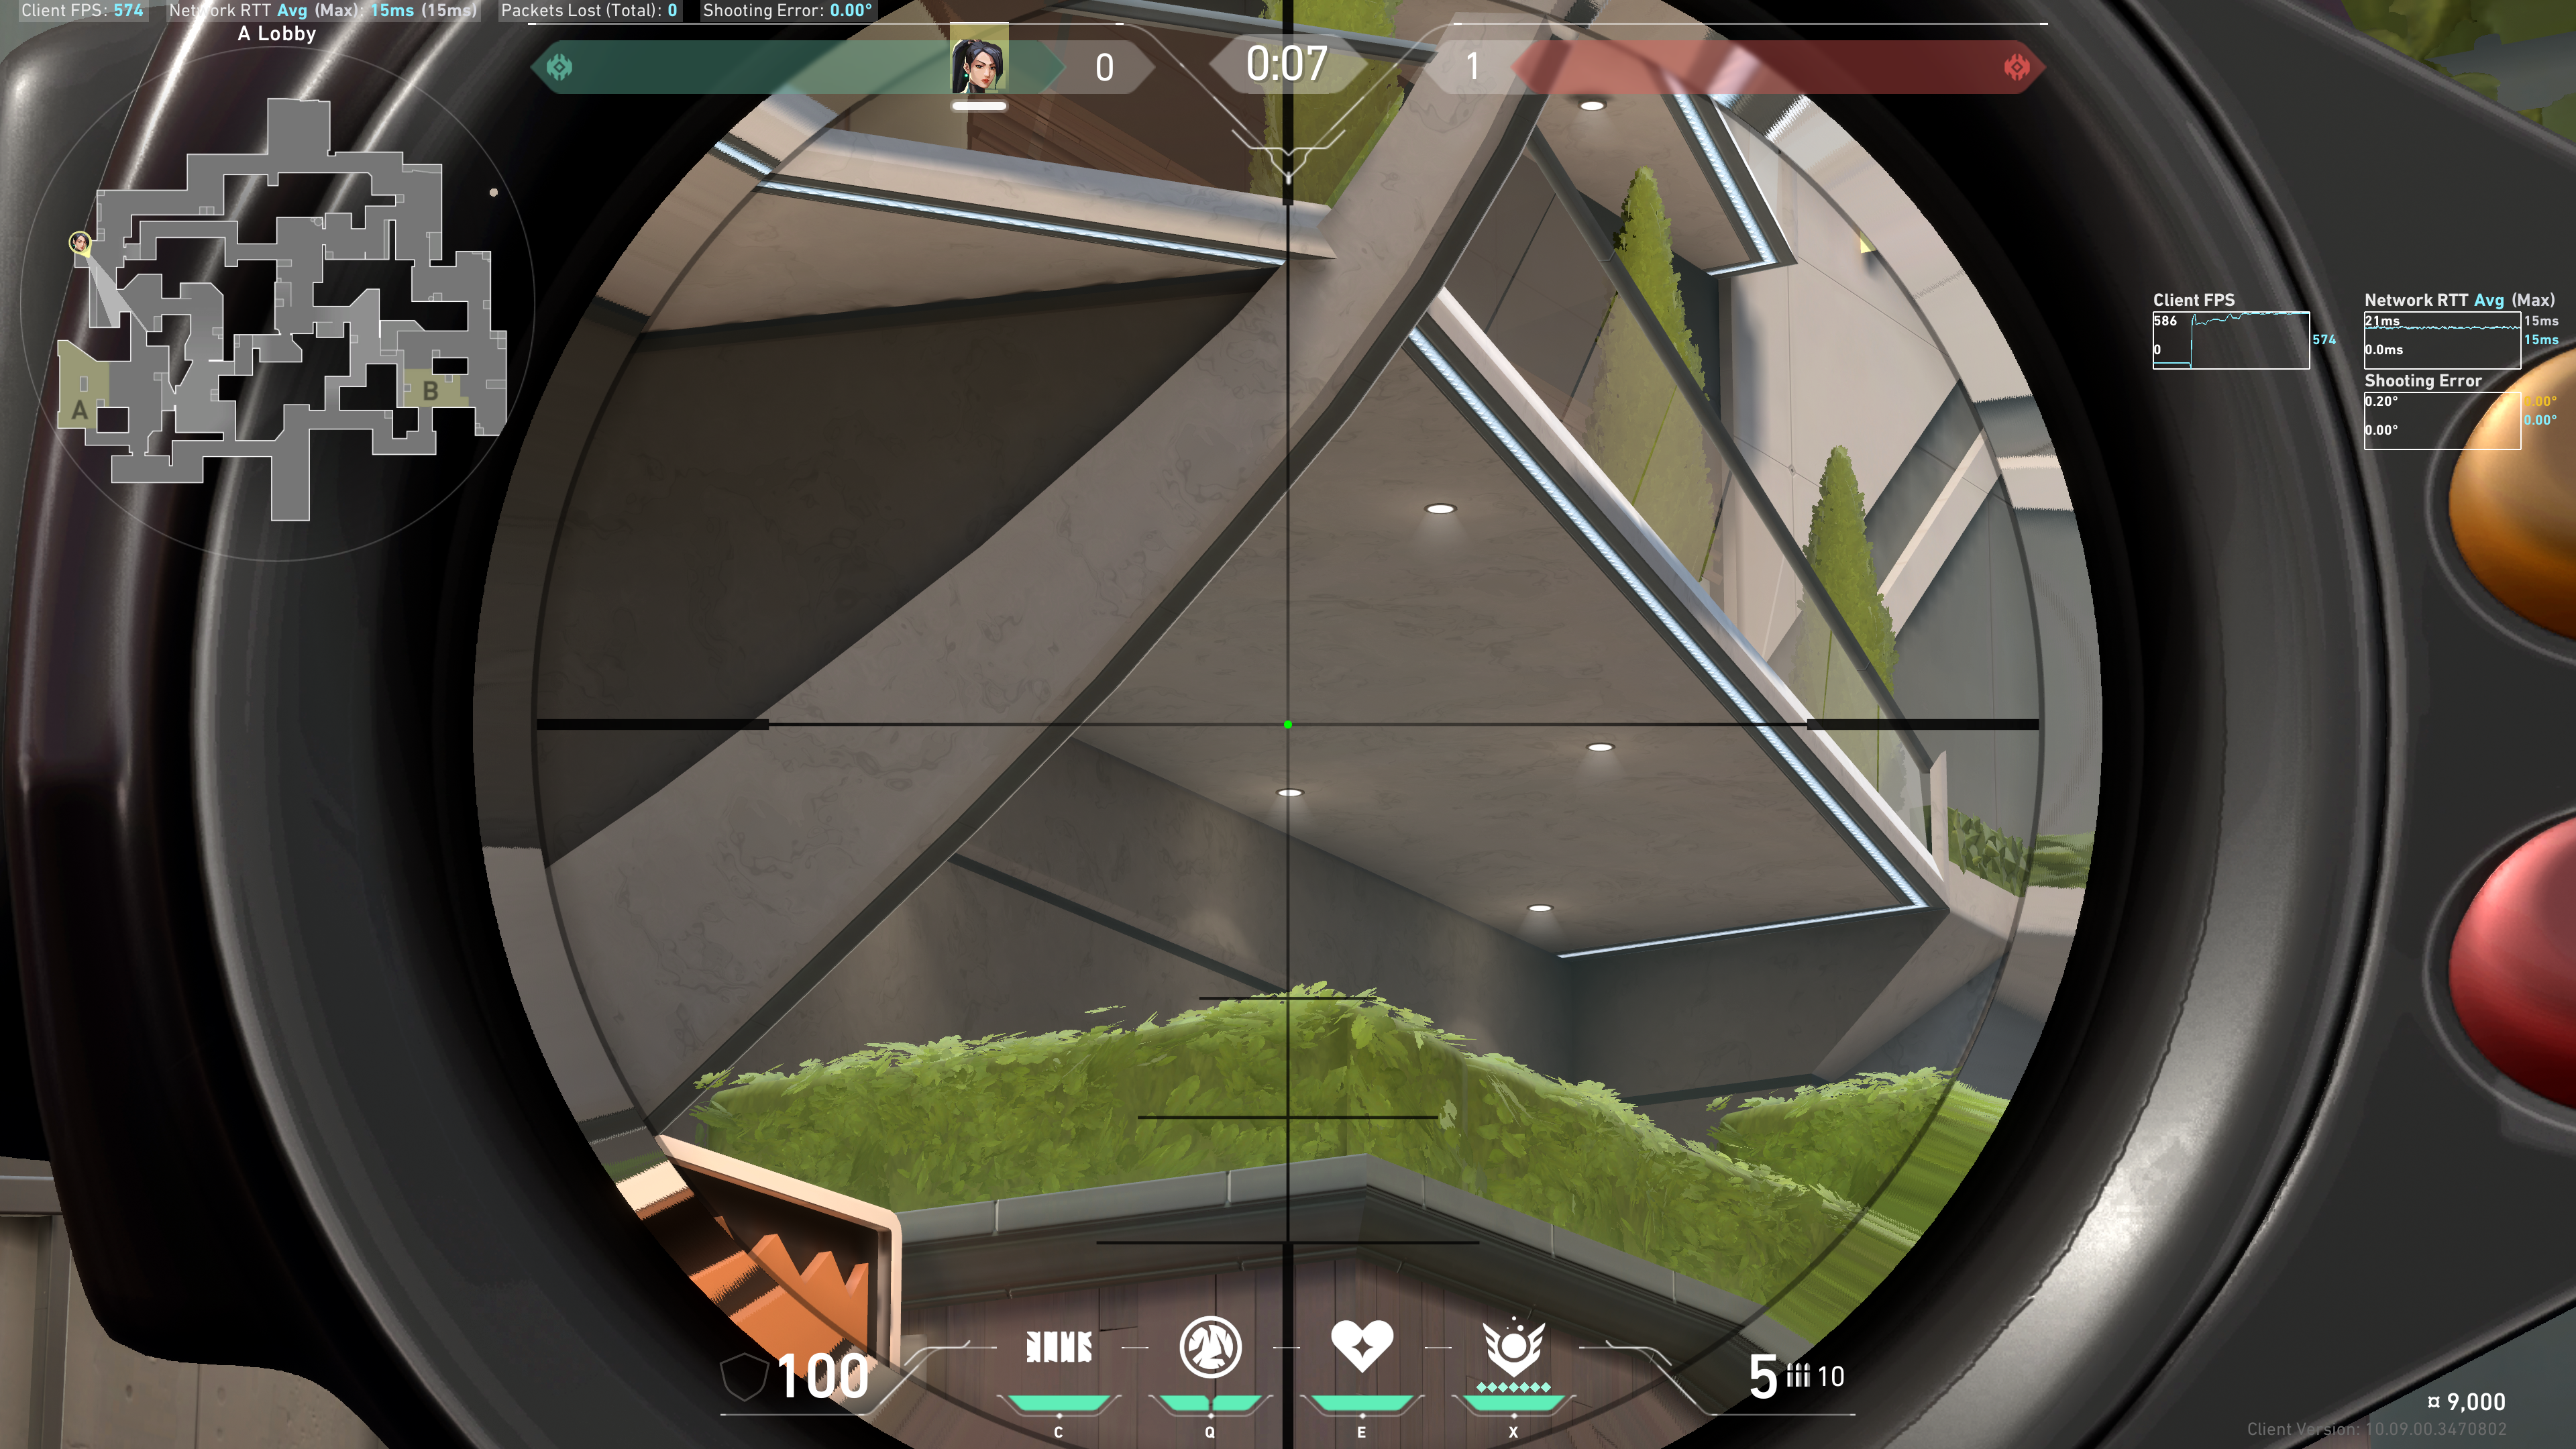
CT to Pillar
The small bar between the Ice Orb and Heal ability; line up the right side of the bar with the left side building's wooden frame:
Result:

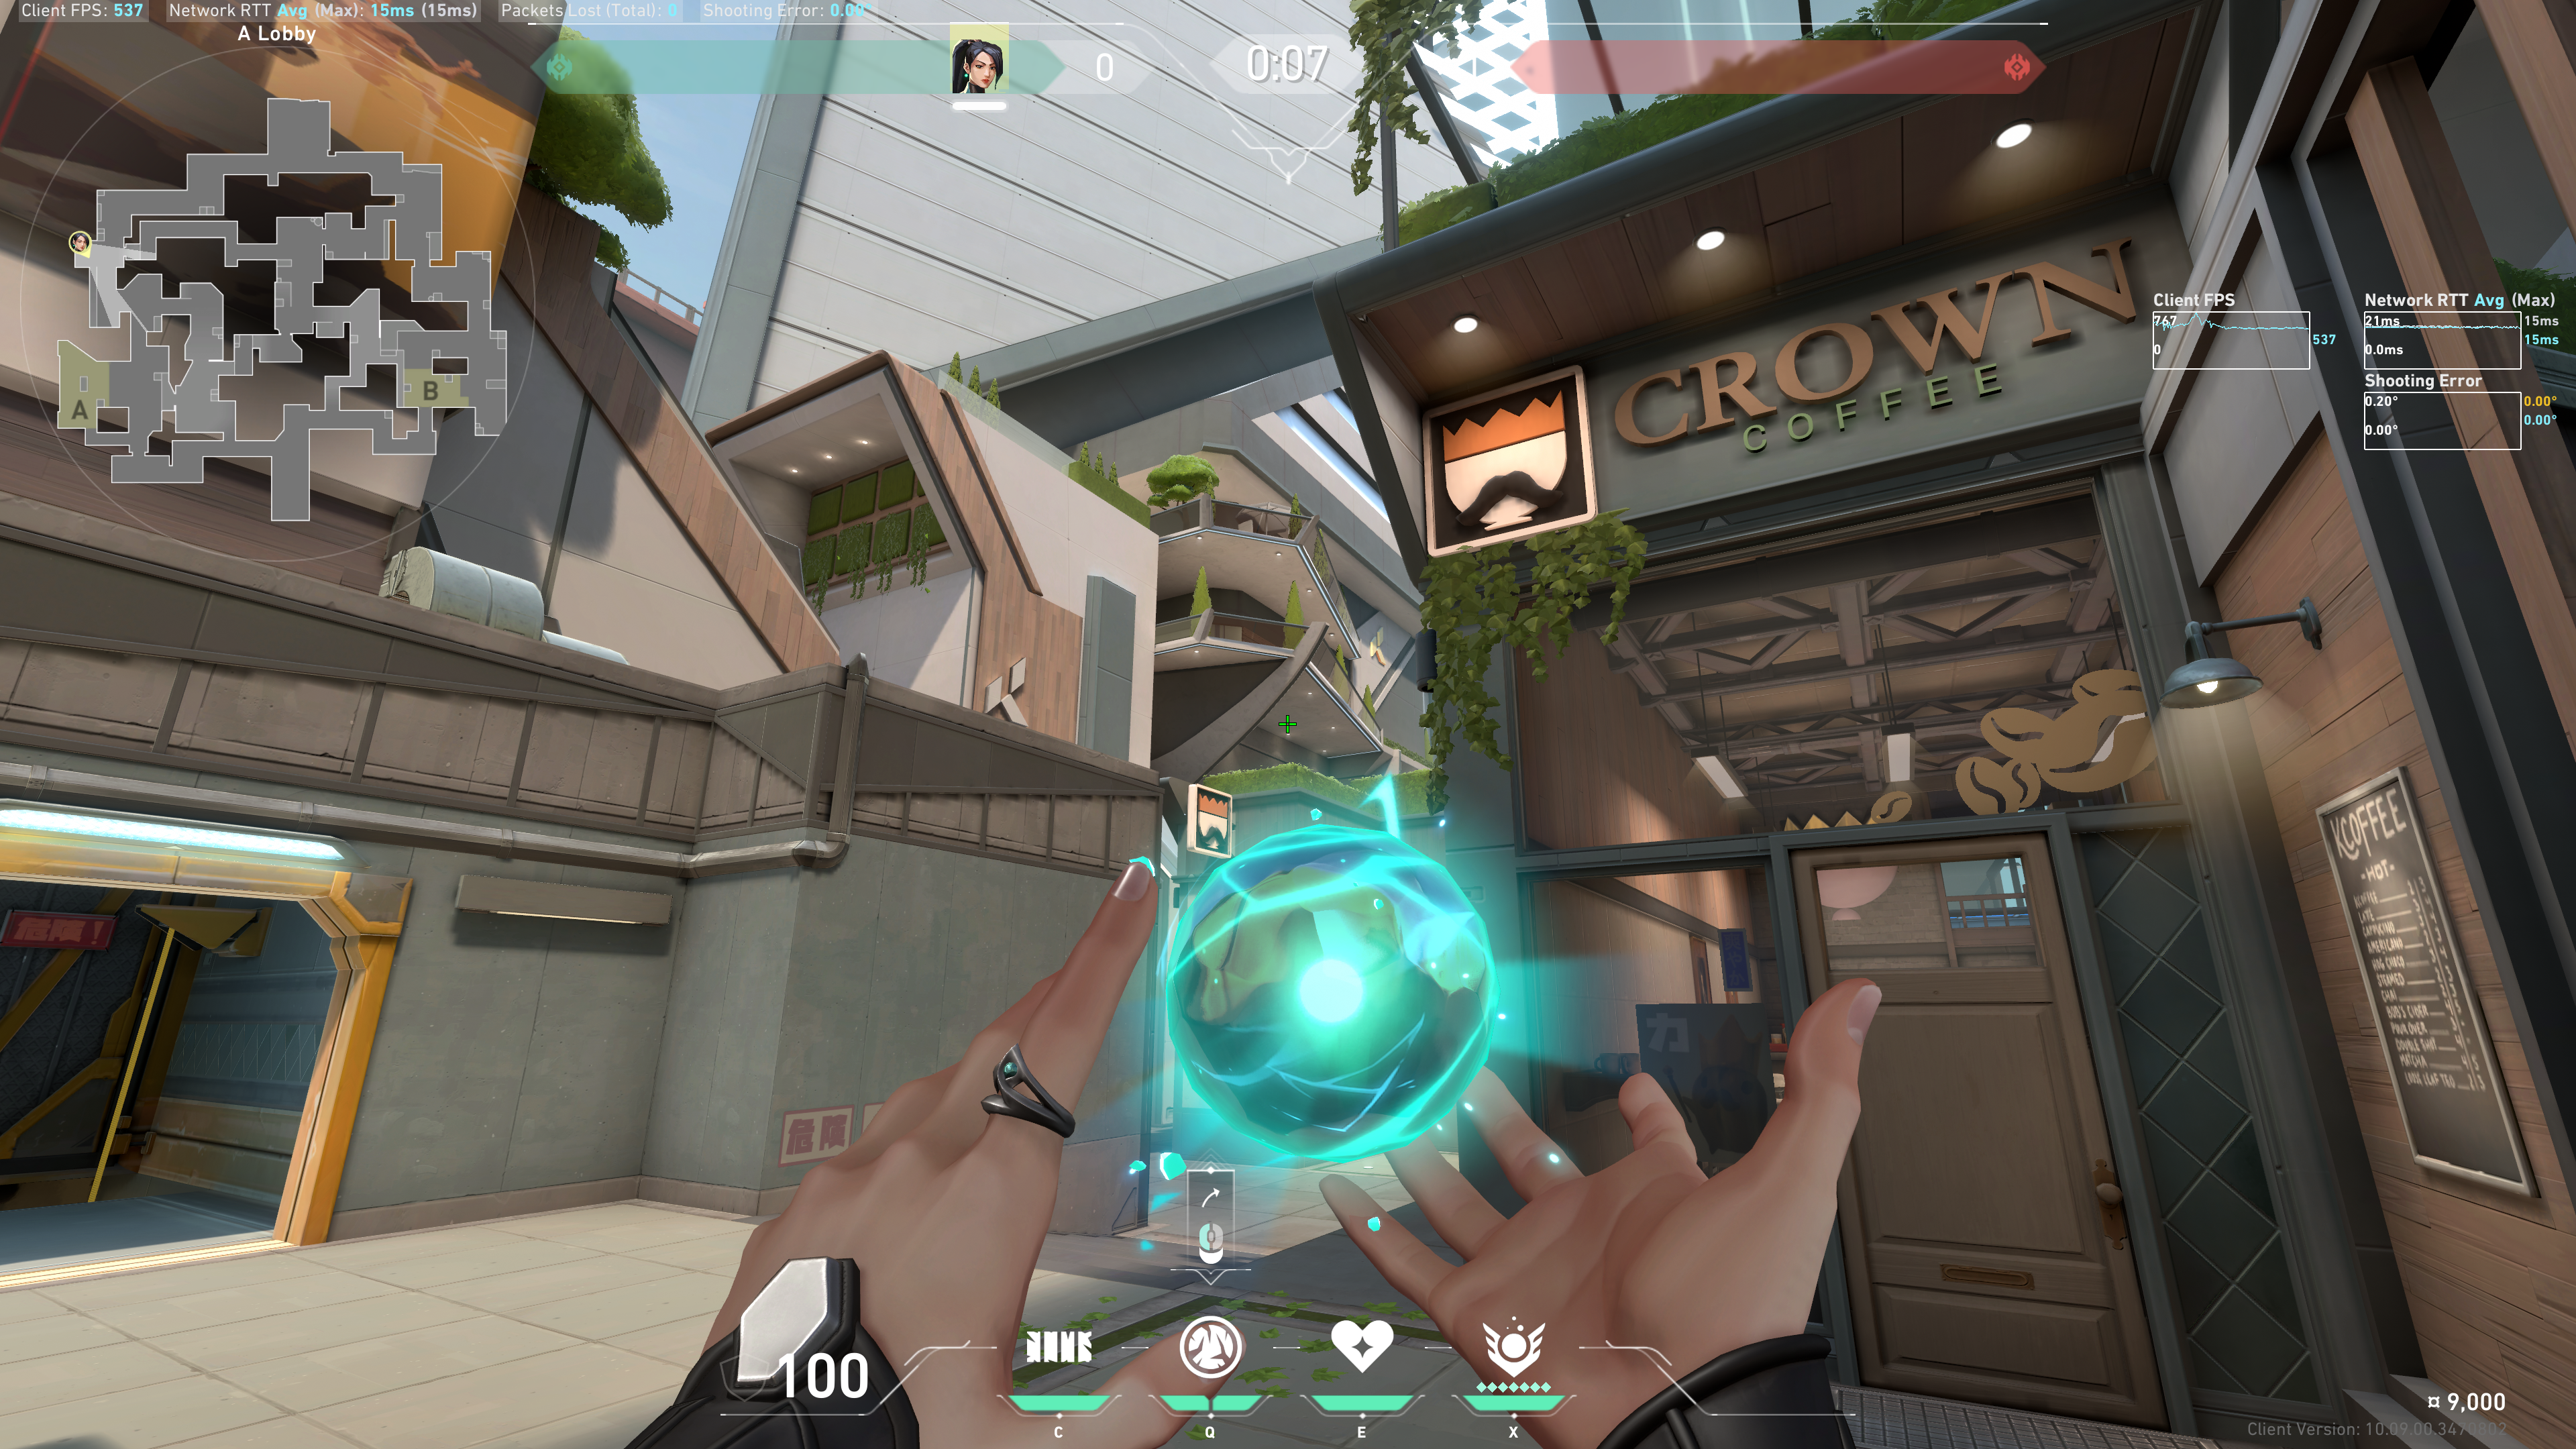
Back site
Put the top of your crosshair below the tip of this leaf:
Result:
Combined results:
Impromptu Back site
Hug this wall:
Take the 1v1 with the guy holding from default:
Aim anywhere along this wall, using it as a backboard. Run and throw:
Result: